
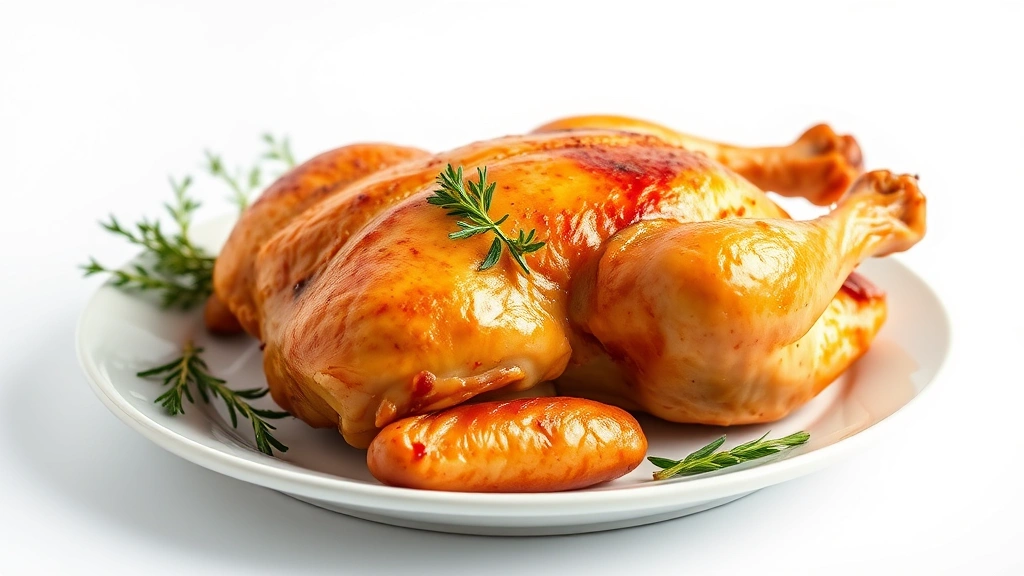
Figuring out how long to cook chicken at 400 degrees is one of those kitchen skills that’ll save you from dry, overcooked poultry and undercooked disasters. Whether you’re roasting a whole bird, baking chicken breasts, or getting thighs golden and crispy, 400°F is that sweet spot—hot enough to get real flavor and texture, but not so blazing that your chicken turns into a charred mess on the outside while staying raw inside. I’ve burned my fair share of chicken and learned the hard way that timing and temperature work together like a perfectly matched pair of socks.
Table of Contents
Chicken Breasts at 400°F
Boneless, skinless chicken breasts are the workhorses of weeknight dinners, and they cook fast at 400 degrees. You’re looking at roughly 20-25 minutes for standard-sized breasts (about 6-8 ounces each). The trick is that they’ll keep cooking even after you pull them out of the oven, so don’t wait until they look perfectly done inside the oven—they’ll be overdone by the time they rest.
I always pat my breasts dry with paper towels before seasoning. Moisture is the enemy of browning, and you want that golden exterior. Brush them lightly with olive oil, season generously with salt and pepper, and arrange them on a baking sheet in a single layer. If your breasts are particularly thick (over an inch), consider pounding them to even thickness first—this ensures uniform cooking and prevents that annoying situation where the edges are done but the center is still pink.
The 400°F temperature works because it creates enough heat to brown the outside while the internal heat gradually brings the meat to safe temperature. Lower temps mean longer cooking and less browning; higher temps risk charring before the inside cooks through.
Thighs and Drumsticks
Chicken thighs and drumsticks are forgiving cuts because they contain more fat and connective tissue than breasts. At 400 degrees, plan on 35-40 minutes for bone-in, skin-on thighs or drumsticks. These darker meat pieces actually benefit from the higher heat—the fat renders out, the skin crisps up, and the meat stays juicy inside.
Here’s where I differ from some recipes: I don’t flip thighs halfway through. Start them skin-side up and let them go. The skin needs that uninterrupted contact with the oven heat to get properly crispy. If you flip them, you’re just resetting the crisping process on the skin side.
Boneless thighs will cook faster, around 25-30 minutes, so adjust accordingly. The bone-in versions are worth the extra time because the bone conducts heat into the meat and adds flavor to the pan drippings if you’re making a quick sauce.
Whole Bird Roasting
Roasting a whole chicken at 400°F is where things get interesting. You’re looking at approximately 50-60 minutes for a 4-5 pound bird, depending on exact weight and how you’ve prepared it. The general rule is about 12-15 minutes per pound at 400 degrees.
Pat your chicken completely dry inside and out—this is crucial for crispy skin. Season the cavity with salt, pepper, and whatever aromatics you like (I’m partial to lemon halves and fresh thyme). Rub the outside with softened butter or oil, season generously, and place it breast-side up on a roasting pan with a little liquid in the bottom (water, broth, or wine).
The 400°F temperature is perfect for whole birds because it’s hot enough to get that skin golden and crackling without drying out the breast meat. If you’re worried about the breast cooking faster than the thighs, you can tent the breast loosely with foil for the first 30 minutes, then remove it for the last 20-30 minutes to let the skin crisp. This is a legitimate technique, not cheating.
Bone-In, Skin-On Pieces
Bone-in, skin-on chicken pieces (what you get when you cut up a whole bird) are the Goldilocks option—faster than a whole bird, more forgiving than boneless breasts. At 400°F, expect 30-35 minutes for a mix of thighs and breasts.
The key here is arranging them properly on your pan. Thighs take longer than breasts, so I position the thighs toward the hotter parts of the oven (usually the back) and breasts toward the front or sides where it’s slightly cooler. This is a subtle trick, but it helps everything finish around the same time. If your oven has hot spots (and most do), use this to your advantage.
Skin-on pieces are more forgiving than skinless because that skin layer insulates the meat underneath. You can cook them a few minutes longer without drying them out, which takes some pressure off the timing.
Internal Temperature Check
The only reliable way to know if your chicken is done is an instant-read meat thermometer. I’m not exaggerating when I say this tool changed my cooking life. Forget the old tricks about juices running clear or wiggling the thigh—a thermometer gives you facts.
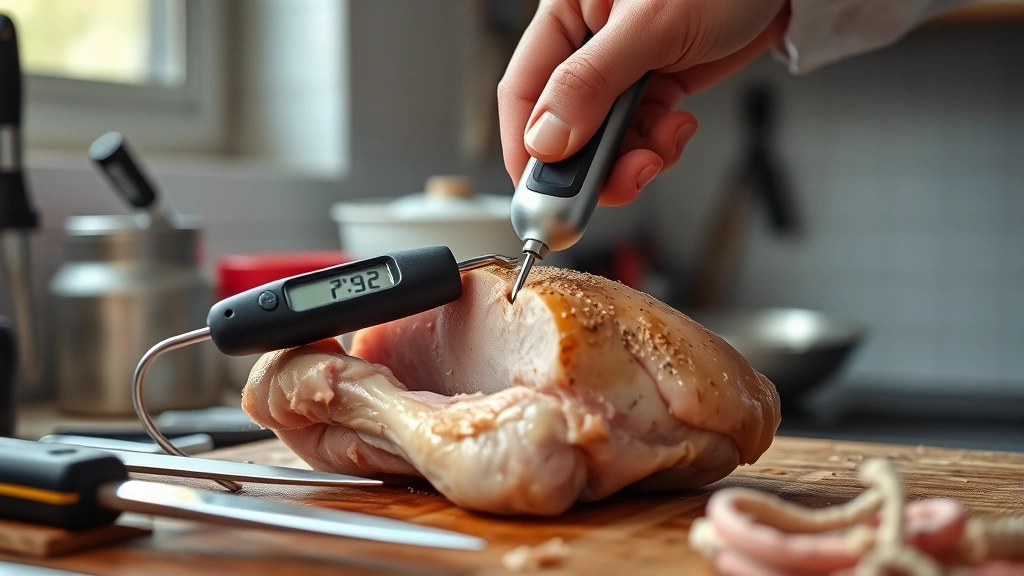
Chicken is safely cooked when it reaches an internal temperature of 165°F (74°C) in the thickest part. For whole birds, check the thickest part of the thigh (not touching bone), the thickest part of the breast, and the innermost part of the wing. All three spots need to hit 165°F.
For pieces, stick the thermometer into the thickest part without touching bone. For boneless breasts, insert it horizontally into the thickest part. The thermometer should go in smoothly and give you a reading within a couple of seconds with a good digital one.
Here’s the thing nobody tells you: the chicken will continue cooking after you remove it from the oven due to carryover cooking. This is why many experienced cooks pull chicken at 160-162°F if they’re going to let it rest. By the time it rests for 5-10 minutes, it’ll coast up to that safe 165°F zone. But if you’re not resting it, pull it at 165°F exactly.
Resting and Carryover Cooking
Resting your chicken after cooking is non-negotiable if you want juicy results. When you cook chicken, the heat pushes all the juices toward the center of the meat. If you cut into it immediately, those juices run out onto your plate instead of staying in the meat.
Let whole birds rest for at least 10 minutes (up to 20 is even better) before carving. Pieces can rest for 5-10 minutes. Tent the pan loosely with foil to keep it warm. During this rest, the residual heat continues cooking the meat slightly (that carryover cooking we mentioned), and the juices redistribute throughout the meat, making every bite more tender and juicy.
This resting time also makes carving a whole bird infinitely easier. Hot chicken is floppy and falls apart; rested chicken holds together and carves cleanly. It’s worth the wait.
Seasoning and Prep Work
The best time to season chicken is right before it goes in the oven, not hours ahead. Salt does penetrate over time, but for most home cooking situations, last-minute seasoning works fine and gives you more flexibility if you change your mind about flavors.
Pat your chicken completely dry with paper towels—this is the single most important step for browning. Moisture prevents browning, period. If your chicken is wet, it’ll steam instead of roast, and you’ll miss out on that golden, flavorful exterior.
Oil matters too. A light coating of olive oil or another cooking oil helps browning and prevents sticking. Don’t skip this step or use cooking spray—real oil is your friend here. For skin-on chicken, you can skip the oil since the skin has enough fat.
If you’re doing a whole bird, consider a 30-minute uncovered rest in the fridge before cooking. This dries out the skin even more and helps it crisp up beautifully. It’s an optional step, but it’s the secret to restaurant-quality skin.
Troubleshooting Common Issues
Dry chicken is usually the result of cooking too long or at too high a temperature. At 400°F, you’ve got a decent safety margin, but it’s still possible to overcook. This is why the thermometer is essential—don’t rely on time alone.
If your chicken is consistently dry, try pulling it 2-3°F earlier than you normally would. The carryover cooking will get you to 165°F, and you’ll notice a real difference in juiciness. Also, make sure you’re resting it—resting makes an enormous difference in perceived juiciness.
Undercooked chicken is a food safety issue, so don’t take chances. If your thermometer reads below 165°F, it goes back in the oven. There’s no shame in this; it happens, especially when you’re learning your oven’s quirks.

Uneven cooking usually means your oven has hot spots or your chicken pieces are different sizes. Rotate the pan halfway through cooking, or arrange pieces so thicker parts are toward the hotter areas. Pounding boneless breasts to even thickness solves a lot of these problems.
Pale, rubbery skin means your oven temperature might be off (invest in an oven thermometer—they’re cheap and revelatory), or you didn’t dry the chicken well enough. Make sure your oven actually reaches 400°F before you put the chicken in, and pat that bird dry.
Frequently Asked Questions
Can I cook frozen chicken at 400°F?
Not recommended. Frozen chicken will take significantly longer to cook evenly, and the outside might overcook while the inside is still frozen. Thaw your chicken in the refrigerator overnight or use the cold water thaw method (submerge sealed chicken in cold water, changing water every 30 minutes) before cooking. It takes about 2 hours for a whole bird this way.
Why is my chicken skin not crispy?
Three main culprits: the chicken wasn’t dry enough before cooking, your oven temperature is off, or you’re covering it during cooking. Pat it completely dry, verify your oven temperature with an oven thermometer, and don’t tent the whole thing with foil. If you need to tent part of it, use foil loosely over just the breast area.
Does chicken continue cooking after you remove it from the oven?
Yes, absolutely. This is carryover cooking, and it’s real. The residual heat in the meat will raise the temperature another 5°F or so while it rests. This is why many cooks pull chicken at 160-162°F for pieces or 165°F for whole birds, depending on how much rest time they’re giving it.
Should I flip chicken while it cooks at 400°F?
For skin-on pieces or whole birds, I don’t flip. Let the skin side stay up and contact that oven heat for the whole time. For boneless breasts, you don’t need to flip, but it won’t hurt if you do halfway through. For drumsticks and thighs, skin-side up the whole time gives you the crispiest results.
What’s the difference between baking and roasting at 400°F?
Technically, roasting uses higher heat and often involves an open pan with some liquid, while baking is more about dry heat in a covered or uncovered pan. At 400°F, the distinction gets blurry. For home cooking, just focus on getting good browning and hitting that 165°F internal temperature. The terminology matters less than the results.
Can I cook chicken breasts and thighs together at 400°F?
Yes, but arrange them strategically. Put thighs toward the back or hotter parts of the oven and breasts toward the front or cooler areas. Check the thighs first for doneness (they take longer), and pull the whole pan when everything hits 165°F. Alternatively, add the breasts to the pan about 10 minutes after the thighs start cooking.
Final Thoughts
Cooking chicken at 400°F is straightforward once you understand the basic principles: chicken breasts need 20-25 minutes, thighs and drumsticks need 35-40 minutes, and whole birds need about 50-60 minutes. The real secret is using a meat thermometer to verify doneness (165°F internal temperature), patting your chicken dry before cooking, and always letting it rest before cutting into it.
Start with these times as your baseline, but remember that every oven is different. Keep notes on what works in your kitchen. After a few batches, you’ll develop an intuition for it, and you’ll be turning out perfectly cooked, golden-brown chicken every single time. The learning curve is short, and the payoff is huge—no more dry chicken, no more guessing, just reliable, delicious results.
If you’re looking to round out your dinner plate, consider pairing your chicken with steamed green beans for a quick vegetable side or exploring comfort food recipes that showcase your perfectly cooked chicken. And if you’re feeling adventurous with protein options, check out this ahi tuna recipe for something different. For those nights when you want to build a complete meal around quality proteins, classic bolognese and amatriciana recipes offer hearty alternatives that prove you’ve got serious cooking skills.


