
How long does it take to change brake pads? For most DIYers with basic tools and mechanical confidence, you’re looking at 30 minutes to 2 hours per axle—meaning both front or both rear pads. If you’re tackling all four wheels in one session, budget 3-4 hours total. But here’s the thing: the actual time depends on your vehicle, your experience level, and whether you hit any surprises under there. Let me walk you through what affects the timeline and how to get it done right.
Table of Contents
Timeframe Breakdown by Experience
Your skill level makes a huge difference. A seasoned mechanic can knock out brake pads in 20-30 minutes per axle. If you’ve done this before, expect 45 minutes to an hour per side. First-timers? Give yourself 1.5 to 2 hours per axle, and that’s being realistic, not pessimistic. You’ll be reading instructions, double-checking everything, and taking your time—which is exactly what you should do when you’re working on safety-critical systems.
I always tell people: don’t rush brake work. This isn’t the time to beat a personal record. Taking an extra 20 minutes to verify your calipers are secure or your pads are seated correctly could save you from a brake failure down the road.
Factors Affecting Total Time
Several variables will push your timeline up or down. Vehicle accessibility is huge—some cars have wheels that come off in seconds, while others require removing plastic fenders or dealing with stubborn lug nuts. The age and condition of your brake components matter too. If your rotors are seized or your caliper bolts are rusted solid, you’re adding time.
Brake pad type affects the timeline as well. Ceramic pads are straightforward; semi-metallic pads sometimes require additional break-in procedures. Your workspace also plays a role—working in a well-lit garage with a lift is faster than jacking up your car in a driveway with a flashlight in your teeth.
Environmental factors count. Cold weather makes grease thicker and bolts stiffer. If you’re working on a car that’s been sitting in winter, plan for extra time wrestling with frozen components.
Tools You’ll Actually Need
Here’s what separates a smooth job from a frustrating one: having the right tools ready before you start. You’ll need a jack and jack stands (non-negotiable for safety), a lug wrench, a socket set, brake fluid (for topping off), a C-clamp or brake caliper tool, and ideally a torque wrench to get those caliper bolts to spec.
A turkey baster or small siphon is clutch for removing old brake fluid before you compress the calipers. Wire or zip ties keep the caliper from hanging by the brake hose. A wire brush cleans up rust on the caliper mounting hardware. Having all this staged before you lift the car saves 15-20 minutes of “where did I put that thing” moments.
Don’t skip the torque wrench. Guessing on caliper bolt tension is how you end up with a pad that shifts during braking. Most cars spec those bolts between 20-40 foot-pounds—tighten by feel and you’re gambling.
Step-by-Step Process Overview
The basic sequence is straightforward: lift the car, remove the wheel, remove the caliper, remove the old pads, clean the caliper and rotor, install new pads, reinstall the caliper, and bleed air from the brake lines if needed. That last part is critical—if you compressed the calipers hard, you’ve likely introduced air into the system.
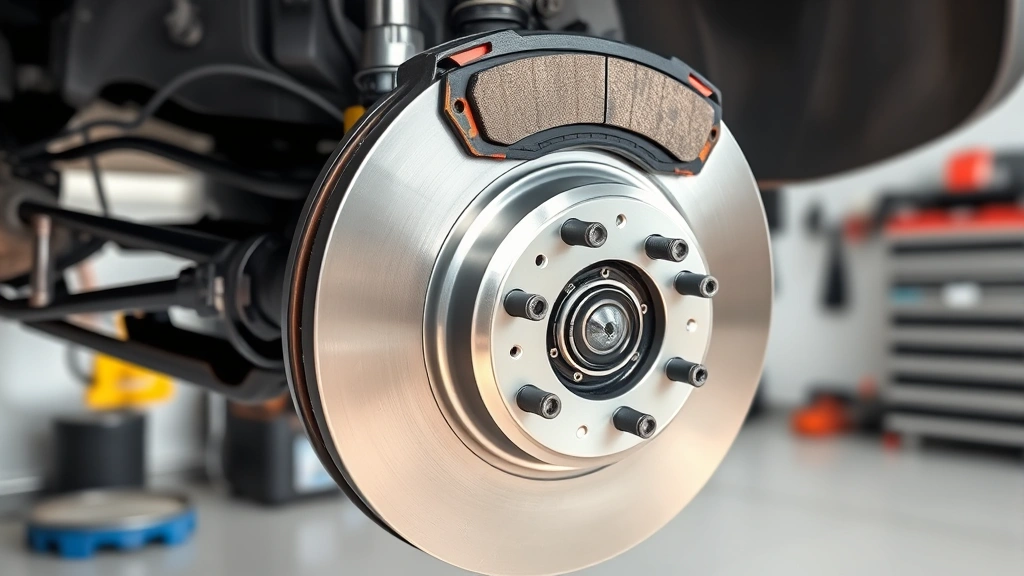
Start by lifting one corner at a time and removing the wheel. Access the caliper bolts (usually two, located on the back of the caliper). Remove those bolts and carefully slide the caliper off the rotor. Support it with wire so it doesn’t hang by the brake hose—that hose is expensive to replace.
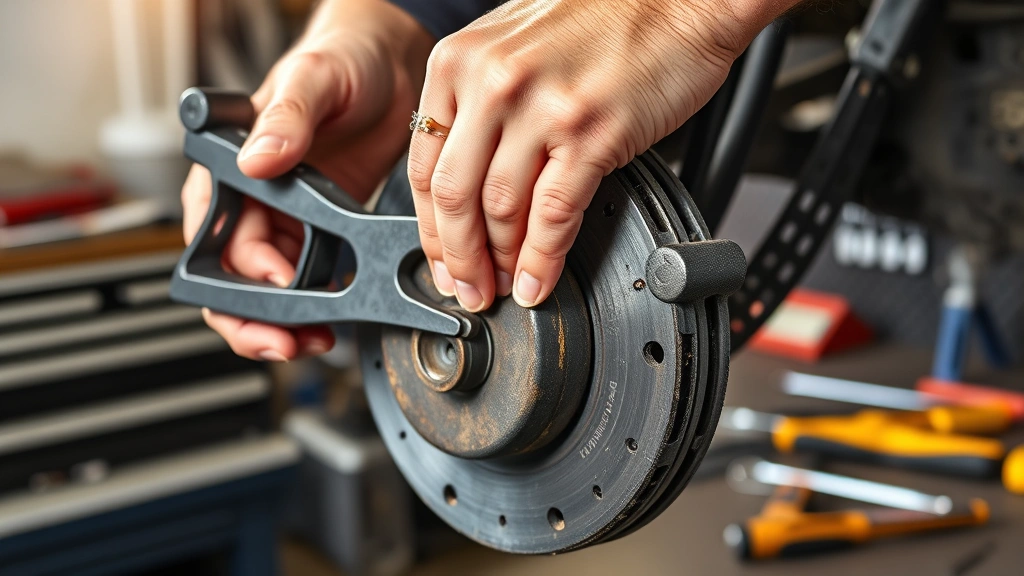
Slide out the old pads and note their orientation. The wear indicator (that little metal tab) should be on the inside of the pad. Install new pads in the same orientation. Before reinstalling the caliper, use your C-clamp to compress the piston back into its bore—this gives you room for the thicker new pads.
Slide the caliper back on, torque the bolts to spec, and reinstall the wheel. Pump the brake pedal several times before driving to re-establish pressure. Some cars need a full brake bleed after pad replacement; check your manual.
Common Time-Wasters to Avoid
Here’s where I see people lose 30 minutes or more. First: not having your tools organized. Grabbing a wrench, realizing it’s the wrong size, putting it back—that adds up fast. Lay everything out before you start.
Second: not removing old brake fluid before compressing the calipers. When you squeeze that piston back, old fluid gets pushed backward into the master cylinder. If you don’t siphon it out first, you’re forcing contaminated fluid back into the system, which means a full brake bleed later.
Third: struggling with stuck caliper bolts. Spray them with penetrating oil and let it sit for 5-10 minutes before trying to remove them. Forcing a stuck bolt wastes time and risks stripping it.
Fourth: forgetting to check your rotor condition while you’re in there. If your rotors are warped or scored, new pads will wear unevenly. Take 5 minutes to measure them or do the visual inspection. It’s way faster to address it now than to come back in 6 months.
When to Call a Professional
Some situations justify paying a shop. If your rotors need machining or replacement, the job becomes more complex and time-consuming. If you’re finding seized caliper pistons or corroded brake lines, that’s beyond a pad swap. If your brake fluid looks dark or contaminated, a full system flush might be necessary.
Also consider your comfort level. If you’re uncertain about torque specs, brake bleeding, or whether your pads are seated correctly, a professional can knock this out in an hour and give you confidence that it’s done right. A shop typically charges $150-$300 per axle, which isn’t unreasonable for the liability and warranty they’re providing.
Age and vehicle condition matter too. Older vehicles with corroded components take longer and carry more risk of discovering additional problems. Sometimes the $200 shop fee saves you from a $400 mistake.
Brake Pad Types Matter
The type of brake pads you choose affects both the job difficulty and the timeline. Organic pads are the easiest to install but wear faster. Semi-metallic pads require a break-in period where you gradually apply braking pressure over the first 200 miles—this doesn’t add installation time, but it does affect your driving schedule.
Ceramic pads are premium and straightforward to install, with minimal break-in. Carbon-ceramic pads (found on performance cars) require specialized tools and knowledge; that’s definitely a shop job. Sintered pads for off-road or high-heat applications sometimes need additional setup.
For a standard sedan or SUV, ceramic pads are your best bet: clean, quiet, and predictable. They add maybe 5 minutes to your job because they’re less messy than semi-metallic.

Safety Checks Included in Time
Don’t skip the safety verification steps—they’re not time-wasters, they’re brake-failure prevention. After you reinstall the caliper, wiggle it to confirm it’s secure. Check that the brake hose isn’t kinked or rubbing on the wheel. Spin the wheel by hand to ensure the pads aren’t dragging.
Pump the brake pedal 10-15 times before you lower the car. The pedal should feel firm and responsive. If it feels squishy, you’ve got air in the lines and need to bleed the brakes. That’s an extra 30-45 minutes, but skipping it is dangerous.
Take a test drive in an empty parking lot. Apply the brakes gradually, then harder. The car should stop evenly without pulling to one side. Listen for any squealing or grinding—new pads shouldn’t make noise for the first few weeks, but if something sounds wrong, investigate before highway driving.
Frequently Asked Questions
Can you change brake pads in 15 minutes?
Only if you’re a professional with a lift, all tools staged, and zero complications. For a DIYer, 15 minutes is unrealistic and unsafe. You need time to work carefully and verify everything’s correct.
Do I need to change all four brake pads at once?
Not necessarily. Front pads wear faster than rear pads, so you might replace fronts while rears are still good. However, it’s smart to do both sides of the same axle at the same time for even braking. Replacing all four together is the safest approach if the rears are getting close to worn.
How often should brake pads be replaced?
Most pads last 25,000-70,000 miles depending on driving style and pad type. Check your owner’s manual or have a shop inspect them annually. Don’t wait for grinding noises—that means metal-on-metal contact and rotor damage.
Do I need to bleed brakes after changing pads?
Not always. If you didn’t compress the calipers hard or if the brake system was sealed, you might be fine. However, if the pedal feels squishy after installation, you need to bleed the air out. This adds 30-45 minutes but is essential for safety.
What’s the hardest part of changing brake pads?
For most people: removing the caliper bolts if they’re corroded, or properly compressing the caliper piston without introducing air. These are learnable skills, but they trip up first-timers. Take your time and don’t force anything.
Can I drive immediately after changing brake pads?
Yes, but gently. New pads need a break-in period of 100-200 miles of light braking to seat properly. Avoid hard stops for the first few days. Also, test your brakes in an empty lot before highway driving to confirm everything’s working.


