
If you’re wondering how long does it take for caulk to dry, the answer depends on several factors that most DIYers overlook until they’re staring at a wet bead wondering if they can paint over it yet. Let me walk you through everything you need to know to get this right the first time.
Table of Contents
Caulk Drying Basics Explained
Here’s the thing about caulk drying that catches most people off guard: there’s a massive difference between when it feels dry to the touch and when it’s actually ready for the next step. Most standard caulks dry to the touch in about 1-3 hours, but that doesn’t mean you should paint over it or expose it to water yet.
The drying timeline for caulk is roughly this: surface dry in 1-3 hours, tack-free in 3-8 hours, and fully cured (ready for water exposure or heavy use) in 24-48 hours. I’ve learned this the hard way after rushing a bathroom caulk job and watching it separate from the tub when someone took a shower the next morning.
Think of caulk like concrete—it might feel solid on top while still being soft underneath. Your patience here directly impacts whether your caulk job lasts 5 years or 15 years.
Different Caulk Types Matter
Not all caulk is created equal, and the type you choose dramatically affects drying time. Acrylic latex caulk, the most common choice for interior work, typically dries in 1-3 hours and fully cures in 24 hours. It’s water-based, easy to clean up, and perfect for most homeowners.
Silicone caulk is a different beast entirely. It takes longer—usually 24-48 hours to cure fully—but it’s worth the wait because it’s incredibly flexible and waterproof. This is what you want around bathtubs and kitchen sinks where water exposure is constant.
Then there’s polyurethane caulk, which is the heavy hitter for outdoor and structural applications. It can take up to 10 days to fully cure, which sounds crazy until you realize it bonds like nothing else and handles extreme temperature swings. For most bathroom and kitchen projects, though, you won’t need this.
Paintable caulk versus non-paintable also matters. Paintable varieties need to dry before paint application, while non-paintable caulks (usually silicone) stay flexible and shouldn’t be painted because paint won’t adhere properly.
Factors That Affect Drying Time
Temperature is the heavyweight champion of drying speed. Caulk dries faster in warm conditions and slower in cold. Most manufacturers specify their drying times at 70°F (21°C). Drop that to 50°F and you’re looking at significantly longer drying times—sometimes double or triple. In winter months, I always plan extra time before moving to the next step.
Humidity plays an equally important role. High humidity slows down evaporation, which is why caulk dries faster on a dry day than a humid one. If you’re caulking in spring when there’s moisture in the air, expect the process to take longer than the label suggests.
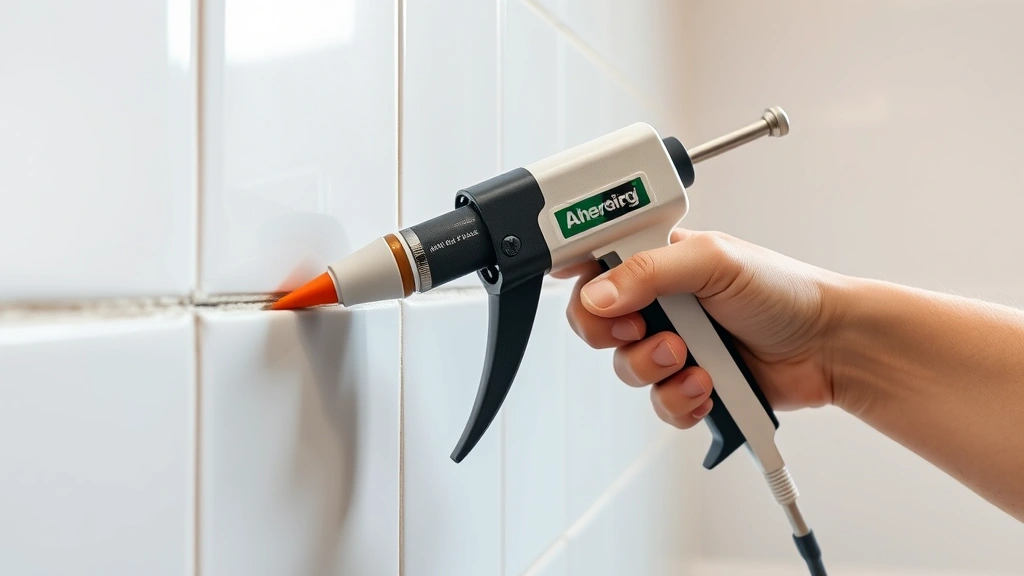
The thickness of your caulk bead matters too. A thin, professional bead dries faster than a thick glob. This is one reason why learning proper application technique actually saves you time—those thin, consistent beads dry in the timeframe the manufacturer promises, while sloppy thick applications can take twice as long.
Air circulation accelerates drying significantly. A fan in the room, an open window, or even just good ventilation speeds things up. I always crack a window when caulking indoors, even in winter, because the air movement helps tremendously.
Temperature and Humidity Impact
Let’s get specific about temperature since this is where most people mess up. At 70°F with 50% humidity, acrylic latex caulk dries in about 1-3 hours. But move the thermostat down to 60°F and you’re looking at 4-6 hours minimum. At 50°F, you could be waiting 8-12 hours or more.
Humidity above 85% basically puts caulk drying on pause. The moisture in the air prevents the water in water-based caulks from evaporating properly. If you’re caulking right before or after rain, or in a naturally humid climate, plan for extended drying times.
The sweet spot for caulking is 60-80°F with 40-60% humidity. If conditions aren’t ideal, you have two choices: wait for better conditions or accept that the job will take longer. I’ve learned that rushing a caulk job in poor conditions always comes back to haunt you.
Pro tip: Check your local weather before scheduling caulk work. If rain is forecast within 24 hours, postpone. If humidity is predicted to spike, start early in the morning when conditions are typically drier.
Cure Time vs. Dry Time
This distinction is critical and often misunderstood. Drying time is when the caulk is no longer wet and feels solid to the touch. Cure time is when the caulk has reached full strength and flexibility. These are completely different timelines.
Acrylic latex caulk might be dry in 3 hours but won’t be fully cured for 24 hours. During that 3-24 hour window, the caulk is vulnerable. It can be smudged, it might shrink slightly as it continues to cure, and it shouldn’t be exposed to water or heavy stress.
Silicone caulk has an even longer cure period. Yes, it might feel dry in 24 hours, but full cure often takes 48 hours. Until that full cure happens, the caulk is still off-gassing and setting up internally. This is why manufacturer instructions say “do not expose to water for 24-48 hours”—they’re talking about cure time, not drying time.
The label on your caulk tube will specify both times. Read it carefully. The smaller number is drying time; the larger number is cure time. Plan your project around the cure time, not the drying time.
How to Speed Up Drying
If you absolutely need to speed things up, there are legitimate methods that actually work. First, improve air circulation. Open windows, turn on a fan, or use a dehumidifier if humidity is the problem. Air movement is your best friend for faster drying.
Increase temperature gradually if possible. If you’re indoors, turning up the heat to 75-80°F helps, but don’t go crazy—extreme temperature swings can cause caulk to crack. A modest increase is all you need.
Use a dehumidifier if you’re in a naturally humid environment. This is especially helpful in bathrooms where you’re caulking around tubs and showers. Running a dehumidifier for a few hours after caulking can cut drying time noticeably.
Some people use heat guns or hair dryers on low settings, but I’m cautious about this. Too much direct heat can cause the surface to dry too fast while the interior stays soft, leading to cracking and poor adhesion. If you go this route, keep the heat source moving and at least 12 inches away.
Choose the right caulk type for your timeline. If you’re in a hurry, acrylic latex dries faster than silicone. Plan accordingly when selecting your product.
Mistakes That Slow Drying
The biggest mistake I see is applying caulk too thickly. That giant bead you squeezed out might look professional, but it’ll take forever to dry and often doesn’t cure properly in the middle. Thin, consistent beads dry predictably and cure evenly.
Another common error is caulking in poor conditions and hoping for the best. Applying silicone caulk on a humid day in a poorly ventilated bathroom is asking for trouble. The caulk will take twice as long to cure, and you might end up with mold growing on it before it fully sets.
Disturbing the caulk before it’s dry is surprisingly common. Running your finger along it to smooth it before it’s set, or moving the object you just caulked, can ruin the job. I always tell people: once you apply caulk, leave it alone for at least 3-4 hours minimum.
Painting over caulk too soon is another killer. Just because it feels dry doesn’t mean it’s ready for paint. Most caulks need at least 3-8 hours before painting, and many manufacturers specify 24 hours. Painting too soon traps moisture and can cause the paint to peel.
Using the wrong caulk for the application is a setup for failure. Acrylic caulk in a wet area will fail. Silicone caulk painted with latex paint will peel. Match your caulk type to your specific application and follow the manufacturer’s recommendations.
When Can You Paint Over Caulk
For acrylic latex caulk, you can typically paint after 3-8 hours, depending on the brand and conditions. Check your specific product’s label—some manufacturers say 1 hour, others say 24 hours. Don’t guess; read the tube.

The general rule is this: if the caulk is completely dry to the touch and no longer sticky, you can probably paint it. But “probably” isn’t good enough for me. I always wait at least 8 hours, preferably overnight, before painting caulk. That extra wait time ensures the surface is fully set and the paint will adhere properly.
Silicone caulk should never be painted with standard latex or oil paint. The paint won’t stick properly because silicone is non-porous and non-absorbent. If you need paintable caulk, buy paintable caulk (usually acrylic latex). If you need waterproof caulk, use silicone and don’t paint it.
Before painting, make sure the caulk is completely dry. Run your finger over it—if it leaves a mark or feels tacky, wait longer. Painting wet or partially cured caulk leads to peeling paint and wasted effort.
For best results, use a primer before painting caulk. This helps the paint adhere better and provides more uniform coverage. Quality paint over quality caulk with proper drying time will last years without peeling.
Frequently Asked Questions
Can I shower after caulking my bathtub?
No, wait at least 24-48 hours before exposing silicone caulk to water. This is cure time, not drying time. Even though it might feel dry after 24 hours, it’s not fully set. Exposing it to water too soon can cause it to fail prematurely. Mark your calendar and be patient—it’s only two days.
Does caulk dry faster in the sun?
Yes, sunlight and warm temperatures speed drying significantly. If you’re caulking outdoors or near a sunny window, expect faster drying than in a shaded, cool room. However, extreme heat can cause some caulks to cure too quickly and crack, so moderate warmth is ideal.
What if my caulk won’t dry?
If caulk isn’t drying after 24 hours, something is wrong. Check humidity levels—if they’re above 85%, that’s likely your culprit. Improve ventilation, run a dehumidifier, or wait for better conditions. Also verify you’re using the right caulk type for your application. Wrong product choice will cause extended drying times.
Can I use a hair dryer to speed up caulk drying?
Use extreme caution with heat guns or hair dryers. Direct heat can cause surface drying while the interior stays soft, leading to cracks and poor cure. If you must use heat, keep it on low, keep it moving, and maintain at least 12 inches distance from the caulk.
Is paintable caulk better than silicone?
They serve different purposes. Paintable (acrylic latex) caulk is great for trim, baseboards, and areas where you want a finished paint look. Silicone is superior for wet areas like bathrooms and kitchens because it’s waterproof and flexible. Choose based on your specific application, not personal preference.
How do I know if caulk is fully cured?
The manufacturer’s timeline is your best guide. For most acrylic latex caulk, 24 hours means full cure. For silicone, expect 48 hours. You can gently press on it—if it doesn’t indent and springs back, it’s likely cured. But honestly, just follow the label instructions and you’ll be fine.
Final Thoughts
Getting caulk drying time right is one of those details that separates amateur-looking jobs from professional results. It’s not complicated—it just requires patience and attention to the specific product you’re using. Read your label, check your conditions, and give it the time it needs.
Whether you’re installing a Ring doorbell, working on plumbing like when you install a garbage disposal, or tackling bathroom projects, proper caulking technique matters. The same attention to detail that makes a clean washing machine last longer applies to caulk work.
Most caulk failures I’ve seen weren’t caused by bad product—they were caused by impatience. Someone painted too soon, exposed it to water too early, or applied it in poor conditions and hoped for the best. Don’t be that person. Follow the timeline, respect the cure period, and your caulk job will look great and last for years.
For more detailed guidance on caulking techniques and product selection, check resources like Family Handyman, This Old House, and Bob Vila for comprehensive guides on home improvement projects involving caulk and sealants.
Take your time, follow the manufacturer’s instructions, and you’ll get professional results that last.


