
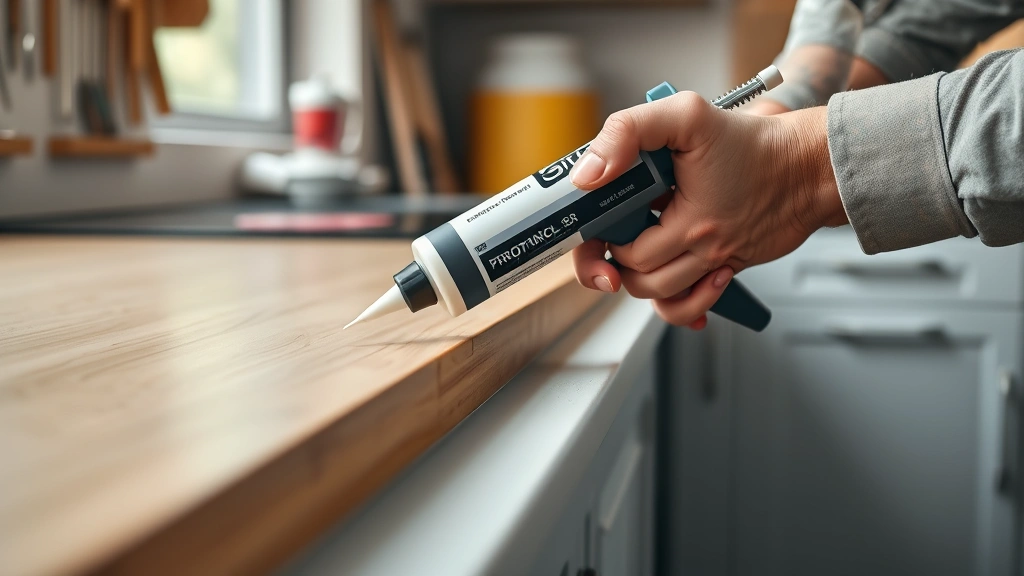
How long does caulk take to dry? That’s the million-dollar question every DIYer asks right after squeezing that caulk gun. The honest answer: it depends. Drying times range anywhere from 24 hours to a full week, and I’m going to walk you through every factor that affects it.
Table of Contents
Caulk Types Matter Most
Before we talk timeline, you need to know what you’re working with. The type of caulk you choose is literally the biggest factor in how long does caulk take to dry. I’ve used acrylic latex, silicone, and polyurethane in different situations, and they’re completely different beasts.
Acrylic latex caulk is the beginner-friendly option. It’s water-based, easy to clean up, and generally dries fastest. Silicone caulk is the tough guy—waterproof and flexible, but takes longer. Polyurethane sits somewhere in the middle but offers incredible durability. Each one has its own drying personality, and you need to match the right caulk to your project.
Acrylic Latex Drying Times
If you’re using acrylic latex caulk, you’re looking at the shortest wait. Most brands claim they’re “paintable” in 1-3 hours, but I always give it at least 24 hours before I consider it fully cured. That’s the difference between surface-dry and actually-ready-for-water.
Surface drying happens quickly—usually within an hour on a good day. You can touch it without leaving fingerprints. But full cure? That takes the full day. I’ve made the mistake of running water over acrylic latex caulk after just a few hours, and it started pulling away from the joint. Not fun.
The manufacturer’s label will give you specific times, but add a buffer. If it says 24 hours, I wait 30. Better safe than redoing the whole job.
Silicone Caulk Needs Patience
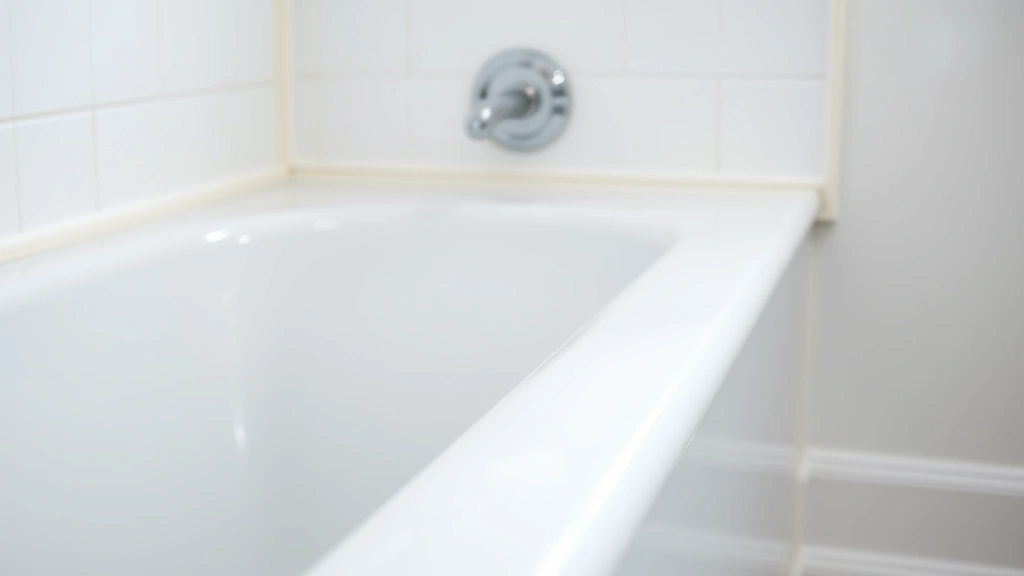
Silicone caulk is where patience becomes a virtue. This stuff can take 24-48 hours just to surface dry, and full cure? Try 7-14 days. I know that sounds brutal, but that’s why silicone is perfect for bathrooms and kitchens—it stays flexible and waterproof for years.
The trick with silicone is that it cures from the outside in. You might think it’s dry on the surface after a day, but squeeze the bead and you’ll feel it’s still soft inside. I’ve learned to mark my calendar when I apply silicone caulk, especially around tubs and shower surrounds. That’s where water exposure will destroy a premature seal.
One pro tip: silicone cures faster in low-humidity environments. Bathroom? Expect the longer end of that timeline. Dry basement? It might surprise you and cure a day or two faster.
Polyurethane Caulk Details
Polyurethane caulk is the middle ground. You’re looking at 24-48 hours for surface drying, and 3-7 days for full cure. It’s tougher than acrylic latex and cures faster than silicone, making it great for exterior work or areas that see movement.
I use polyurethane when I need something that’ll handle temperature swings and UV exposure without breaking down. It’s not as flexible as silicone, but it bonds better to wood and concrete. The drying timeline is manageable if you plan ahead.
One thing about polyurethane: it’s moisture-sensitive. Humid conditions actually help it cure faster because it needs moisture to activate. That’s opposite to most other caulks. If you’re applying it on a dry day, mist the joint lightly with water and it’ll cure quicker.
Temperature & Humidity Impact
Here’s where things get real. Temperature and humidity are the invisible hands controlling your caulk’s drying schedule. Cold weather? Double your drying time. Hot, dry weather? You might shave off a few hours.
Ideal conditions are 50-85°F with moderate humidity (30-50%). Below 50°F and caulk basically stops drying. I’ve applied caulk in winter and watched it sit there like wet toothpaste for days. Above 85°F with low humidity, and it dries so fast the surface can skin over while the inside’s still soft—that causes cracking.
Humidity is tricky. Too much and caulk takes forever to cure. Too little and it can skin over too fast. Acrylic latex actually needs some moisture to cure properly. Silicone and polyurethane are more forgiving, but they still perform best in moderate conditions.
Check the forecast before you caulk. If rain’s coming in 12 hours, wait. If it’s going to be 90°F and bone dry, plan for faster surface drying but still give it full cure time before exposing it to water.
Speeding Up Drying Process
Sometimes you need caulk dry faster. I get it. Here’s what actually works:
Ventilation is your friend. Open windows, run a fan, create air movement. This helps moisture escape and is especially effective with acrylic latex. For silicone, airflow matters less but still helps.
Temperature matters. Warmer is better (within reason). If it’s 55°F, move a space heater nearby. Don’t blast it directly at the caulk, but warming the room helps. I’ve cut drying time by 25% just by keeping the space at 75°F instead of 60°F.
Dehumidifiers work for silicone and polyurethane. Lower the humidity and these caulks cure faster. Acrylic latex is opposite—it needs some moisture, so don’t over-dehumidify.
Don’t use heat guns directly. I see people try this and it causes uneven drying, cracking, and skin formation. Just no.
Honestly? The best way to speed things up is to plan ahead. Start your caulking project early in the day on a mild, moderately humid day. You’ll be amazed how much faster it dries when conditions cooperate.
Common Drying Mistakes
I’ve made every caulking mistake possible, so let me save you the headache. The biggest error is exposing caulk to water too early. You think it’s dry because it feels dry. Nope. Water gets in there and ruins the whole seal. Wait the full time.
Second mistake: painting over caulk before it’s cured. Paint acts as a moisture barrier and can trap water inside the caulk, preventing proper cure. Most caulks need at least 24 hours before painting, but check your specific product.
Third mistake: applying caulk in the wrong conditions and wondering why it never hardens. Cold, wet weather is caulk’s enemy. If conditions are bad, postpone the project. I’ve waited weeks for the right weather window rather than deal with failed caulking.
Fourth mistake: applying too much caulk thinking it’ll dry faster. Thick beads take longer to cure all the way through. Proper technique is a thin, smooth bead. It looks better and dries faster.
Fifth mistake: not reading the label. Different brands have different timelines. What works for one silicone might not work for another. Always check the manufacturer’s instructions.
Testing If Caulk’s Ready
So how do you actually know if your caulk is dry enough? Don’t just guess. Here’s my testing method:
The touch test: Gently press your finger on the caulk. If it springs back, it’s not ready. If it stays indented, it’s still curing. You want zero give.
The water droplet test: For bathroom and kitchen caulk, put a water droplet on it. If it beads up, you’re good. If it soaks in or spreads, wait longer.
The smell test: Acrylic latex has a distinct smell when wet. When that smell is completely gone, it’s dry. Silicone has a vinegar smell that fades as it cures.
The visual check: Color change is a clue. Most caulk darkens slightly as it cures. When the color stabilizes, you’re close.
For critical areas like shower surrounds, I always wait the full manufacturer-recommended time plus a day. It’s not worth the risk of water damage.
Frequently Asked Questions
Can I shower after caulking my bathroom?
No. Wait the full cure time—usually 7 days for silicone. I know it’s annoying, but one premature shower can ruin a week’s worth of work. Use another bathroom if you can, or wait it out.
Does caulk dry faster in sunlight?
Not really. UV light doesn’t speed up curing much. What matters is temperature and humidity. Direct sun might warm the area slightly, which helps a little, but it’s not a game-changer.
What if caulk won’t dry?
Check temperature (is it below 50°F?), humidity (is it above 80%?), and whether you used the right caulk type. If conditions are bad, wait for better weather. If it’s been two weeks and still soft, the caulk might be defective—remove it and start over.
Can I use a hair dryer to speed drying?
Not recommended. Hair dryers create uneven heating and can cause surface skinning. Stick with room-temperature ventilation methods.
Is paintable caulk really paintable in 1 hour?
It can be, technically. But I always wait 24 hours. That 1-hour claim is the bare minimum, and painting too early can trap moisture and prevent full cure.
Why is my caulk cracking?
Usually because it dried too fast (applied in hot, dry conditions) or you applied it too thick. Make sure conditions are moderate, apply a thin bead, and don’t paint over it too quickly.
Bottom line: How long does caulk take to dry depends on type, temperature, and humidity. Acrylic latex: 24 hours. Silicone: 7 days. Polyurethane: 3-7 days. When in doubt, wait longer. A few extra days beats redoing the whole project. Plan your caulking for mild weather, read the label, and be patient. Your future self will thank you when that seal lasts for years without cracking or leaking.
For more home maintenance insights, check out our guides on how to change smoke alarm batteries and programming your garage door opener. And if you’re tackling kitchen projects, our garbage disposal installation guide has everything you need.
For authoritative information on caulking best practices, check out Family Handyman’s comprehensive caulking resources, This Old House’s detailed tutorials, and Bob Vila’s expert recommendations.


