
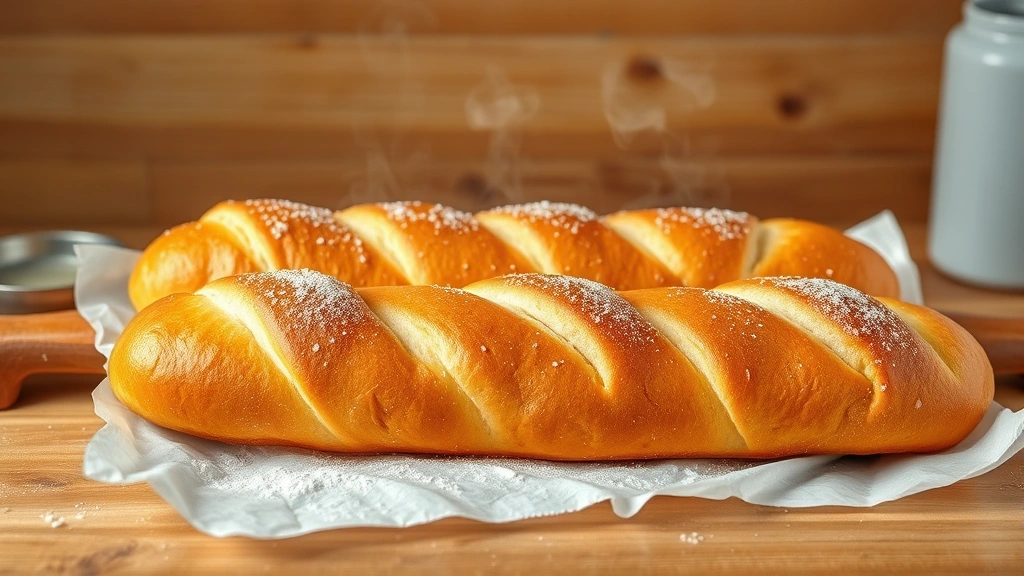
A hoagie bread recipe is the foundation of every great sandwich—crusty on the outside, soft and airy on the inside, with just enough flavor to stand up to your favorite fillings. If you’ve ever bitten into a store-bought hoagie roll and thought “I can do better,” you’re absolutely right. Making your own hoagie bread at home takes just five straightforward steps and a bit of patience, and the results will blow anything you grab at the grocery store out of the water.
I’ve been baking bread for years, and I can tell you that hoagie rolls are one of the most forgiving projects for home bakers. You don’t need fancy equipment or obscure ingredients—just flour, water, yeast, salt, and a little time. The magic happens when you understand the simple science: hydration, fermentation, and steam in the oven. In this guide, I’ll walk you through my battle-tested method that delivers restaurant-quality rolls every single time.
Table of Contents
Why Homemade Matters
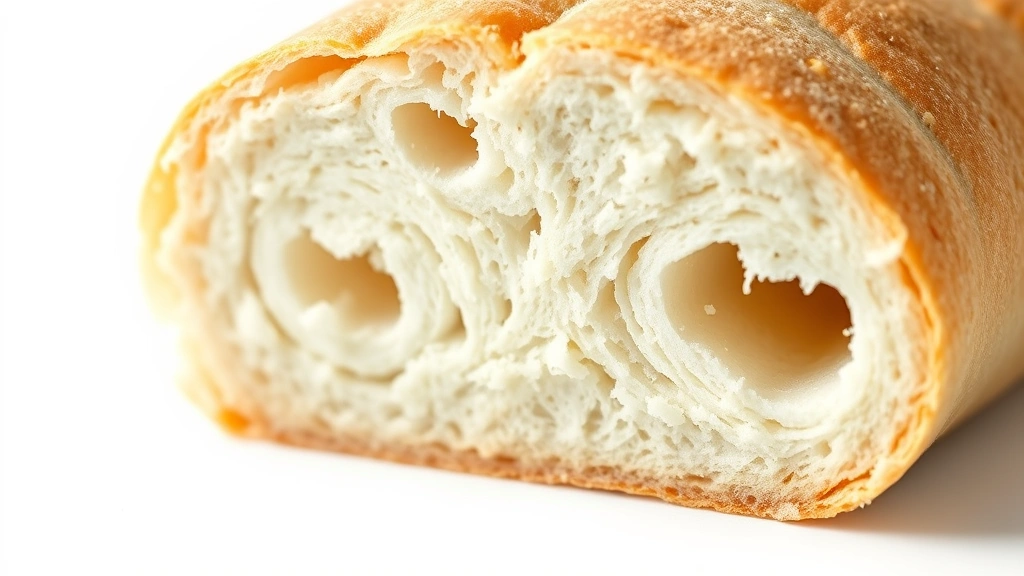
Store-bought hoagie rolls often contain preservatives, dough conditioners, and additives you can’t pronounce. When you make your own, you control every ingredient. More importantly, you control the texture and flavor. Homemade rolls have a superior crust that cracks satisfyingly when you bite into it, and the interior stays tender for days longer than commercial versions.
The real advantage? Freshness. There’s nothing like pulling a warm hoagie roll from the oven and filling it immediately. The contrast between the crispy exterior and steaming interior is something you simply cannot replicate with day-old store bread. Plus, your kitchen will smell incredible—that’s not a bonus you get from the bakery section.
Gather Your Ingredients
Here’s what you need for a batch of six perfect hoagie rolls:
- 500g (4 cups) bread flour or all-purpose flour
- 325ml (1.3 cups) warm water
- 7g (2 teaspoons) instant yeast
- 10g (2 teaspoons) salt
- 5ml (1 teaspoon) sugar
- 15ml (1 tablespoon) olive oil
- Extra flour for dusting
The measurements matter here, so use a kitchen scale if you have one. If you’re working with cups and spoons, that’s fine—just make sure you’re packing flour lightly into the measuring cup and leveling it off. Want to know how many grams to a quarter pound? Getting your measurements precise is crucial for consistent results, whether you’re baking bread or following any recipe that demands accuracy.
The type of flour matters too. Bread flour has higher protein content than all-purpose flour, which means more gluten development and chewier rolls. If you only have all-purpose flour, your rolls will still turn out great—they’ll just be slightly less chewy and a bit more tender.
Mix and Knead the Dough
Pour your warm water into a large mixing bowl. The water should feel warm to the touch—around 110°F (43°C). Too hot and you’ll kill the yeast; too cold and fermentation will drag on forever.
Add your instant yeast and sugar to the water, and let it sit for about 30 seconds. You don’t need to wait for it to foam up—instant yeast doesn’t always do that, and it’s not a sign of failure if it doesn’t. Stir gently to combine.
Add your flour and salt to the water mixture. Mix everything together with your hands or a wooden spoon until you have a shaggy, rough dough. Don’t worry about it being messy—that’s exactly what you want at this stage. Let it rest for 10 minutes. This rest period, called autolyse, allows the flour to fully hydrate and makes kneading easier.
After the rest, add your olive oil and knead the dough. If you’re doing this by hand, it’ll take about 10 minutes of solid work. You’ll know the dough is properly kneaded when it becomes smooth, elastic, and springs back when you poke it. If you have a stand mixer, use the dough hook on medium speed for about 6 minutes. The dough should pull away from the sides of the bowl and form a cohesive ball.
First Rise & Fermentation
Shape your dough into a ball and place it in a lightly oiled bowl. Turn the dough to coat it lightly with oil—this prevents a skin from forming on top. Cover the bowl with a damp kitchen towel or plastic wrap.
Let the dough rise at room temperature for 1.5 to 2 hours, until it roughly doubles in size. You’re looking for the dough to be puffy and jiggly when you gently shake the bowl. If your kitchen is cool, this might take longer. If it’s warm, it could be faster. There’s no exact timer—watch the dough, not the clock.
Here’s a pro tip: you can do a slow overnight fermentation instead. Just refrigerate the dough after shaping it in the bowl, let it rise in the fridge for 8-16 hours, and then proceed to shaping. Cold fermentation actually improves flavor and makes the dough easier to handle.
Shape and Proof the Rolls
Turn your risen dough out onto a lightly floured work surface. Divide it into six equal pieces—a kitchen scale is helpful here, but eyeballing it works fine. You’re aiming for roughly equal sizes so they bake evenly.
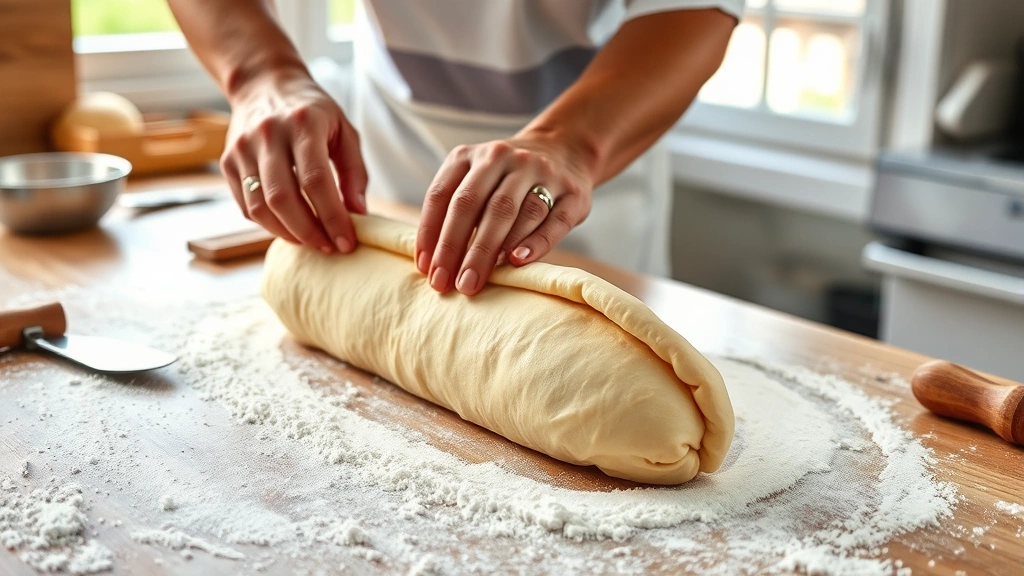
Take one piece and gently flatten it into a rectangle about 4 inches wide and 6 inches long. Roll it up tightly from one of the long sides, sealing the seam with the heel of your hand as you go. You should end up with a log shape that’s about 6-7 inches long. Place it seam-side down on a parchment-lined baking sheet.
Repeat with the remaining five pieces, spacing them about 2 inches apart on the baking sheet. Cover them loosely with plastic wrap or a damp towel and let them proof for 45 minutes to 1 hour, until they’re puffy and have increased noticeably in size.
While the rolls are proofing, preheat your oven to 450°F (230°C). If you have a baking stone or Dutch oven, place it in the oven now so it preheats along with the oven. This helps create the crispy crust you’re after.
Bake to Perfection
Just before baking, score each roll with a sharp knife or bread lame. Make one or two diagonal cuts about ¼ inch deep across the top of each roll. These scores control where the bread expands and give you that authentic bakery look. Dust the rolls lightly with flour for extra visual appeal.
If you’re using a Dutch oven, carefully transfer your parchment paper with the rolls into the preheated Dutch oven, cover it with the lid, and bake for 20 minutes. Remove the lid and bake for another 15-20 minutes until the rolls are deep golden brown.
If you’re using a regular baking sheet, you’ll want to create steam in the oven. Pour about a cup of hot water into a shallow pan on the bottom oven rack just before you put the rolls in. Bake the rolls for 25-30 minutes total until they’re golden and sound hollow when you tap the bottom.
The internal temperature should reach 205-210°F (96-99°C) when you stick a thermometer into the center of one roll. This ensures the inside is fully baked and won’t be gummy.
Troubleshooting Common Issues
Rolls are too dense: This usually means under-fermentation. Give them more time to rise before baking. The dough should be noticeably puffy and jiggly.
Rolls spread out instead of up: Your dough might be too wet or you might not have developed enough gluten during kneading. Make sure you’re kneading for the full time and that your water measurement is accurate.
Crust is too soft: You need more steam in the oven. Try the Dutch oven method or place a pan of hot water on the bottom rack. Also, make sure your oven is fully preheated.
Rolls are pale and not golden: Your oven temperature might be off. Use an oven thermometer to verify. Also, make sure you’re baking long enough—they need 25-30 minutes minimum.
Rolls taste yeasty: This means fermentation went too long. Shorten your first rise or use cooler water to slow down the process. You can also reduce the yeast slightly to 6g.
Storage and Serving Ideas
Fresh hoagie rolls are best eaten the same day, but they’ll stay fresh in an airtight container for up to three days. After that, they start to get stale, though you can revive them by wrapping them in foil and warming them in a 350°F oven for 10 minutes.
For longer storage, wrap cooled rolls individually in plastic wrap and freeze them for up to three months. Thaw them at room temperature for a few hours, or wrap them in foil and warm them in a 350°F oven for about 15 minutes from frozen.
These rolls are perfect for classic Italian hoagies, but don’t stop there. Use them for pulled pork sandwiches, meatball subs, or even as the base for how to make gravy from turkey drippings sandwiches if you’re working with holiday leftovers. They’re also fantastic for breakfast sandwiches or just buttered and eaten warm straight from the oven.
For more creative sandwich ideas and culinary inspiration, check out authoritative resources like Family Handyman’s food section, This Old House’s kitchen guides, and Bob Vila’s home cooking tips. These sites have excellent resources for home cooking projects.
Frequently Asked Questions
Can I use instant yeast instead of active dry yeast?
Yes, absolutely. Instant yeast and active dry yeast are largely interchangeable in this recipe. Instant yeast has slightly smaller granules and ferments a bit faster, but the amount stays the same. You might see your dough rise slightly faster, so keep an eye on it.
What if I don’t have a kitchen scale?
You can use cup measurements, but weigh your flour if possible—it’s the most variable ingredient. If you must use cups, fluff the flour in the bag, spoon it into a measuring cup, and level it off with a knife. Don’t scoop directly from the bag, as this packs the flour and throws off your ratios.
Can I make these rolls with whole wheat flour?
You can substitute up to 25% of the bread flour with whole wheat flour without major changes. Beyond that, your rolls will be denser and may need slightly more water. Whole wheat flour absorbs more liquid than white flour, so you might need to add 15-30ml more water if you go beyond 25%.
How do I know when the dough has risen enough?
The poke test works great: gently poke the dough with your finger. If the indentation springs back slowly and partially, it’s ready. If it springs back immediately, it needs more time. If it doesn’t spring back at all, you’ve over-proofed it.
Can I make the dough ahead of time?
Absolutely. After mixing and kneading, refrigerate the dough in an oiled bowl for up to 24 hours. When you’re ready to shape, let it come to room temperature for about 30 minutes first. You can also refrigerate the shaped rolls for up to 16 hours before baking.
Why do my rolls have big holes inside?
Large holes usually mean over-fermentation or not enough degassing during shaping. When you shape the rolls, press out excess air with your hands. Also, make sure you’re not letting them rise too long—they should be puffy but not overly inflated.
What’s the difference between hoagie rolls and sub rolls?
Hoagie rolls and sub rolls are essentially the same thing—regional naming differences. Some areas call them hoagies, some call them subs, some call them grinders or po’boys. The bread is identical: a crusty exterior with a soft, airy crumb inside.
Final Thoughts
Making a hoagie bread recipe from scratch is one of those projects that seems intimidating until you do it once. After that, you’ll wonder why you ever bought them from the store. The five-step process is straightforward, the ingredients are pantry staples, and the results are consistently excellent.
The real skill isn’t in following exact times—it’s in learning to read your dough. Every kitchen is different. Every batch of flour is slightly different. Once you understand what the dough should feel like at each stage, you can adjust timing as needed. That’s when you stop following a recipe and start actually baking.
Start with one batch and see how it goes. You’ll likely nail it on the first try. If you don’t, the worst-case scenario is you still have fresh, homemade bread. That’s a win in my book. Get those hoagie rolls in the oven and enjoy the process.


