
A healthy overnight oats recipe is your ticket to stress-free mornings—no cooking, no excuses, just grab-and-go nutrition that actually tastes like dessert. I’ve spent years perfecting this technique in my own kitchen, and I’m going to walk you through exactly how to build the perfect bowl from scratch.
Table of Contents
Why Overnight Oats Work
Here’s the thing about overnight oats—they’re not magic, but they sure feel like it. The science is straightforward: rolled oats absorb liquid overnight, softening without heat. You’re essentially cold-soaking your breakfast, which means the oats stay creamy and tender while preserving more nutrients than cooking would. No stovetop required. No burnt-on mess. Just prep it before bed, and you’ve got breakfast waiting when you wake up.
The beauty here is that you’re not fighting against time in the morning. You’re not standing in front of the stove half-asleep, wondering if you remembered to add salt. You open the fridge, grab your container, and eat. This is the kind of breakfast strategy that actually sticks because it removes friction from your day.
Gathering Your Ingredients
Before you start assembling, let’s talk about what you actually need. The foundation of any healthy overnight oats recipe is simple: rolled oats, liquid, and something to sweeten or flavor it. Don’t overthink this part.
The Base (Non-Negotiable):
- Rolled oats (½ to ¾ cup per serving)
- Milk of choice (dairy, almond, oat, coconut—whatever you’ve got)
- Yogurt (Greek yogurt adds creaminess and protein)
The Flavor Layer:
- Honey, maple syrup, or agave (1-2 tablespoons)
- Vanilla extract or almond extract (½ teaspoon)
- Spices like cinnamon or nutmeg (pinch)
The Mix-Ins (Pick Your Adventure):
- Fresh or frozen berries
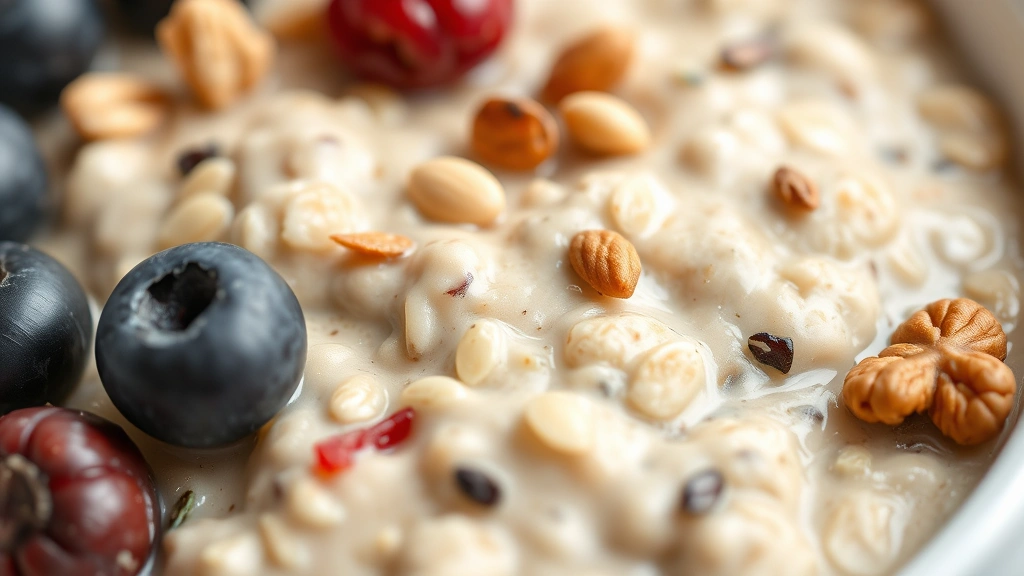
- Nuts and seeds (chia, flax, almonds, walnuts)
- Fresh fruit like bananas or apples (prevent browning with lemon juice)
- Coconut flakes, cacao nibs, or granola
The key is balancing wet ingredients with dry ones. Too much liquid and you’ve got oat soup. Too little and you’re chewing rubber. We’ll nail the ratio in the next section.
Step-by-Step Method
This is where the actual work happens—and I promise it’s minimal. I’m talking five minutes of actual hands-on time.
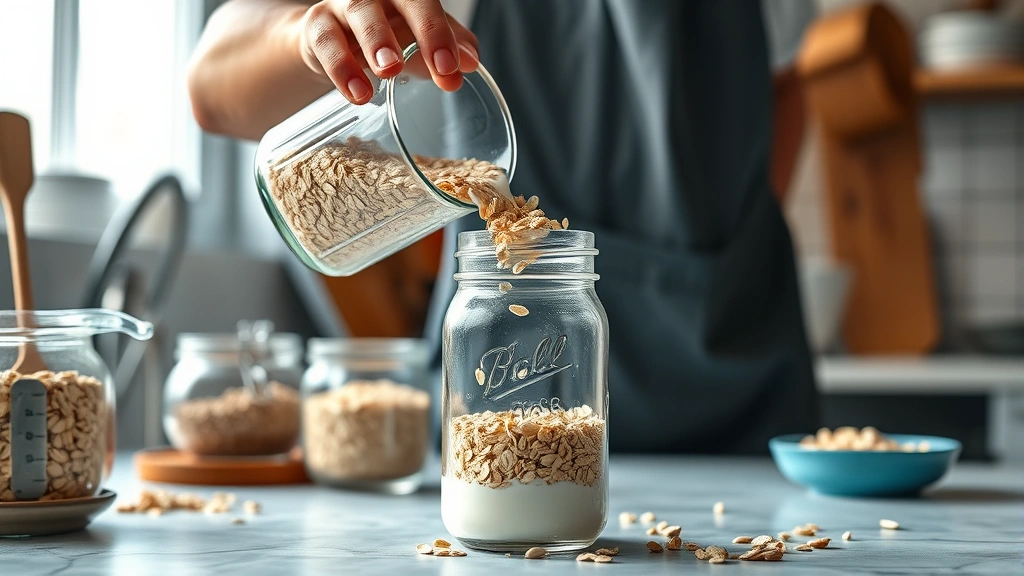
Step 1: Choose Your Container
Use a mason jar, glass container, or plastic container with a tight-fitting lid. A pint-sized mason jar (16 oz) is perfect for one serving. You need something that seals completely so your oats don’t dry out or absorb weird fridge smells.
Step 2: Add Dry Ingredients First
Pour ½ cup of rolled oats into your container. Add a pinch of salt (this matters—it enhances flavor) and any spices you’re using. If you’re adding chia seeds or ground flax for extra nutrition, this is the time. Shake it around to distribute everything evenly.
Step 3: Pour Your Liquid
Add ½ cup of milk, then ¼ cup of yogurt. The ratio here is roughly 1:1 oats to liquid, but yogurt counts as part of that liquid. Stir this together thoroughly—you want the oats to start absorbing immediately. If you’re using frozen berries, add them now; they’ll thaw overnight and release their juice into the mixture.
Step 4: Add Sweetener and Flavor
Drizzle in 1-2 tablespoons of honey or maple syrup. Add ½ teaspoon of vanilla extract. Stir everything together until you’ve got a cohesive mixture with no dry pockets of oats sitting at the bottom. This is important—any dry oats won’t hydrate properly.
Step 5: Seal and Refrigerate
Screw the lid on tight and place it in the fridge. Leave it overnight (or at least 4 hours, though overnight is ideal). The oats will continue absorbing liquid and softening. In the morning, give it a stir. If it’s too thick, add a splash more milk. If it’s too thin, add a few more oats.
Flavor Combinations That Pop
Once you understand the basic structure, you can build endless variations. Here are my go-to combinations that actually work:
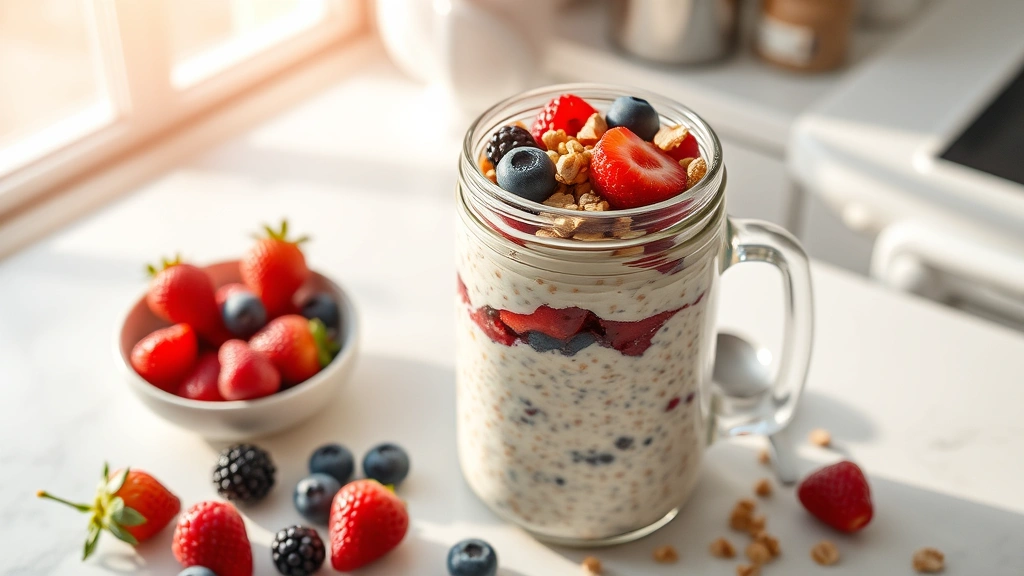
Berry Blast: Mix fresh or frozen blueberries, raspberries, and blackberries into the base. Add a tablespoon of honey and ½ teaspoon of vanilla. Top with granola and chopped almonds in the morning.
Apple Pie: Dice fresh apples (or use pre-prepped apples to prevent browning), add them to the oats with a teaspoon of cinnamon, a pinch of nutmeg, and a tablespoon of maple syrup. Top with walnuts.
Tropical Escape: Use coconut milk as your liquid base, add fresh pineapple chunks and shredded coconut, sweeten with honey, and finish with macadamia nuts.
Chocolate Peanut Butter: Stir in a tablespoon of natural peanut butter and a tablespoon of unsweetened cocoa powder into your base. Sweeten with honey. Top with chocolate chips and peanuts.
Protein Power: Add a scoop of vanilla protein powder to your base, mix in chia seeds, and top with berries and almonds.
The rule I follow: start with a solid flavor foundation (sweetener + extract), then add one or two complementary ingredients. Don’t throw everything at it or you’ll end up with confused flavor.
Storage and Prep Strategy
Here’s where overnight oats become genuinely practical for real life. Make a batch on Sunday, and you’ve got breakfast handled for most of the week.
How Long They Last: Properly sealed overnight oats stay fresh for 4-5 days in the fridge. The oats continue to soften slightly each day, so day one is creamier than day five. I actually prefer them on day two or three when they’ve reached peak texture.
Batch Prep Like a Pro: Make four or five jars at once. Line them up on a shelf in your fridge. Each morning, grab one and go. This is the breakfast equivalent of meal prep—minimal effort, maximum payoff.
Freezer Hack: You can freeze overnight oats for up to three months. Thaw overnight in the fridge, and they’re good to eat. This works best with fruit-based recipes rather than chocolate or nut butter versions.
The Night-Before Technique: If you’re really organized, prep your dry ingredients in jars on Sunday (oats, spices, chia seeds). Monday through Friday mornings, just add liquid and yogurt, stir, and refrigerate. You’ll save even more time.
Customization for Your Taste
Everyone’s taste is different, and that’s the whole point. Here’s how to adjust the basic recipe to match what you actually want to eat:
Too Thick? Add another splash of milk (1-2 tablespoons) and stir. You want it spoonable, not gelatinous.
Too Thin? Add more oats (a tablespoon at a time) or a dollop of yogurt. Let it sit for 10 minutes so the oats can absorb the extra liquid.
Not Sweet Enough? Drizzle more honey or syrup on top before eating. I prefer adding sweetness at the end so I can control the intensity.
Want More Protein? Add Greek yogurt (increases creaminess too), protein powder, or a handful of nuts. A tablespoon of peanut or almond butter works great.
Need It Lighter? Use unsweetened milk, skip the sweetener, and load up on fresh fruit. The natural sugars from berries or banana will sweeten it enough.
The point is: this isn’t a rigid formula. It’s a framework. Once you’ve made it a couple times, you’ll develop instincts about what works for your palate.
Nutrition Benefits Breakdown
Let’s talk about why this is actually healthy and not just convenient. A basic serving of overnight oats (½ cup oats, ½ cup milk, ¼ cup yogurt, berries, and honey) typically contains:
- Calories: 300-350 (depending on milk choice)
- Protein: 10-12g (more if using Greek yogurt)
- Fiber: 6-8g (keeps you full longer)
- Carbs: 45-50g (mostly complex carbs from oats)
- Fat: 5-7g (healthy fats if you add nuts or seeds)
The fiber in oats helps regulate blood sugar, meaning you won’t hit an energy crash mid-morning. The protein keeps you satisfied. The whole setup is designed to keep you fueled for hours, not just until 10 AM.
Add nuts or seeds, and you boost the healthy fat content, which improves nutrient absorption and satiety. This is a breakfast that actually works for your body, not against it.
Common Problems Solved
Problem: My oats are mushy and gross.
You’re using too much liquid or letting them sit too long. Stick to the 1:1 ratio of oats to liquid. If they’re already made and mushy, use them in smoothies or baked goods instead of eating straight.
Problem: The fruit is getting brown and weird.
Use frozen fruit instead of fresh, or add fresh fruit in the morning rather than the night before. If you’re using apples, learn how to keep apples from turning brown by using lemon juice.
Problem: Everything tastes bland.
You’re probably not using enough sweetener or flavor extract. Don’t be shy—a tablespoon of honey or maple syrup isn’t excessive. Add ½ teaspoon of vanilla, and taste as you go.
Problem: My oats separated into layers.
Stir them more thoroughly before sealing. Make sure the oats are evenly distributed and absorbing liquid throughout, not clumping at the bottom.
Problem: I’m bored after three days.
Make different flavors each week. Rotate between berry, tropical, apple pie, and chocolate versions. You’ve got endless options.
Frequently Asked Questions
Can I eat overnight oats cold, or do I need to heat them?
You can eat them straight from the fridge, which is the whole appeal. Some people prefer them at room temperature or slightly warmed up (microwave for 30-60 seconds). It’s entirely your preference.
What type of milk works best?
Any milk works—dairy, almond, oat, coconut, soy. Oat milk and dairy milk create the creamiest texture. Almond milk is thinner. Use what you have or prefer. The oats will hydrate regardless.
Can I make overnight oats without yogurt?
Yes, but yogurt adds creaminess and protein. If you skip it, increase your milk by ¼ cup and consider adding protein powder to keep the protein content up.
How do I prevent overnight oats from getting watery?
Use a tight-fitting lid so they don’t absorb moisture from the fridge air. Keep them sealed. If they do get watery, you’ve either made them too far in advance or used too much liquid initially.
Are overnight oats good for weight loss?
They can be, because they’re filling and balanced with protein and fiber. A serving keeps you satisfied for hours, which means you’re less likely to snack mid-morning. That said, portion control still matters.
Can I use steel-cut oats instead of rolled oats?
Steel-cut oats take longer to soften and won’t reach the right texture overnight. Stick with rolled oats or old-fashioned oats. Quick oats work but get mushier faster.
What’s the best container for overnight oats?
Mason jars are ideal because they’re durable, seal well, and you can see what’s inside. Plastic containers work fine too if you prefer something lighter to carry.
Can I make a big batch and portion it out?
Absolutely. Make four or five jars on Sunday, and you’ve got breakfast for the week. This is the most practical approach for busy mornings.
Final Thoughts
A healthy overnight oats recipe is one of those rare things that’s both genuinely nutritious and genuinely convenient. You’re not sacrificing quality for speed or health for taste. You get all three.
Start with the basic five-step method I outlined, make it a few times to understand how the ratios work, then start experimenting with flavors. Within a week, you’ll have this dialed in. Within a month, it’ll be automatic.
The real win here isn’t just having breakfast ready—it’s removing a daily decision from your plate. You wake up, grab your jar, and you’re already ahead of the game. That’s the kind of small habit that compounds into real change over time.
Now go make a batch. Your future self will thank you.


