
A green enchilada recipe is one of those dishes that looks intimidating but honestly comes together faster than you’d think. I’m talking about the real deal here—not some shortcut version, but the authentic Mexican approach that actually tastes like it came from someone’s abuela’s kitchen. The magic is in the sauce, the technique, and knowing which corners you can cut without sacrificing flavor.
Table of Contents
Building Your Sauce Foundation
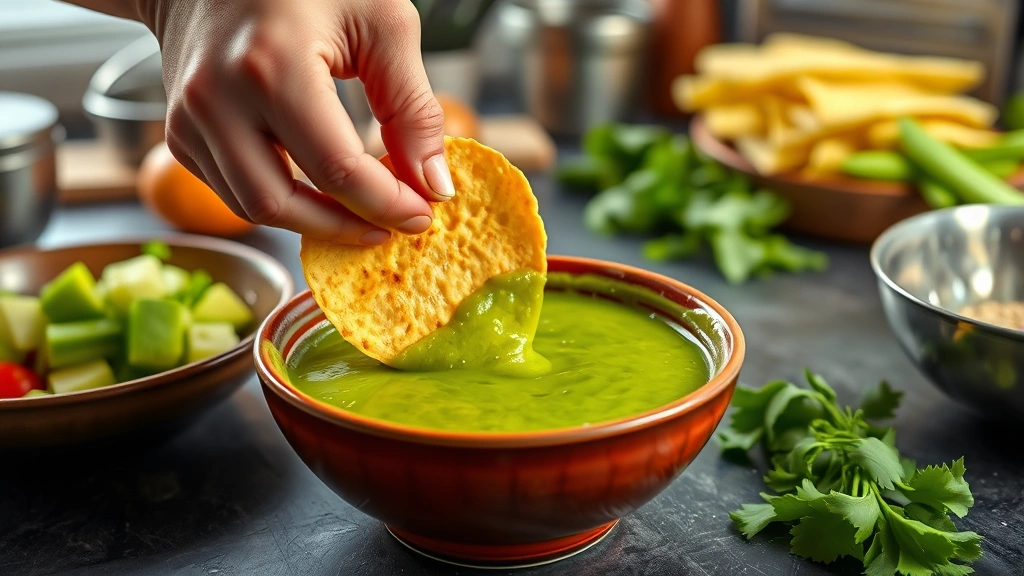
The heart of any green enchilada recipe starts with the sauce. This isn’t something you want to skip or substitute with canned salsa. Fresh tomatillos, roasted poblano peppers, and a handful of cilantro create a sauce that’s bright, balanced, and nothing like the jarred stuff.
Start by roasting about 2 pounds of fresh tomatillos and 2-3 poblano peppers directly over a gas flame or under your broiler. You want them charred and soft, about 8-10 minutes total. The char adds depth that raw peppers just can’t deliver. Once they’re cooled enough to handle, peel off the blackened skin—it comes off easier than you’d expect. Blend these with a small white onion, 3-4 garlic cloves, a cup of chicken broth, and a generous handful of fresh cilantro. Season with salt and a squeeze of lime juice. That’s your foundation.
The consistency should be like heavy cream—pourable but not watery. If it’s too thick, add more broth. Too thin? Let it simmer for 5 minutes to reduce slightly. This sauce is the difference between a forgettable casserole and something people ask you to make again.
Sourcing Quality Ingredients
You can find decent tomatillos at most grocery stores year-round now, but farmers markets will have the best ones—firm, bright green, and heavy for their size. Skip any that are soft or have blemishes. Poblano peppers are your friend here; they’re milder than jalapeños but have real flavor.
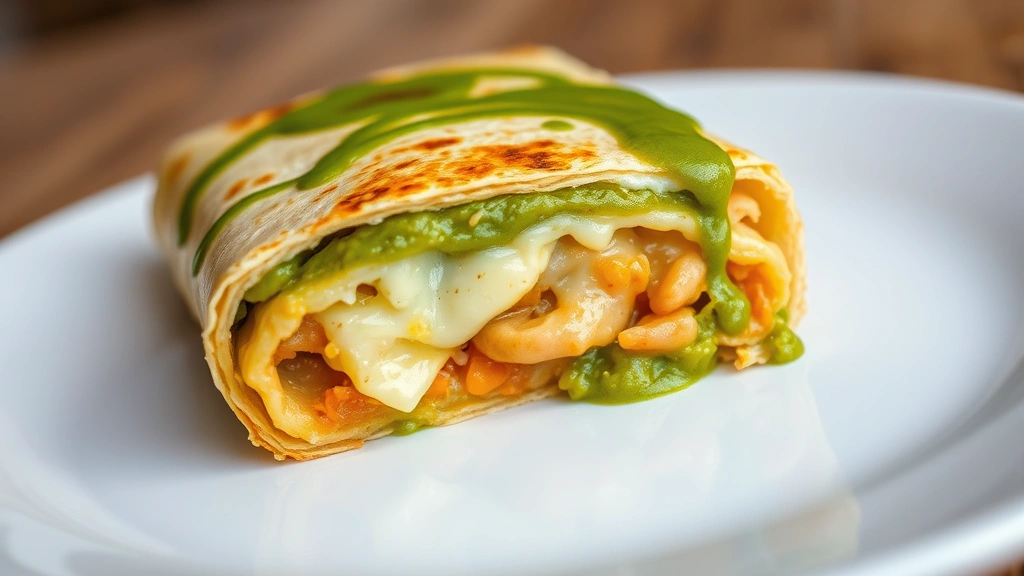
For the filling, I use a mix of shredded chicken (rotisserie works great) and a creamy element. Some traditional recipes use crema or sour cream mixed into the filling itself, which adds richness. Fresh Mexican cheese like queso fresco crumbles beautifully and doesn’t get rubbery when baked like some harder cheeses do.
Corn tortillas are non-negotiable. Flour tortillas will get soggy and fall apart. Look for fresh ones from your bakery section or a local tortillería. If you can only find packaged ones, warm them slightly before rolling so they don’t crack. Check out our guide on complementary cooking techniques for more prep insights.
Prep Work Before Assembly
This is where most people rush and regret it. Set up your workspace like an assembly line. You’ll need: your sauce in one bowl, warm tortillas in a stack, your filling in another bowl, shredded cheese in a third, and your baking dish ready to go.
Have a shallow dish with about an inch of your green sauce at the bottom of your baking pan. This prevents sticking and ensures every enchilada gets that sauce underneath. Dip each tortilla into the sauce quickly—just one second per side—then lay it flat on your work surface. The sauce helps them stay pliable and adds flavor throughout.
Fill each tortilla with about 2-3 tablespoons of your chicken mixture and a small handful of cheese. Don’t overfill. Roll it tightly but not aggressively—you’re not making a burrito. Place it seam-side down in your prepared pan. The seam side down keeps everything from unraveling during baking.
Assembly Technique Matters
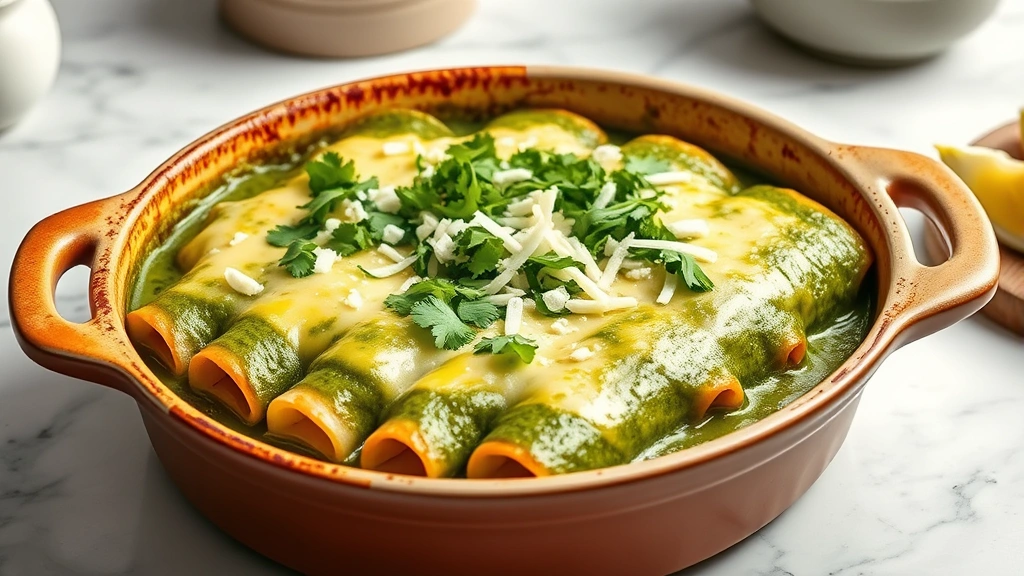
Stack your enchiladas snugly in rows. They should touch slightly but not be crammed in. Pour remaining sauce over the top, making sure every enchilada gets coverage. This is crucial—exposed tortillas will dry out and get tough. Sprinkle your cheese over everything, but don’t go overboard. You want flavor, not a thick cheese crust that overpowers the delicate sauce.
Some recipes call for sour cream drizzled on top before baking. I’m a fan of this approach—it adds tang and creaminess. Just use a fork to drizzle it in thin lines across the top.
Let me mention that similar to how you’d approach cooking vegetables properly, timing and temperature control make the difference between mediocre and excellent results.
Baking Process and Timing
Preheat your oven to 350°F. Bake uncovered for 25-30 minutes. You’re looking for the sauce to bubble gently around the edges and the cheese to be melted and slightly golden. The whole pan should be hot all the way through.
If your cheese is browning too fast before the enchiladas are heated through, cover with foil for the first 15 minutes, then remove it for the final 10-15 minutes. Ovens vary wildly, so start checking at 20 minutes.
The enchiladas are done when you can insert a knife into the center and it comes out hot, and the sauce is bubbling. Don’t skip the rest period—let them sit for 5 minutes after coming out of the oven. This lets everything set up so they don’t fall apart when you plate them.
Flavor Variations Worth Trying
Once you master the basic green enchilada recipe, experiment. Some people add a pinch of cumin or Mexican oregano to the sauce. Others blend in a jalapeño for heat. A tablespoon of Mexican crema stirred into the finished sauce adds luxury without being heavy.
For the filling, try mixing shredded chicken with sautéed mushrooms, or use a combination of black beans and cheese for a vegetarian version. Some cooks add roasted corn to the filling for sweetness and texture. The sauce stays the same; it’s the filling that lets you play.
Similar to exploring different recipe approaches, don’t be afraid to adapt based on what you have on hand.
Storage and Make-Ahead Tips
This is a make-ahead dream. Assemble everything the night before, cover with plastic wrap, and refrigerate. When you’re ready to bake, add 10-15 minutes to your cooking time since you’re starting from cold. You can also freeze unbaked enchiladas for up to three months. Thaw overnight in the fridge before baking.
Leftovers keep for 3-4 days in an airtight container. Reheat gently in a 325°F oven for 15-20 minutes, covered with foil so they don’t dry out. The microwave works but tends to make the tortillas tough.
Serving Suggestions
Serve your green enchilada recipe with traditional sides: Mexican rice, black beans, and a simple lime crema (sour cream mixed with lime juice and salt). A fresh salad with avocado cuts through the richness beautifully. Warm flour tortillas on the side never hurt.
For garnish, add sliced radishes, fresh cilantro, diced white onion, and crumbled queso fresco on top of each plate. These fresh elements brighten everything up and add textural contrast.
For more recipe inspiration, check out classic recipe collections that show different approaches to traditional dishes.
Frequently Asked Questions
Can I use canned tomatillos for this green enchilada recipe?
You can, but fresh is genuinely better. Canned tomatillos are sometimes mushy and lack the brightness you want. If you must use canned, drain them well and add extra lime juice to compensate for lost acidity.
What’s the difference between green and red enchiladas?
Red enchiladas use dried red chiles like guajillo or ancho, while green enchiladas use fresh tomatillos and poblanos. Green sauce is brighter and more acidic; red is deeper and earthier. Both are delicious—just different flavor profiles.
Can I make this vegetarian?
Absolutely. Use black beans, cheese, and sautéed vegetables for filling. Make sure your broth is vegetable-based. Everything else stays the same.
How do I prevent soggy enchiladas?
Don’t oversaturate with sauce—there’s a balance. Make sure your filling isn’t too wet. Use corn tortillas, not flour. And don’t let them sit in the sauce too long before baking.
Can I prepare this the day before?
Yes. Assemble, cover, and refrigerate. Add 10-15 minutes to baking time. This is actually one of the best make-ahead meals.
A solid green enchilada recipe is one of those dishes that impresses people without requiring you to spend all day in the kitchen. The technique is straightforward, the ingredients are accessible, and the results taste like you actually know what you’re doing. Master this one, and you’ll make it regularly.


