

A gorditas recipe is your ticket to making thick, fluffy Mexican corn cakes stuffed with whatever fillings your crew craves. These aren’t your average tortillas—gorditas are pillowy pockets of masa goodness that hold up to generous portions of meat, cheese, beans, and toppings without falling apart. Whether you’re cooking for a family dinner or impressing friends at a weekend gathering, mastering gorditas transforms your kitchen into an authentic Mexican cooking station.
Table of Contents
What Are Gorditas Exactly?
Gorditas are thick, hand-held Mexican masa cakes that sit somewhere between a tortilla and a piece of flatbread. The name comes from the Spanish word “gordo,” meaning fat or thick—and that’s exactly what makes them special. Unlike thin tortillas that can tear under heavy fillings, gorditas have real substance. They’re typically about a quarter-inch thick and cooked until they develop a slightly crispy exterior while staying soft inside.
Think of them as edible vessels designed to hold generous portions of your favorite fillings. You can serve them open-faced like a taco or keep them sealed like a pocket sandwich. The beauty of a good gorditas recipe is its versatility—you control the thickness, the texture, and what goes inside.
Essential Ingredients You’ll Need
Before you start mixing, gather these non-negotiable items:
- Masa harina (corn flour made from nixtamalized corn)—this is the foundation
- Warm water (around 100°F works best)
- Salt (don’t skip this)
- Lard or vegetable shortening (optional but traditional for better texture)
- Baking powder (adds lift and fluffiness)
That’s it for the base. The magic happens when you add your fillings. For those, you might pull together shredded chicken, seasoned ground beef, refried beans, cheese, or carnitas. If you’re looking for complementary flavors, a Creole Seasoning Recipe can add unexpected depth, or keep it traditional with fresh cilantro and lime.
Preparing the Masa Base
Here’s where patience pays off. Mix 2 cups of masa harina with 1½ teaspoons of salt and ½ teaspoon of baking powder in a large bowl. Gradually add warm water—about 1¼ cups—while mixing with your hands. The consistency should resemble soft Play-Doh: moist enough to hold together but not sticky or wet.
If you’re using lard (the traditional route), work about 2 tablespoons of softened lard into the mixture. This creates a richer, more tender gordita. Let the dough rest for 5-10 minutes—this allows the masa harina to fully hydrate and makes shaping much easier.
Test your dough by pinching off a small piece and rolling it between your palms. It should hold shape without cracking at the edges. Too dry? Add water a tablespoon at a time. Too wet? Sprinkle in a bit more masa harina.
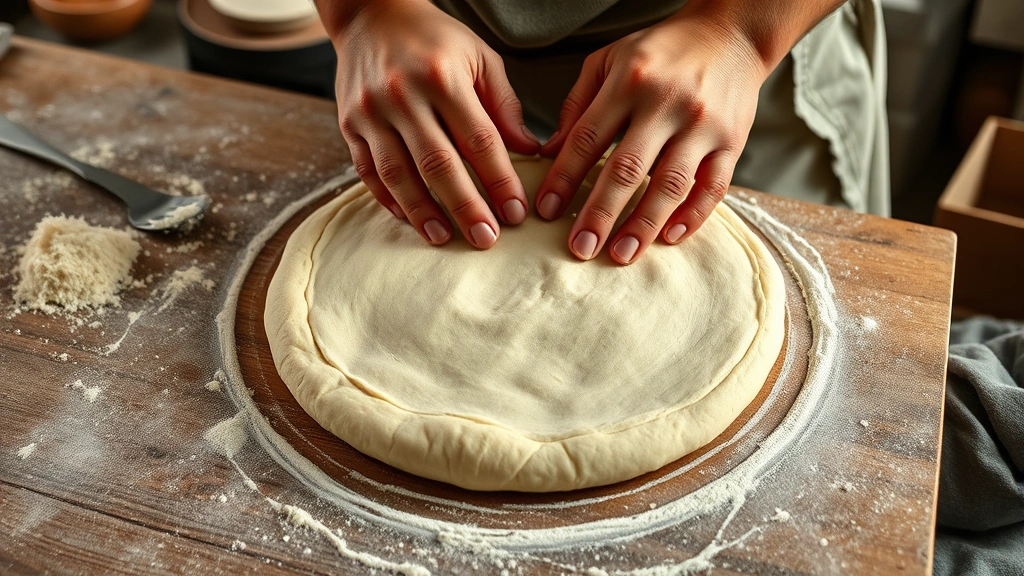
Shaping and Cooking Gorditas
This is where your hands become your best tool. Divide the dough into golf-ball-sized portions (about 2 ounces each). Roll each ball between your palms until smooth, then flatten it into a disk about 3 inches wide and ¼ inch thick.
You can use a tortilla press lined with plastic bags if you want uniform thickness, but honestly, hand-shaping gives you better control. The slight irregularities actually cook better than perfectly uniform disks.
Heat a cast-iron skillet or griddle to medium-high heat (around 375°F). Don’t use oil—gorditas cook on dry heat. Place each gordita on the hot surface and cook for about 2-3 minutes per side. You’re looking for light golden spots and a slight puff. The gordita should feel firm but still have give when you press it gently.
As each gordita finishes cooking, wrap it in a clean kitchen towel to keep it warm and soft. This is important—the steam keeps them pliable for stuffing.
Best Filling Options
The beauty of a gorditas recipe is that you’re only limited by your imagination. Here are the crowd-pleasers:
Shredded Chicken: Cook chicken breasts with onion, garlic, and a pinch of cumin. Shred it fine and mix with a splash of the cooking liquid. This is your safest bet for a family meal.
Seasoned Ground Beef: Brown ground beef with diced onions and garlic, then season with chili powder, cumin, and a splash of lime juice. Drain excess fat before stuffing.
Carnitas: Slow-cooked pork shoulder is the luxury option. If you have a Crockpot Recipes collection, carnitas are perfect for batch cooking ahead.
Refried Beans: Mix with a bit of cheese and jalapeños for vegetarian guests. This combination holds up beautifully inside a gordita.
Cheese and Rajas: Roasted poblano peppers with melted Oaxaca or mozzarella cheese creates a vegetarian option that feels substantial.
Topping Combinations That Work
Once your gordita is stuffed, it’s time to layer on toppings. Keep these combinations balanced—you want flavor without overwhelming the delicate masa:
Classic Combo: Shredded cabbage, diced tomato, Mexican crema, and a sprinkle of cotija cheese. This gives you texture and freshness.
Spicy Route: Add pickled jalapeños, a drizzle of hot sauce, and fresh cilantro. If you want to get fancy, a Cilantro Sauce Recipe takes it to the next level.
Loaded Version: Combine refried beans, your filling, shredded cheese, lettuce, tomato, onion, and crema. This works best if you keep the gordita open-faced rather than folded.
Pro tip: Warm your toppings slightly—especially beans and cheese—so everything melds together rather than sitting separately.
Storage and Make-Ahead Tips
One of the best things about gorditas is that they’re forgiving to make ahead. Cook your gorditas up to 2 hours before serving and keep them wrapped in foil in a warm oven (250°F). They’ll stay soft and pliable.
For longer storage, let cooked gorditas cool completely, then stack them with parchment paper between each one. Wrap the stack tightly in plastic wrap and refrigerate for up to 4 days. Reheat by wrapping in a damp towel and microwaving for 20-30 seconds, or warming them on a skillet over medium heat for about 1 minute per side.
You can also freeze uncooked gorditas. Place them on a baking sheet, freeze until solid (about 2 hours), then transfer to a freezer bag. Cook from frozen, adding an extra minute or two to the cooking time.
Common Problems and Fixes
Gorditas are too dry and crumbly: Your dough doesn’t have enough water. Add water a tablespoon at a time and knead it in thoroughly. The dough should feel like soft clay.
They’re too thick and doughy inside: Your heat wasn’t hot enough. Make sure your skillet reaches 375°F before you start cooking. You need that initial sear to set the outside while the inside cooks through.
Gorditas are tearing when you try to fill them: You’re not letting them cool enough or you’re being too aggressive. Let each one rest for 30 seconds after cooking, then gently work your filling in from the side rather than trying to split them open.

They’re puffing up too much: Your baking powder is too generous. Stick to ½ teaspoon per 2 cups masa harina. A slight puff is good; a balloon is not.
Serving Suggestions and Sides
Gorditas shine when served with complementary sides that balance the richness of the filled masa. Pair them with Easy Mexican Rice Recipes for a complete meal, or go with simple sides like black beans, charred corn, or a fresh salad.
For sauces, set out a few options: salsa roja, salsa verde, and a cooling crema or sour cream mixed with lime juice. Let your guests customize their experience. If you want to prep sauces ahead, a Canning Salsa Recipe gives you shelf-stable options you can make weeks in advance.
Serve gorditas immediately after filling them while the masa is still warm. They’re best enjoyed fresh, though they’ll stay good for a couple hours if kept covered.
Frequently Asked Questions
Can I make gorditas without masa harina?
Not really. Masa harina is nixtamalized corn flour with a specific texture and flavor profile that regular cornmeal can’t replicate. You can find it at most grocery stores in the international aisle, or order it online. It’s worth the effort to get the real thing.
What’s the difference between gorditas and pupusas?
Gorditas are thicker and typically stuffed after cooking, while pupusas are stuffed before cooking and sealed. Both are delicious, but gorditas give you more flexibility in filling combinations since you add them after the masa is cooked.
How far ahead can I prepare the filling?
Most fillings keep for 3-4 days in the refrigerator in an airtight container. Shredded chicken, ground beef, and carnitas all reheat beautifully. Just warm them gently before stuffing your gorditas.
Can I use a tortilla press for gorditas?
Yes, but line it with plastic bags so the dough doesn’t stick. Just remember that gorditas need to be thicker than regular tortillas—about ¼ inch rather than the thin tortilla thickness.
What if my gorditas are too soft and fall apart?
This usually means your dough has too much water. Also, make sure you’re cooking them long enough—they need that exterior firmness to hold fillings. Cook for the full 2-3 minutes per side and look for light golden spots.
Are gorditas gluten-free?
Yes! Since they’re made from masa harina (which is corn), gorditas are naturally gluten-free. Just verify that your masa harina brand hasn’t added any wheat products.
Final Thoughts
Mastering a gorditas recipe opens up a whole world of Mexican cooking possibilities. These thick, satisfying masa cakes are forgiving enough for beginners but impressive enough for entertaining. The key is getting your dough consistency right, cooking them at proper temperature, and not being shy with your fillings and toppings.
Start with simple fillings like shredded chicken or seasoned ground beef, then branch out into carnitas, cheese and peppers, or whatever your crew loves. The beauty of gorditas is that they’re a blank canvas for your creativity. Make them ahead, freeze them, reheat them—they’re the ultimate flexible meal for busy cooks who don’t want to sacrifice authenticity.


