
A ginger bug recipe is your gateway to making homemade fermented soda, and honestly, it’s one of the most rewarding kitchen projects you can tackle. This living starter culture—a blend of ginger, sugar, and water left to ferment—becomes the fizzy foundation for naturally carbonated beverages that taste miles better than anything from a bottle.
Table of Contents
What Is a Ginger Bug?
Think of a ginger bug as the sourdough starter of the fermentation world. It’s a living culture of wild yeast and beneficial bacteria that you cultivate over about 5-7 days. The name comes from the “bugs” (microorganisms) that do the actual fermentation work. Unlike commercial sodas loaded with artificial ingredients, this homemade starter produces naturally carbonated drinks with real ginger flavor and probiotic benefits.
The beauty of this fermented soda starter is that it’s self-sustaining. Once you’ve got it going, you can keep it alive indefinitely by feeding it regularly. It becomes a living thing in your kitchen—something that actually improves with age and care.
Why Ferment at Home?
Let’s be real: store-bought sodas are basically sugar delivery systems with a bunch of chemicals you can’t pronounce. When you make your own fermented beverages, you control every single ingredient. You know exactly what’s going into your drink.
Beyond that, fermentation creates probiotics—the good bacteria your gut actually wants. The natural carbonation comes from the fermentation process itself, not from a CO2 cartridge. Plus, there’s something deeply satisfying about creating something fizzy and delicious from just ginger, sugar, and time. It’s like kitchen magic, except it’s actually science.
Ingredients You Need
Here’s what you’ll gather to start your ginger bug recipe:
- Fresh ginger root – 1 tablespoon, grated (don’t peel it; the skin holds beneficial microbes)
- Organic cane sugar – 1 tablespoon (organic works better for fermentation)
- Filtered water – 1 cup (chlorine can inhibit fermentation)
- Glass jar – at least 1 quart capacity
- Cheesecloth or coffee filter – to cover the jar
- Rubber band – to secure the cloth
That’s genuinely it. No special equipment, no expensive starter cultures. The ginger and sugar feed the microorganisms already present on the ginger skin, and they do the rest of the work for you.
Step-by-Step Process
Day 1: Starting Your Culture
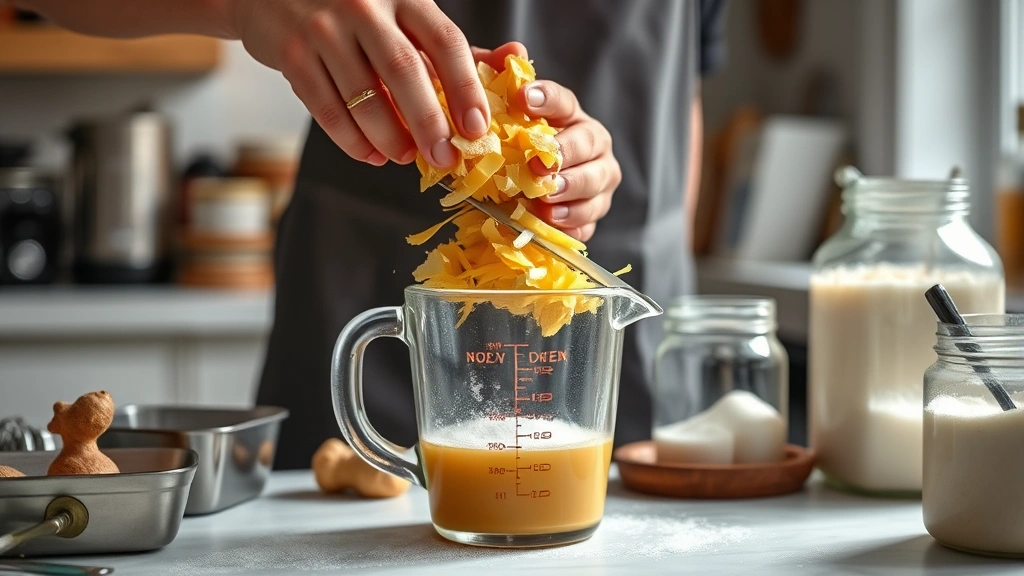
Pour your filtered water into a clean glass jar. Add 1 tablespoon of grated ginger and 1 tablespoon of sugar. Stir it well until the sugar dissolves completely. Cover the jar loosely with cheesecloth secured with a rubber band—you want air circulation but no dust or bugs getting in. Leave it on your counter at room temperature, away from direct sunlight.
Days 2-5: The Feeding Schedule
Each day for the next four days, add another tablespoon of ginger and another tablespoon of sugar. Stir gently each time. You’ll start noticing bubbles forming—that’s the fermentation happening. The mixture might smell a bit funky; that’s normal. You’re essentially building a thriving ecosystem of microorganisms.
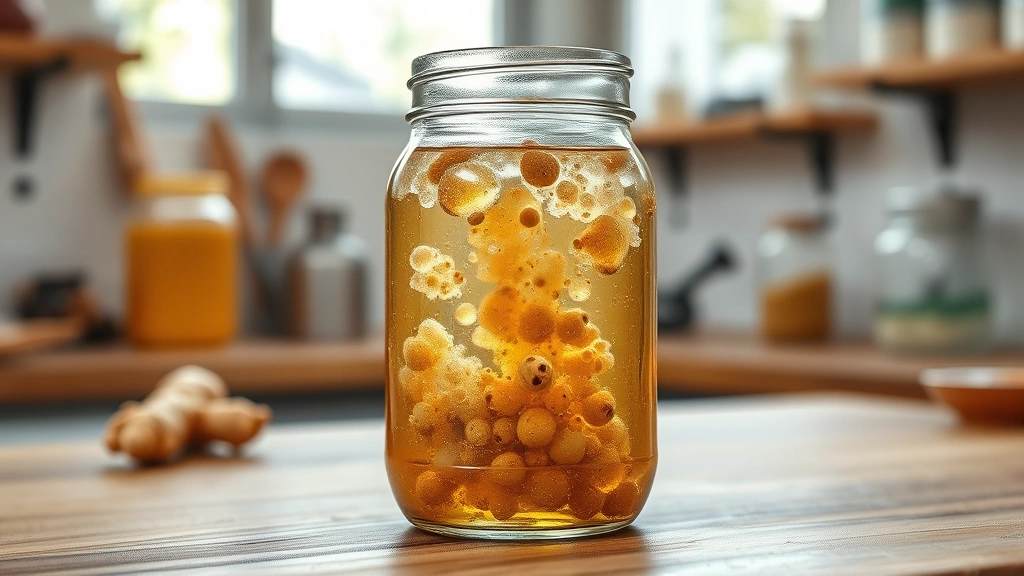
Day 6-7: Checking for Readiness
By day six or seven, your ginger bug should be actively bubbling when you stir it. It’ll smell pleasantly yeasty and gingery, maybe with a slight vinegary note. When you stir it, bubbles should rise from the bottom of the jar. That’s your signal that it’s ready to use.
Feeding Your Starter
Once your ginger bug is active, you need to keep it alive with regular feedings. If you’re using it frequently (making soda multiple times a week), feed it every 2-3 days. If you’re taking a break, you can store it in the fridge and feed it weekly.
To feed: Simply add 1 tablespoon of ginger and 1 tablespoon of sugar, stir, and let it sit. Within 24 hours, it should be actively bubbling again. This is exactly like maintaining a sourdough starter—consistency is key.
Your ginger bug will develop a thin layer on top (called a “mother”) over time. Don’t remove it; it’s part of the culture. If you see fuzzy mold (blue, green, or black), that’s contamination and you’ll need to start over. But a thin white or tan layer is totally fine.
Troubleshooting Common Issues
No Bubbles After Day 5
This usually means your water had too much chlorine or your ginger wasn’t fresh enough. Try using filtered or bottled water and fresher ginger. You can also add a tiny pinch of yeast to jumpstart things, though it’s not ideal. Give it another 2-3 days before giving up.
Smell Like Vinegar
A slight vinegary smell is fine—that’s acetic acid forming. But if it smells like nail polish remover or rotting fruit, something went wrong. Start fresh with new ingredients and a sterilized jar.
Liquid Separates from Solids
Don’t panic. Just stir it back together. This happens naturally during fermentation. If the liquid is clear and the smell is still pleasant, you’re good to go.
Using Your Ginger Bug
Here’s where your fermented soda starter earns its keep. To make a batch of ginger ale or ginger beer, strain out the solids from your ginger bug and use about ¼ cup of the liquid per quart of final beverage. Mix it with fruit juice, herbal tea, or flavored sugar syrup, then bottle it tightly for 2-3 days to build carbonation.
The secondary fermentation in the sealed bottle is what creates that satisfying fizz. Open carefully (pressure builds up), and you’ve got naturally carbonated soda. You can also use your ginger bug liquid in cocktails or craft drinks for a probiotic kick.
Flavor Variations
Once you’ve mastered the basic ginger bug recipe, experiment with different flavors. Try adding turmeric for a golden soda, lemon for brightness, or even a hint of cayenne for spice. Some people add different spices like cardamom or cinnamon during the initial fermentation.
You can also use your ginger bug to ferment completely different beverages. Add it to spicy concoctions or sweet fruit juices. The culture is versatile—it’ll ferment whatever you feed it.
Storage Tips
Keep your active ginger bug on the counter if you’re using it regularly. For longer storage, move it to the fridge, where it’ll slow down significantly but stay alive for months between feedings. Before using after cold storage, let it come to room temperature and feed it 24 hours before you need it.
Never store it in a sealed container at room temperature—pressure will build and it could explode. Always use cheesecloth or a loose cover. Glass jars are ideal; avoid metal containers that might react with the acidic fermentation.
Frequently Asked Questions
How long does it take to make a ginger bug?
The initial ginger bug recipe takes 5-7 days to become active and ready to use. Once established, you can make carbonated beverages in just 2-3 additional days through secondary fermentation in bottles.
Is ginger bug safe to drink?
Yes, when made properly. The fermentation process creates an acidic environment (pH drops to around 3.5) that prevents harmful bacteria from growing. The beneficial bacteria and yeast are what you want. If anything looks or smells wrong (fuzzy mold, rotten smell), don’t drink it.
Can I use ground ginger instead of fresh?
Fresh ginger is strongly preferred because the skin contains the wild microorganisms you need for fermentation. Ground ginger won’t work as well. If you must use it, add a tiny pinch of yeast to help things along.
What if my ginger bug stops bubbling?
It probably just needs feeding. Add your regular tablespoon of ginger and sugar, stir, and wait 24 hours. If it still doesn’t bubble after a week of regular feeding, it might be dead and you’ll need to start over.
Can I make ginger bug without sugar?
Not really. The microorganisms need sugar to ferment and create carbonation. You could use honey or other sweeteners, but the fermentation will be slower and less reliable. Sugar is the most predictable choice.
How carbonated will my soda be?
It depends on secondary fermentation time and temperature. Warmer temperatures (70-75°F) create more carbonation faster. You’ll get moderate fizz—not quite as much as commercial soda, but satisfying and natural. Bottle pressure builds quickly, so open carefully.
Wrapping Up Your Ginger Bug Journey
A ginger bug recipe is genuinely one of the easiest fermentation projects to start with, and it opens doors to making all kinds of naturally carbonated drinks. You’re working with basic ingredients, natural fermentation, and a process that’s been around for centuries. Start with the simple version, keep your culture fed and happy, and you’ll have a reliable source of homemade soda for months or even years.
The first batch might take a week to get going, but after that, you’re just maintaining something alive in a jar. It’s less work than keeping a plant alive, and way more delicious. Plus, you’ll know exactly what’s in every bottle you drink. That’s something you can’t get from any store.
Check out resources like Family Handyman for other fermentation projects, or explore This Old House for kitchen preservation techniques. You can also find detailed fermentation science at your local extension office if you want to dive deeper into the microbiology.


