
A fried apples recipe is one of those timeless Southern comfort dishes that’ll have your kitchen smelling like heaven and your family asking for seconds before you’ve even sat down. This isn’t fancy food—it’s honest, straightforward cooking that’s been feeding families for generations, and honestly, it takes maybe 20 minutes from start to finish.
Table of Contents
What Makes Great Fried Apples
The beauty of a proper fried apples recipe is its simplicity. You’re not trying to reinvent the wheel here—you’re just caramelizing apples with butter, brown sugar, and a few warm spices until they’re tender and syrupy. The magic happens when the natural sugars in the apples start to break down and mingle with the butter and brown sugar to create this incredible caramelized sauce.
What separates mediocre fried apples from the kind that make people close their eyes and smile? Temperature control and timing. You want your skillet hot enough to get some color on the apples, but not so aggressive that they turn to mush. Think of it like searing a steak—you’re looking for that golden-brown exterior while keeping the inside tender and intact.
Ingredients You Need
Here’s what goes into a solid fried apples recipe that serves 4-6 people:
- 4-5 medium apples (Granny Smith, Honeycrisp, or a mix)
- 4 tablespoons butter
- 1/3 cup packed brown sugar
- 1/2 teaspoon ground cinnamon
- 1/4 teaspoon ground nutmeg
- Pinch of salt
- 1/4 teaspoon vanilla extract (optional but recommended)
- 2 tablespoons water or apple juice
That’s it. No cream, no flour, no complicated steps. The ingredient list is so short you could practically memorize it, which is part of what makes this recipe so reliable for weeknight cooking.
Prep Work Matters
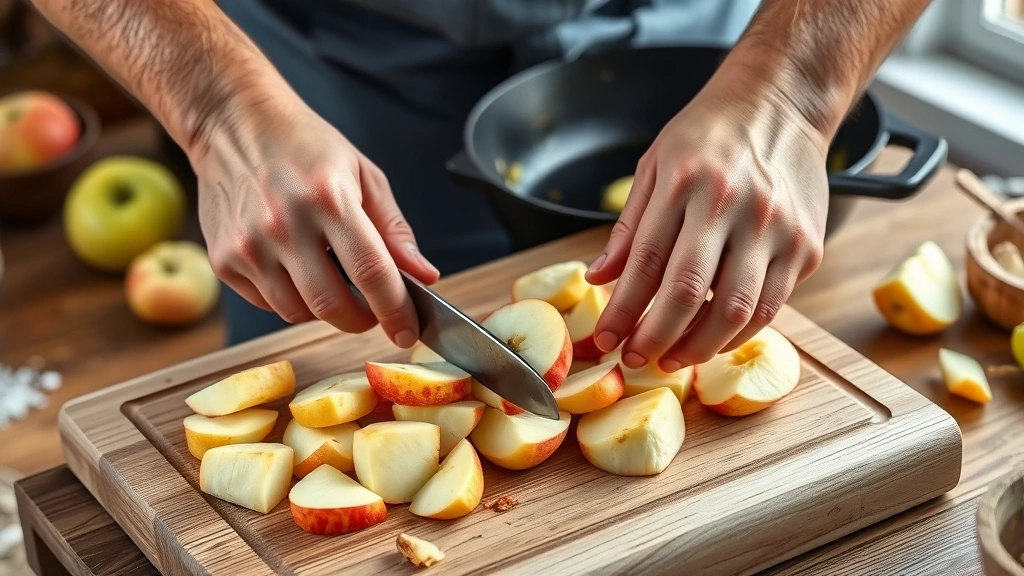
Before you fire up the skillet, get your apples ready. Wash them thoroughly, then peel, core, and slice them into 1/4-inch thick slices. The thickness matters—too thin and they’ll turn to applesauce; too thick and they won’t cook through evenly. I like to keep the slices fairly uniform because it helps everything cook at the same rate.
Pro tip: If you’re not cooking immediately, toss your sliced apples with a little lemon juice to prevent browning. This won’t affect the final dish but keeps things looking fresh while you’re prepping other components.
Get your spices measured out and ready to go. This is one of those recipes where having everything prepped before you start cooking makes a huge difference because once the apples hit the hot skillet, things move fast.
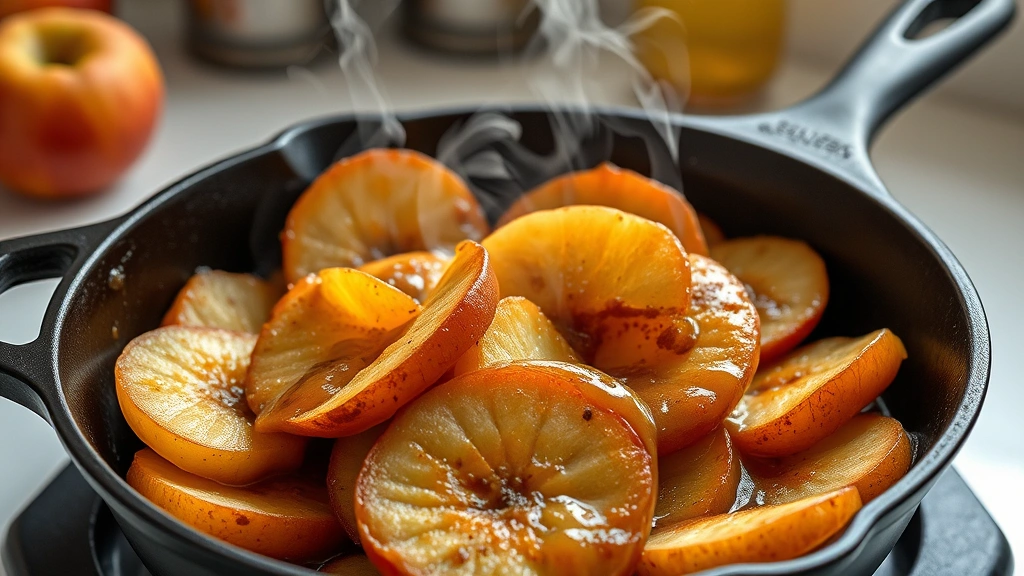
The Cooking Technique
Heat a large skillet (cast iron is ideal, but stainless steel works great too) over medium-high heat. Once it’s hot, add your butter and let it melt completely. You’ll know it’s ready when it starts to foam slightly and smells nutty.
Add your brown sugar, cinnamon, nutmeg, and salt to the melted butter. Stir this together for about 30 seconds until it’s well combined and starting to smell amazing. This is the flavor foundation for your entire dish.
Now add your apple slices. This is where you need to be a bit deliberate—don’t just dump them all in at once. Add them in batches, stirring gently so each slice gets coated with the butter-sugar mixture. Once all the apples are in, add your water or apple juice. This liquid will help create that syrupy sauce as the apples cook down.
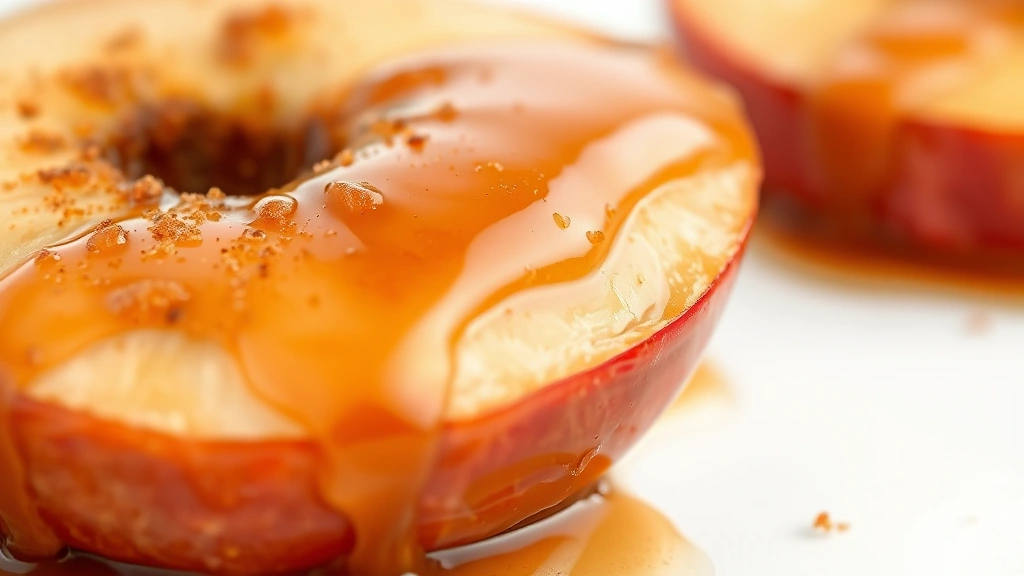
Let everything cook for 8-12 minutes, stirring occasionally. You’re looking for the apples to become tender but still hold their shape, and for the liquid to reduce down into a glossy glaze. The whole mixture should look caramelized and smell like a cinnamon-sugar dream.
In the last minute of cooking, add your vanilla extract if you’re using it. This adds a subtle depth that people often can’t quite identify but definitely notice.
Flavor Variations to Try
Once you’ve nailed the basic fried apples recipe, you can start playing around. Add a splash of bourbon for a grown-up version—just add it in the last minute of cooking. A tablespoon of bourbon won’t make this boozy, but it’ll add a sophisticated warmth that pairs beautifully with the apples.
Try adding 1/4 teaspoon of allspice or a pinch of ginger for a more complex spice profile. Some folks add a tablespoon of molasses for deeper flavor. Others swear by a sprinkle of sea salt on top right before serving—the salt really brings out the sweetness of the caramelized apples.
If you’re serving these alongside savory dishes, you can dial back the brown sugar slightly and add a tiny pinch of cayenne pepper. This creates a sweet-spicy element that works incredibly well with pork or ham.
Serving Suggestions
Fried apples are incredibly versatile. Serve them warm as a side dish with breakfast—they pair beautifully with pancakes, waffles, or biscuits. You can also serve them alongside pork chops, ham, or roasted chicken for dinner. The sweetness complements savory meat dishes in a way that feels traditional and right.
They’re also fantastic as a topping for vanilla ice cream or served alongside a slice of pound cake. Some people even use them as a filling for turnovers or hand pies.
If you’re planning a gravy-based meal, fried apples make an excellent complementary side. They also work well alongside BBQ sauce dishes, especially if you’re serving pork ribs or brisket.
Storage & Make-Ahead Tips
Fried apples keep beautifully in the refrigerator for up to 5 days in an airtight container. You can reheat them gently on the stovetop over low heat, adding a splash of water if they’ve thickened too much. You can also reheat them in the microwave, though the stovetop method preserves the texture better.
Here’s the thing about make-ahead cooking: you can actually prep this dish partially the night before. Slice your apples, measure out your spices, and have everything ready to go. Then when you’re ready to cook, it’s just a matter of throwing it together—no stress, especially if you’re managing a big meal.
You can also freeze fried apples for up to 3 months. Let them cool completely, transfer to a freezer-safe container, and thaw in the refrigerator before reheating. This is a lifesaver if you’re meal prepping or want to have homemade sides ready to go.
Common Mistakes & Fixes
Apples turning to mush: You’re cooking them too long or at too high a temperature. Reduce heat to medium and check them at the 8-minute mark. They should be tender but still hold their shape.
Not enough sauce: Make sure you’re adding the full 2 tablespoons of liquid. If your apples are particularly dry or you’re cooking at high altitude, you might need a splash more. The sauce should be glossy and coat the apples.
Too much sugar, not enough apple flavor: This usually means you’re using too much brown sugar or your apples aren’t very flavorful to begin with. Use quality apples—Granny Smiths have great tartness that balances the sweetness.
Apples sticking to the pan: Make sure you’re using enough butter and stirring occasionally. Cast iron is more forgiving than stainless steel for this recipe, but either works if you keep things moving.
Frequently Asked Questions
What type of apples work best for fried apples?
Granny Smith apples are the gold standard because they’re tart and hold their shape well during cooking. Honeycrisp, Pink Lady, and Braeburn apples also work great. Avoid very soft apples like Red Delicious unless you’re okay with them breaking down into more of an apple compote.
Can I make this recipe in the oven?
You can bake sliced apples with butter and brown sugar, but you won’t get the same caramelization and glossy sauce. The stovetop method gives you that beautiful golden color and concentrated flavor that’s hard to replicate in the oven. That said, if you’re preheating your oven for other dishes, you could bake them at 375°F for about 20 minutes, stirring halfway through.
How much does this recipe yield?
This basic recipe serves 4-6 people as a side dish. If you’re using it as a topping or dessert component, it might stretch to serve 8. The recipe doubles easily if you need more.
Can I use apple juice instead of water?
Absolutely. Apple juice adds subtle apple flavor and creates a slightly sweeter sauce. Use the same amount—2 tablespoons. Some people use a combination of apple juice and a splash of apple cider vinegar for complexity.
Is this recipe gluten-free?
Yes, completely. There’s no flour or any gluten-containing ingredients. Just make sure your brown sugar and spices are certified gluten-free if you’re serving someone with celiac disease.
Can I add nuts to fried apples?
Definitely. Toast 1/4 cup of chopped pecans or walnuts and add them in the last minute of cooking. They add a nice textural contrast to the soft apples.
What’s the difference between fried apples and baked apples?
Fried apples are cooked in a skillet on the stovetop with butter and sugar, creating a caramelized glaze. Baked apples are typically whole apples stuffed with filling and baked in the oven. Fried apples cook faster and have more concentrated flavor from the caramelization process.
Can I make this without butter?
You could use coconut oil or another fat, but butter is really integral to the flavor here. The nutty quality of browned butter is part of what makes this recipe special. If you need a dairy-free version, try using clarified butter or ghee instead.
Final Thoughts
A solid fried apples recipe is one of those kitchen skills that pays dividends. Once you’ve made it a few times, you’ll have it completely memorized, and it becomes one of those dishes you can throw together without thinking. It’s the kind of recipe that works for breakfast, dinner, or dessert, that impresses people with its simplicity, and that tastes like genuine home cooking.
The best part? You probably have everything you need in your kitchen right now. No special equipment, no obscure ingredients, just apples, butter, brown sugar, and spices coming together to create something that tastes like it took way more effort than it actually did. That’s the real magic of Southern cooking—making something delicious look effortless.
Start with the basic recipe, get comfortable with the technique, then play around with the variations. Whether you’re serving these to your family on a random Tuesday or bringing them to a potluck, they’re going to disappear. And honestly, that’s exactly how it should be.


