
Dutch oven bread recipes are the secret weapon every home baker needs in their arsenal. Whether you’re a seasoned sourdough enthusiast or just picking up a bread pan for the first time, mastering the art of baking bread in a Dutch oven transforms your kitchen into a professional bakery. The magic happens when you trap steam inside that cast iron vessel—it creates a crispy, golden crust while keeping the interior perfectly tender and open-crumbed.
Table of Contents
Why Dutch Ovens Work Magic
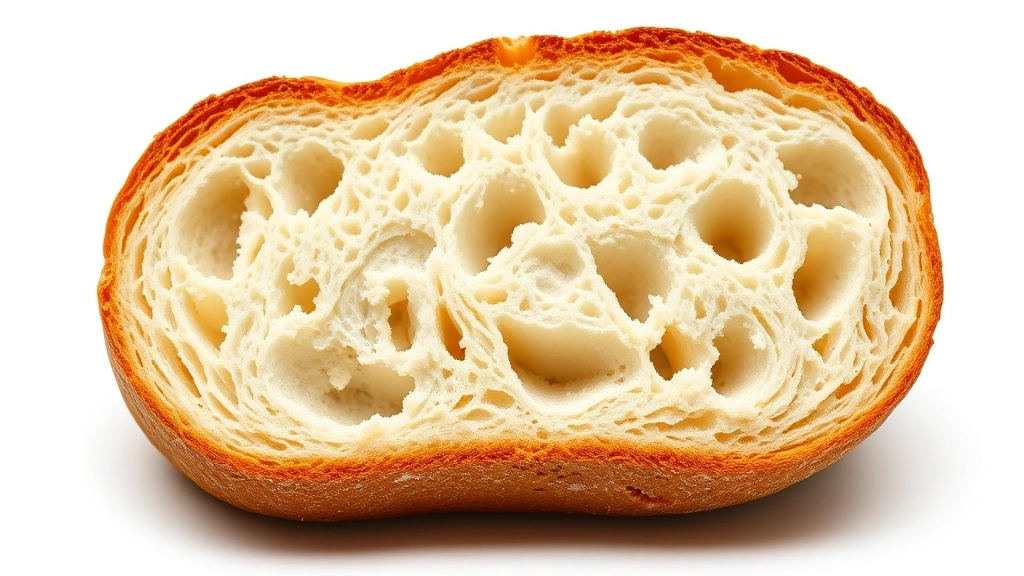
The Dutch oven is basically a steam chamber that does the heavy lifting for you. When you bake bread in a regular oven, the exterior dries out before the interior fully expands. With a Dutch oven, that trapped steam keeps the surface flexible during the crucial first 15-20 minutes of baking—the “oven spring” phase. This allows your loaf to expand fully and develop that restaurant-quality crust everyone dreams about.
The cast iron also distributes heat evenly, preventing those annoying burnt spots on the bottom while ensuring the top browns beautifully. It’s the same principle professional bakeries use with steam-injection ovens, except you’re doing it with a $30-50 piece of cookware sitting in your kitchen.
Choosing Your Bread Vessel
Not all Dutch ovens are created equal for bread baking. You need one with a tight-fitting lid—loose-fitting lids let steam escape and defeat the whole purpose. Look for cast iron or enameled cast iron models with a 5-7 quart capacity. This size handles standard loaves without being so massive that you’re heating unnecessary metal.
Enameled Dutch ovens (like Le Creuset) are easier to maintain and won’t rust, but they cost more. Plain cast iron works just as well and costs less—just season it properly. The key is that the lid must seal well. If you’re checking out more best Dutch oven recipes, you’ll notice they all emphasize lid quality because it’s non-negotiable for steam management.
Classic Artisan Loaf
This is the bread that made Dutch ovens famous in home kitchens. It’s essentially a 500-gram loaf using just four ingredients: bread flour, water, salt, and time. The long fermentation does most of the work, building flavor and structure without aggressive kneading.
Basic Recipe:
- 500g bread flour (about 3.5 cups)
- 350ml water (about 1.5 cups)
- 10g salt (2 teaspoons)
- 2g instant yeast (half a teaspoon)
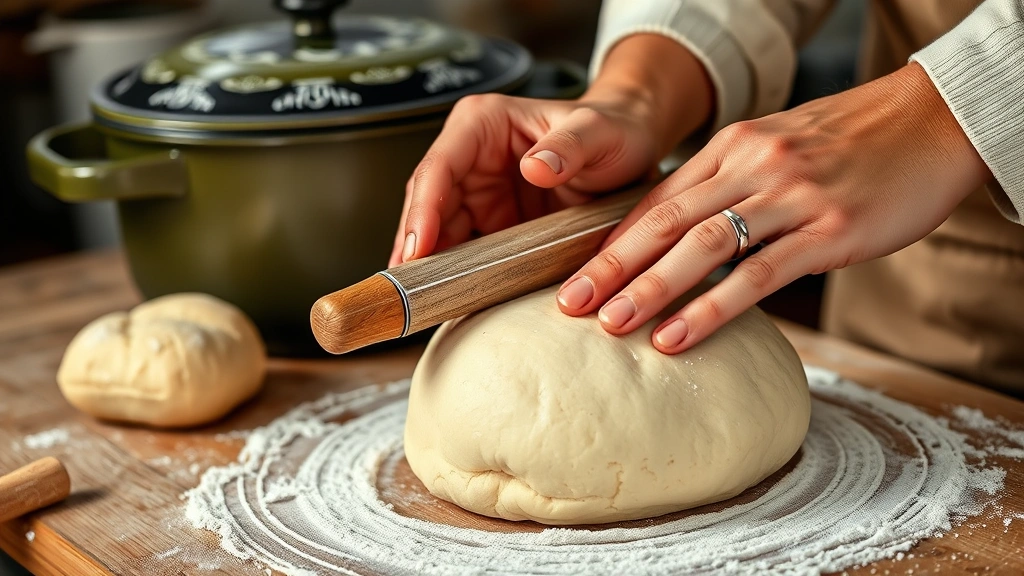
Method: Mix flour and water the night before, let it rest 30 minutes (autolyse), then add salt and yeast. Bulk ferment 12-18 hours at room temperature with a few stretch-and-folds during the first 2 hours. Shape, cold-proof overnight in the fridge, then bake in a preheated Dutch oven at 450°F (230°C) for 45 minutes covered, 15 minutes uncovered.
The long fermentation develops complex flavors and creates that open crumb structure you see in fancy bakery loaves. This is where patience becomes your ingredient.
Sourdough Starter Method
If you want to skip commercial yeast entirely, a sourdough starter is your ticket. It’s a living culture of wild yeast and beneficial bacteria that ferments your dough naturally. Building a starter takes about a week of daily feeding, but once established, it lasts indefinitely.
Starter Maintenance: Keep it in a jar at room temperature, feed it equal parts flour and water (100g each) once or twice daily. When it’s bubbly and active (doubling within 4-8 hours of feeding), it’s ready to use.
Sourdough Recipe:
- 500g bread flour
- 350ml water
- 100g active starter (fed 4-6 hours prior)
- 10g salt
Mix, autolyse 30 minutes, add salt, then bulk ferment 4-6 hours with stretch-and-folds. The timeline is shorter because sourdough ferments faster than commercial yeast. Shape, final proof 2-4 hours at room temperature or overnight in the fridge, then bake in your Dutch oven as before.
Sourdough develops deeper, more complex flavors—slightly tangy with nutty undertones. The fermentation also makes the bread easier to digest and improves nutrient availability.
No-Knead Bread Formula
This is the gateway drug to Dutch oven bread baking. No kneading, minimal effort, maximum results. It’s so simple that people often think something’s wrong because they’re not doing any work.
Ingredients:
- 3 cups all-purpose or bread flour
- 1.5 cups water
- 0.5 teaspoon instant yeast
- 1.5 teaspoons salt
Process: Mix everything in a bowl, cover with plastic, and leave it alone for 12-18 hours. The dough will be shaggy and wet—that’s correct. Dump it onto a floured surface, fold it over itself a few times to shape it, then place it on parchment paper. Let it rest 2 hours, then transfer (parchment and all) into your preheated Dutch oven and bake at 450°F for 45 minutes covered, 15 minutes uncovered.
The magic is that long fermentation with minimal yeast creates excellent flavor and structure without the physical work. It’s perfect for busy people who want bakery-quality bread without the bakery-level effort.
Whole Wheat Variations
Whole wheat flour absorbs more water than white flour, so you need to adjust your recipes. Replace 25-50% of your bread flour with whole wheat flour and increase water by 5-10% to compensate. The dough will feel slightly wetter and denser.
50/50 Whole Wheat Recipe:
- 250g bread flour
- 250g whole wheat flour
- 370ml water (increased from 350ml)
- 10g salt
- 2g instant yeast
Whole wheat ferments slightly faster than white flour, so reduce bulk fermentation to 10-14 hours. The crumb will be denser but nuttier and more nutritious. If you want to explore more Dutch oven cooking, check out these authentic jambalaya recipes that also rely on that sealed-vessel cooking method.
Scoring and Steam Techniques
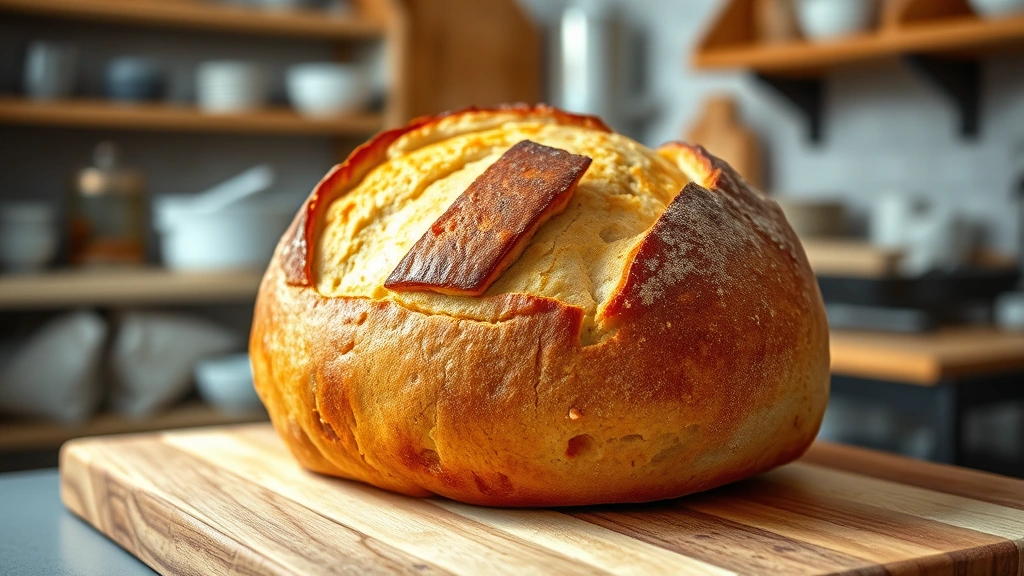
Scoring (slashing the top of your loaf) does two things: it controls where the bread expands and creates those beautiful ear formations. Use a sharp bread lame or razor blade at a 30-45 degree angle, cutting about 0.5 inches deep. A single long slash works, or try an artistic cross pattern.
For steam management, preheat your Dutch oven in a 500°F oven for 45 minutes. This ensures the vessel is screaming hot when you add the dough—that initial shock helps the loaf spring. Carefully transfer your shaped dough onto the hot surface, score it quickly, cover with the lid, and reduce heat to 450°F.
The covered baking traps steam naturally. At 20 minutes, remove the lid to let the crust set and brown. Some bakers spray water on the dough before covering, adding extra steam. If you’re trying this method with other recipes, you’ll notice the same principle applies to arroz con pollo recipes—the Dutch oven’s sealed environment creates magic.
Common Baking Problems
Dense, Gummy Crumb: Your dough is underproofed or you’re not baking long enough. Increase fermentation time by 2-4 hours or extend baking time by 5 minutes. Undercooked bread feels soft but tastes like raw dough.
Flat Loaf with No Oven Spring: Either your dough is overproofed (it’s already expanded all it can before baking) or your Dutch oven wasn’t hot enough. Poke the dough gently before baking—if it springs back immediately, it needs more time. If it doesn’t spring back, it’s overproofed. Always preheat the Dutch oven fully.
Pale, Soft Crust: You’re removing the lid too early or your oven temperature is too low. Keep the lid on for the full 20 minutes, and verify your oven temperature with a thermometer (many ovens run 25-50°F cooler than they display).
Burnt Bottom: Your Dutch oven is too hot or you’re baking too long. Try placing a baking sheet under the Dutch oven to insulate the bottom, or reduce baking time by 5 minutes.
Storage and Shelf Life
Fresh Dutch oven bread stays good for 3-4 days at room temperature in a paper bag or bread box. Paper allows the crust to breathe while keeping the interior moist. Plastic bags trap steam and soften the crust—only use plastic if you want softer bread.
Freeze baked loaves for up to 3 months. Wrap cooled bread tightly in plastic wrap, then aluminum foil. Thaw at room temperature for 2-3 hours or reheat frozen bread in a 350°F oven for 20-25 minutes. Reheating in the oven restores crispness better than a microwave.
Store unbaked dough in the fridge for 3-5 days in an airtight container. This actually improves flavor through cold fermentation. Bring it to room temperature before shaping, or shape it cold and extend the final proof to 3-4 hours.
Frequently Asked Questions
Can I use a regular pot instead of a Dutch oven?
Not really. Regular pots don’t handle oven temperatures well, and the lid usually doesn’t seal tightly enough to trap steam effectively. You need something specifically designed for oven use. A Dutch oven is a one-time investment that’ll last decades.
How do I know when my dough is properly proofed?
Use the poke test. Gently press your finger into the dough. If it springs back slowly (taking 2-3 seconds), it’s perfectly proofed. If it springs back immediately, it needs more time. If it doesn’t spring back at all, it’s overproofed.
Why is my bread so dense compared to bakery bread?
Either you’re not fermenting long enough, your dough is overproofed, or you’re not baking hot enough. Bakery bread often ferments 16-24 hours. Also verify your oven temperature with an oven thermometer—this is the most common culprit.
Can I use whole wheat flour exclusively?
Yes, but the bread will be denser and heavier. Whole wheat has less gluten than white flour, so the crumb structure won’t be as open. Start with 50% whole wheat, then gradually increase if you like the flavor. You’ll also need to increase water by 10-15%.
What’s the difference between instant yeast and active dry yeast?
Instant yeast is ground finer and hydrates faster. You can substitute them 1:1 in recipes, but instant yeast ferments slightly faster. For Dutch oven bread, either works fine—the long fermentation time matters more than yeast type.
Do I need a bread lame to score my loaf?
A sharp razor blade or box cutter blade works perfectly. Bread lames are nice but not essential. The key is using something sharp—dull blades drag instead of cutting, which prevents proper ear formation.
Can I bake multiple loaves at once?
Not in the same Dutch oven—they’ll steam each other unevenly. If you have two Dutch ovens, absolutely. Otherwise, bake loaves sequentially. The second loaf will bake slightly faster because your oven is already hot.
Final Thoughts
Dutch oven bread recipes unlock a level of baking that feels impossible until you try it. The combination of steam, even heat distribution, and proper fermentation creates bread that rivals professional bakeries. Start with the no-knead formula if you’re nervous, graduate to the classic artisan loaf once you’re comfortable, then experiment with sourdough when you’re ready for the next challenge.
The investment in a good Dutch oven pays dividends. You’ll use it for bread, roasted vegetables, braises, and stews. It’s one of those tools that earns its place in your kitchen through sheer versatility. Master these techniques and you’ll never buy mediocre bread again—you’ll be making loaves that make your friends ask where you’re buying from.


