
A dilly beans recipe is your ticket to preserving crisp, flavorful green beans that taste like summer in a jar. Whether you’re a seasoned canner or picking up a mason jar for the first time, this easy canning method produces restaurant-quality pickled beans with that signature dill kick and satisfying crunch.
Table of Contents
What Are Dilly Beans?
Dilly beans are fresh green beans that have been pickled with dill and spices, creating a tangy, crunchy snack or condiment. Unlike regular steamed or sautéed green beans, these babies get packed into jars with a vinegar-based brine and dill sprigs, then processed through a water bath canner to seal them up tight. The result is shelf-stable jars that stay crisp for months and taste even better as they age. Think of them as the gateway drug to home canning—they’re forgiving, quick, and absolutely delicious straight from the jar.
Gather Your Supplies
Before you start, round up these essentials. You’ll need fresh green beans (about 2 pounds per quart jar), fresh dill sprigs or 1 teaspoon dill seed per jar, garlic cloves, peppercorns, red pepper flakes, white vinegar, water, and pickling salt. For equipment, grab a water bath canner or large pot, mason jars (quart or pint size), new lids and bands, a jar lifter, a bubble remover tool, and a clean kitchen towel. Don’t skip the proper canning lids—regular jar lids won’t seal correctly. You can find detailed prep techniques similar to steaming carrots if you’re new to vegetable preservation.
Prepare the Beans
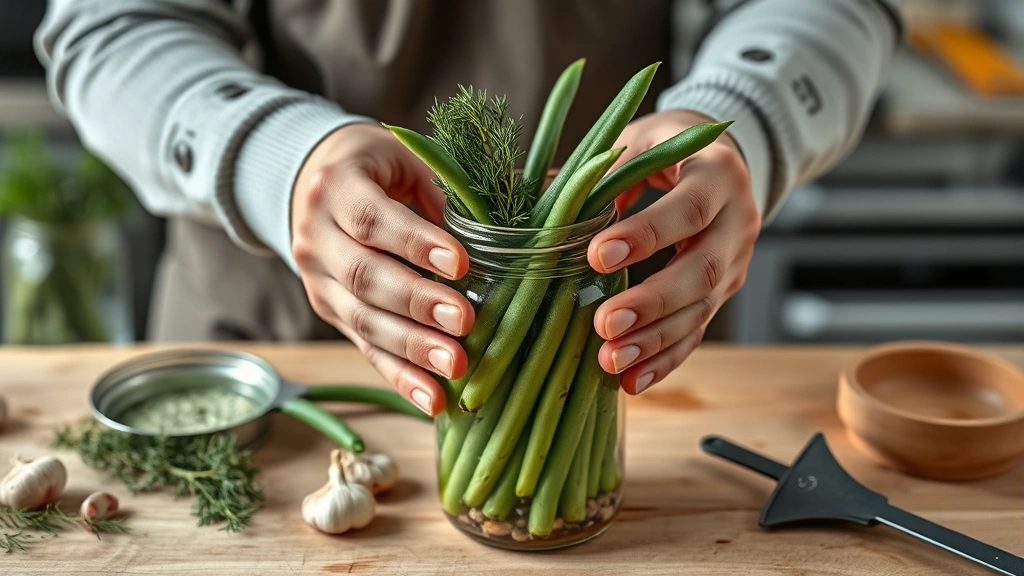
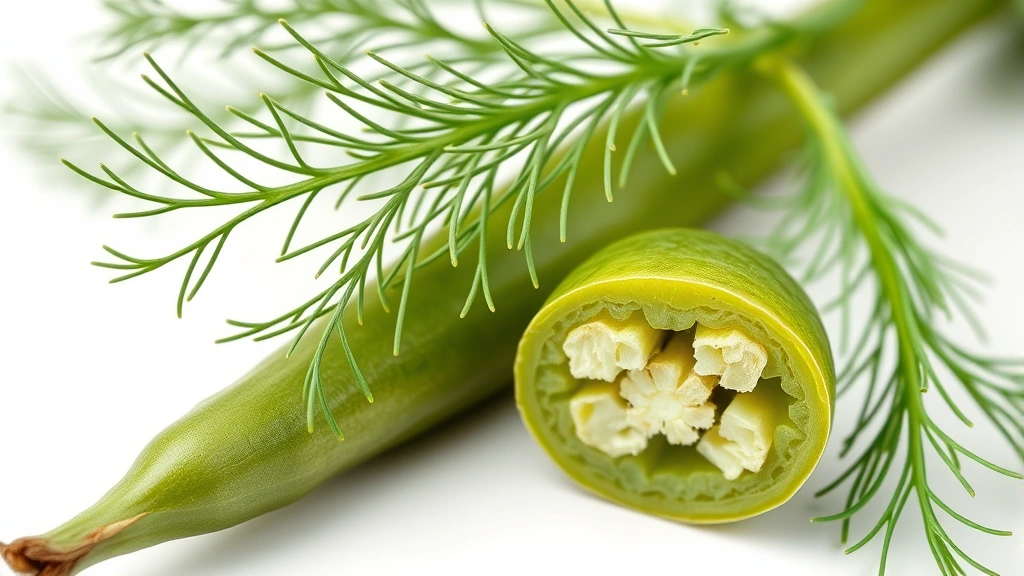
Start with firm, fresh green beans—the fresher, the crispier your final product. Wash them thoroughly under cool running water and snap off both the stem and tail ends. You want beans that are roughly the same length so they pack evenly into your jars. If you’re using quart jars, aim for beans about 4-5 inches long. Trim them to fit snugly in the jar with about half an inch of headspace at the top. Don’t cut them into pieces—whole beans look better and maintain their signature crunch throughout the canning process.
Make the Brine
The brine is where the magic happens. In a large pot, combine 5 cups of water, 5 cups of white vinegar, and 5 tablespoons of pickling salt. Bring this mixture to a rolling boil, stirring occasionally to dissolve the salt completely. This ratio creates the perfect balance of tanginess and preservative power. You can adjust vinegar slightly if you prefer a milder or sharper taste, but don’t reduce the salt—it’s critical for safe preservation. Keep the brine hot on the stove while you pack your jars; this ensures proper sealing and processing.
Pack and Process
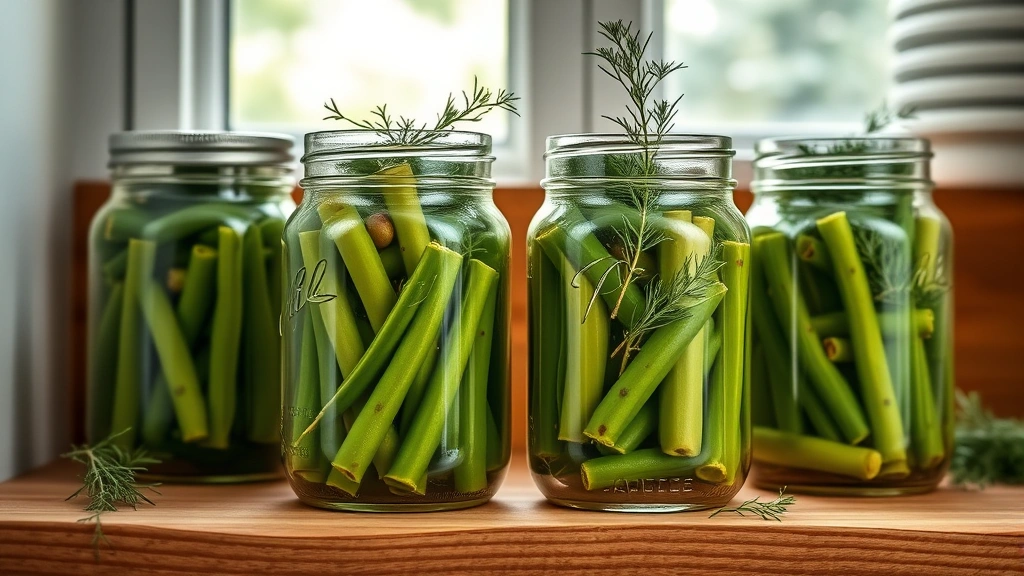
Sterilize your mason jars by running them through a hot dishwasher cycle or boiling them for 10 minutes. Into each quart jar, place one fresh dill sprig (or 1 teaspoon dried dill seed), 1-2 garlic cloves (sliced or whole), 1/2 teaspoon peppercorns, and a pinch of red pepper flakes if you like heat. Pack the trimmed green beans vertically into the jar, standing them upright like pencils. They should fit snugly but not be crushed. Leave about half an inch of headspace at the top. Carefully pour the hot brine over the beans, maintaining that half-inch clearance. Use a bubble remover tool to release any trapped air pockets by sliding it around the inside edges of the jar. Wipe the rim clean with a damp cloth, then place a hot lid and band on top, tightening the band finger-tight—not wrench-tight.
Place your filled jars into a water bath canner filled with hot water. The water should cover the jars by at least one inch. Bring to a rolling boil and process quart jars for 10 minutes (or 5 minutes for pint jars). Start timing once the water reaches a full boil. After processing, carefully remove the jars using a jar lifter and place them on a clean towel to cool undisturbed for 12-24 hours. You’ll hear the satisfying “pop” as each lid seals—that’s your signal that the canning worked.
Storage and Shelf Life
Once cooled and sealed, store your dilly beans in a cool, dark place like a pantry or basement. They’ll keep for up to one year, though the flavor actually improves over the first 2-3 weeks as the dill and spices fully infuse the beans. Check seals before storing by pressing the center of each lid—it should be slightly concave and not flex up and down. Any jars that didn’t seal should be refrigerated and consumed within a few weeks. Once opened, keep jars in the refrigerator and use within a few months for best quality.
Flavor Variations
While the classic dilly beans recipe is hard to beat, you can experiment with flavors once you master the basics. Try adding a dried chile pepper or jalapeño slice for heat, fresh thyme or tarragon for herbaceous notes, or mustard seeds for a subtle tang. Some folks add a bay leaf or a strip of lemon zest to their jars. You can also make bread recipes without yeast to pair with your homemade pickles. The brine ratio stays the same—only the aromatics change. Just remember that fresh herbs should be used sparingly since they can introduce bacteria if overused.
Troubleshooting Tips
Soft or mushy beans usually mean you either used older beans or processed them too long. Always start with the freshest beans you can find and stick to the recommended processing times. If your beans turn brown or discolored, it’s likely from oxidation or using tap water with high mineral content—filtered water helps prevent this. Cloudy brine is typically just salt settling or yeast growth from improper sealing, so check those lid seals carefully. If a jar doesn’t seal after 24 hours, refrigerate it immediately and use it within a few weeks. Never reprocess jars that fail to seal—it’s not worth the food safety risk. For more preservation techniques, explore growing and preserving vanilla beans to expand your canning skills.
Frequently Asked Questions
Can I use frozen green beans for this recipe?
No, frozen beans won’t work well for dilly beans. They lose their firm texture during freezing, and thawed beans become mushy when canned. Always use fresh, firm beans picked within a day or two of canning for the best results.
What if I don’t have a water bath canner?
You can use any large pot deep enough to cover your jars by at least one inch. Place a canning rack (or even a folded kitchen towel) on the bottom to prevent jars from touching the pot directly and cracking. A water bath canner is just a specialized pot with handles and a rack—the function is the same.
How do I know if my dilly beans went bad?
Signs of spoilage include a bulging lid, cloudy brine with sediment, off-smells, or visible mold. If you notice any of these, discard the entire jar without tasting. Trust your senses—if something seems off, it’s better to be safe than sorry with home-canned goods.
Can I use apple cider vinegar instead of white vinegar?
You can, but it will change the flavor profile and may darken the beans slightly. For the most reliable results and clearest appearance, stick with white vinegar. The acidity level is consistent and predictable, which matters for food safety in canning.
Why are my dilly beans still crunchy after weeks?
That’s actually a sign you did everything right! The brine and processing method preserve the beans’ natural firmness. If they soften over time, it’s usually because the seal failed or storage conditions were warm. Keep them cool and dark for maximum crunch.
Can I adjust the salt or vinegar amounts?
Don’t reduce the salt—it’s essential for safe preservation and preventing bacterial growth. You can increase vinegar slightly (up to 6 cups) for a sharper taste, but decreasing it compromises food safety. The 5:5:5 ratio of water, vinegar, and pickling salt is tested and proven.
Wrap It Up
Making a dilly beans recipe at home is one of the most rewarding canning projects you can tackle. You’ll end up with shelf-stable jars of crisp, flavorful pickled beans that beat anything from the grocery store. The process is straightforward, the ingredients are simple, and the satisfaction of opening a homemade jar months later is absolutely worth the effort. Start with the classic version, master the technique, then experiment with flavor variations once you’re confident. Before you know it, you’ll be the person friends ask for canning advice. Check out resources like Family Handyman for broader food preservation techniques, and don’t hesitate to reference This Old House for detailed canning safety guidelines. Your pantry (and your taste buds) will thank you.


