

A detroit style pizza recipe is your ticket to creating those legendary rectangular slices with crispy, golden edges and fluffy, airy centers that made Motor City pizza famous. If you’ve ever bitten into an authentic Detroit-style pie, you know exactly what I’m talking about—that perfect contrast between the caramelized, cheese-loaded perimeter and the tender crumb inside.
Table of Contents
What Makes Detroit Style Unique
Detroit-style pizza isn’t just another regional variation—it’s a completely different animal from New York or Neapolitan styles. The key difference lies in the rectangular shape, the pan used, and how the dough develops during fermentation. This style emerged in the 1940s when Detroit bakers started using industrial sheet pans (the same ones used for baking bread) to make pizza, and the results were absolutely transformative.
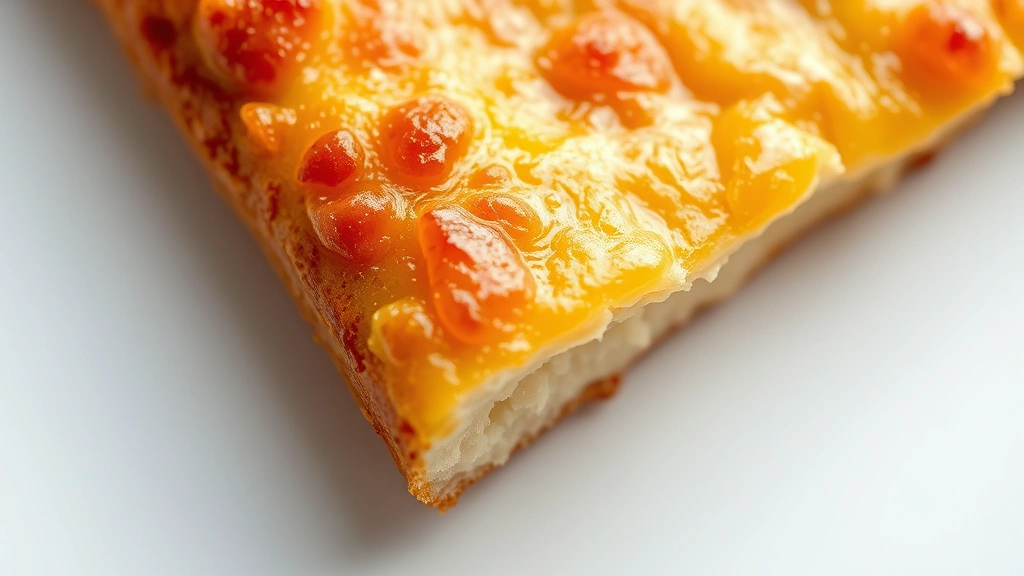
The magic happens in three places: the thick, airy crust that’s almost focaccia-like, the crispy, caramelized bottom and edges loaded with cheese, and the way toppings sit on top rather than getting buried. The cheese actually goes on the pan first, then the dough, then sauce on top—it’s backwards from what most people expect, but that’s what creates those legendary frico (crispy cheese edges).
What you’re really after is that Sicilian-pizza foundation with Detroit execution. The dough is wetter, more hydrated, and gets handled differently. You’ll need patience, proper fermentation, and the right equipment—but trust me, once you nail this, you’ll never go back.
Building Your Dough Foundation
Start with a high-hydration dough—we’re talking 65-70% water content. This might seem wet and unmanageable at first, but that’s exactly what gives you that open crumb structure and pillowy texture. Here’s what you need:
Dough Ingredients (for one 14×18″ pan):
- 500g bread flour (or all-purpose if that’s what you’ve got)
- 325ml water (65% hydration)
- 10g salt
- 3g instant yeast (or 1.5g if doing cold fermentation)
- 10g olive oil
Mix your flour and water first—just get them combined, then let it rest for 20 minutes. This autolyse period lets the flour fully hydrate and develops gluten naturally. Then add your salt, yeast, and oil. Mix until everything comes together. Don’t worry about it being shaggy and sticky; that’s the goal.
Use the stretch-and-fold method during the bulk fermentation phase. Every 30 minutes for the first two hours, grab one side of the dough, stretch it up, and fold it over itself. Do this four times around the dough ball. This builds strength without aggressive kneading and keeps your dough from degassing.
Fermentation and Timing
Here’s where patience separates good Detroit pizza from great Detroit pizza. You have two paths: bulk fermentation at room temperature (4-6 hours) or cold fermentation in the fridge (12-72 hours). I prefer cold fermentation because it develops better flavor and is way more forgiving with timing.
After your stretch-and-folds are done, let the dough bulk ferment at room temperature for 1-2 hours until it’s puffy and about 50% larger. Then transfer it to an oiled container and refrigerate. The cold fermentation allows the yeast to work slowly, developing complex flavors and making the dough easier to handle.
When you’re ready to bake, pull the dough out 30 minutes before you plan to shape it. This takes the edge off the cold and makes it slightly more pliable. You want it cold enough to handle but not so cold it tears.
Sauce and Cheese Strategy
This is where Detroit style gets weird in the best way. You’re building layers in reverse order: cheese first, dough second, sauce third. For the cheese, use a blend—about 60% whole milk mozzarella and 40% aged white cheddar or provolone. The mozzarella gives you that stretch and browning, while the sharp cheese adds depth and helps create those crispy edges.
For sauce, keep it simple. A basic tomato sauce with San Marzano tomatoes, salt, garlic, and oregano is all you need. Don’t oversauce—Detroit pizza uses less sauce than you’d expect. You want to see the cheese through it. About 1/2 cup of sauce spread across the surface is plenty for a 14×18″ pan.
One pro move: grate your cheese fresh. Pre-shredded cheese has cellulose added to prevent clumping, and it won’t melt or brown as beautifully. Block cheese from the deli counter is your best friend here.
Pan Selection and Preparation
You need a proper sheet pan—specifically, a 14×18″ half-sheet pan or similar rectangular baking pan. This is non-negotiable. Don’t try to use a 9×13″ baking dish; it’ll give you different results. Aluminum sheet pans are traditional and work great because they conduct heat evenly and don’t retain heat excessively after baking.
Prep your pan generously with oil. We’re talking about 3-4 tablespoons of olive oil spread across the entire surface, including the sides. This does multiple things: it prevents sticking, it fries the bottom of the dough creating that crispy crust, and it helps the cheese brown and crisp at the edges. Don’t be shy with the oil—this is a feature, not a bug.
Some people add a light dusting of cornmeal to the oiled pan, which adds texture and helps with release. If you go this route, use a light hand; you don’t want crunchy bits all over your pizza.
Assembly and Layering Technique
Here’s the sequence that makes Detroit pizza work:
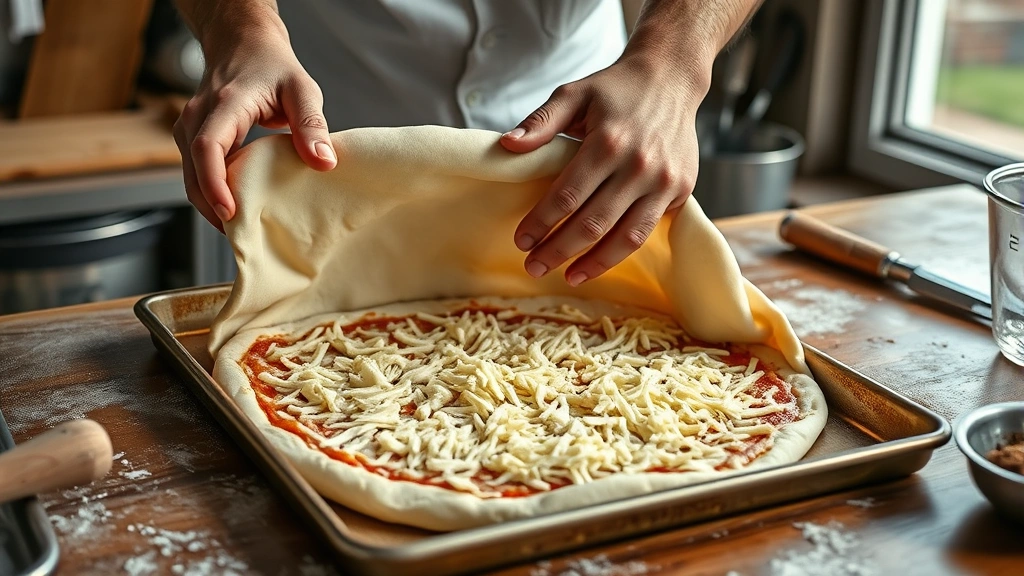
Step 1: Oil your pan as described above. Let it sit for a minute so the oil settles.
Step 2: Spread your cheese across the entire pan in an even layer, right down to the edges. This is crucial—the cheese needs to touch the pan edges so it can crisp and caramelize. You’re looking at about 2 cups of shredded cheese for a full pan.
Step 3: Gently stretch your cold dough and lay it on top of the cheese. This is the trickiest part. Don’t use a rolling pin; instead, oil your hands lightly and gently stretch the dough from the center outward. Let gravity help you. If it resists, let it rest for 5 minutes and try again. You want it to reach all four corners of the pan.
Step 4: Dimple the dough with your fingertips, creating small indentations across the surface. This prevents large air bubbles from forming and gives you that characteristic Detroit texture.
Step 5: Spread your sauce evenly across the dough. Remember: less is more. You want to see cheese peeking through.
Step 6: If you’re adding toppings, do it now. Pepperoni, onions, herbs—whatever you want. Don’t overload; Detroit pizza is about balance and letting each component shine.
Baking to Perfection
Let your assembled pizza proof for 45 minutes to 2 hours at room temperature. You want the dough to puff up noticeably but not completely double. This is your final rise before baking.
While the pizza is proofing, preheat your oven to 500°F (or as high as your oven goes). Detroit pizza needs serious heat to develop that crispy bottom and caramelized cheese edges. If you have a convection setting, this is a great time to use it—it circulates heat and promotes even browning.
Bake for 20-25 minutes. You’re looking for the cheese edges to be deeply caramelized and golden brown, and the bottom should be crispy and golden when you peek underneath. The dough should be cooked through but still have a slight give when you press it.
If your oven has hot spots, rotate the pan halfway through baking. Every oven is different, so watch your first pizza carefully and take notes on timing and positioning.
Cooling and Cutting Method
This is where most home bakers mess up. Pull your pizza out of the oven and let it cool in the pan for 5-10 minutes. This allows the cheese to set slightly and makes cutting cleaner. If you cut too early, the cheese is molten and everything slides around.
For cutting, use a sharp pizza wheel or a long chef’s knife. Detroit pizza traditionally gets cut into rectangular squares—usually 6-8 pieces depending on how generous you want to be. Cut parallel to the long sides first, then perpendicular to create squares. The corner pieces will have extra crispy edges, which is a feature, not a bug.
Once cut, let the pizza cool another 2-3 minutes before serving. This lets the cheese firm up enough that you can pick up a slice without it folding or dripping.
Common Mistakes and Fixes
Dough won’t stretch: Your dough is too cold or you’re being too aggressive. Let it rest at room temperature for 15 minutes and try again with gentler pressure.
Cheese isn’t crispy at edges: You didn’t use enough oil in the pan, or your oven temperature is too low. Crank the heat and make sure oil reaches the edges.
Bottom is soggy: The pan wasn’t oiled enough, or you’re using too much sauce. Oil generously and keep sauce light.
Dough is gummy inside: You’re underbaking. Bake longer until the bottom is deeply golden and the internal temperature hits 205-210°F.
Cheese slides off: You cut too early. Wait until the pizza cools slightly in the pan so the cheese sets.
Variations and Topping Ideas
Once you master the basic formula, Detroit style is incredibly versatile. Try classic combinations like pepperoni with fresh basil, or get creative with seasonal vegetables. Here are some ideas that work beautifully:
- Classic Detroit: Pepperoni, oregano, and frico (crispy cheese edges)
- Meat Lovers: Pepperoni, sausage, and bacon—keep sauce light
- Veggie Forward: Caramelized onions, roasted mushrooms, and fresh arugula added after baking
- Spicy Version: Hot sausage, jalapeños, and a drizzle of hot honey post-bake
- Gourmet Twist: Prosciutto, fresh mozzarella (added after baking), and microgreens
Pro tip: If you’re using wet toppings like fresh tomatoes or mushrooms, pat them dry first. Excess moisture creates steam and prevents crisping.
For more creative topping inspiration, check out our Adobo Sauce Recipe for making flavored oils to drizzle, or explore Brie Bites Recipe techniques for working with cheese applications. Even Chess Bars Recipe methods teach us about layering and baking chemistry that applies to pizza.
Frequently Asked Questions
Can I make Detroit style pizza without a half-sheet pan?
Technically yes, but it won’t be authentic. You could use a 9×13″ baking dish, but you’ll get a thicker, more cake-like result. The rectangular shape and specific pan size are pretty central to the Detroit style identity. If you’re serious about this, grab a proper sheet pan—they’re inexpensive and useful for everything from roasting vegetables to keeping prepared ingredients fresh.
How far in advance can I prepare the dough?
Cold fermentation is your friend here. You can refrigerate the dough for up to 72 hours. Actually, 24-48 hours tends to give the best flavor development. Pull it out, let it come to room temperature for 30 minutes, shape, proof for 45 minutes to 2 hours, then bake.
What’s the difference between Detroit and Sicilian pizza?
They’re cousins. Both use rectangular pans and high-hydration dough, but Detroit is specifically Detroit—it has the cheese-first assembly, the specific pan size, and cultural history tied to Motor City. Sicilian pizza is the ancestral style from Italy. Detroit took that foundation and made it its own.
Can I freeze Detroit pizza dough?
Absolutely. After bulk fermentation, portion the dough into pizza-sized portions, oil them lightly, wrap them individually, and freeze for up to 3 months. Thaw overnight in the fridge, then proceed with shaping and final proof.
Why do you put cheese under the dough?
This is the secret sauce. When cheese sits directly on the oiled pan and gets heat from below, it caramelizes and crisps up beautifully. It also prevents the dough from sticking and adds flavor from the bottom up. Plus, when the dough puffs during baking, it creates those amazing crispy-cheesy edges.
What oven temperature should I use?
As hot as your oven goes. Most home ovens max out at 500-550°F. If you have a convection setting, use it. The high heat is essential for getting that crispy bottom and caramelized cheese edges. Bake for 20-25 minutes depending on your oven’s actual temperature and how dark you like your cheese.
Can I make Detroit pizza in a regular home oven?
Yes, absolutely. You don’t need a fancy wood-fired oven or commercial equipment. A standard home oven works perfectly fine. Just make sure it gets hot, use the right pan, and follow the timing. The technique matters way more than the equipment.
Final Thoughts
Mastering a detroit style pizza recipe is genuinely achievable in your home kitchen. The technique isn’t complicated—it’s just different from what most people expect. High-hydration dough, proper fermentation, cheese-first assembly, and hot oven heat are the core principles. Once you understand why each step matters, you can troubleshoot when something goes sideways.
Your first attempt might not be perfect, and that’s fine. Take notes. Was the bottom crispy enough? Did the cheese brown evenly? Did you let the dough proof long enough? Each pizza teaches you something. By your third or fourth attempt, you’ll have the rhythm down and you’ll be making pizza that rivals any Detroit pizzeria.
The beauty of Detroit style is that it’s forgiving in some ways and exacting in others. The cold fermentation gives you flexibility with timing. The high oil content prevents disasters. But the cheese-first assembly and proper pan selection are non-negotiable. Get those right, and you’re already 80% of the way there.
Start with the basic formula, nail it, then experiment with toppings and variations. Your friends and family will be absolutely blown away when you pull a perfectly crispy, cheese-edged Detroit pizza out of your home oven. That’s the real payoff.


