
Dessert bar recipes are your secret weapon for impressing guests without spending all day in the kitchen. Whether you’re hosting a party, setting up for a wedding, or just want to offer something special at home, these 10 easy treats will have everyone coming back for seconds. The beauty of a dessert bar is that you can prep most items ahead of time, arrange them beautifully, and let guests help themselves—no stress, all reward.
Table of Contents
Chocolate Lover’s Dream
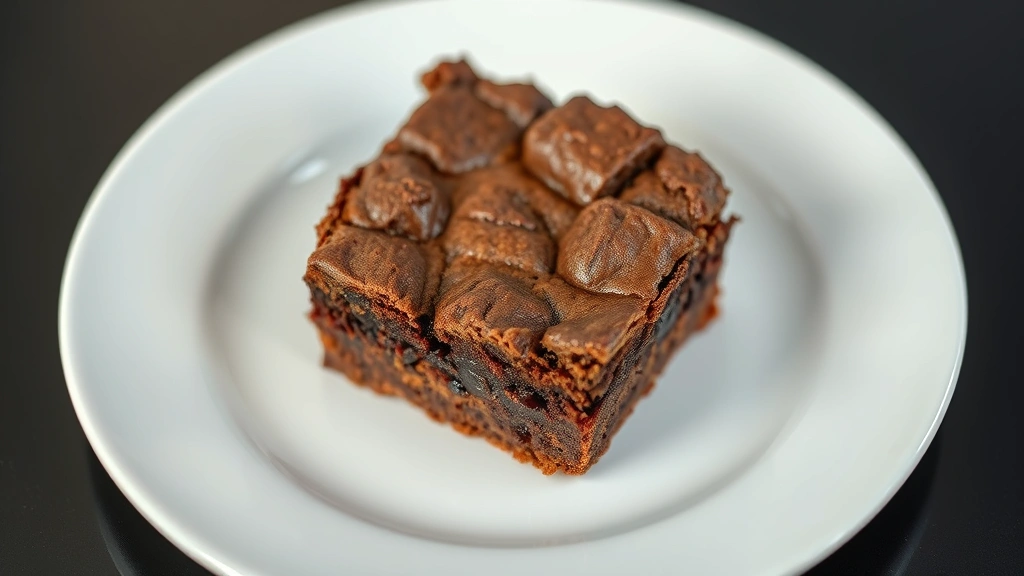
Start your dessert bar with a showstopper: fudgy brownies cut into bite-sized squares. These dense, chocolatey bars are forgiving to make and nearly impossible to mess up. Mix melted butter with cocoa powder, sugar, eggs, and flour—that’s it. Bake at 350°F for about 25 minutes until a toothpick comes out with just a few crumbs. The key is not overbaking; you want that gooey center.
Pair your brownies with chocolate truffles rolled in cocoa powder or sprinkles. Melt dark chocolate, stir in heavy cream and a pinch of sea salt, chill until firm, then roll into balls. These look fancy but take maybe 15 minutes of actual work. Your guests will think you spent hours in the kitchen.
Fruity Fresh Options
Balance the richness with bright, fruity treats. Make a simple berry tart by spreading pastry cream (just whisk egg yolks, sugar, and cornstarch, heat with milk, cool) into a pre-made tart shell, then top with fresh raspberries, blueberries, and strawberries. The contrast of creamy, fruity, and flaky is irresistible.
Don’t skip lemon bars—they’re tangy, refreshing, and cut cleanly into squares for easy serving. A buttery shortbread base topped with a bright lemon custard is pure magic. You can make these days ahead and store them covered in the fridge. Consider adding a blueberry syrup recipe drizzle on top for extra visual appeal and flavor complexity.
No-Bake Winners
When you want zero oven time, cheesecake bites are your friend. Crush graham crackers, mix with melted butter, press into muffin tins, chill. Then layer on a simple cheesecake filling (cream cheese, sugar, vanilla, whipped cream) and top with fruit or chocolate sauce. These can sit in the fridge for days, making them perfect for advance prep.
Peanut butter cups are another no-bake marvel. Melt chocolate, spread a thin layer in cupcake liners, chill, add a dollop of peanut butter mixed with powdered sugar, cover with more chocolate, and chill again. Homemade versions taste miles better than store-bought and cost a fraction of the price.
Layered Bar Magic
Magic bars (also called seven-layer bars) are the ultimate crowd-pleaser. In a 9×13 pan, layer: graham cracker crumbs mixed with melted butter, chocolate chips, coconut flakes, pecans or walnuts, sweetened condensed milk drizzled over everything. Bake at 350°F for 25-30 minutes. The condensed milk bakes into a gooey caramel that binds everything together. Cut into small squares—these are rich and satisfying.
Mint chocolate bars follow the same logic but with different layers: chocolate base, mint-flavored filling, dark chocolate top. The layering approach means you can customize based on what’s in your pantry. These bars also freeze beautifully, so you can make them weeks ahead.
Candy Apple Twist
For something with visual drama, try a candy apple station. You can make traditional candy apples by heating sugar, corn syrup, water, and red food coloring to hard-crack stage, then dipping small apples on sticks. If that sounds intimidating, use pre-made candy coating instead—it’s foolproof and comes in every color imaginable.
To prevent oxidation, brush your apples with lemon juice before dipping. You can also coat the candy layer with crushed nuts, sprinkles, or white chocolate drizzle for extra texture. These are both delicious and Instagram-worthy.
Bear Claw Style
If you want something with serious visual impact, make bear claw pastries. These are almond paste-filled pastries shaped like bear claws with sliced almond “toes” sticking out. You can use puff pastry to skip the lamination step. Spread almond paste down the center of a pastry rectangle, fold it in half, score the top, brush with egg wash, add sliced almonds, and bake until golden.
Bear claws look like you spent all day in a French bakery but actually come together in about an hour. They’re perfect for a dessert bar because they’re portion-controlled and look absolutely professional.
Setup & Display Tips
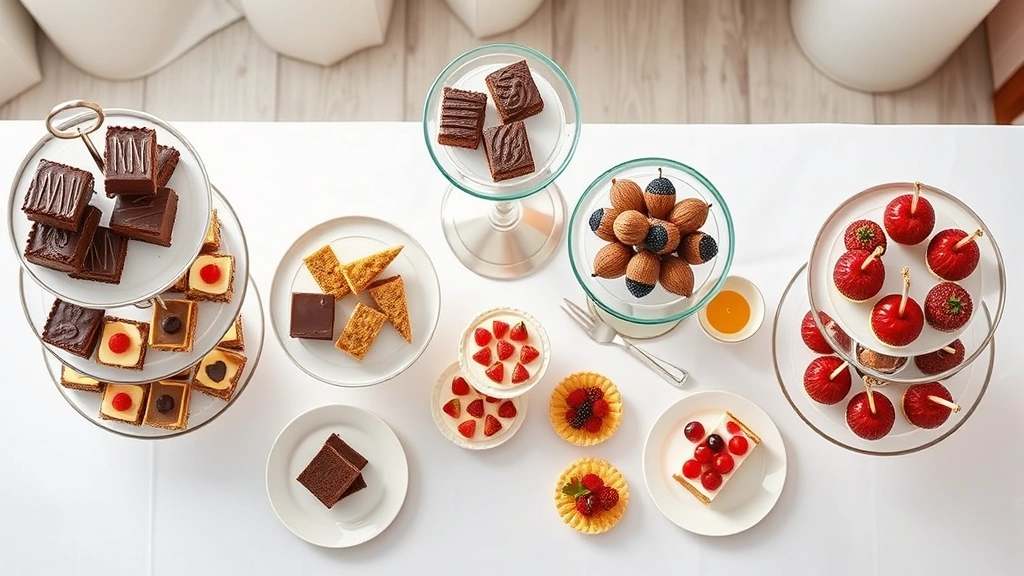
The presentation of your dessert bar is half the appeal. Use tiered stands, cake pedestals, and wooden boards at different heights to create visual interest. Group items by color—chocolates together, fruity items together, etc. This makes it easier for guests to choose and looks more curated.
Label each item with small cards, especially if any contain common allergens like nuts or dairy. Provide small plates, forks, and napkins within easy reach. Consider adding a crostini recipe base as a savory-sweet option that breaks up the sweetness and gives guests another choice.
Use simple garnishes like fresh mint, edible flowers, or a light dusting of powdered sugar to make everything look polished. Even simple treats look premium when they’re well-presented.
Make-Ahead Strategy
The real secret to a stress-free dessert bar is planning. Most of these recipes can be made 2-3 days ahead and stored covered in the fridge. Brownies and bars actually improve as they sit. Cheesecake bites and truffles last a week. Fresh fruit should be added the day-of to prevent browning—though you can learn how to keep apples from browning if you’re adding them early.
Create a timeline: bake bars and brownies three days ahead, make truffles and cheesecake bites two days ahead, prepare candy apples or bear claws the day before, and assemble fresh fruit the morning of your event. This spreads the work across several days and keeps you sane.
Keep everything in labeled containers in the fridge until it’s time to set up. About an hour before guests arrive, arrange everything on your display. This way, nothing sits at room temperature too long, and you’re not scrambling at the last minute.
Frequently Asked Questions
How far ahead can I make dessert bar recipes?
Most desserts can be prepared 2-3 days in advance. Brownies, bars, and truffles actually improve with time as flavors meld. Cheesecake bites last up to a week. Fresh fruit should be added the day-of. Always store items covered in the refrigerator unless otherwise specified.
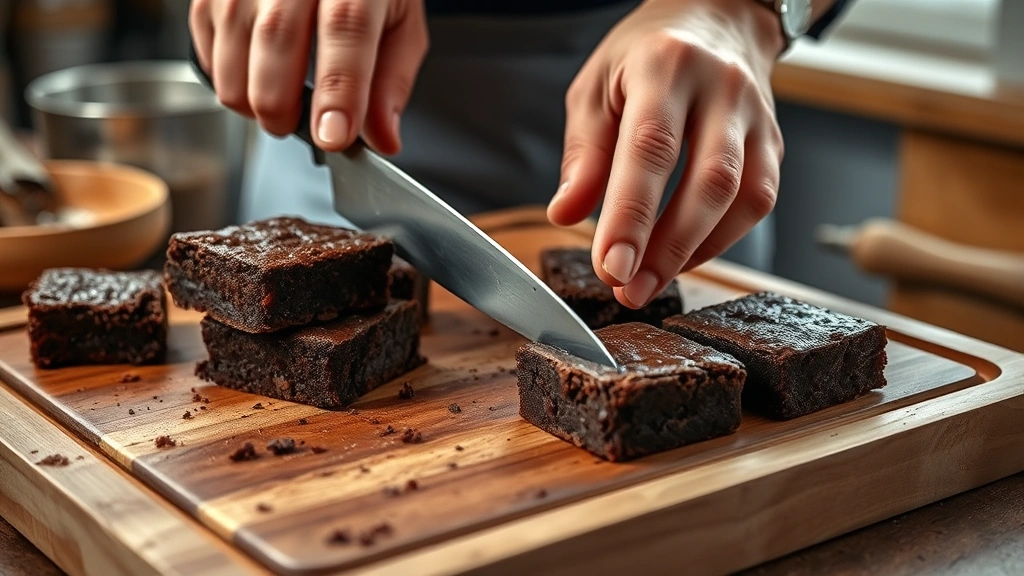
What’s the best way to cut bars without them crumbling?
Let bars cool completely, then use a sharp knife dipped in hot water and wiped clean between cuts. For extra-fudgy brownies, chill them first—cold brownies cut much cleaner than room-temperature ones. A bench scraper or offset spatula helps lift pieces without breaking them.
Can I make these recipes gluten-free?
Absolutely. For bars and brownies, swap regular flour for a 1:1 gluten-free flour blend. Most recipes work seamlessly with this substitution. For pastry items like bear claws, use a gluten-free puff pastry—many brands are now available and work great. Always check that other ingredients like oats or baking products are certified gluten-free.
How many pieces should I make per guest?
Plan for 3-4 pieces per guest if dessert is the main event. For a dessert bar at a party with other food, 2-3 pieces per person is plenty. Since you’re offering variety, guests will sample multiple items, so smaller portions work well.
What’s the easiest dessert bar recipe for beginners?
Magic bars are foolproof—just layer ingredients and bake. No mixing, no technique required. Chocolate truffles are also beginner-friendly since you just melt, mix, chill, and roll. Both look impressive but require minimal skill.
Can I freeze dessert bar recipes?
Yes, most desserts freeze beautifully for up to three months. Brownies, bars, truffles, and cheesecake bites all freeze well. Thaw them in the refrigerator overnight before serving. Avoid freezing items with fresh fruit topping, as they’ll get soggy when thawed.
The Bottom Line
Building a dessert bar doesn’t require fancy skills or expensive ingredients. These 10 recipes prove that simple, well-executed treats impress more than complicated showpieces. The key is choosing recipes you can make ahead, arranging them thoughtfully, and letting the variety speak for itself. Your guests get choice, you get to relax, and everyone leaves happy. That’s the whole point of a dessert bar—delicious food that doesn’t stress you out in the process.


