

A cottage cheese chips recipe might sound unconventional, but trust me—this high-protein snack is about to become your new kitchen obsession. If you’re tired of the same old chip options and want something that actually fills you up without the guilt, these crispy, savory bites deliver exactly what you need. I’ve tested this recipe a dozen times, tweaking temperatures and seasonings until I nailed the perfect texture: crispy on the outside, tender on the inside, and packed with protein that keeps you satisfied between meals.
Table of Contents
Why Cottage Cheese Works
When I first heard about making chips from cottage cheese, I was skeptical. But here’s the science: cottage cheese is mostly protein and moisture. When you drain it properly and bake it at the right temperature, that moisture evaporates and leaves behind crispy, golden pieces. It’s similar to how bariatric recipes utilize high-protein ingredients for maximum nutrition. Unlike regular potato chips loaded with empty calories, these deliver real nutritional value—about 7 grams of protein per serving depending on your batch size.
The texture transformation is remarkable. You start with soft, creamy cottage cheese, and through proper baking technique, you end up with chips that rival store-bought versions in crispiness. Plus, cottage cheese is incredibly affordable, especially when you buy the larger containers on sale.
Gathering Your Ingredients
Here’s what you’ll need for a basic batch:
- 2 cups full-fat or 2% cottage cheese (don’t use non-fat—it won’t crisp properly)
- 1 tablespoon olive oil or melted butter
- 1 teaspoon salt (adjust to taste)
- ½ teaspoon black pepper
- ½ teaspoon garlic powder
- ¼ teaspoon paprika (optional, but recommended)
That’s genuinely it for the basic version. The beauty of this recipe is its simplicity—you’re not juggling twenty ingredients or complicated techniques. I’ve found that full-fat cottage cheese works best because it has better texture and flavor, but 2% works in a pinch. Just avoid non-fat versions; they tend to become rubbery rather than crispy.
Prep Work Matters Most
This is where most people fail, so listen up: draining your cottage cheese properly is absolutely critical. Place your cottage cheese in a fine-mesh strainer lined with cheesecloth or a clean kitchen towel. Let it sit for 10-15 minutes. You want to remove as much liquid as possible—this directly impacts how crispy your chips become. I usually press gently with a spoon to encourage drainage without squeezing too hard and breaking down the curds.
While the cottage cheese drains, preheat your oven to 350°F and line two baking sheets with parchment paper. This prevents sticking and makes cleanup infinitely easier. Trust me on this—I learned the hard way that skipping parchment paper results in chips welded to your pan.
Five Easy Steps to Success
Step 1: Combine Your Base
Transfer your drained cottage cheese to a mixing bowl. Add the olive oil, salt, pepper, garlic powder, and paprika. Using a fork, gently break down the curds until you have a mixture with small, uniform pieces—not a smooth paste. You want texture here; those little curds are what become crispy chips.
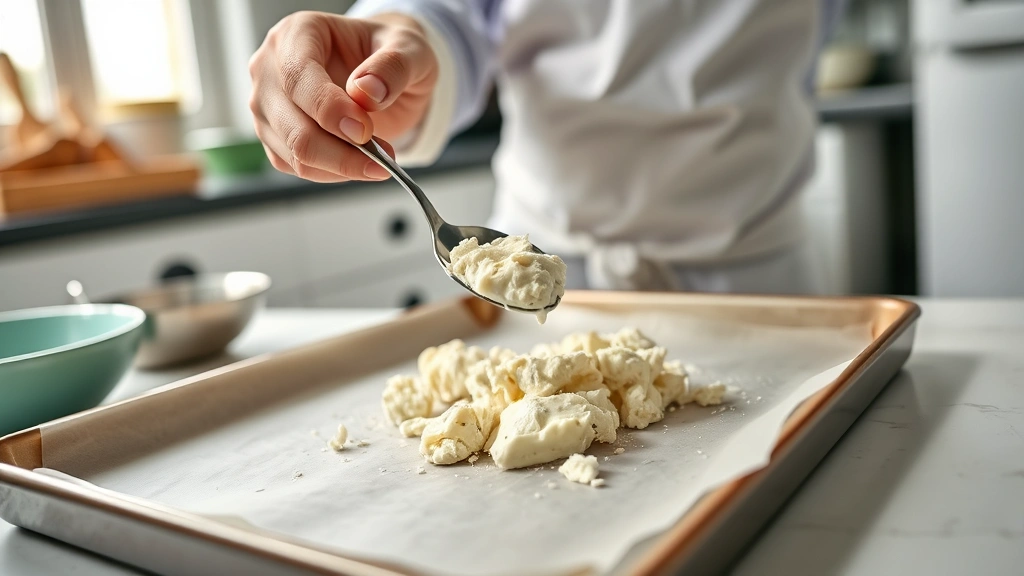
Step 2: Portion Onto Baking Sheets
Using a small spoon or cookie scoop, drop teaspoon-sized portions onto your parchment-lined baking sheets. Space them about ½ inch apart. They won’t spread like cookies, but you want enough room for air circulation. This step determines your chip size, so be consistent if you want uniform cooking.
Step 3: Initial Bake
Bake at 350°F for 15 minutes. You’re looking for the edges to start turning golden. Don’t expect them to be fully crispy yet—that’s coming. At this point, they should look slightly dried out but still somewhat soft in the center.
Step 4: Increase Temperature
Bump your oven to 400°F and bake for another 8-12 minutes. Watch them carefully during this phase. They go from soft to crispy to burnt pretty quickly. You’re aiming for golden brown, not dark brown. When they’re done, they should feel completely hard when you tap them.
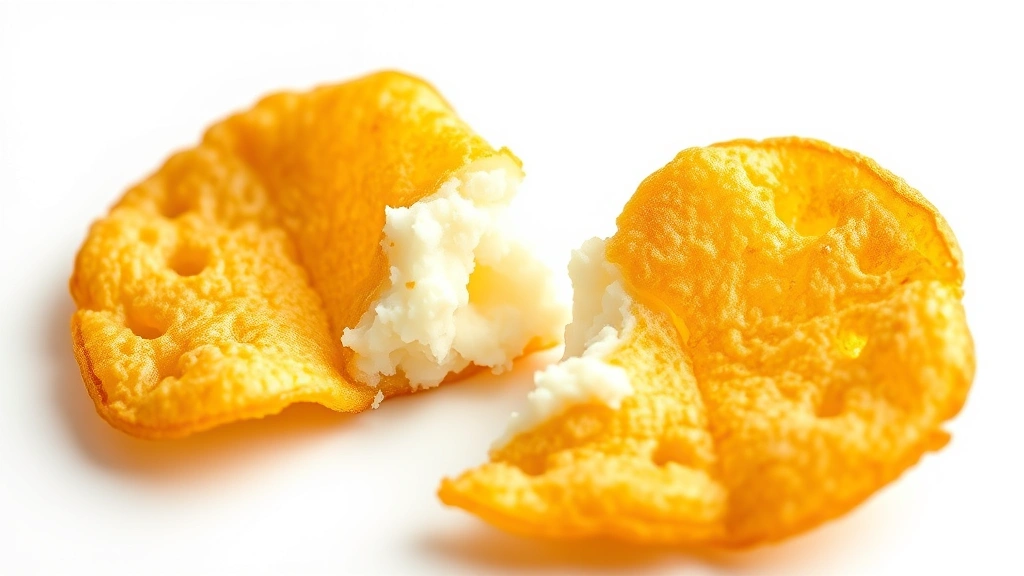
Step 5: Cool and Crisp Up
Remove from the oven and let them cool on the baking sheet for at least 5 minutes. This is crucial—they continue crisping as they cool. Once they’re room temperature, transfer to a container. If you bite into one and it’s still slightly soft in the middle, pop them back in a 375°F oven for another 3-4 minutes.
Seasoning Variations
Once you master the basic version, the flavor possibilities expand dramatically. Here are my favorite combinations:
- Ranch Style: Add 1 teaspoon dried dill, ½ teaspoon onion powder, and ½ teaspoon dried parsley
- Spicy Kick: Mix in ½ teaspoon cayenne pepper and ¼ teaspoon smoked paprika
- Italian Herb: Combine 1 teaspoon Italian seasoning and ½ teaspoon garlic powder
- Cheesy Version: Stir in ¼ cup grated Parmesan cheese before baking
- Barbecue Flavor: Add 1 teaspoon smoked paprika, ½ teaspoon chili powder, and ¼ teaspoon cayenne
The key with any seasoning variation is restraint. Start with less than you think you need, taste-test one chip after cooling, and adjust for your next batch. Seasonings intensify during baking, so what seems mild in the raw mixture often tastes stronger once baked.
Storage Tips
These chips are best eaten fresh, but they’ll keep for up to 5 days in an airtight container at room temperature. Store them in a sealed container with a paper towel on the bottom to absorb any residual moisture. Don’t refrigerate them—cold temperatures make them chewy. If they soften after a few days, you can recrisp them in a 300°F oven for 5 minutes.
For longer storage, freeze them in an airtight container for up to 2 weeks. Thaw at room temperature for about 30 minutes before eating. They won’t be quite as crispy as fresh, but they’re still perfectly acceptable. This makes batch-cooking a smart strategy if you want snacks ready throughout the week.
Troubleshooting Guide
Chips are too soft: You likely didn’t drain the cottage cheese thoroughly enough, or your oven temperature is running cool. Try using an oven thermometer to verify accuracy, and extend the baking time by 2-3 minutes.
Chips are burnt on edges but soft in middle: Your oven has hot spots. Rotate the baking sheets halfway through the second baking phase, and consider lowering the final temperature to 375°F.
Chips taste bland: Cottage cheese is naturally mild, so don’t be shy with seasoning. Add more salt and seasonings to taste. You can always sprinkle additional seasoning on the chips after cooling if needed.
Chips stick to the pan: This is why parchment paper exists. Use it. If you’re already using parchment and still having issues, try silicone baking mats instead.
Uneven cooking: Make sure your portions are roughly the same size. Use a cookie scoop for consistency, and ensure even spacing on the baking sheet.
Frequently Asked Questions
Can I use flavored cottage cheese?
Technically yes, but I don’t recommend it. Flavored varieties often contain additives that affect texture and can make the chips taste off. Stick with plain cottage cheese and add your own seasonings for better control.
What’s the best type of cottage cheese to use?
Full-fat or 2% cottage cheese works best. The fat content helps with crisping and flavor. Non-fat versions tend to become tough and chewy rather than crispy. Check the label for cottage cheese with the fewest additives.
How many chips does one batch make?
A 2-cup batch typically yields 40-50 chips depending on portion size. One batch provides roughly 4-6 servings if you’re using them as a snack.
Can I make these ahead for meal prep?
Absolutely. Make them on Sunday and store in airtight containers for the week. They’re great for lunchboxes, snack breaks, or paired with dips like ranch or hummus.
Do these work with cottage cheese substitutes?
I’ve experimented with ricotta and Greek yogurt, and results are inconsistent. Cottage cheese’s specific curd structure is what creates the ideal texture. Stick with actual cottage cheese for best results.
Can I add mix-ins like herbs or cheese?
Yes, but keep them finely minced or powdered. Large chunks of cheese or herbs can burn. Grated Parmesan, finely chopped fresh herbs, or dried spices all work well mixed into the base mixture.
What dips pair well with these chips?
Try ranch dip, hummus, salsa, guacamole, or a simple sour cream and herb mixture. The neutral flavor of the chips makes them versatile with most dips.
Are these gluten-free and keto-friendly?
Yes to both! They’re naturally gluten-free and very low in carbs—roughly 1-2 grams per serving depending on seasoning additions. They’re perfect for keto diets and fit well into bariatric recipes for high-protein snacking.
Final Thoughts
Making cottage cheese chips recipe at home is genuinely easier than I expected when I first tried it. What seemed like a weird kitchen experiment turned into my go-to snack that I make regularly. The combination of simplicity, nutrition, and customization options makes this recipe worth adding to your rotation. Start with the basic version to master the technique, then experiment with seasonings that match your preferences. You’ll quickly understand why this snack has gained traction among people looking for healthier alternatives to traditional chips. Give it a shot this weekend—I’m confident you’ll be making batch after batch once you taste how good these actually are.


