
A killer cinnamon roll filling recipe is what separates those bakery-quality rolls from the mediocre ones sitting in your kitchen. I’ve spent years perfecting this, and I’m going to walk you through exactly what makes the difference—from ingredient ratios to pro techniques that’ll have your family asking for seconds before the first batch even cools.
Table of Contents
Ingredients That Matter
Let’s get real—your cinnamon roll filling recipe is only as good as what goes into it. You’re looking at four core components: butter, brown sugar, cinnamon, and salt. That’s it. No shortcuts, no substitutions that’ll ruin the magic.
The butter needs to be softened, not melted. Room temperature is your sweet spot. Cold butter won’t spread evenly, and melted butter creates a greasy mess that slides right out of your rolls during baking. I keep mine on the counter for about 30 minutes before I start working.
Brown sugar is non-negotiable. White sugar won’t give you that deep molasses undertone that makes people close their eyes when they bite into a roll. The moisture in brown sugar also helps bind everything together, creating a paste-like consistency that sticks to your dough without leaking out the sides.
Classic Filling Ratio
Here’s the formula that works every single time: for one standard batch of cinnamon rolls (about 12 rolls), you need:
- ½ cup softened butter
- 1 cup packed brown sugar
- 2½ tablespoons ground cinnamon
- ¼ teaspoon salt
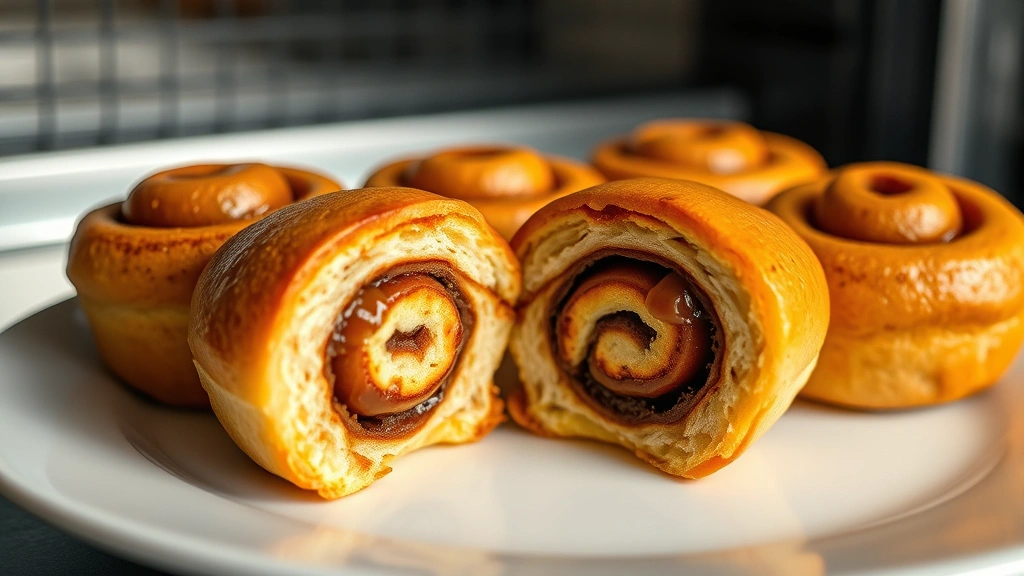
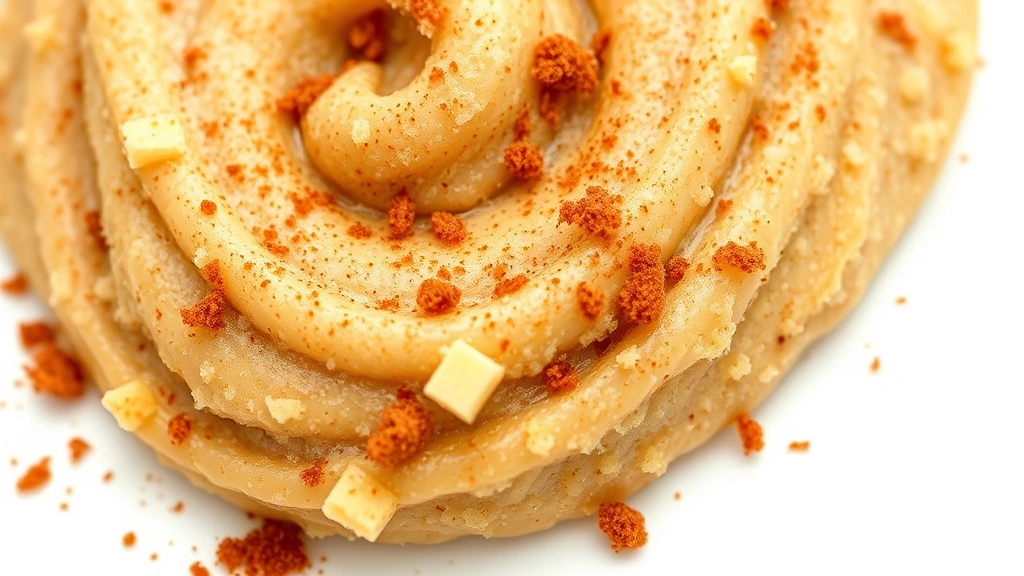
Mix these together until you get a spreadable paste. It should look like wet sand—chunky enough to hold together, but soft enough to spread without tearing your dough. This ratio gives you that perfect balance where the filling caramelizes during baking without burning or becoming overly sweet.
Why Brown Sugar Works Best
I tested this extensively with white sugar, coconut sugar, and even maple syrup. Brown sugar wins every time, and here’s why: it contains molasses, which adds depth and prevents the filling from tasting one-dimensional. When those rolls bake, the brown sugar melts into a gooey, almost caramel-like layer that creates those gorgeous swirls everyone drools over.
Pack that brown sugar firmly into your measuring cup. Loose brown sugar will give you an inconsistent filling. Press it down with the back of a spoon until it’s compact, then level it off. This ensures you’re getting the actual volume you need for proper sweetness and texture.
Spice Blend Secrets
Cinnamon is the star, but it doesn’t have to be alone. The classic approach is straight cinnamon, but I’ve found that adding a pinch of nutmeg (⅛ teaspoon), a tiny bit of cardamom (just a whisper), or even a touch of vanilla extract elevates the whole thing.
Quality matters here more than anywhere else. Cheap cinnamon tastes dusty and flat. Invest in good cinnamon—Ceylon if you can find it—and you’ll taste the difference immediately. Store it in an airtight container away from light. Old spices lose their punch, so if your cinnamon’s been sitting in the cabinet for three years, it’s time for a refresh.
Butter Incorporation Technique
This is where most people mess up. Don’t just dump everything together and call it a day. Here’s the process:
- Start with your softened butter in a bowl
- Add the brown sugar and mix with a fork until you get a crumbly texture
- Add cinnamon and salt, then fold everything together gently
- Use the back of your fork to press and fold until you get a cohesive paste
This method prevents overworking the mixture, which can make it greasy. You want it to hold together when you press it, but still have a slightly grainy texture from the brown sugar crystals. Those crystals create texture and help the filling caramelize properly during baking.
Creative Flavor Variations
Once you’ve mastered the classic, it’s time to experiment. Here are my go-to variations:
Maple Cinnamon: Replace ¼ cup of brown sugar with pure maple syrup. This adds a subtle earthiness that pairs beautifully with coffee.
Cream Cheese Version: Mix in 2 ounces of softened cream cheese with your butter. This creates a tangier filling that’s absolutely addictive. Similar to how you’d approach making adobo sauce recipe variations by layering flavors, you’re building complexity here.
Brown Butter Upgrade: Brown your butter first by heating it in a saucepan over medium heat until it turns golden and smells nutty (about 5-7 minutes). Let it cool completely before mixing. This adds a sophisticated, toasted depth.
Spiced Chai Version: Add ½ teaspoon ginger, ¼ teaspoon cloves, and a pinch of black pepper. This creates a warming spice profile that’s incredible in fall.
Application Method Matters
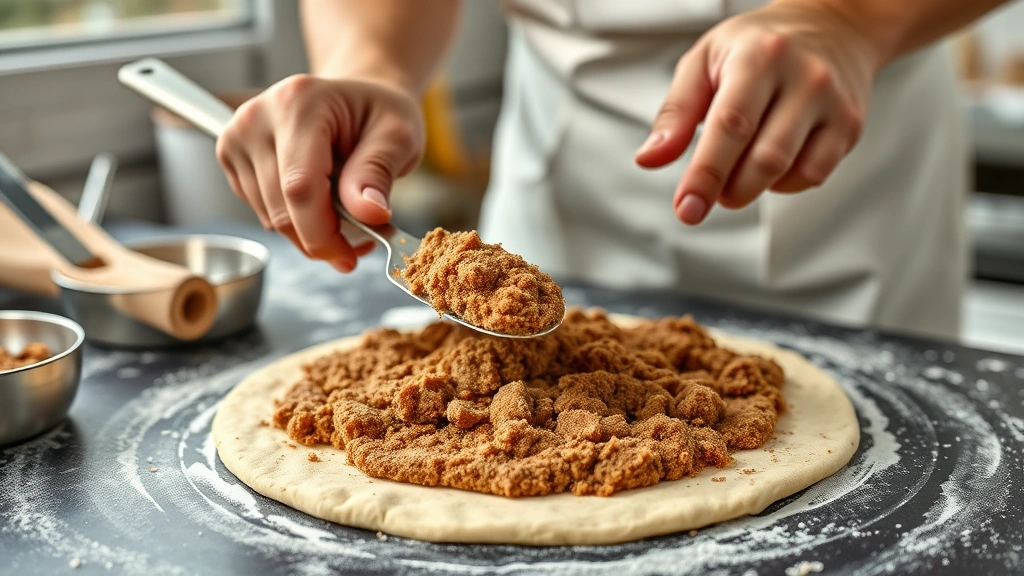
How you apply the filling determines whether you get those beautiful swirls or a lumpy mess. Spread your filling in an even layer across your rolled-out dough, leaving about ½ inch at the edges. This prevents the filling from squishing out when you roll.
Use an offset spatula or the back of a spoon to spread it smoothly. Work from the center outward, using gentle pressure. You want even coverage without gaps, because thin spots mean some rolls will have less flavor than others.
Roll tightly from one end, using a bench scraper to help guide the dough if it sticks. Cut with a sharp serrated knife using a gentle sawing motion—don’t press down, as this squeezes out the filling. Dental floss works great too if you want perfectly clean cuts.
Storage and Make-Ahead Tips
You can prepare your filling up to three days ahead. Store it in an airtight container in the refrigerator. It’ll firm up, but that’s actually helpful—it’s easier to spread when it’s cold.
If you’re making the rolls ahead, assemble them completely, then refrigerate overnight before baking. The cold rise actually develops more flavor. Just add 5-10 minutes to your baking time since they’ll be cold when they go in the oven.
Frozen rolls keep for up to three months. Place unbaked rolls on a baking sheet, freeze until solid (about 4 hours), then transfer to a freezer bag. Bake from frozen, adding 10-15 minutes to the baking time.
Common Mistakes to Avoid
Filling leaking out: This happens when you use too much filling or spread it too close to the edges. Stick to the ratio and leave that ½-inch border.
Dry filling: If your filling seems crumbly after mixing, your butter wasn’t soft enough. Let it sit at room temperature longer next time.
Burnt sugar: This occurs when your oven runs hot or you overbake. Check rolls at 20 minutes—they should be golden brown, not dark.
Uneven distribution: Use an offset spatula and take your time spreading. Rushing this step ruins the whole batch.
Greasy rolls: Too much butter or butter that was too warm. Measure carefully and make sure it’s softened, not melted.
Just like when you’re learning how to keep apple slices from turning brown, precision in your preparation prevents frustration later.
Pro Tips from the Workshop
Temperature control is everything. Keep your dough cool while you work—warm dough is harder to roll and the filling slides around. If your kitchen is hot, refrigerate your dough for 15 minutes between steps.
Toast your cinnamon lightly in a dry skillet for 30 seconds before measuring. This wakes up the flavor and makes it more vibrant. Just don’t burn it—you’ll smell it the second it starts to char.
Use a kitchen scale for the brown sugar if you have one. Volume measurements can vary based on how tightly you pack it, but weight is always consistent. One cup of packed brown sugar should weigh about 220 grams.
Consider the complementary approach when planning your meal—pair your cinnamon rolls with almond flour bread recipe options for a complete breakfast spread, or even lighter fare.
Final Thoughts
Mastering a cinnamon roll filling recipe isn’t complicated, but it does require attention to detail. The difference between mediocre and magnificent comes down to quality ingredients, proper technique, and understanding why each step matters. Start with the classic ratio, nail the fundamentals, then experiment once you’re confident.
Your filling should taste amazing straight from the bowl—if it doesn’t, something’s off. Trust your palate, adjust as needed, and remember that baking is forgiving. You’ll get better with every batch, and soon you’ll be making rolls that rival any professional bakery.
Frequently Asked Questions
Can I make the filling without butter?
You could use coconut oil or another fat, but butter is really the best option. It has the right melting point and flavor profile. Coconut oil creates a different texture, and oil-based fillings tend to slide out during baking.
How long does cinnamon roll filling last?
Refrigerated filling keeps for about a week in an airtight container. It’s best used within three days for optimal flavor and texture. Freezing extends this to three months, though the texture becomes slightly grainy after thawing.
Can I use granulated sugar instead of brown?
You can, but you’ll lose the molasses depth that makes the filling special. The rolls will taste flatter and more one-dimensional. If you must, add a tablespoon of molasses or honey to compensate.
What’s the best cinnamon to use?
Ceylon cinnamon (true cinnamon) is superior to cassia cinnamon because it’s sweeter and more delicate. It’s more expensive, but the flavor difference is noticeable. Store any cinnamon in an airtight container away from heat and light.
Should the filling be warm or cold when I apply it?
Room temperature is ideal. Cold filling is harder to spread evenly, and warm filling melts into the dough before you can roll it. If your filling is too firm from refrigeration, let it sit on the counter for 15 minutes.
Can I double the filling recipe?
Absolutely. The ratio scales perfectly. Just make sure you’re using the same proportions, and mix in batches if your bowl is small. Overmixing can make the filling greasy.


