
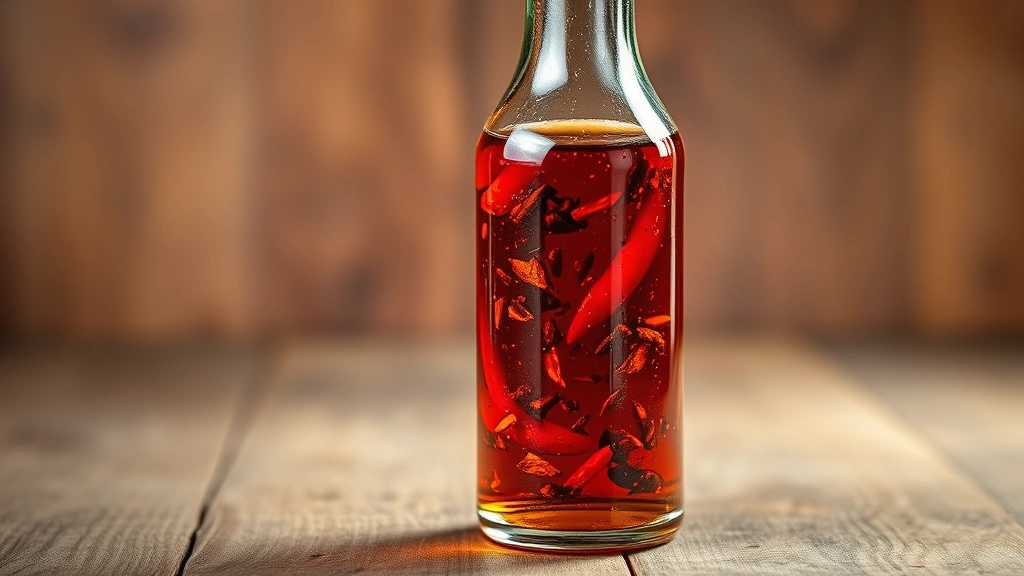
A chilli oil recipe is one of those kitchen staples that’ll transform your cooking from ordinary to absolutely legendary. Whether you’re drizzling it over pizza, dipping bread into it, or using it as a finishing touch on soups and salads, homemade chilli oil brings that perfect balance of heat, flavor, and sophistication that store-bought versions just can’t match. The best part? You can make it in your own kitchen with just a handful of ingredients and about 30 minutes of your time.
Table of Contents
Why Homemade Matters
Look, I’ve been making chilli oil for years, and the difference between homemade and commercial versions is night and day. When you make it yourself, you control everything—the type of chillies, the oil quality, the infusion time, and the flavor profile. Store-bought options often contain preservatives, stabilizers, and sometimes that stale taste from sitting on shelves for months. Your homemade chilli oil recipe will be fresher, more vibrant, and tailored exactly to your heat preference. Plus, there’s something genuinely satisfying about creating something in your kitchen that tastes restaurant-quality.
Gather Your Ingredients
Here’s what you’ll need for a basic batch that yields about 1.5 cups:
- 1 cup high-quality neutral oil (grapeseed, vegetable, or light olive oil)
- 3-4 dried chillies (adjust based on heat preference)
- 4-5 fresh chillies, sliced
- 4 garlic cloves, thinly sliced
- 1 teaspoon Sichuan peppercorns (optional but recommended)
- 1 teaspoon sesame seeds
- ½ teaspoon salt
- 1 teaspoon sugar
- ½ teaspoon red pepper flakes
The beauty of this chilli oil recipe is its flexibility. You can adjust quantities based on your spice tolerance and available ingredients. Some people add star anise, cinnamon sticks, or dried citrus peel for complexity. The key is using quality ingredients—cheap oil will result in cheap-tasting chilli oil, period.
Choosing the Right Chillies
This is where your chilli oil recipe either becomes amazing or mediocre. You’ve got options here, and each brings something different to the table. Thai chillies pack serious heat and fruity notes. Bird’s eye chillies deliver intense spice with less flavor complexity. Dried Calabrian chillies from Italy offer smoky, almost chocolatey undertones. Habaneros bring fruity sweetness alongside serious heat. For a balanced approach, I mix dried chillies (for depth and concentrated flavor) with fresh ones (for brightness and texture). The combination gives you layers of flavor rather than just one-note heat. Start with what’s available locally, then experiment. Your palate will guide you toward your perfect chilli oil recipe variation.
Step-by-Step Process
Step 1: Prepare Your Chillies
Remove stems and seeds from dried chillies if you prefer less heat, or leave them in for maximum spice. Slice fresh chillies into thin rings—keep the seeds unless you want a milder version. The seeds contain most of the capsaicin (the compound that makes chillies hot), so this is where you control your heat level.
Step 2: Toast Your Spices
Heat a small dry pan over medium heat for about 30 seconds. Add your Sichuan peppercorns and sesame seeds, then toast for 1-2 minutes until fragrant. This step is crucial—it wakes up the flavors and prevents them from tasting raw or flat in your finished chilli oil recipe. You’ll notice the aroma shift from subtle to unmistakable. That’s your signal you’re done.
Step 3: Prepare Your Container
Use a clean glass jar or bottle. Sterilize it by washing with hot soapy water and rinsing thoroughly, or run it through the dishwasher. This prevents unwanted bacteria from spoiling your chilli oil recipe.
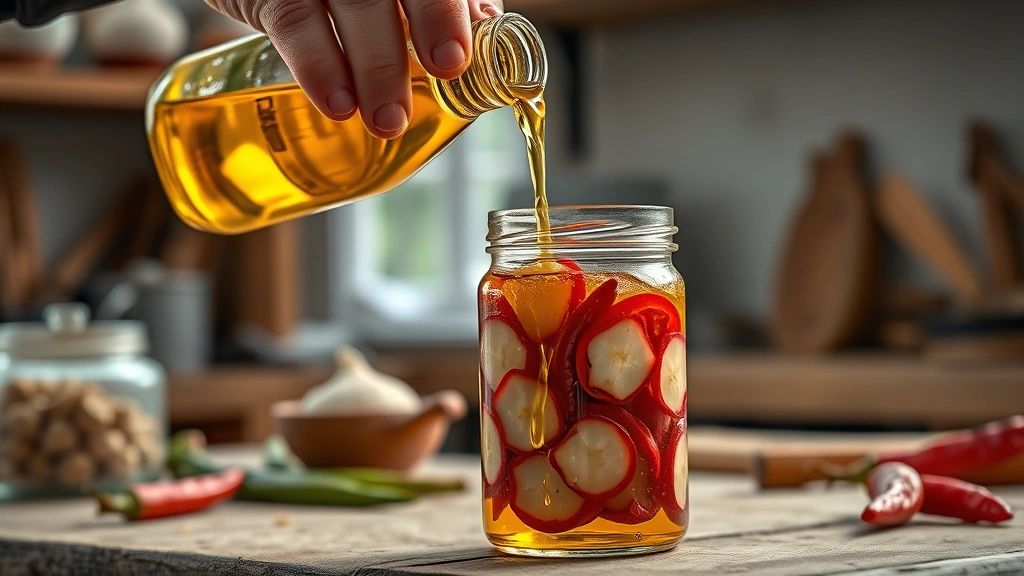
Step 4: Combine Ingredients
Add your sliced fresh chillies, garlic, toasted spices, salt, and sugar to the jar. Pour in your oil slowly, stirring gently to distribute ingredients evenly. Make sure everything is submerged in oil—this prevents mold and extends shelf life.
Step 5: Let It Infuse
Cover loosely and let it sit at room temperature for 3-7 days. The longer it sits, the more intense the flavor becomes. Taste it daily after day 3 to find your sweet spot. Some people prefer 3 days for a lighter, fresher taste. Others go a full week for deep, complex flavor.
Infusion Techniques Explained
There are three main approaches to infusing your chilli oil recipe, and each produces slightly different results.
Cold Infusion (Most Common)
This is what I’ve described above—simply letting ingredients sit in oil at room temperature. It’s the safest method because it prevents any risk of botulism. The flavor develops slowly but becomes incredibly complex. It’s perfect for beginners and produces consistent results.
Warm Infusion (Faster Results)
Heat your oil gently (never above 180°F) with ingredients for 30-45 minutes. This accelerates flavor extraction, so you can use your chilli oil recipe the same day. The trade-off is slightly less complexity, but many people prefer the cleaner, more straightforward heat this method produces. Let it cool completely before storing.
Hot Infusion (Quick Method)
Pour boiling oil over your ingredients and let them steep for 10-15 minutes. This is the fastest approach but requires careful handling. The intense heat can sometimes make the flavors taste slightly cooked rather than fresh. Use this method only if you’re in a hurry.
For your first batch, stick with cold infusion. It’s forgiving, safe, and produces restaurant-quality results. Once you’ve made it a few times, experiment with the other methods to see which you prefer.
Flavor Variations Worth Trying
Once you’ve mastered the basic chilli oil recipe, here are some variations that’ll keep things interesting:
Asian-Inspired Version
Add 1 tablespoon soy sauce, 1 teaspoon fish sauce, and a strip of kombu (dried seaweed) to your infusion. This creates a deeply savory chilli oil that’s incredible on rice, noodles, and dumplings. It pairs beautifully with steamed broccoli—check out our guide on how to steam broccoli in microwave for the perfect accompaniment.
Mediterranean Style
Include dried oregano, thyme, and a few anchovy fillets. Add a strip of lemon zest and some black olives. This version is perfect for dipping bread or drizzling over grilled vegetables.
Smoky Version
Use smoked paprika instead of regular red pepper flakes. Add a pinch of liquid smoke if you want extra depth. This chilli oil recipe works wonderfully with grilled meats and BBQ applications—similar to how you’d use our BBQ beans recipe.
Sweet and Spicy
Increase the sugar to 1 tablespoon and add 1 teaspoon honey. Include a cinnamon stick and a few cloves. This version bridges the gap between condiment and finishing oil, working equally well on desserts and savory dishes.
Storage and Shelf Life
Your chilli oil recipe will keep for about 3-4 weeks at room temperature in a sealed container, or up to 2 months in the refrigerator. Cold storage slows flavor development but extends shelf life significantly. Some people prefer the taste after refrigeration because the flavors mellow slightly.
For longer storage, you can freeze your chilli oil in ice cube trays, then pop the cubes into freezer bags. This gives you perfect portions for cooking. Frozen chilli oil keeps for 6-8 months.
Watch for signs of spoilage: cloudiness (other than from settled particles), off smells, or visible mold. If you see any of these, discard the batch. Homemade chilli oil lacks the preservatives of commercial versions, so proper storage matters.
Serving Suggestions
Now comes the fun part—actually using your creation. Here are my favorite applications:
- Pizza Topper: A drizzle on top transforms any pizza into something special. The heat complements cheese and tomato perfectly.
- Bread Dipper: Mix a tablespoon into balsamic vinegar for an incredible bread dip.
- Soup Finisher: A small drizzle on top of soups (especially tomato-based ones) adds visual appeal and flavor complexity.
- Pasta Enhancement: Toss warm pasta with your chilli oil recipe before adding sauce. It coats the noodles and adds incredible flavor.
- Salad Dressing Base: Use your chilli oil as the base for vinaigrette instead of plain oil.
- Dumplings and Dim Sum: The perfect companion to any dumpling sauce.
- Grilled Vegetables: Brush on vegetables before grilling or drizzle after cooking.
- Egg Dishes: Drizzle on scrambled eggs, omelets, or avocado toast for breakfast elevation.
The versatility of a good chilli oil recipe is one of its greatest strengths. It works in savory applications, can complement desserts, and brings life to dishes that would otherwise taste flat.
Troubleshooting Tips
Oil Tastes Too Mild
Your infusion time was too short, or your chillies weren’t fresh enough. Next batch, let it sit longer (up to 10 days) or use hotter chilli varieties. You can also add more fresh chillies mid-infusion.
Oil Tastes Bitter or Burned
This usually means you used too much heat during the infusion process or left ingredients steeping too long in warm oil. Stick to cold infusion next time, or reduce warm infusion time to 20-30 minutes.
Oil Looks Cloudy
This is normal and comes from particles settling. It’s not spoilage. Simply strain through cheesecloth if you prefer clear oil, but I actually prefer the cloudy version because it contains more flavor.
Mold Appearing on Top
This happens when ingredients aren’t fully submerged in oil. Always make sure everything is covered. If you see mold, discard the entire batch—it’s not safe to simply remove the moldy layer.
Oil Separating or Looking Strange
Some oils naturally separate in cold temperatures. This is fine and will recombine when the oil warms. However, if you see anything that looks like slime or has an off smell, discard it immediately.
Frequently Asked Questions
Can I use fresh chillies only in my chilli oil recipe?
Yes, absolutely. Fresh chillies alone will create a lighter, brighter-tasting oil. The flavor won’t be as deep as when you combine fresh and dried, but it’ll still be delicious. Use about 6-8 fresh chillies for a batch.
Is homemade chilli oil safe to store at room temperature?
For short-term storage (up to 2 weeks), yes. Beyond that, refrigerate it. The main concern is preventing bacterial growth, which cold temperatures inhibit. Always ensure ingredients are fully submerged in oil.
Can I add herbs like basil or cilantro to my chilli oil recipe?
Fresh herbs can work, but they tend to lose flavor quickly and can develop off-tastes after a few days. If you want herbal notes, use dried herbs instead. They’re more stable and won’t spoil your batch.
What’s the best oil for a chilli oil recipe?
Neutral oils work best because they don’t compete with the chilli flavors. Grapeseed oil is my top choice—it’s light, clean, and has a high smoke point. Vegetable oil works fine too. Avoid extra virgin olive oil, which can taste heavy and mask the chilli complexity.
How do I know when my chilli oil recipe is ready?
Taste it starting on day 3. You’re looking for a good balance of heat and flavor. The oil should have a rich chilli color (deep red to orange-red) and smell intensely of chillies and garlic. If it tastes flat, wait another day or two.
Can I gift my homemade chilli oil recipe to friends?
Absolutely! It makes an excellent gift. Pour into attractive bottles, add a handwritten label with the date and ingredients, and include storage instructions. Most people are thrilled to receive homemade chilli oil.
Does chilli oil go bad?
Yes, eventually. Properly stored chilli oil lasts 3-4 weeks at room temperature, 2 months in the fridge, or 6-8 months frozen. Signs of spoilage include mold, cloudiness that doesn’t clear, slimy texture, or off-smells. When in doubt, throw it out.
Can I make chilli oil without garlic?
Yes, but garlic adds incredible depth and complexity. If you’re avoiding garlic for dietary reasons, add extra Sichuan peppercorns, sesame seeds, or dried herbs for flavor compensation. Your chilli oil recipe will still be good, just different.
What if I want to make a large batch for storage?
You can easily multiply the recipe. Just maintain the same proportions. For long-term storage, freeze in ice cube trays as mentioned earlier. This gives you perfect portions without the worry of spoilage.
Should I strain my finished chilli oil recipe?
That’s personal preference. Straining gives you a cleaner-looking oil but removes some flavor particles. I prefer leaving the ingredients in for maximum flavor, but if you want a refined appearance, strain through fine cheesecloth after your infusion period.
Final Thoughts
Making a chilli oil recipe is genuinely one of the easiest ways to level up your cooking game. You’re not just creating a condiment—you’re crafting a flavor multiplier that’ll make ordinary dishes taste extraordinary. Start with the basic recipe, taste it daily during infusion, and adjust to your preferences. Once you’ve made it a few times, you’ll develop an intuition for what works. Then start experimenting with variations. Try it with your favorite dishes, whether that’s drizzled over homemade apple sauce for an unexpected sweet-spicy combination, or alongside squid game cookies for a conversation-starting contrast. The beauty of homemade chilli oil is that it’s forgiving, flexible, and delivers results that’ll make people ask for your recipe. And now you’ve got it—use it well.


