
Making a cherry jam recipe at home is one of those kitchen projects that feels fancy but honestly couldn’t be simpler. You’re basically cooking fruit, sugar, and a little lemon juice until it gets thick and jammy—no fancy equipment needed, just patience and a decent pot. I’ve made batches that turned out restaurant-quality, and I’m going to walk you through exactly how to do it without overthinking it.
Table of Contents
Why Homemade Jam Beats Store-Bought
There’s something satisfying about opening a jar of jam you made yourself. Store-bought versions are loaded with preservatives and often taste like they’re trying too hard. Your homemade version? It tastes like actual cherries. You control the sweetness, the texture, and whether you want it chunky or smooth. Plus, the smell filling your kitchen while it cooks is worth the effort alone. If you’re looking to expand your kitchen skills, learning proper jam-making technique opens doors to other preserves and canning projects.
Ingredients You Need
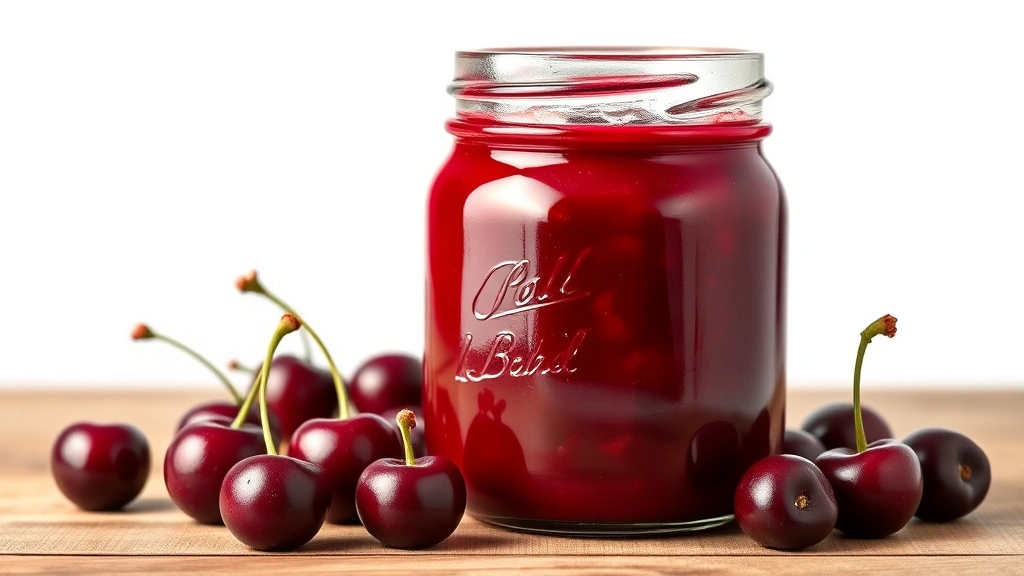
Let’s keep this straightforward. You need fresh cherries—about 2 pounds pitted. Sugar (2 cups), fresh lemon juice (2 tablespoons), and that’s genuinely it. Some people add a tiny pinch of salt or a splash of vanilla, but we’re starting with the basics. The ratio matters: roughly equal parts fruit and sugar by weight. Fresh cherries are best, but frozen works fine if you thaw them first. Don’t use canned—the texture won’t cooperate.
Prep Work Matters
This is where most people get lazy and regret it. Pit those cherries properly. A cherry pitter makes this about 10 times easier than using a knife, and your fingers will thank you. If you don’t have a pitter, a small paring knife works—just cut around the pit and twist. Measure your sugar accurately. Too little and your jam won’t set properly; too much and it becomes candy rather than jam. Weigh if you can, measure if you must. Get your jars clean and ready before you start cooking. This isn’t optional—you want them sterilized and warm when you’re ready to fill them.
Three-Step Cooking Method
Step One: Combine and Heat
Dump your pitted cherries into a heavy-bottomed pot (stainless steel or copper work best). Add the sugar and lemon juice. Stir it together and let it sit for 15 minutes. This lets the fruit start releasing its juices. Then turn the heat to medium-high. You’re looking for a rolling boil—not a timid simmer, a real boil where bubbles break the surface aggressively. This usually takes 10-15 minutes to reach.
Step Two: Maintain the Boil
Once you hit that rolling boil, keep it going. Stir occasionally (every 5 minutes or so) to prevent sticking on the bottom. Skim off the foam that rises to the top with a spoon—that’s just impurities and excess pectin rising up. This step typically lasts 20-30 minutes. Don’t walk away completely; jam can go from perfect to scorched faster than you’d think. If you’re planning other recipes alongside your jam-making, consider timing it with something like how to steam broccoli in microwave as a quick side project.
Step Three: Cool and Jar
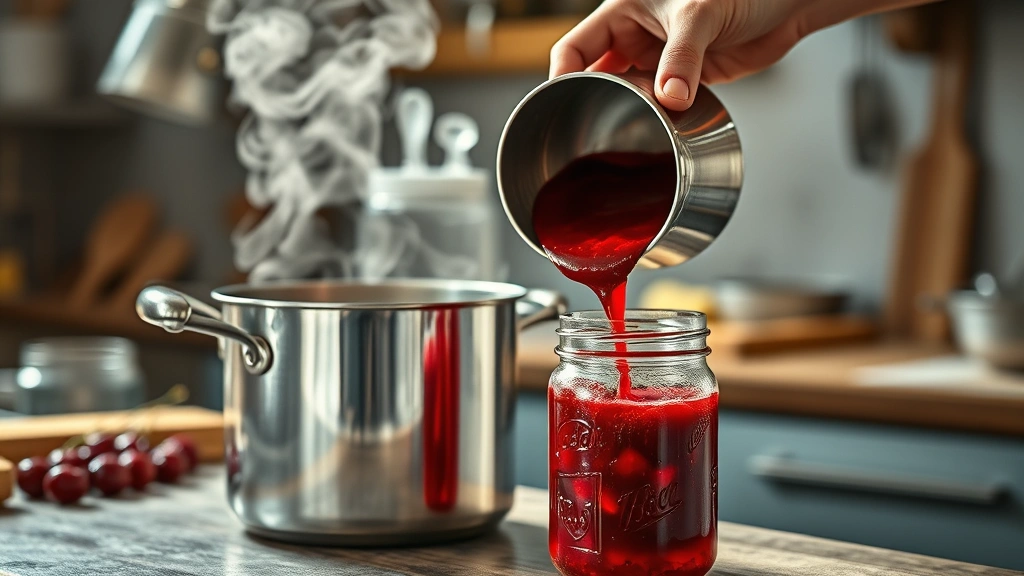
Once your jam reaches the right consistency (we’ll talk about testing in a second), remove it from heat. Let it cool for 5 minutes, then carefully ladle it into your warm, sterilized jars. Leave about ¼ inch of headspace. Wipe the rims clean, place lids on top, and screw the bands on finger-tight. Some people process these in a water bath for shelf stability; others just let them cool and store in the fridge. Both work—water bath processing gives you shelf-stable jars for gifts or long-term storage.
Testing for Perfect Doneness
This is the make-or-break moment. You need to know when to stop cooking. The wrinkle test is your friend: put a small spoonful of jam on a chilled plate (keep one in your freezer for this). Let it cool for a minute, then push it with your finger. If it wrinkles and doesn’t flow back together immediately, you’re done. If it’s still runny, keep cooking and test again in 2 minutes. The temperature should hit around 220°F on a candy thermometer, but the wrinkle test is more reliable. Different cherry varieties release pectin at different rates, so timing varies—anywhere from 25-40 minutes of boiling is normal.
Jarring and Storage
Hot jam in hot jars is the key to proper sealing. If you’re water-bath processing, submerge filled jars in boiling water for 10 minutes, then remove and let cool completely—you’ll hear the lids pop as they seal. If you’re refrigerator-storing, just let the jars cool on the counter, then move to the fridge once they’re room temperature. Properly sealed jars last 1-2 years in a cool, dark cupboard. Opened jars last about 3 weeks in the fridge. The flavor actually improves slightly over the first few weeks as everything melds together.
Flavor Variations to Try
Once you’ve nailed the basic recipe, experiment. Add a cinnamon stick while cooking for warmth. A splash of almond extract (just ¼ teaspoon) adds sophistication. Combine cherries with raspberries for a different profile. Some people add a vanilla bean or a pinch of cardamom. You could even incorporate this into other recipes—imagine how to make edible cookie dough with cherry jam swirled through it. The beauty of homemade jam is you’re not locked into one flavor profile. Play around and find what works for your palate.
Troubleshooting Common Issues
Jam too runny? You didn’t cook it long enough. Next batch, keep the heat higher and test more frequently. Jam too thick or crystallized? You either cooked it too long or used too much sugar. Cut it with a little water and reheat gently. Jam tastes too sweet? Add more lemon juice next time—it balances sweetness and actually helps with setting. Mold on top of opened jar? That means it wasn’t sealed properly or wasn’t stored cool enough. Always use clean spoons when taking jam out; contamination is the main culprit for spoilage.
Frequently Asked Questions
Do I need special equipment to make jam?
Nope. A heavy pot, a wooden spoon, a thermometer (optional), and clean jars are all you need. A cherry pitter makes prep easier but isn’t mandatory. A canning kit with a jar lifter is nice if you’re processing jars, but a kitchen towel works fine.
Can I use frozen cherries?
Absolutely. Thaw them completely first and drain excess liquid. The jam-making process is identical. Frozen fruit sometimes sets slightly differently due to pectin loss, so test carefully.
How much jam does this recipe make?
About 4-5 cups of finished jam, depending on how much it reduces. That’s roughly 6-8 standard jars. Yields vary based on how long you cook it and how much water the cherries release.

What’s the difference between jam and jelly?
Jam has fruit pieces throughout; jelly is strained smooth. This recipe makes jam. If you want jelly, strain the cooked mixture through cheesecloth before jarring.
Can I make this without added sugar?
Technically yes, but your jam won’t set properly. Sugar isn’t just sweetness—it’s what makes jam gel. You could use honey or other sweeteners, but you’d need to adjust ratios and the results vary. Stick with regular sugar for reliable results.
How do I know if my jam has gone bad?
Look for mold, smell for fermentation, or taste a tiny bit. If it smells off or tastes fizzy, toss it. Properly stored jam lasts years, so this is rare. Trust your senses.
Can I double the recipe?
Yes, but keep the batch size reasonable—no more than 5 pounds of fruit at once. Larger batches cook unevenly and take forever to reach setting point. Make two batches instead.
What if I want a chunkier texture?
Roughly chop some cherries instead of pitting them whole, or add a handful of whole pitted cherries toward the end of cooking. They’ll stay firmer and give you that texture.
Final Thoughts
A cherry jam recipe doesn’t need to be complicated. Follow the three steps, test for doneness properly, and you’ll have jam that tastes homemade because it is. Start with this basic formula, then branch out into variations once you’re comfortable. The whole process takes about an hour from pit to jar, and you’ll end up with something better than anything you can buy. Your kitchen will smell amazing, and you’ll have a genuine reason to feel proud of yourself. That’s worth the minimal effort involved.


