
A cheesy rice recipe is one of those comfort food staples that belongs in every home cook’s rotation. Whether you’re feeding a family on a weeknight or bringing a dish to a potluck, creamy, cheesy rice hits different—it’s simple, satisfying, and honestly foolproof once you nail the technique. I’ve made this dish hundreds of times, and I’m going to walk you through exactly how to pull off creamy perfection every single time.
Table of Contents
Gather Your Ingredients
Before you even think about turning on the stove, let’s talk about what you actually need. The beauty of a cheesy rice recipe is that it doesn’t demand fancy ingredients—just quality basics. You’ll want 2 cups of rice (I prefer arborio or short-grain white rice for creaminess), 4 cups of chicken or vegetable broth, 1 cup of whole milk, 4 ounces of sharp cheddar cheese (freshly shredded, not pre-shredded), 2 tablespoons of butter, half a diced onion, 2 cloves of minced garlic, salt, and black pepper. Some people add a pinch of cayenne or smoked paprika—I do, because it deepens the flavor without making it spicy. Don’t skip the butter; it’s not just for taste, it’s structural.
Choose the Right Rice Type
This is where a lot of people mess up. Long-grain white rice will work, but it won’t give you that creamy texture you’re after. Arborio rice, which is traditionally used for risotto, releases starch as it cooks—and that starch is what creates the creamy sauce you want. If you can’t find arborio, short-grain white rice or even sushi rice will do the job. The key is avoiding jasmine or basmati rice, which stay separate and fluffy. You want rice that wants to stick together and absorb liquid. This is the foundation of a truly excellent cheesy rice recipe.
Prep Work Matters
I know prep work sounds boring, but trust me—it’s the difference between a good dish and a great one. Dice your onion into small pieces, mince your garlic, and shred your cheese fresh. If you use pre-shredded cheese from a bag, it won’t melt smoothly because of the anti-caking agents they add. Fresh-shredded melts like butter. Have your broth warm in a separate pot—this is important. Cold broth will shock the rice and mess with the cooking process. Measure everything out and set it within arm’s reach of your stove. Once you start cooking, you can’t walk away.
Toast Your Rice First
Here’s the pro move that separates good from great: toast your rice before adding liquid. Heat your butter in a large, heavy-bottomed pot or Dutch oven over medium heat. Add your diced onion and cook for 2-3 minutes until it’s soft and fragrant. Throw in your minced garlic and cook for another 30 seconds. Now add your rice and stir constantly for about 2 minutes. You want every grain coated in butter and slightly translucent at the edges. This toasting step develops nutty flavor and helps the rice maintain its structure while still getting creamy. It’s the same technique used in risotto, and it works magic.
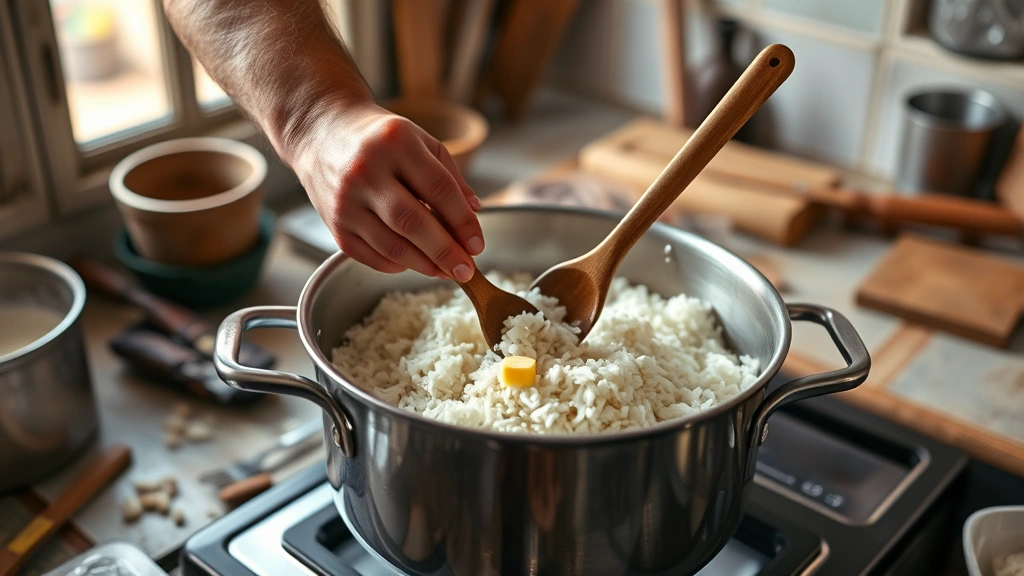
Add Liquid Slowly
This is where patience becomes your best friend. Pour in your warm broth about 1 cup at a time, stirring frequently. Don’t just dump all 4 cups in at once—that’s the shortcut that ruins everything. Let each addition of liquid get mostly absorbed before you add more. This process takes about 15-18 minutes total. Stir every minute or so. You’re not making risotto where you stir constantly, but you’re also not just letting it sit. The goal is to keep the rice moving and help release that starch that creates creaminess. As you add the last cup of broth, also add your milk. Keep the heat at medium—too high and the bottom burns, too low and it takes forever.
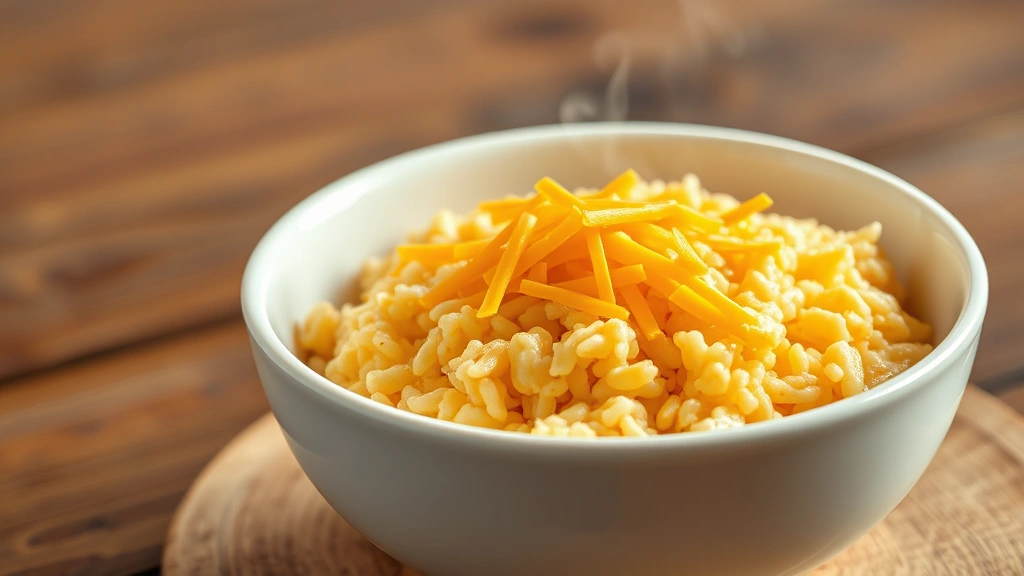
Melt in the Cheese Magic
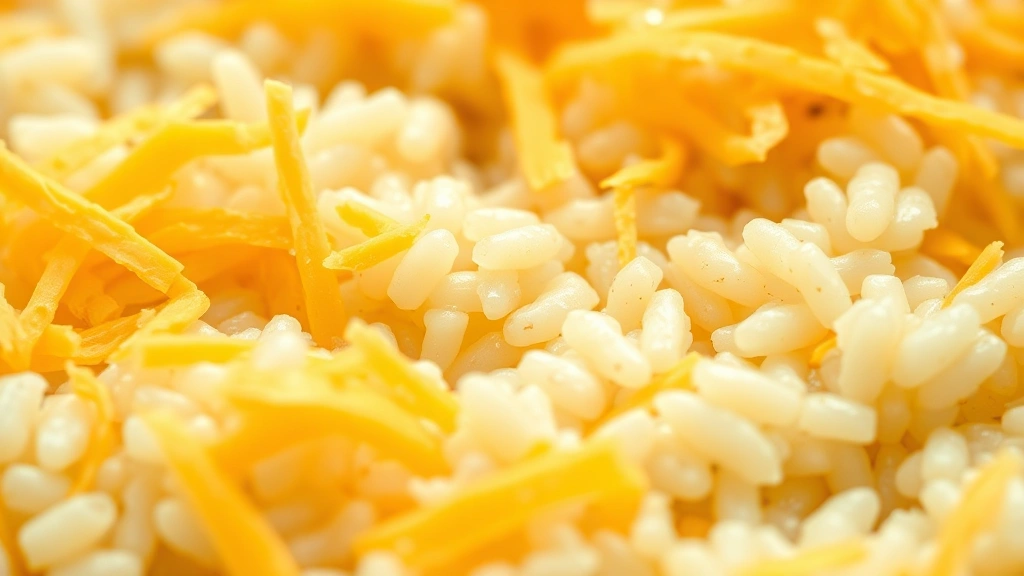
When the rice is tender but still has a tiny bit of bite (al dente, if you want to get fancy), it’s time for the cheese. Turn the heat down to low. Add your freshly shredded cheddar in handfuls, stirring after each addition until it’s completely melted. The residual heat will melt it beautifully without breaking the sauce. If your mixture seems too thick, you can add a splash more warm broth or milk. If it’s too thin, just let it sit for a minute or two—it’ll continue to thicken as it cools slightly. This is also a great time to stir in any extra butter if you want it extra creamy. Don’t judge me; I always do.
Season and Taste Adjust
Now taste it. Seriously, taste it before you serve it. Add salt and black pepper to your liking. Remember that cheese is salty, so go easy at first. If you want depth, add a pinch of cayenne or smoked paprika. Some people add a teaspoon of Dijon mustard—it doesn’t make it taste like mustard, it just amplifies the cheese flavor. This is your dish; make it taste like you want it to taste. A cheesy rice recipe is incredibly forgiving at this stage. Underseasonalized? Add more salt. Too rich? A squeeze of lemon juice balances it out. The rice should be creamy, cheesy, and absolutely comforting.
Common Mistakes to Avoid
Let me save you some grief. First mistake: using cold broth. Always warm your liquid first. Second: not toasting the rice. You lose that nutty depth. Third: adding all the liquid at once. You lose the creaminess. Fourth: using pre-shredded cheese. It won’t melt right. Fifth: cooking on high heat. You’ll burn the bottom and have crunchy rice on top. Sixth: not tasting as you go. You can’t fix it after it’s already on the plate. Seventh: walking away while it cooks. This needs attention. These aren’t just suggestions—they’re the difference between mediocre and memorable.
Variations and Upgrades
Once you’ve nailed the basic technique, you can build on it. Add crispy bacon and some fresh thyme for a more sophisticated version. Stir in some roasted broccoli or mushrooms for vegetables. Mix in some cooked chicken to make it a complete meal. Try different cheeses—gruyere, fontina, or a mix of sharp cheddar and parmesan. For a fall version, check out our best fall recipes for seasonal inspiration. You could also make this in a Dutch oven and finish it in the oven with a breadcrumb topping for a baked version. The foundation is solid; the variations are endless. Pair it with sides like steamed asparagus or BBQ beans for a complete meal. You could even serve it alongside air fryer sweet potatoes for a unique combination, or make it a taco night side with al pastor.
Frequently Asked Questions
Can I make this ahead of time?
Yes, but it’s best served fresh. If you need to make it ahead, cook it until the rice is almost done, then finish cooking and add cheese just before serving. You can reheat it gently on the stove with a splash of milk to restore creaminess. Microwaving works but can make it a bit grainy.
What if my rice is too thick?
Add warm broth or milk a quarter cup at a time, stirring well. It’ll loosen up quickly. What if it’s too thin? Let it sit for a few minutes off heat—it continues to thicken as it cools slightly. If that doesn’t work, mix a tablespoon of cornstarch with cold milk and stir it in while the rice is on low heat.
Can I use a rice cooker?
Not really. This recipe needs constant attention and stirring to develop creaminess. A rice cooker won’t give you that. Stick to the stovetop method.
What cheese works best?
Sharp cheddar is my go-to because it has the most flavor. Gruyere is excellent if you want something more sophisticated. Avoid American cheese and anything processed. Fresh, real cheese melts better and tastes infinitely better.
How long does it keep?
Refrigerate in an airtight container for up to 3 days. Reheat gently on the stove with a splash of milk. It won’t be quite as creamy as the first day, but it’s still delicious.
The Bottom Line
A cheesy rice recipe done right is pure comfort on a plate. It’s not complicated—it’s just rice, cheese, broth, and a little patience. The five-step process I’ve laid out here (toast the rice, add liquid slowly, melt in the cheese, season to taste, and serve) is foolproof. Start with quality ingredients, pay attention while you’re cooking, and taste as you go. You’ll end up with creamy, cheesy rice that tastes like you spent hours on it, even though you didn’t. That’s the kind of cooking I love—simple technique, big results, and a dish that makes people happy. Give it a try this week. Your family will thank you.


