
A cashew cheese recipe is one of those game-changing kitchen hacks that’ll make you wonder why you didn’t discover it sooner. Whether you’re going fully plant-based, dealing with dairy sensitivities, or just looking to expand your culinary toolkit, this creamy, tangy spread rivals traditional cheese in flavor and texture. The best part? You can whip up a batch in five minutes with nothing more than raw cashews, a blender, and a few pantry staples.
Table of Contents
What Is Cashew Cheese?
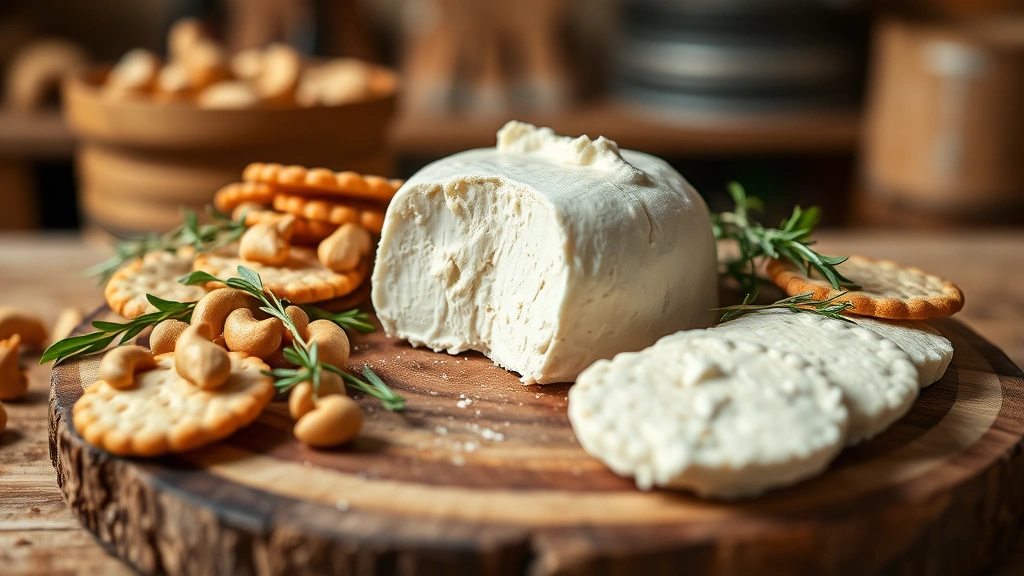
Cashew cheese is a plant-based alternative made from blended raw or soaked cashews. It’s not trying to be a fake-out—it’s its own delicious thing. The natural fat content in cashews creates that creamy, spreadable consistency you want in cheese, while the subtle earthiness pairs perfectly with savory flavors. Unlike some dairy-free spreads that taste like cardboard, a proper cashew cheese recipe actually tastes good enough that omnivores will happily eat it too.
Think of it as a bridge between traditional cheese and plant-based eating. You get the richness, the tang (when you add the right ingredients), and the versatility without the animal products.
Why Cashews Work Best
Cashews are the MVP of vegan cheese-making because they’re naturally buttery and high in fat. Unlike almonds or sunflower seeds, cashews don’t need hours of soaking to blend into a silky paste. Their mild flavor means they won’t overpower your other ingredients, and they’re neutral enough to work in both savory and sweet applications.
The key is using raw cashews, not roasted. Roasted ones have already lost some moisture and won’t blend as smoothly. Raw cashews still contain their natural oils, which is exactly what you need for that cheese-like texture. If you can only find roasted cashews at your local store, they’ll still work—just expect slightly less creaminess.
Basic 5-Minute Recipe
Here’s the stripped-down version that works every single time:
Ingredients:
- 1 cup raw cashews (soaked 15-30 minutes in hot water, or use raw unsalted)
- 3 tablespoons nutritional yeast
- 2 tablespoons lemon juice or apple cider vinegar
- 1 teaspoon garlic powder
- ½ teaspoon sea salt
- ¼ cup water (add more as needed)
Instructions:
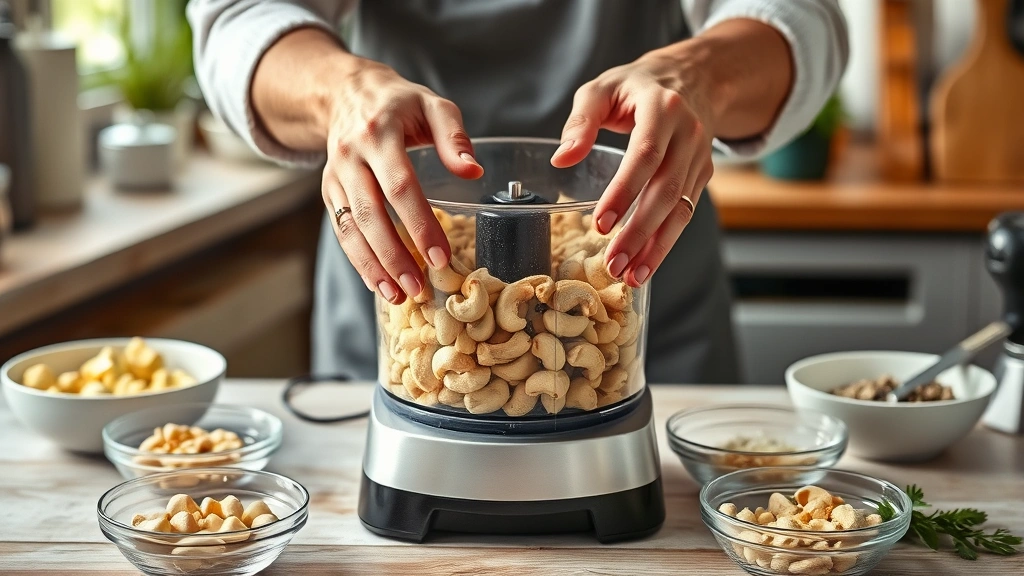
- Drain your soaked cashews and add them to a food processor or high-powered blender
- Add nutritional yeast, lemon juice, garlic powder, and salt
- Blend on high for 2-3 minutes, stopping to scrape down the sides
- Add water one tablespoon at a time until you reach your desired consistency
- Taste and adjust seasonings—more lemon for tang, more garlic for punch
- Transfer to a container and refrigerate
That’s it. You now have homemade vegan cheese that’ll last a week in the fridge. The nutritional yeast is crucial here—it provides that umami, cheesy flavor you’re after. Don’t skip it or substitute it with regular yeast.
Flavor Variations to Try
Once you’ve mastered the basic cashew cheese recipe, the fun starts. Here are some combinations that actually work:
Herb & Garlic: Add 1 tablespoon fresh dill, 1 teaspoon thyme, and an extra clove of garlic. Perfect on crackers or as a spread alongside black lentil recipes.
Smoky Paprika: Mix in 1 teaspoon smoked paprika and a pinch of cayenne. This version works beautifully on sandwiches and brings serious depth.
Everything Bagel: Fold in 1 tablespoon everything bagel seasoning after blending. Use this on toast, in wraps, or as a dip.
Roasted Red Pepper: Blend in ½ cup roasted red peppers (jarred works fine) for a naturally sweet, slightly smoky version. You might need less water since peppers add moisture.
Truffle & Black Garlic: For the fancy-pants version, add ½ teaspoon truffle oil and 1 teaspoon black garlic paste. This stuff is restaurant-quality.
The beauty of making your own is that you control every ingredient. Allergic to garlic? Leave it out. Want more tang? Add extra lemon juice. This flexibility is why homemade beats store-bought every time.
Storage and Shelf Life
Your finished cashew cheese will keep in an airtight container in the refrigerator for 5-7 days. The lemon juice acts as a preservative, but it’s not a miracle worker. After a week, you might notice the flavor getting a bit funky or the texture separating slightly.
Freezing works, but it changes the texture. If you freeze it, plan to use it in cooked applications (melted on pizza, stirred into pasta) rather than as a spread. Thaw it in the fridge overnight, and it’ll be slightly grainier than fresh but still delicious.
Pro move: Make a double batch and portion it into ice cube trays before freezing. Pop out individual cubes for smaller uses or to test flavor variations without committing to a full container.
Common Problems Solved
It’s Too Thick: Add water one teaspoon at a time. Sounds tedious, but it prevents you from ending up with soup. Blenders are aggressive, and water goes a long way.
It Won’t Blend Smooth: Your blender might not be powerful enough, or your cashews are too dry. Soak them longer next time—30 minutes in hot water is the sweet spot. If you’re using a standard blender (not a Vitamix), you might need to work in smaller batches.
Tastes Bitter: You’ve either over-blended or your cashews have gone rancid. Raw cashews can turn bitter if they’re old or stored poorly. Buy from stores with good turnover, and store them in the fridge or freezer at home.
Separates in the Container: This is normal. Just stir it back together before using. The oil naturally rises to the top—it’s not a sign something went wrong. In fact, that oil is what makes it creamy.
Too Bland: Nutritional yeast quality varies wildly. Some brands taste like nothing, others taste like the ocean. Try a different brand, and don’t be shy with the salt and lemon juice. Taste as you go.
Creative Serving Ideas
Now that you’ve got your cashew cheese recipe dialed in, let’s talk about what to actually do with it:
Spread It: On crackers, bread, or toast. Add some apple slices to prevent browning alongside for a sweet-savory combo.
Dip It: Thin it with a bit more water and use it as a dip for vegetables, pretzels, or chips. The herb and garlic version is especially good here.
Melt It: Spoon it onto pizza before baking, stir it into pasta for a creamy sauce, or use it as a base for mac and cheese.
Layer It: Use it in lasagna, between layers of vegetables, or as a filling for stuffed peppers.

Dress Salads: Thin it out more and use it as a creamy salad dressing. The everything bagel version is particularly good on grain bowls.
Sandwich Star: This is the obvious one, but it bears repeating. It’s a game-changer on sandwiches, wraps, and paninis.
Getting the Perfect Texture
The difference between mediocre and excellent cashew cheese comes down to texture. Here’s what you’re aiming for:
Spreadable But Not Runny: You want something that holds its shape but spreads easily with a knife. Think of the consistency of cream cheese or soft butter, not hummus (too thick) or ranch dip (too thin).
Blending Method Matters: A food processor gives you more control than a blender. You can pulse it and stop exactly when you want. A high-powered blender (Vitamix, Ninja) will turn it into butter if you’re not careful. If you’re using a regular blender, blend in 30-second bursts and check frequently.
Water Addition is Key: Start with ¼ cup and add more gradually. Once you add too much, you can’t take it back. A tablespoon of water seems small, but in a cup of cashews, it makes a noticeable difference.
Temperature Affects Consistency: Cold cashew cheese is thicker than room-temperature. If you make it and it seems too thin, chill it for an hour and it’ll firm up slightly. If it’s too thick, let it sit at room temperature for 20 minutes before serving.
Frequently Asked Questions
Can I use soaked cashews instead of raw?
Yes, absolutely. Soaking them for 15-30 minutes in hot water actually makes them blend more smoothly and creates a creamier final product. Some people prefer soaking because it removes any dust or debris. If you’re using a powerful blender, you can skip soaking, but the texture might be slightly less silky.
What’s the difference between nutritional yeast and regular yeast?
Nutritional yeast is deactivated yeast that’s been processed to be shelf-stable and nutrient-dense. It has a cheesy, umami flavor. Regular baking yeast is alive and will ferment your cheese—definitely not what you want. They’re completely different products. Get nutritional yeast; it’s the only option that works here.
Can I make this without a food processor?
A blender works, but you might need to soak your cashews longer and add more water. Immersion blenders won’t cut it—the motor isn’t strong enough. If you don’t have either, a high-powered blender is your best bet. Some people have reported success with a mortar and pestle, but you’d be there for hours.
Is this actually healthier than dairy cheese?
It’s different, not necessarily better. Cashew cheese is lower in saturated fat, higher in unsaturated fat, and contains no cholesterol. It’s also usually lower in sodium than aged cheeses. But it’s not a health food—it’s still calorie-dense because of the fat content. Use it like you’d use regular cheese: as a flavoring, not the main event.
Can I use roasted and salted cashews?
You can, but the results won’t be quite as creamy since roasted cashews have less moisture. You might need to add a bit more water. Also, taste it before adding salt—roasted salted cashews mean you might not need the full teaspoon of salt in the recipe.
How long does it actually take to make?
If your cashews are already soaked, 5 minutes is accurate. If you’re starting from scratch, add 15-30 minutes for soaking. From blender to finished product, hands-on time is about 5 minutes.
Can I make this nut-free?
Not really. Cashews are what make this work. Sunflower seeds create a grainier texture, and seeds don’t have the same fat content. You could try tahini-based cheese, but that’s a different recipe entirely. If you have a nut allergy, this unfortunately isn’t the option for you.


