
A burnt ends recipe is your ticket to BBQ legend status—these caramelized, crispy-edged beef brisket cubes are pure smoky gold. Whether you’re a seasoned pitmaster or firing up your first smoker, I’m walking you through exactly how to nail this Kansas City classic that’ll have your neighbors asking what smells so incredible.
Table of Contents
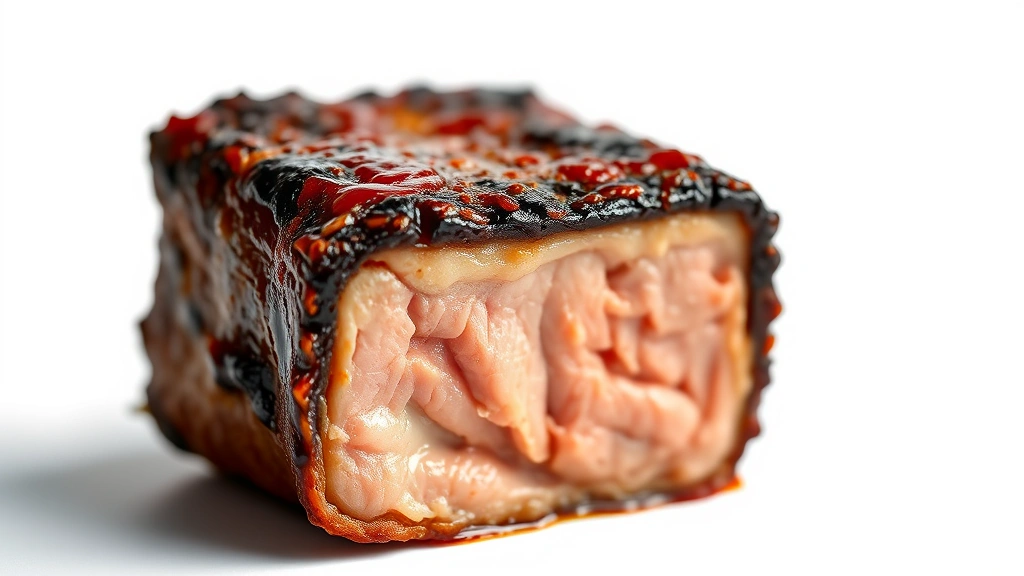
What Are Burnt Ends?
Burnt ends aren’t actually burnt—they’re the caramelized, bark-covered cubes cut from the point (deckle) end of a smoked brisket. This cut has more intramuscular fat than the flat, which renders beautifully during smoking and creates those crispy, charred edges everyone craves. The Kansas City style involves smoking the whole brisket first, then cubing the point, tossing it with sauce, and finishing it in the smoker until the exterior gets that gorgeous, sticky glaze.
The magic happens because you’re essentially double-smoking these cubes. First pass renders the fat and develops smoke flavor. Second pass caramelizes the sauce and creates textural contrast—crunchy bark outside, tender and juicy inside. It’s not complicated, but timing and temperature control matter.
Choosing Your Brisket
You need a full packer brisket (12-16 pounds is ideal) with good marbling and a decent fat cap. Look for meat that’s bright red, not dark or gray. The point should be clearly separated from the flat—you want that distinct muscle to work with. Skip the ultra-lean cuts; fat is your friend here. A whole packer gives you the flat for slicing and the point for burnt ends.
Buy from a butcher counter if possible. They’ll trim it properly and can answer questions about the specific cut. Avoid pre-packaged briskets that have been sitting under lights for days. Fresh or frozen is better than that.
Prep and Seasoning
Trim the fat cap to about ¼ inch—you want some protection, not a thick, chewy layer. Remove any silver skin from the bottom. Pat the meat completely dry with paper towels; moisture is the enemy of bark formation.
For seasoning, keep it simple: kosher salt, coarse black pepper, and optional garlic powder. This is called “dalmatian” rub in BBQ circles, and it lets the smoke and meat shine. If you prefer more flavor, add brown sugar, paprika, and cayenne. Apply the rub generously the night before, or at least 40 minutes before smoking. The salt needs time to penetrate.
Smoking Setup Essentials
You’ll need a smoker that holds 225-250°F steadily. Offset barrel smokers, kamados, and pellet grills all work. Set up for indirect heat—the brisket shouldn’t sit directly over coals or flames. Use a water pan to stabilize temperature and add humidity. Fill it with water, not apple juice; you want moisture, not competing flavors.
Choose your wood wisely. Hickory, oak, or mesquite are traditional for beef. Start with a mix of hickory and oak if you’re new to this. Avoid softwoods like pine or cedar. You want smoke, not acrid creosote coating everything. Use a meat thermometer with a remote probe—checking the brisket constantly opens your smoker and drops temperature.
First Smoke Phase
Place the brisket fat-side up on the grate, away from direct heat. Aim for 225-250°F. Smoke for about 1 hour per pound of meat, roughly 12-16 hours for a full packer. You’re looking for an internal temperature of 190-203°F in the thickest part of the point.
Around the 4-hour mark, the brisket hits “the stall”—temperature plateaus as evaporative cooling takes over. Some pitmasters wrap in foil (“the Texas crutch”) to power through. Others wrap in butcher paper for a compromise. If you wrap, do it around 165°F internal temp. Unwrapped takes longer but builds more bark.
Don’t spritz or mop the brisket constantly. Every time you open the smoker, you’re losing heat and smoke. Once wrapped, you can spritz with apple juice every hour if you want, but it’s optional. The goal is patience and stable temperature.
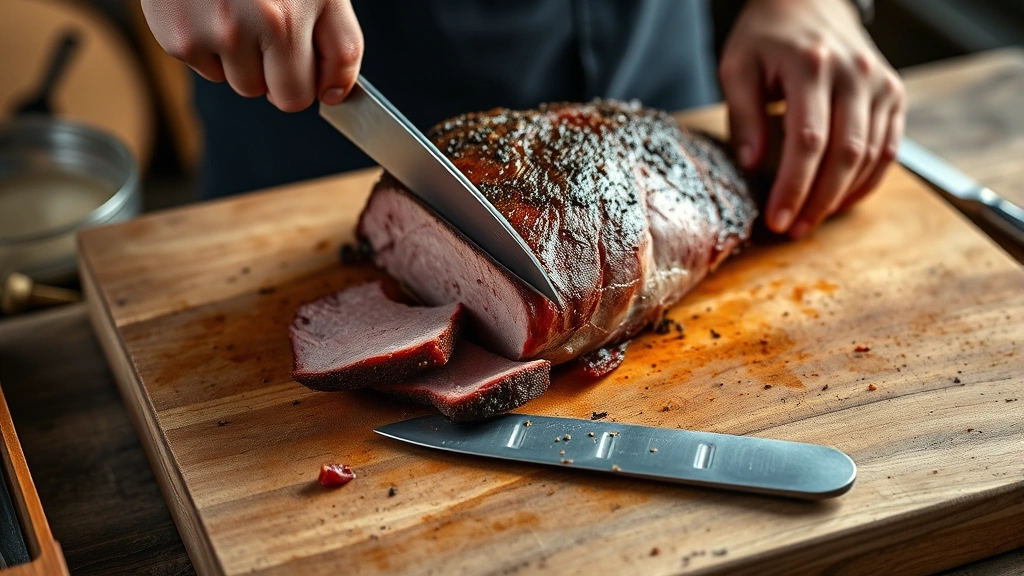
Cubing and Saucing
Once the brisket hits 190°F, remove it and let it rest for 15-20 minutes. Separate the point from the flat with a sharp knife—they naturally separate along the seam. Save the flat for slicing and sandwiches. The point is your burnt ends canvas.
Cut the point into ¾-inch to 1-inch cubes. Don’t stress about perfect uniformity; variation in size is fine. Toss the cubes in a disposable aluminum pan with your sauce. Traditional burnt ends sauce is brown sugar, butter, and BBQ sauce simmered together. Make it sweet and sticky—the caramelization during the second smoke is critical.
A basic sauce: ½ cup brown sugar, ¼ cup butter, 1 cup BBQ sauce (your favorite brand), 2 tablespoons honey, 1 tablespoon Worcestershire. Heat gently until combined and brush generously over the cubes. Don’t be shy.
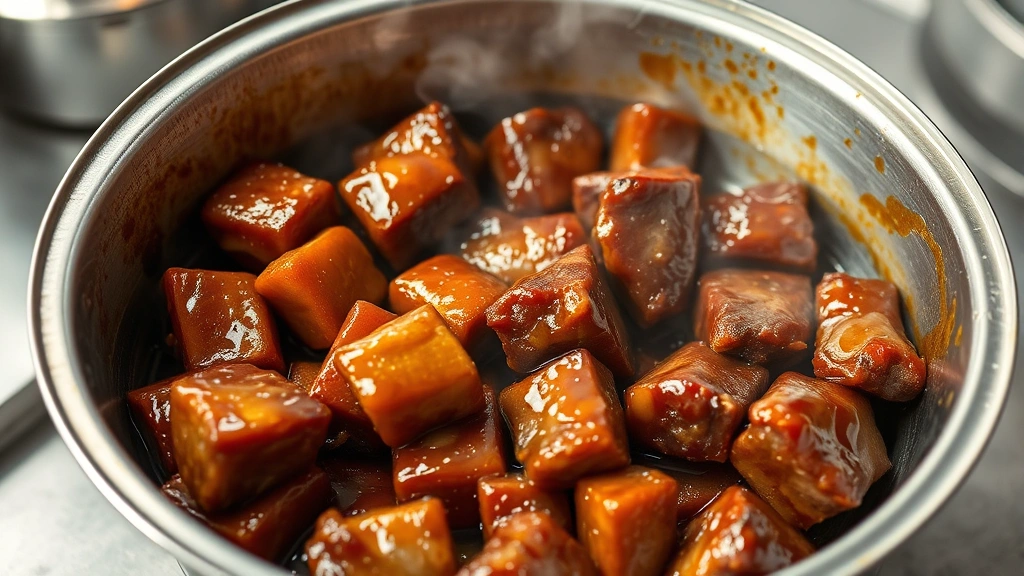
Finishing Phase
Return the pan of sauced cubes to the smoker at 250°F for 1.5 to 2 hours. Stir occasionally—every 30 minutes is good—and add more sauce if needed. The cubes should caramelize and develop a sticky, dark exterior. The sauce will bubble around the edges and the meat will pull apart easily with a fork.
You’re not trying to cook the meat further; it’s already done. This phase is all about caramelization and bark development. When the cubes look dark and sticky, with crispy edges, they’re ready. The internal temperature doesn’t matter as much now—you’re chasing texture and color.
Slicing and Serving
Serve burnt ends hot, straight from the pan. They’re best eaten with your hands or a fork. The bark should crunch slightly before giving way to tender, juicy meat. Drizzle any remaining sauce over the top. They’re incredible on their own, but some folks serve them on a bun with coleslaw for a sandwich.
Burnt ends hold well in a warm cooler for a few hours. If you need to make them ahead, refrigerate them in the sauce and reheat gently in a 325°F oven for 20-30 minutes, covered with foil. They won’t be quite as good as fresh, but still excellent.
Troubleshooting Common Issues
Cubes are tough or chewy: You either didn’t smoke the brisket long enough initially, or you’re not getting enough intramuscular fat breakdown. Make sure the point reaches 190°F+ before cubing. The point should shred easily; if it doesn’t, it needs more time.
Sauce is too thin or doesn’t stick: Use less liquid in your sauce recipe. Brown sugar and butter should dominate. If your sauce is runny after the second smoke, you added too much liquid or your smoker temperature was too low.
Bark is soggy, not crispy: Your smoker might be too humid, or you’re wrapping too early. Try smoking unwrapped longer, or use butcher paper instead of foil. Also, ensure your sauce isn’t overly wet—it should coat, not drench.
Cubes are dry: The point wasn’t rendered enough in the first smoke, or you cooked them too long in the second phase. Don’t exceed 2 hours for the finishing phase. The point is fatty; it shouldn’t dry out if you’re not overcooking.
Frequently Asked Questions
Can I use just the flat for burnt ends?
Technically yes, but it’s not ideal. The flat is leaner and won’t have the same tender, juicy texture. The point is specifically suited for burnt ends because of its higher fat content and connective tissue structure. Stick with the point.
How far ahead can I prep the brisket?
You can trim and season it up to 24 hours before smoking. Keep it uncovered in the fridge overnight—this actually helps bark formation. Remove it 30 minutes before smoking to let it come closer to room temperature.
What if my smoker can’t hold 250°F?
You can smoke at 225°F; it just takes longer. Add about 1.5 hours to your total time. Lower temperature can actually produce better bark, so don’t worry if you’re running cool.
Do I need to separate the point before smoking?
No. Smoking the whole packer is easier and gives better results. The point and flat cook at slightly different rates, but separating before smoking complicates temperature management. Separate after smoking when you can see the natural seam.
Can I make burnt ends in the oven?
You can bake smoked brisket cubes with sauce, but they won’t be true burnt ends without smoke. If you don’t have a smoker, consider a pellet grill or even a charcoal kettle with indirect heat and wood chips. The smoke is what defines this dish.
Final Thoughts
A great burnt ends recipe is about respecting the process, not rushing it. Smoke low and slow, let the fat render, cube when ready, sauce generously, and finish with patience. The bark you develop in that second smoke phase is what separates good burnt ends from legendary ones. Your first attempt might not be perfect—temperature management and timing take practice—but even an imperfect batch of burnt ends beats most BBQ you’ll buy. Get your smoker dialed in, grab a quality brisket, and trust the process. You’ve got this. If you want to expand your cooking skills beyond the smoker, check out how to steam carrots for complementary side dishes. And if you’re maintaining your kitchen equipment properly, how to clean a washing machine keeps your cooking space running smoothly. For those who like to set the mood while cooking, how to produce perfume can inspire your kitchen atmosphere. For more on creating ambiance, how to make perfume last longer extends those pleasant scents. And if your smoker setup requires any home repairs, how to patch a hole in drywall handles any accidental damage.


