

A blinchiki recipe is your golden ticket to mastering Russian crepes that’ll have everyone asking for seconds. These delicate, paper-thin pancakes are nothing like their American cousins—they’re elegant, versatile, and honestly, easier to nail than you’d think. In just 20 minutes, you can have a stack of these beauties ready to serve with sour cream, jam, or savory fillings. Whether you’re cooking for a weekend breakfast or impressing guests at brunch, this traditional Russian staple deserves a spot in your kitchen rotation.
Table of Contents
What Are Blinchiki?
Blinchiki are traditional Russian thin crepes that sit somewhere between a delicate pancake and a French crêpe. The key difference? They’re thinner and more tender than American pancakes but slightly thicker and fluffier than French crêpes. Think of them as the Goldilocks of the pancake world—just right in every way. These beauties have been feeding Russian families for generations, and once you master the technique, you’ll understand why. They work equally well for breakfast, lunch, or dessert, making them one of the most versatile recipes in Eastern European cuisine.
Gather Your Ingredients
Here’s what you’ll need for a basic blinchiki recipe that yields about 12-15 crepes:
- 1 cup all-purpose flour
- 2 large eggs
- 1 cup whole milk
- 1/2 cup water (this keeps them thin and delicate)
- 1/4 teaspoon salt
- 1 tablespoon sugar
- 2 tablespoons melted butter (plus extra for the pan)
- A pinch of vanilla extract (optional but recommended)
The beauty of this blinchiki recipe is its simplicity. You’re not wrestling with complicated ingredients or special equipment. Everything in your pantry probably covers this already. The ratio of liquid to flour is crucial—that extra water makes all the difference between thick pancakes and proper blinchiki.
Mixing the Batter
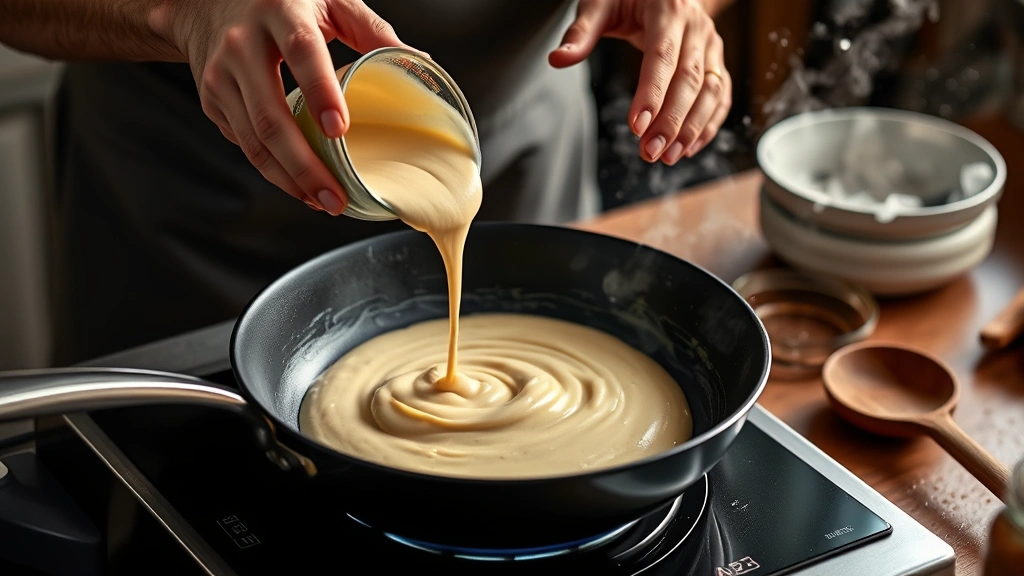
Start by whisking your eggs in a large mixing bowl until they’re lightly beaten. Add the milk and water together—don’t skimp on the liquid, as this is what gives blinchiki their signature thin, delicate texture. Gradually whisk in your flour, salt, sugar, and vanilla, stirring until you’ve got a smooth batter with no lumps. This shouldn’t take more than 2-3 minutes of actual whisking.
Here’s a pro tip: let your batter rest for 5 minutes. This allows the flour to fully hydrate and actually improves the texture of your finished crepes. While you’re waiting, melt your butter and stir it into the batter along with a tiny splash more water if the batter seems too thick. You want consistency like thin pancake batter—it should pour easily but not be watery.
Pan Preparation Technique
Your pan choice matters here. An 8-inch nonstick skillet or crêpe pan is ideal, but honestly, a regular nonstick frying pan works just fine. Heat it over medium-high heat for about 2 minutes until it’s properly hot—you can test this by flicking a tiny drop of water on it; it should sizzle immediately.
Lightly butter the pan before each crepe. This is where many home cooks go wrong—they either use too much butter (creating greasy blinchiki) or too little (causing sticking). A quick swipe with a butter-soaked paper towel is all you need. The pan should be hot enough that the batter sizzles immediately when it hits the surface, but not so hot that it browns too quickly.
Cooking Method Step-by-Step
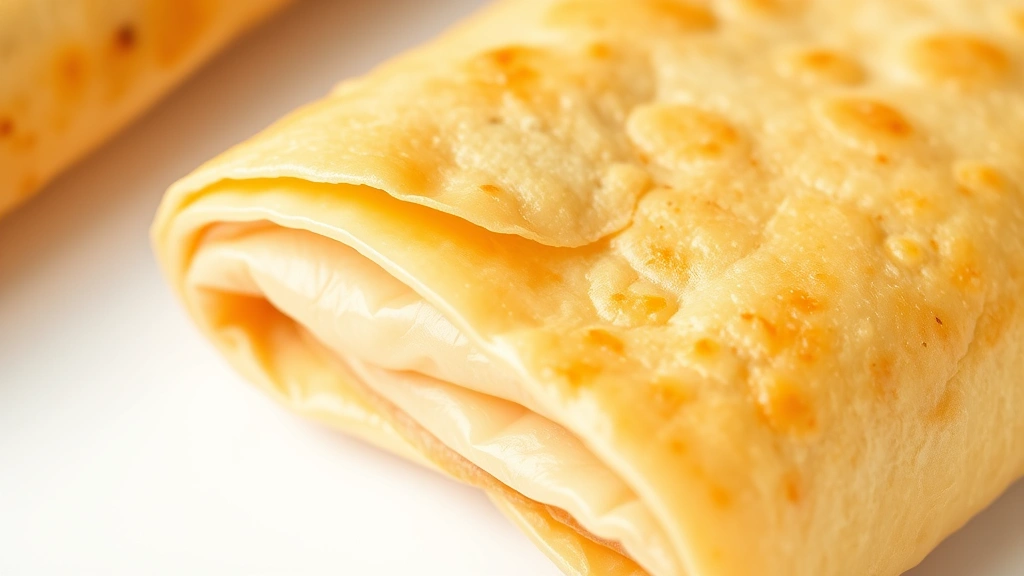
Here’s where the magic happens. Pour about 1/4 cup of batter into the center of your hot, buttered pan. Immediately tilt and rotate the pan in a circular motion—this is the key technique that separates blinchiki from regular pancakes. You’re aiming for an even, thin layer that covers the entire bottom of the pan. If you’ve got holes or thin spots, don’t panic; they add character and are totally normal.
Cook for about 30-40 seconds on the first side until the bottom is light golden and the top looks mostly set but still slightly wet. Here’s the tricky part: flip it. Use a thin spatula and flip it quickly and confidently. Cook the other side for just 15-20 seconds—it’ll be much lighter than the first side, and that’s exactly right. The first side gets the color; the second side just needs to set.
Transfer each finished blinchiki to a plate and repeat with the remaining batter. The whole process for 12-15 crepes should take about 15-18 minutes once you get into a rhythm. Stack them as they cool—they’ll stay warm and pliable, making them easy to fold or fill later.
Filling and Topping Ideas
This is where your blinchiki recipe becomes personal. The traditional Russian way is to serve them with a generous dollop of sour cream and jam—strawberry, apricot, or cherry are classics. But you can get creative. Try spreading a thin layer of chipotle aioli for a savory version, or go classic with bearnaise sauce if you’re serving them with smoked salmon.
For sweet blinchiki, consider cottage cheese mixed with a little sugar and vanilla, fresh berries, Nutella, or even a simple dusting of powdered sugar. For savory applications, sautéed mushrooms, caramelized onions, or ground meat work beautifully. The versatility here is genuinely impressive—these crepes adapt to whatever you pair them with.
If you’re looking to expand your culinary repertoire, check out banana fritters recipe for another quick breakfast option, or explore air fried tofu recipe for savory protein additions to your blinchiki.
Storage and Reheating
Cooked blinchiki keep in the refrigerator for 3-4 days when stacked between parchment paper in an airtight container. To reheat, simply warm them in a dry skillet over medium heat for about 30 seconds per side, or microwave them wrapped in a damp paper towel for 20-30 seconds. They’ll regain their soft, pliable texture beautifully.
You can also freeze them for up to a month. Stack them with parchment between each crepe, wrap the whole stack in plastic wrap, and freeze. Thaw at room temperature for about 30 minutes before reheating. This makes blinchiki an excellent make-ahead option for busy mornings.
Troubleshooting Common Issues
If your blinchiki are coming out too thick, your batter needs more liquid—add water a tablespoon at a time until you get the right consistency. If they’re tearing when you flip them, your pan might not be hot enough, or you’re not letting the bottom cook long enough to set. If they’re browning too quickly, reduce your heat slightly.
Holes in the crepes? That’s actually fine and happens to everyone. It doesn’t affect the taste or texture. If you’re getting lumpy batter, strain it through a fine-mesh sieve before cooking. If the first crepe sticks despite your buttering efforts, wipe out the pan, re-butter it, and try again—the first one is often a test run anyway.
Want to pair your blinchiki with a warm beverage? Learn how to make a caramel macchiato for the perfect coffee pairing, or explore air fryer vegetable recipes if you want to create a complete meal around your crepes.
Frequently Asked Questions
Can I make blinchiki batter ahead of time?
Absolutely. Prepare the batter up to 2 hours before cooking and store it in the refrigerator. Give it a quick stir before using, as the flour may settle slightly. You might need to add a splash of water if it’s thickened up.
What’s the difference between blinchiki and crêpes?
Blinchiki are slightly thicker and often fluffier due to the egg content and batter consistency. Crêpes are paper-thin and more delicate. Both are delicious, but blinchiki have a more tender, cake-like quality that makes them easier for beginners to master.
Can I make a dairy-free blinchiki recipe?
Yes. Substitute the milk with any plant-based milk (oat, almond, or soy work great), and use melted coconut oil or vegetable oil instead of butter. The results are nearly identical—you won’t notice much difference in the final product.
How do I know when the pan is the right temperature?
The pan should be hot enough that a drop of water sizzles immediately on contact. If your batter sizzles and sets within 2-3 seconds of hitting the pan, you’ve got the temperature right. If it spreads slowly, heat it a bit more.
Why did my blinchiki turn out rubbery?
Overcooked batter causes rubberiness. Remember, you’re only cooking each side for 30-40 seconds on the first side and 15-20 on the second. If you’re cooking longer than that, reduce the heat slightly and work faster.
Can I add flavoring to my blinchiki batter?
Definitely. Lemon zest, cinnamon, or almond extract all work beautifully. Add about 1/2 teaspoon of any extract or a tablespoon of zest to your batter. For savory blinchiki, try adding fresh dill, chives, or a touch of garlic powder.
Mastering Your Blinchiki Recipe
Once you’ve made a batch of homemade blinchiki, you’ll understand why this blinchiki recipe has endured for centuries in Russian cuisine. They’re genuinely quick to prepare, require minimal ingredients, and deliver restaurant-quality results that’ll make you feel like a pro. The 20-minute timeline isn’t exaggerated—from mixing batter to plating your last crepe, you’re looking at about that timeframe once you’ve got the technique down.
The real secret to perfect blinchiki isn’t some mysterious Russian technique or special equipment. It’s simply understanding that thin batter, proper heat, and confident flipping are all you need. Start with this basic blinchiki recipe, practice your flipping technique, and soon you’ll be making them on autopilot. Your family breakfast game will never be the same.


