
A bear claw recipe is your ticket to bakery-quality pastries without leaving your kitchen. These sweet, almond-filled Danish pastries look intimidating, but I’m going to walk you through making them in five straightforward steps that’ll have you pulling golden, flaky bear claws from your oven like a pro.
Table of Contents
What Are Bear Claws?
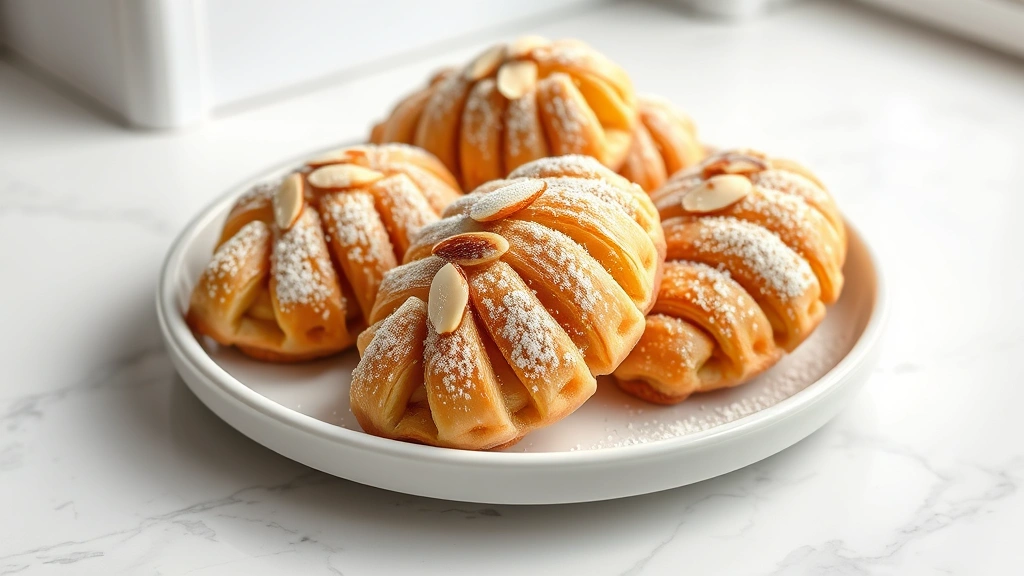
Bear claws are a classic Danish pastry that earned their name from their distinctive claw-like shape. They’re made from laminated dough—that means butter and dough are folded together multiple times to create those beautiful, flaky layers you see when you bite into one. The interior is typically filled with almond paste and sometimes topped with sliced almonds and a light glaze.
What makes them special is the contrast: crispy, shattering exterior meets soft, sweet almond filling. They’re the kind of pastry that makes your kitchen smell like a European bakery, and honestly, there’s nothing quite like serving homemade bear claws to friends and family. Once you nail this bear claw recipe, you’ll understand why people line up at bakeries for these things.
Gather Your Ingredients
Before you start folding dough, get everything measured and ready. Here’s what you’ll need:
For the Dough:
- 2 cups all-purpose flour
- 1 tablespoon sugar
- 1 teaspoon salt
- 1 teaspoon instant yeast
- ¾ cup whole milk, warmed
- 2 tablespoons unsalted butter, softened
- 6 ounces cold unsalted butter (for lamination)
For the Filling:
- 1 cup almond paste
- ¼ cup granulated sugar
- 1 egg white
- ½ teaspoon almond extract
For Assembly and Topping:
- 1 egg, beaten (egg wash)
- ½ cup sliced almonds
- ¼ cup powdered sugar
- 2 tablespoons milk (for glaze)
The key here is keeping your lamination butter cold. This is non-negotiable if you want those crispy layers. Think of it like thawing ingredients properly—temperature control matters in the kitchen.
Prepare the Dough
Start by combining your dry ingredients in a large mixing bowl: flour, sugar, salt, and yeast. Mix them together thoroughly so the yeast is evenly distributed. This prevents clumpy rising later.
Pour in your warm milk and add the 2 tablespoons of softened butter. Mix everything until you have a shaggy dough—it should look rough and slightly sticky. Don’t worry about it being perfect at this stage.
Knead the dough for about 8 minutes by hand (or 5 minutes in a stand mixer) until it becomes smooth and elastic. You’ll know it’s ready when you can stretch a small piece thin without it tearing. This develops the gluten structure that’ll support all those butter layers.
Shape the dough into a ball, place it in a lightly oiled bowl, cover it with plastic wrap, and let it rise at room temperature for about 1 hour until it doubles in size. This is your bulk fermentation—it builds flavor and develops the dough’s strength.
Laminate and Fold
This is where the magic happens. After your dough has risen, turn it out onto a lightly floured surface and gently press it into a rough rectangle about ½ inch thick. Don’t be aggressive—you want to keep some of that air you just developed.
Take your 6 ounces of cold butter and pound it between two sheets of plastic wrap until it’s about ¼ inch thick and roughly rectangular. You want it cold enough to hold its shape but pliable enough to spread without cracking.
Place the butter block in the center of your dough rectangle, then fold the dough edges over it like you’re wrapping a present. Seal the edges by pressing them together gently. You’ve now got a butter package inside dough—this is called the “lock-in.”
Now comes the lamination: Roll your dough packet out to about ¼ inch thickness, then fold it into thirds like a business letter (one short end folds to the middle, then the other short end folds over it). This is “turn one.” Rotate the dough 90 degrees, then repeat the rolling and folding. Do this for a total of 4 turns, chilling the dough for 15-20 minutes between every two turns in the refrigerator.
Those folds create dozens of butter layers that’ll puff up beautifully in the oven. It’s the same principle that makes slow cooking work so well—time and technique create the results.
Shape and Fill
After your final lamination turn, refrigerate the dough for at least 30 minutes. This relaxes the gluten and makes it easier to shape.
While the dough chills, make your almond filling by beating together almond paste, sugar, egg white, and almond extract until you have a smooth, spreadable paste. Set it aside.
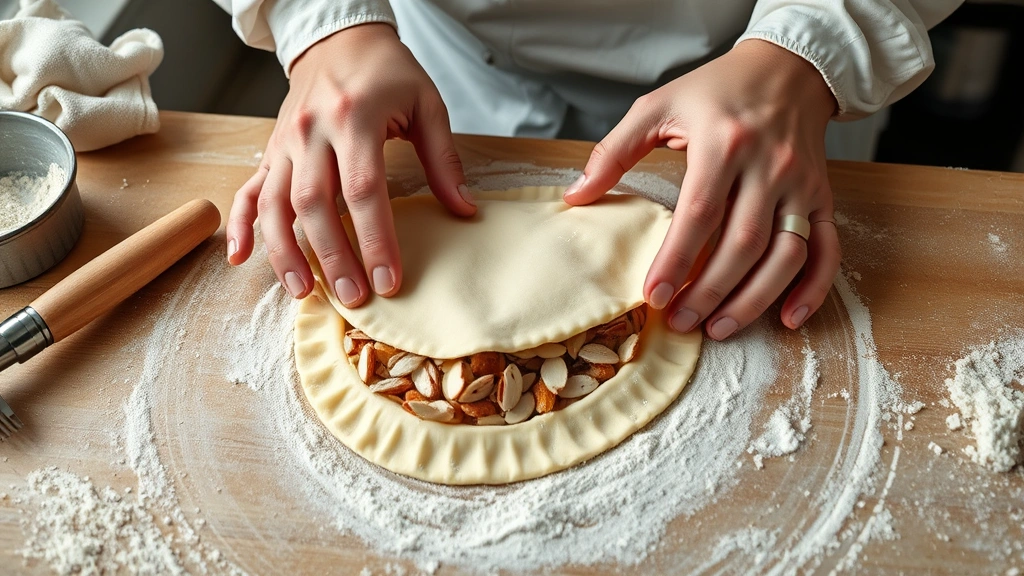
Roll out your chilled dough to about ⅛ inch thickness and cut it into rectangles roughly 4 inches by 3 inches. Spread about 2 tablespoons of almond filling down the center of each rectangle, leaving a ½-inch border on all sides.
Here’s the shaping trick: Using a sharp knife, make diagonal cuts from the long edges toward the center, stopping about ½ inch from the filling. These cuts create the “claws.” Fold the strips over the filling in an alternating pattern, creating that distinctive claw appearance. Some strips will overlap—that’s exactly what you want.
Place your shaped bear claws on parchment-lined baking sheets, cover them loosely with plastic wrap, and let them proof at room temperature for 45 minutes to 1 hour until they’re puffy and light.
Bake to Perfection
Preheat your oven to 375°F about 20 minutes before baking. While it heats, brush each bear claw generously with beaten egg wash and sprinkle with sliced almonds. Don’t be shy—this creates that gorgeous golden crust and nutty flavor.
Bake for 18-22 minutes until the pastries are deep golden brown and the almond filling is just starting to peek through the sides. Your kitchen will smell absolutely incredible at this point.
While they cool slightly, whisk together powdered sugar and milk to make a simple glaze. Drizzle it over the warm bear claws—it’ll set as they cool and add a subtle sweetness that complements the almond filling perfectly.
Pro Tips and Tricks
Keep your work surface cool. If your kitchen is warm, chill your rolling pin and work surface before laminating. Warm dough means the butter will smear into the dough instead of creating distinct layers.
Don’t skip the rest periods between lamination turns. These aren’t just for convenience—they allow the gluten to relax, making the dough easier to handle and preventing shrinkage during baking.
Use a pastry brush for egg wash application. A fork or your fingers will create uneven coverage, and you want that shiny, professional-looking finish.
If your almond filling is too soft, chill it for 15 minutes before spreading. This makes it much easier to work with and prevents it from squishing out during shaping.
For extra flavor, add a pinch of cardamom or cinnamon to your almond filling. It’s a subtle addition that elevates the whole pastry. You can also experiment with different extracts—vanilla or orange work beautifully.
Storage and Serving
Bear claws are best enjoyed fresh from the oven while the pastry is still crispy. However, they’ll keep in an airtight container at room temperature for up to 2 days. The pastry will soften slightly, but it’ll still taste great.
You can also freeze unbaked, shaped bear claws for up to 1 month. Bake them directly from frozen, adding 5-7 minutes to the baking time. This is perfect for meal prep or when you want fresh pastries without the full effort.
To refresh day-old bear claws, warm them in a 300°F oven for about 5 minutes. This restores some of the crispiness to the pastry.
Pair your homemade bear claws with strong coffee or tea. They’re rich enough to stand up to bold flavors, and the combination is absolutely classic. If you’re looking for other kitchen projects, check out air fried recipes for different cooking techniques.
Frequently Asked Questions
Can I make bear claws without laminating the dough?
Technically yes, but you’ll lose the signature flaky texture that makes bear claws special. The lamination is what creates those crispy, shattering layers. If you’re short on time, you could use store-bought puff pastry as a shortcut, though it won’t be quite the same as homemade.
What’s the difference between bear claws and croissants?
Both are laminated pastries, but croissants use more lamination turns (typically 6) and are shaped differently. Bear claws use fewer turns and have the distinctive claw shape with almond filling. Croissants are usually plain or chocolate-filled and have that iconic crescent shape.
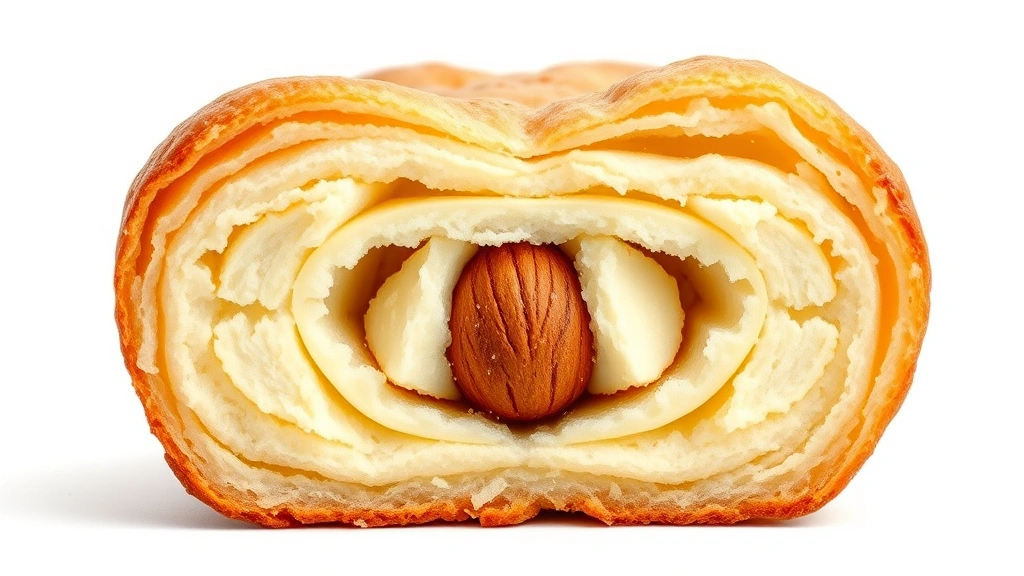
How do I know when my dough is properly laminated?
When you cut into a baked bear claw, you should see distinct, thin layers of pastry separated by butter. If it looks more like a single thick layer, you need more lamination turns. Practice makes perfect—your second batch will be noticeably better than your first.
Can I use margarine instead of butter?
I wouldn’t recommend it. Butter has a higher melting point than margarine, which is crucial for creating those flaky layers. Margarine will melt too quickly and won’t give you the same structure. Stick with real butter—it’s worth it.
Why did my bear claws come out dense instead of flaky?
This usually happens if the butter got too warm during lamination and mixed into the dough instead of staying in distinct layers. It can also result from not enough lamination turns or skipping the rest periods. Keep everything cold and be patient with the process.
Can I make the dough ahead of time?
Absolutely. After your bulk fermentation, you can refrigerate the dough for up to 24 hours before starting the lamination process. Just bring it to room temperature for about 15 minutes before rolling. You can also freeze shaped, unbaked bear claws for later baking.
What if I don’t have almond paste?
You can make a simple almond filling by grinding blanched almonds with powdered sugar and a bit of egg white. Alternatively, use a mixture of ground almonds, sugar, and butter. Some bakeries use apple or cherry filling too, so don’t be afraid to experiment once you’ve mastered the basic recipe.
How do I prevent the filling from leaking out during baking?
Make sure your filling isn’t too soft, and don’t overfill each pastry. Keep about ½ inch clear on all sides before you fold the dough strips over. The egg wash also helps seal the edges, so apply it generously.
For more detailed lamination techniques, check out resources from Family Handyman, and for professional baking insights, visit This Old House. You can also find additional pastry guidance at Bob Vila.


