

Making an arabic bread recipe at home is easier than you’d think, and honestly, it’s one of those kitchen wins that’ll make you feel like a pro. Fresh pita bread straight from your oven beats anything you’ll grab from a grocery store—it’s warm, fluffy, and tastes incredible. In just 30 minutes, you can have homemade Arabic bread that’s perfect for wraps, dips, or just tearing apart with your hands. Let’s dive into this straightforward recipe that works every single time.
Table of Contents
What is Arabic Bread?
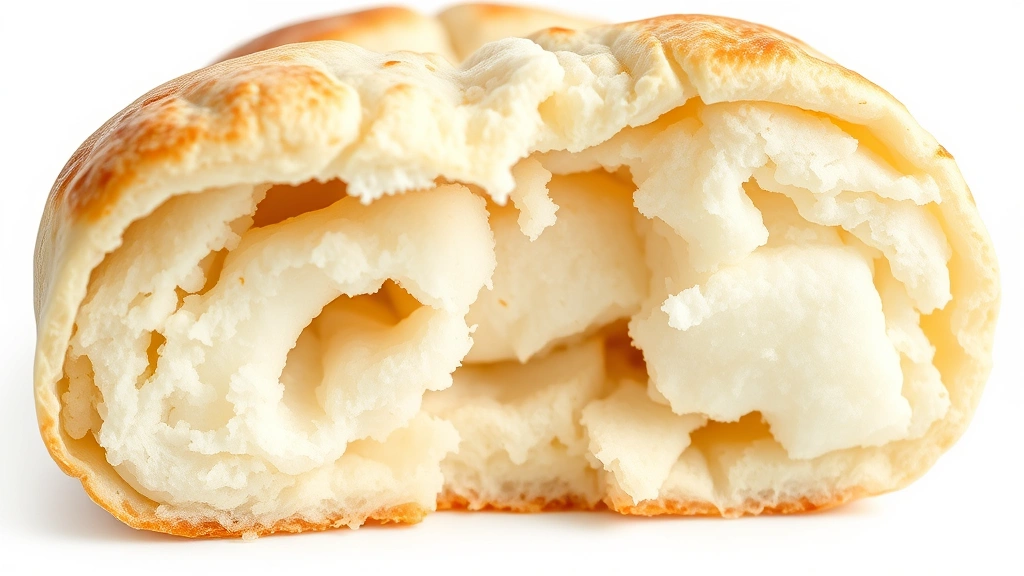
Arabic bread, also called pita bread, is a soft, pillowy flatbread with a pocket that forms during cooking. It’s a staple across the Middle East, Mediterranean, and beyond. The magic happens when the dough hits high heat—steam creates that characteristic pocket inside, making it perfect for stuffing with falafel, shawarma, or hummus. Unlike regular flatbread, pita has a tender crumb and that satisfying chewiness that makes it stand out. Once you master this arabic bread recipe, you’ll understand why people have been making it for centuries.
Ingredients You Need
Here’s what goes into making authentic Arabic bread:
- 3 cups all-purpose flour (or bread flour for chewier results)
- 1.5 teaspoons salt
- 1 teaspoon instant yeast
- 1 tablespoon sugar or honey
- 1 tablespoon olive oil
- 1 cup warm water (around 110°F)
That’s it. Five simple ingredients, nothing fancy. The beauty of this arabic bread recipe is its simplicity—no special equipment needed, just your hands and a hot skillet or oven.
Mixing the Dough
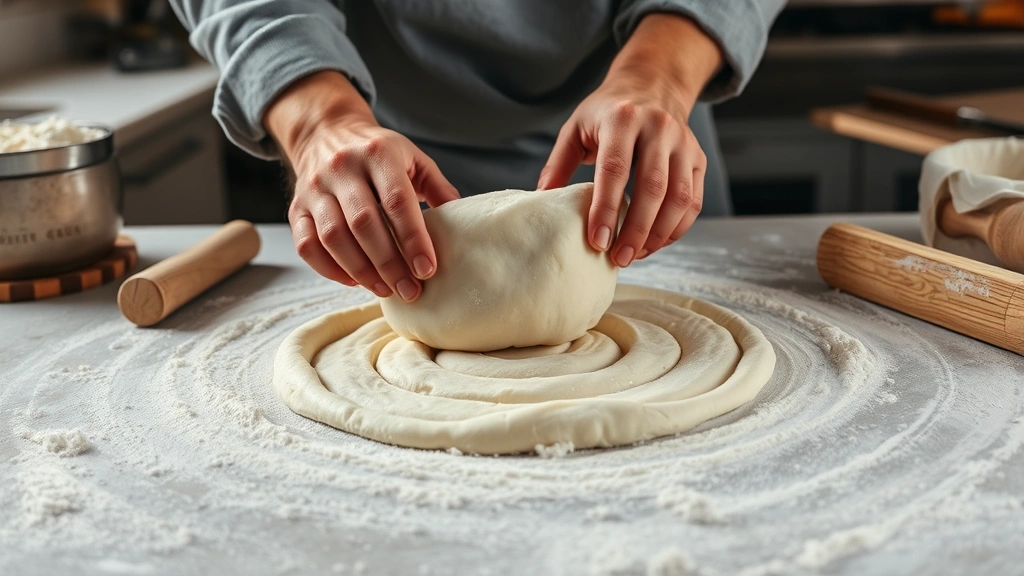
Start by combining your dry ingredients in a large bowl: flour, salt, yeast, and sugar. Mix these together thoroughly so the yeast is evenly distributed. Pour your warm water and olive oil into the center, then mix everything with your hands until you’ve got a shaggy dough. Don’t worry about it looking perfect at this stage—you’re just bringing everything together.
Now knead for about 10 minutes. This is where the dough transforms. Work it on a clean countertop, pushing it away from you with the heel of your hand, folding it back, rotating, and repeating. You’ll feel the dough go from sticky and rough to smooth and elastic. This is crucial for developing gluten, which gives your pita that signature chew. If it’s sticking too much, dust with a little flour, but don’t overdo it.
Resting and Rising
Shape your kneaded dough into a ball and place it in a lightly oiled bowl. Cover with a damp towel and let it rise at room temperature for about 10-15 minutes. You’re not looking for a dramatic rise here—just enough so the dough relaxes and becomes easier to shape. This quick rest makes a huge difference in how your bread comes out.
Some bakers prefer a longer rise (30-60 minutes), which develops more flavor. If you’ve got the time, go for it. But this recipe is designed for speed, so 10-15 minutes works perfectly fine.
Shaping Your Rounds
Turn your dough out onto a lightly floured surface and divide it into 8 equal pieces. Roll each piece into a ball, then let them rest for 2-3 minutes under a towel. This resting period is key—it prevents the dough from shrinking back as you roll it.
Now flatten each ball and roll it into a circle about 1/4-inch thick. Aim for even thickness throughout; this helps them cook uniformly. The circles should be roughly 6-7 inches in diameter. Don’t stress about perfect circles—rustic is part of the charm. Stack your rolled dough between parchment paper to prevent sticking.
Cooking Technique
This is where the magic happens. You have two options: stovetop or oven.
Stovetop Method: Heat a cast-iron skillet or heavy-bottomed pan over medium-high heat. Once it’s hot (test with a drop of water—it should sizzle immediately), place your dough circle on the skillet. Cook for about 1-2 minutes until the bottom starts showing light brown spots. Flip and cook the other side for another 1-2 minutes. If you see the bread puffing up, that’s the pocket forming—exactly what you want. Transfer to a plate and cover with a towel to keep warm.
Oven Method: Preheat your oven to 475°F. Place your dough rounds on a baking sheet and bake for 5-7 minutes until they puff up and develop light brown spots. The pocket forms inside as steam builds up. Remove and wrap in a towel immediately to keep them soft.
The stovetop method is faster and gives you more control, but both work great. Most home cooks prefer the skillet method because you can see exactly what’s happening.
Storage Tips
Fresh Arabic bread is best eaten the same day, but you can store it. Wrap cooled bread in plastic wrap or a sealed bag and keep it at room temperature for up to 2 days. For longer storage, freeze them in a freezer bag for up to 3 months. To reheat, wrap in foil and warm in a 350°F oven for about 5 minutes, or wrap in a damp paper towel and microwave for 20-30 seconds.
Pro tip: Store them in a bread box or covered container to prevent them from drying out. The pocket inside helps them stay soft longer than regular flatbread.
Troubleshooting Common Issues
Bread won’t puff up: This usually means your heat isn’t hot enough. Make sure your skillet or oven is properly preheated. The temperature needs to be high enough to create steam quickly.
Bread is tough or chewy: You might be kneading too long or using bread flour instead of all-purpose. Also, make sure you’re not cooking on too low heat, which can dry out the bread.
Bread is dry inside: Cover your cooked bread with a towel immediately after cooking. This traps steam and keeps them soft. If they’ve already cooled, reheat wrapped in a damp towel.
Dough is too sticky: Add flour gradually during kneading, but be careful not to make it too dry. The dough should be slightly tacky but not stick to your hands constantly.
For more detailed guidance on kitchen techniques, check out how to make apple cider to understand fermentation and temperature control principles that apply to bread baking. Understanding moisture management is also crucial—similar concepts apply whether you’re preventing apples from browning or keeping bread fresh.
Frequently Asked Questions
Can I make this arabic bread recipe ahead of time?
Absolutely. You can prepare the dough the night before, refrigerate it, and cook it fresh the next day. Just bring it to room temperature for 15-20 minutes before shaping. You can also freeze shaped dough rounds and cook them directly from frozen—just add a minute or two to the cooking time.
What’s the difference between pita and naan?
While both are flatbreads, pita has a pocket that forms during cooking, while naan is thicker and doesn’t typically have a pocket. Naan also uses yogurt and butter, making it richer. This arabic bread recipe specifically creates that characteristic pocket pita is known for.
Can I use whole wheat flour?
Yes, but whole wheat absorbs more water. Start with 2.5 cups all-purpose flour and 0.5 cups whole wheat, then adjust. You might need slightly more water. Whole wheat bread will be denser and nuttier in flavor.
Why isn’t my bread forming a pocket?
The pocket forms from steam buildup inside the dough. Make sure your heat is high enough and your dough is the right thickness (about 1/4 inch). If the dough is too thin, the pocket won’t form properly. Also ensure the skillet or oven is fully preheated before cooking.
How long does fresh pita stay soft?
Fresh pita stays soft for about 2 days at room temperature if stored properly in a covered container or wrapped in plastic. After that, it starts to dry out. Freezing extends the life to 3 months.
Do I need special equipment?
Nope. A mixing bowl, a skillet or baking sheet, and your hands are all you need. No stand mixer, no special pans, no fancy tools. This recipe is designed for simplicity.
Final Thoughts
Making your own arabic bread recipe is a game-changer. It’s faster than you’d expect, cheaper than buying pre-made, and tastes infinitely better. Once you nail this basic technique, you can experiment with whole wheat, add herbs, or make larger batches for the freezer. The confidence you’ll get from pulling warm, puffy pita from your skillet is worth every minute. Start today, and you’ll be making this bread regularly. Your kitchen, your taste buds, and your wallet will thank you.
For more food preservation knowledge, explore how to keep apples from turning brown to understand oxidation prevention—principles that help keep your fresh bread fresher longer. And if you’re interested in food storage science, how to store dry ice covers temperature control methods that serious bakers use for extended storage.


