

Making an apple compote recipe at home is one of those kitchen wins that feels fancy but takes barely any effort. In just 15 minutes, you’ll have a silky, naturally sweet fruit spread that tastes nothing like the jarred stuff sitting on supermarket shelves. Whether you’re topping yogurt, spreading it on toast, or using it as a filling for pastries, homemade apple compote is a game-changer that’ll make you wonder why you ever bought the pre-made version.
Table of Contents
What Is Apple Compote?
Apple compote is essentially cooked-down apples that break apart into a thick, chunky-smooth sauce. It’s different from applesauce in that compote keeps more texture and body—you’re not aiming for a completely smooth puree. Think of it as the middle ground between whole apple slices and baby food. The apples release their natural juices, the sugar caramelizes slightly, and you end up with something that tastes like concentrated apple goodness.
The beauty of this approach is that you’re not adding weird stabilizers or preservatives. Just fruit, a little sweetener, and heat. That’s it. The pectin naturally present in apples does the thickening work for you.
Ingredients You Need
Here’s what goes into a basic apple compote recipe that serves about 4-6 people:
- 4-5 medium apples (mix Granny Smith and Honeycrisp for best flavor balance)
- 2 tablespoons sugar (white or brown, your call)
- 1 tablespoon lemon juice (prevents browning and adds brightness)
- 1/4 teaspoon cinnamon (optional but recommended)
- Pinch of salt (brings out apple flavor)
- 2-3 tablespoons water (helps get things started)
Pro tip: Don’t use all sweet apples. The tart ones (like Granny Smith) give you complexity and keep the compote from tasting one-note. If you’re wondering about fruit ripeness, the same principles apply to other produce—you want ripe but not mushy apples, similar to how how to tell if a pineapple is ripe requires checking for slight give without mushiness.
Equipment Setup
You don’t need fancy gear. Here’s what you’ll actually use:
- Medium saucepan (3-4 quart capacity)
- Sharp knife for chopping apples
- Cutting board (preferably wood to avoid browning apples)
- Wooden spoon for stirring
- Vegetable peeler (optional—you can leave skins on for rustic texture)
That’s genuinely all you need. No special canning equipment, no food processor, nothing complicated. Kitchen basics get the job done perfectly.
Step-by-Step Process
Prep (2 minutes): Wash your apples and chop them into roughly 1-inch chunks. You don’t need to be precise—irregular pieces actually cook more evenly. Leave the skin on if you like texture; peel them if you want something smoother. Remove the cores or work around them as you chop.
Combine (1 minute): Dump your chopped apples into the saucepan. Add the water, lemon juice, sugar, cinnamon, and salt. Stir everything together so the apples get coated with sugar and lemon.
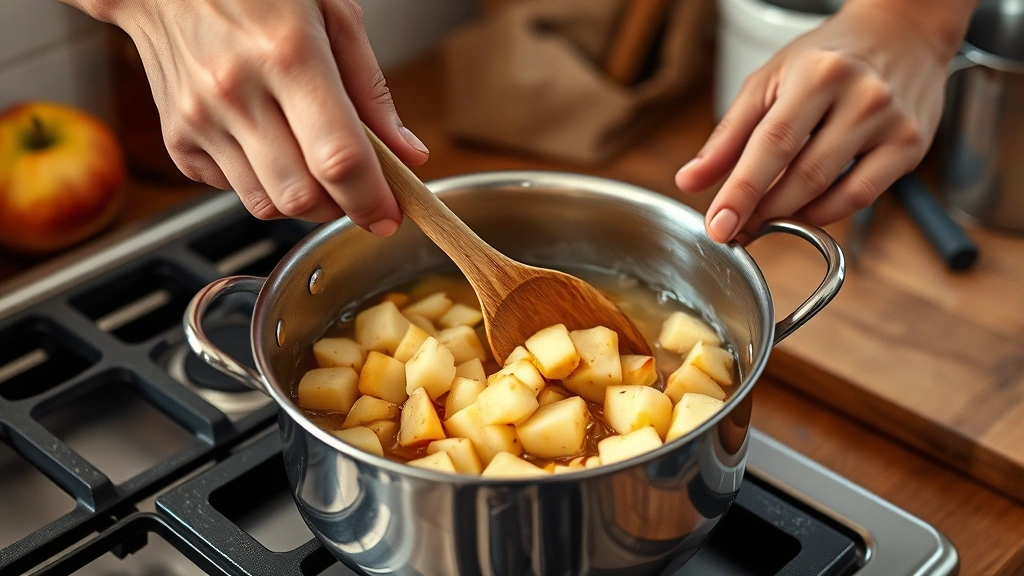
Heat (8-10 minutes): Put the pan on medium-high heat. Once it starts bubbling, reduce to medium and let it simmer. Stir occasionally—every couple of minutes is fine. You’re looking for the apples to start breaking down and releasing juice. After about 8-10 minutes, the apples should be mostly softened and the liquid should be thickening up.
Mash (2-3 minutes): Use your wooden spoon to break down any remaining chunks. You can press them against the side of the pan or just stir aggressively. If you want something smoother, use a potato masher or immersion blender. If you like it chunkier, just do a light mash.
Cool (5 minutes): Let it sit off heat for a few minutes. It’ll thicken up more as it cools. That’s your signal that you’re done.
Flavor Variations
The basic recipe is solid, but here’s where you get creative:
Vanilla Apple Compote: Add 1/2 teaspoon vanilla extract at the end. Transforms it into something dessert-worthy.
Spiced Version: Mix in a pinch of nutmeg, ginger, or cardamom along with the cinnamon. Go light—you want apple to still be the star.
Brown Sugar Depth: Use brown sugar instead of white for a deeper, almost caramel-like flavor.
Maple Compote: Swap half the sugar for pure maple syrup. Adds richness without being heavy.
You can also blend in other fruits if you’re feeling adventurous. A handful of fresh berries or some dried cranberries work surprisingly well. The cooking methods are similar to other quick-prep dishes—for instance, the gentle heat approach mirrors techniques like how to steam broccoli in microwave, where low, controlled heat preserves quality.
Storage Tips
This stuff keeps for about a week in the fridge in an airtight container. The lemon juice acts as a natural preservative, so it stays fresher longer than you’d expect.
For longer storage, you can freeze it in ice cube trays. Pop out the cubes and store them in a freezer bag for up to 3 months. Perfect for portioning out single servings.
If you want to get serious about preservation, you can water-bath can it following standard canning procedures, but that’s beyond the scope of a quick 15-minute recipe. For that level of food prep, check USDA guidelines on safe home canning.
Serving Ideas
Now that you’ve made this stuff, what do you actually do with it?
- Breakfast topping: Dollop on yogurt, oatmeal, or pancakes
- Pastry filling: Spread between layers of puff pastry or phyllo dough
- Cheese board: Serve alongside cheddar, brie, or sharp cheeses
- Baking ingredient: Swirl into cake batter or use as a pie filling
- Toast spread: Simple and classic—better than jam
- Ice cream topping: Warm or cold, it’s delicious over vanilla ice cream
The versatility is part of what makes this apple compote recipe so worth learning. One batch covers breakfast, dessert, and snack situations.
Troubleshooting Common Issues
Too Runny? You cooked it too short or used particularly juicy apples. Next time, let it simmer a bit longer or add an extra apple. If it’s already made, put it back on the heat for another 3-5 minutes.
Too Thick? Stir in a tablespoon of water or apple juice and warm it gently. It’ll loosen right up.

Tastes Bland? You probably need more lemon juice or salt. Both of those ingredients amplify apple flavor, so don’t skip them. Add a squeeze of lemon and a tiny pinch of salt and taste again.
Brown Spots Appearing? That’s oxidation. Use your apples quickly after chopping, and keep them in lemon juice if you’re prepping ahead. It’s not harmful, just cosmetic.
Apples Won’t Break Down? Some varieties are firmer. Just cook longer and mash more aggressively. You might also be using cooking apples that are past their prime—fresher fruit breaks down faster.
Frequently Asked Questions
Can I make apple compote without sugar?
Absolutely. The apples have natural sugars, so you can skip it entirely or use honey instead. It’ll be less sweet, but that’s not a bad thing. Some people actually prefer it that way because the apple flavor shines through more clearly.
What’s the difference between compote and applesauce?
Applesauce is smoother and more uniform in texture. Compote is chunkier and thicker. They’re made the same way basically—the difference is in how much you mash it at the end and how long you cook it down.
Do I have to peel the apples?
Nope. Leaving the skin on adds fiber and keeps more nutrients. It also gives a rustic texture that some people love. If you want something smoother, peel them first.
Can I use frozen apples?
Yes, but thaw them first and drain excess liquid. Frozen apples work fine for compote, though fresh ones give better texture.
How much does this recipe make?
About 1.5 to 2 cups, depending on how much you cook it down. If you reduce it longer, you get less volume but thicker consistency.
Is this safe for babies?
Yes, once they’re eating solids (around 6 months). It’s soft, naturally sweet, and has no added salt or preservatives. Just make sure it’s cooled to room temperature before serving.
Final Thoughts
An apple compote recipe doesn’t require culinary school or fancy equipment. You’re literally just cooking apples until they fall apart and taste incredible. The 15-minute timeframe is real—I’m not exaggerating. Start to finish, you’re done before your coffee gets cold.
The fact that it tastes homemade because it literally is homemade makes it worth doing. Your family will notice the difference, and you’ll feel that small win of making something from scratch. Keep a batch in the fridge and you’ve got an instant upgrade for breakfast, dessert, or whenever you need something naturally sweet and genuinely good.


