

An apple bars recipe is the ultimate crowd-pleaser that sits somewhere between a cookie and a cake—dense, chewy, and absolutely loaded with cinnamon-spiced apples that’ll have everyone asking for seconds. These aren’t your grandma’s dry apple cake; they’re moist, fudgy on the inside, and topped with a buttery crumb layer that makes them impossible to resist.
Table of Contents
Why Apple Bars Win
Let’s be honest—baking an apple pie is a commitment. You’re dealing with dough, crimping edges, and hoping your filling doesn’t explode everywhere. An apple bars recipe skips all that nonsense and gives you the same delicious apple-cinnamon flavor in a format that’s actually portable and shareable. These bars are perfect for potlucks, lunchboxes, or just sitting on your kitchen counter calling your name at 10 PM.
The beauty of this recipe is that it works with whatever apples you’ve got. Granny Smiths give you tartness, Fujis bring sweetness, and mixing varieties creates complexity. If you’re worried about oxidation while prepping, check out our guide on how to keep apples from turning brown—a quick lemon juice trick keeps them looking fresh.
Ingredients You Need
For the base:
- 2 cups all-purpose flour
- 1 cup granulated sugar
- 1/2 cup butter, softened
- 2 large eggs
- 1 teaspoon vanilla extract
- 1 1/2 teaspoons baking powder
- 1/2 teaspoon salt
For the filling:
- 5-6 medium apples, peeled and diced
- 1/2 cup brown sugar
- 2 tablespoons flour
- 1 1/2 teaspoons ground cinnamon
- 1/4 teaspoon nutmeg
- 2 tablespoons butter
- 1 tablespoon lemon juice
For the topping:
- 1/2 cup flour
- 1/4 cup brown sugar
- 1/4 cup cold butter, cubed
- 1/4 teaspoon cinnamon
Prep Work Matters
Here’s where most home bakers cut corners and regret it. Don’t skip the prep. Peel your apples, dice them into consistent 1/2-inch pieces, and toss them immediately with that lemon juice. This prevents browning and adds brightness to the filling. If you’re feeling fancy, you could even make homemade apple cider reduction to brush on top for extra depth, but that’s optional.
Measure everything before you start mixing. Get your 9×13-inch baking pan ready and line it with parchment paper—this makes cleanup infinitely easier and prevents sticking. Preheat your oven to 350°F.
Mixing the Batter
Cream your softened butter and sugar together for about 3 minutes until it’s light and fluffy. This isn’t just busywork—you’re incorporating air that’ll make these bars tender instead of dense and brick-like. Add eggs one at a time, beating well after each addition. Pour in vanilla and mix.
In a separate bowl, whisk together your flour, baking powder, and salt. Fold this dry mixture into the wet ingredients until just combined. Don’t overmix or you’ll develop too much gluten and end up with tough bars. The batter should look thick and slightly lumpy—that’s perfect.
Spread this batter into your prepared pan and smooth the top with a spatula. It’ll be thicker than you expect, but trust the process.
Layering Technique
This is where the magic happens. In a medium skillet, melt 2 tablespoons of butter over medium heat. Add your diced apples and cook for about 5 minutes, stirring occasionally. The apples should soften slightly but still hold their shape. Sprinkle in the brown sugar, flour, cinnamon, and nutmeg. Stir for another 2-3 minutes until everything’s coated and fragrant.
Remove from heat and let the filling cool for 5 minutes—this prevents it from making your batter soggy. Spread this apple mixture evenly over your batter layer. Don’t be shy; you want a good apple-to-cake ratio.
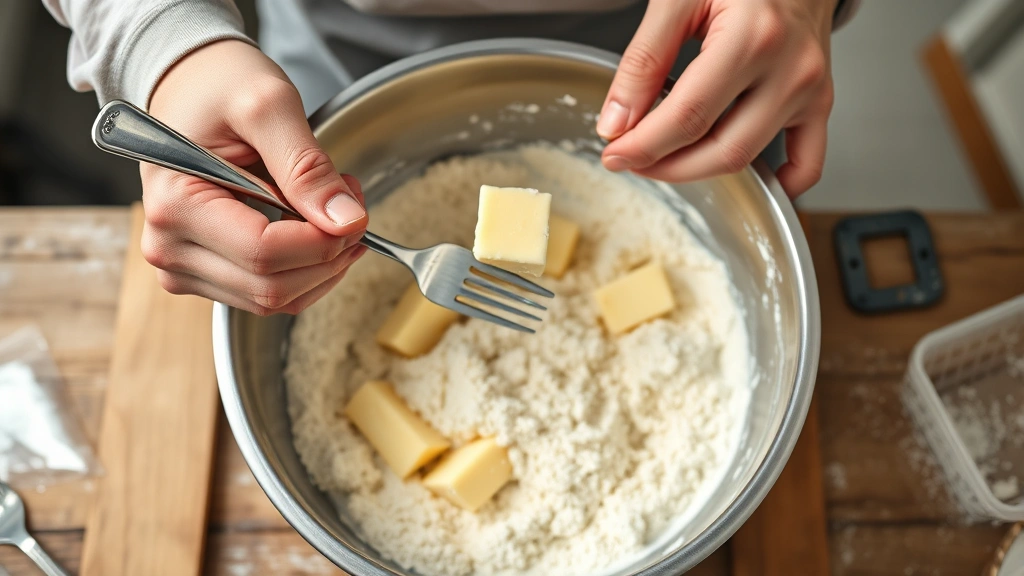
For the crumb topping, mix flour, brown sugar, and cinnamon in a small bowl. Cut in your cold butter with a fork or your fingertips until it looks like coarse sand. Sprinkle this mixture generously over the apple layer. This topping is going to get golden and crispy—it’s the crown jewel of the whole bar.
Baking Timing
Slide your pan into that 350°F oven and set a timer for 35-40 minutes. You’re looking for the crumb topping to turn golden brown and the cake underneath to spring back slightly when you touch it. A toothpick inserted into the cake portion (not through an apple chunk) should come out clean or with just a few moist crumbs.
If your topping is browning too fast, tent the pan loosely with aluminum foil for the last 10 minutes. Every oven is different, so use your eyes more than the timer.
Cooling & Cutting
This is the hardest part—patience. Let your bars cool completely in the pan for at least 2 hours. I know the aroma is torturing you, but cutting into warm bars results in a crumbly mess. Once they’re fully cooled, lift the entire slab out using the parchment paper and transfer to a cutting board.
Use a sharp knife dipped in hot water (wipe between cuts) to slice into 16-24 bars, depending on how generous you’re feeling. The edges will be slightly firmer than the center, which is exactly how they should be.
Storage Tips
Keep these bars in an airtight container at room temperature for up to 4 days. They actually taste better on day two when the flavors have melded together. For longer storage, wrap individual bars in plastic wrap and freeze for up to 3 months. Thaw at room temperature for about 30 minutes before eating.
Pro tip: Store bars in a single layer separated by parchment paper so they don’t stick together in the freezer.
Variations & Twists
Once you’ve mastered the basic apple bars recipe, play around. Add 1/2 teaspoon of cardamom to the filling for Scandinavian vibes. Swap half the all-purpose flour for whole wheat flour to add nuttiness. Top with a simple vanilla glaze if you want extra sweetness. Some bakers add chopped walnuts or pecans to the crumb topping for texture.
If you’re serving these alongside other desserts, consider pairing them with homemade caramel macchiato for an afternoon treat spread. They also work as a casual side dish at family meals—think of them as an alternative to traditional sides like jasmine rice recipes, just sweeter and more indulgent.
Common Issues Fixed
If your bars turned out dry, you likely overbaked them or didn’t cream the butter and sugar enough. Next time, check at 35 minutes and don’t go past 40. If the bottom is soggy, your oven might run cool—try increasing the temperature by 25°F or baking on a lower rack.

Apples sinking to the bottom? Make sure your filling is cooled before spreading it on the batter. Too much liquid pooling? Use firmer apples like Granny Smiths and don’t cook them as long.
Frequently Asked Questions
Can I use canned apples for this recipe?
Fresh apples are strongly recommended because they maintain better texture and flavor. Canned apples tend to be mushy and overly sweet. If you must use canned, drain them very well and skip the cooking step—just spread them directly on the batter.
What’s the best apple variety for bars?
A mix works best. Combine tart Granny Smiths with sweeter varieties like Honeycrisp or Gala. This creates balanced flavor. If using only one type, Granny Smiths are your safest bet because they hold their shape during baking.
Can I make these bars gluten-free?
Yes. Substitute all-purpose flour with a 1:1 gluten-free flour blend in both the batter and topping. The texture will be slightly different but still delicious. Make sure your baking powder is gluten-free certified.
How do I prevent the crumb topping from getting soggy?
Make sure the apple filling has cooled slightly before adding the topping. Also, use cold butter in the crumb mixture—this creates little pockets that stay crispy during baking. Store in an airtight container once completely cooled.
Can these be made in a different pan size?
Yes, but adjust baking time. An 8×8-inch pan will need 45-50 minutes (they’ll be thicker). A 10×15-inch pan will need 25-30 minutes (they’ll be thinner). Check for doneness rather than relying solely on time.
Do I need to refrigerate these bars?
No, they’re fine at room temperature. Refrigeration can actually dry them out. Only refrigerate if your kitchen is very warm or if you’re storing them for more than 4 days.
Final Thoughts
An apple bars recipe is one of those recipes that seems simple on paper but delivers restaurant-quality results when you pay attention to the details. The combination of tender cake, spiced apples, and crispy topping creates a texture and flavor profile that’s hard to beat. Whether you’re baking for a crowd or just yourself, these bars deliver comfort and satisfaction in every bite.
Start with the basic version, master it, then experiment with variations. Your friends and family will think you’ve been secretly attending baking school. The best part? You can make an entire pan in under 2 hours of active time, and they’ll last all week (if you don’t eat them all first).


