

An air fried cauliflower recipe is your ticket to crispy, golden veggie perfection without deep-frying mess or guilt. I’ve tested dozens of methods, and the air fryer absolutely crushes it—delivering restaurant-quality results in about 15 minutes flat. Whether you’re meal prepping, feeding picky eaters, or just want a crunchy snack that doesn’t derail your goals, this approach works every single time.
Table of Contents
Why Air Fry Cauliflower?
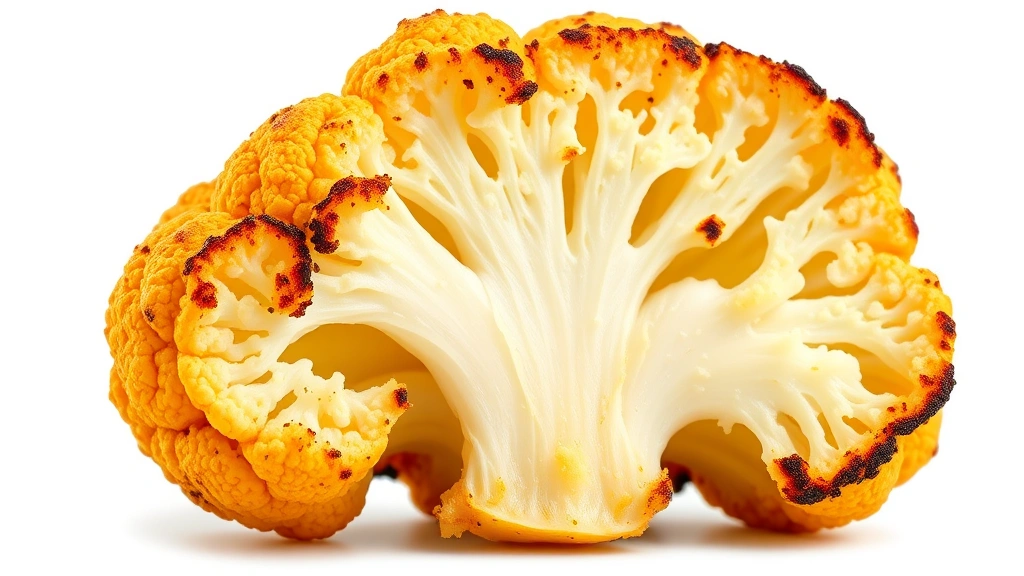
Look, I get it—cauliflower has a reputation for being bland and mushy. But air frying completely changes the game. The circulating hot air crisps up the florets while keeping the inside tender. You’re getting that fried-food satisfaction without heating your kitchen to 95 degrees or dealing with a pot of hot oil.
The real win? Cleanup is a joke. No splatter, no grease-stained stovetop, no lingering smell in your curtains. Just rinse the basket, and you’re done. Plus, you’re cutting the fat content dramatically compared to traditional deep-frying, which means you can eat more guilt-free.
Ingredients & Prep Work
Here’s what you need for a basic batch:
- 1 medium head of cauliflower (about 4-5 cups florets)
- 2 tablespoons olive oil
- 1 teaspoon garlic powder
- 1 teaspoon paprika
- ½ teaspoon salt
- ¼ teaspoon black pepper
- Optional: cayenne, curry powder, or Italian seasoning
Start by cutting your cauliflower into bite-sized florets—think about the size of a golf ball or slightly smaller. Uniform sizing matters because it ensures even cooking. Rinse them thoroughly and pat completely dry. Moisture is the enemy of crispiness, so don’t skip this step.
If you’re prepping ahead, you can chop cauliflower the night before and store it in an airtight container. It’ll keep for 3-4 days in the fridge without browning.
Coating Techniques That Stick
This is where most people fumble. You need a coating that adheres and crisps, not something that slides off halfway through cooking.
The Oil Toss Method: Combine your dried cauliflower florets with olive oil and seasonings in a large bowl. Use your hands to toss everything together—get your fingers in there and make sure every piece gets a light coating. This is the simplest approach and works perfectly fine for basic seasoning.
The Batter Dip: Mix ½ cup flour (or cornstarch for extra crunch), ½ cup water, 1 tablespoon cornstarch, and your seasonings into a thin batter. Dip each floret, let excess drip off, then arrange in the basket. This gives you a crispier, more substantial coating—think restaurant appetizer vibes.
The Panko Crust: For maximum crunch, do a double dip. First, coat florets in the batter above. Then, roll each piece in panko breadcrumbs mixed with your seasonings. Lightly spray with cooking oil. This creates an audible crunch that’ll make you feel like you’re eating fried chicken.
No matter which method you choose, don’t oversaturate. The coating should be light and even, not dripping wet. Excess oil or liquid causes steaming instead of crisping.
Air Fryer Settings & Timing
Here’s the formula that works across most air fryer models:
- Temperature: 400°F
- Time: 12-15 minutes
- Shake: Halfway through (around the 7-8 minute mark)
Load your basket in a single layer. Don’t overcrowd—you want air circulating around each floret. If your basket looks packed, work in batches. It’s tempting to cram everything in, but you’ll end up with some pieces steamed instead of fried.
Set the timer for 7 minutes, then pause and shake the basket. This ensures even browning on all sides. Set it for another 5-7 minutes depending on your desired crispiness. The florets should be golden brown with slightly darkened edges.
Air fryer wattage varies, so the first time you make this, start checking at 12 minutes. Your specific model might need 13 or 14 minutes. Once you dial it in, you’ll nail it every time.
Flavor Variations & Seasonings
Basic salt and pepper is fine, but why stop there? Here are flavor combos I rotate through:
Buffalo Style: Toss finished florets with Frank’s RedHot sauce and a touch of melted butter. Serve with ranch or blue cheese dip. Pair this with jasmine rice recipes for a complete meal.

Parmesan Garlic: Before air frying, coat with garlic powder, Italian seasoning, and a bit of parmesan. After cooking, toss with fresh parmesan and fresh parsley. Finish with a drizzle of balsamic glaze.
Curry Spiced: Mix curry powder, cumin, turmeric, and a pinch of cayenne into your coating. Serve with a yogurt-based dipping sauce. This pairs beautifully with jasmine rice or naan.
Lemon Herb: Add lemon zest, dried oregano, and thyme to your coating. Squeeze fresh lemon juice over the finished florets. Light, fresh, and perfect for summer.
Cajun Heat: Combine paprika, cayenne, garlic powder, onion powder, and black pepper. Adjust cayenne based on your heat tolerance. Serve with a cool sour cream dip to balance the spice.
The beauty of air frying is speed—you can make multiple batches with different seasonings and have a flavor variety ready for the week.
Serving Ideas & Pairings
Air fried cauliflower isn’t just a side dish. It’s versatile enough to anchor a meal or function as an appetizer.
As a Main: Serve over rice (or cauliflower rice if you’re going full veggie mode) with a sauce. Buffalo cauliflower over jasmine rice with a cooling yogurt drizzle is legitimately satisfying. You could also check out how to tell if pineapple is ripe and make a sweet-and-sour cauliflower bowl with fresh pineapple chunks.
As an Appetizer: Serve with three dipping sauces—ranch, sriracha mayo, and a tahini sauce. People will demolish these before dinner even starts.
In Grain Bowls: Layer over quinoa or farro with roasted vegetables, greens, and a tahini dressing. The crispy texture contrasts beautifully with soft grains.
With Proteins: Pair with grilled chicken, fish, or tofu. The cauliflower acts as a textural element that elevates the whole plate.
Salad Topper: Toss warm cauliflower over a bed of greens with a warm vinaigrette. The heat slightly wilts the greens while keeping the florets crispy.
Storage & Reheating Tips
Air fried cauliflower keeps for 4-5 days in an airtight container in the fridge. The texture won’t be quite as crispy on day three, but it’s still good.
Reheating: Don’t use the microwave—it’ll turn everything soggy. Instead, reheat in your air fryer at 350°F for 3-4 minutes. This restores most of the crispiness without drying out the florets.
You can also freeze cooked cauliflower for up to 2 months. Lay it flat on a baking sheet, freeze for 2 hours, then transfer to a freezer bag. When you want it, reheat straight from frozen at 375°F for 6-7 minutes.
For meal prep, I often cook a big batch on Sunday and portion it out. It works as a snack, a lunch side, or a dinner component throughout the week. Beats eating the same thing repeatedly because you can pair it with different sauces and proteins daily.
Troubleshooting Common Issues
Florets Aren’t Crispy: You’re either overcrowding the basket or not coating them enough. Work in smaller batches and ensure each piece has a light oil coating. Also, make sure your air fryer is fully preheated.
Coating Slides Off: You’re using too much oil or your florets are wet. Pat them bone-dry before coating, and use a light hand with the oil. A spray bottle helps apply oil evenly without overdoing it.
Burned Edges, Raw Center: Your temperature might be too high or your florets too large. Cut smaller, uniform pieces and try 375°F instead of 400°F. Cooking takes a few minutes longer but results are more even.
Mushy Texture: You’re either cooking too long or your basket is too crowded. Reduce cooking time by 1-2 minutes and ensure proper air circulation. Moisture = mushiness, so dry your florets thoroughly.
Uneven Browning: You skipped the shake-at-halfway step. Always pause and shake the basket around the 7-8 minute mark. This is non-negotiable for even results.
Frequently Asked Questions
Can you use frozen cauliflower for this recipe?
Yes, but thaw it first and pat it completely dry. Frozen cauliflower contains more moisture, so you’ll need to dry it extra thoroughly to achieve crispiness. Add 2-3 minutes to the cooking time if you skip thawing.
What’s the difference between air frying and baking cauliflower?
Air frying circulates heat at high speed, creating that crispy exterior through rapid moisture evaporation. Baking is slower and gentler, resulting in a softer texture. Air frying is faster and gives better crust formation. For more information on cooking techniques, check out resources from Family Handyman.
Do you need to preheat the air fryer?
Yes. Preheat for 3-5 minutes at your target temperature. This ensures the florets start cooking immediately and develop that crispy exterior. Skipping this step results in uneven cooking.
Can you make this recipe in a regular oven?
You can, but results won’t be identical. Spread florets on a baking sheet, lightly oil and season, then bake at 425°F for 20-25 minutes, stirring halfway. The texture will be crispier on the outside but less uniformly crispy throughout compared to air frying.
What’s the best dipping sauce?
It depends on your flavor profile. Buffalo pairs with ranch. Curry pairs with yogurt. Garlic parmesan pairs with marinara or aioli. Make two or three sauces and let people choose. Check This Old House for recipe inspiration and cooking tips.
How many calories in air fried cauliflower?
A typical serving (about 1 cup of florets) with light oil coating is roughly 60-80 calories depending on your oil amount and coating method. The batter and panko versions run slightly higher at 100-120 calories per serving.
Can you season it after cooking?
Absolutely. Toss hot florets with seasonings, sauces, or spice blends right after cooking. The heat helps flavors adhere better than seasoning before cooking. This is actually my preferred method for maximum flavor control.
Final Thoughts
An air fried cauliflower recipe is one of those kitchen techniques that pays dividends immediately and repeatedly. You’re looking at 15 minutes from raw vegetable to golden, crispy side dish or snack. No special skills required, no complicated ingredients, and cleanup that takes 30 seconds.
Start with the basic salt-and-pepper version to dial in your air fryer’s timing, then experiment with the flavor variations. Once you’ve made this a few times, you’ll develop an intuition for when they’re perfectly done. That’s when you know you’ve mastered it.
Keep your air fryer basket stocked with cauliflower florets, and you’ll always have a healthy, satisfying option ready to go. Whether you’re feeding a family, prepping meals for the week, or impressing guests with a simple appetizer, this recipe delivers every single time. For additional cooking guidance, visit Bob Vila for comprehensive home and kitchen resources.


