
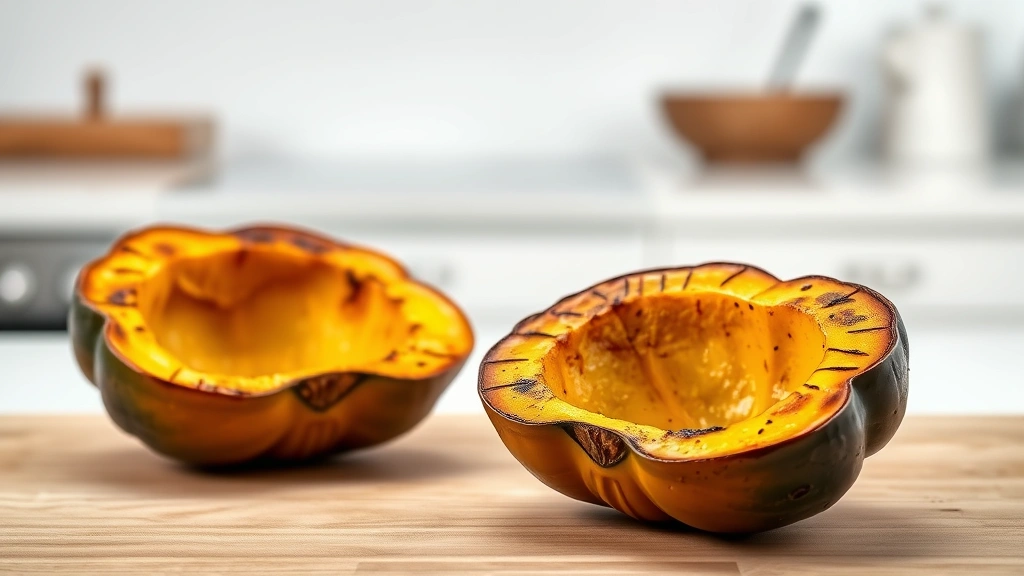
Learning how to cook acorn squash in the oven is one of those kitchen skills that feels fancy but is honestly dead simple—and once you nail it, you’ll be making this nutty, creamy side dish all fall and winter long. I’m talking perfectly caramelized edges, tender flesh, and that natural sweetness that needs almost nothing to shine. No fuss, no complicated techniques, just straightforward oven magic.
Table of Contents
Picking Your Perfect Squash
Before you even think about the oven, you need to pick a solid acorn squash. Head to your produce section and grab one that feels heavy for its size—that’s where the moisture and flavor live. You want dark green skin with minimal soft spots. A squash that’s too light means it’s been sitting around too long and the flesh will be stringy and bland.
Size matters here too. Medium squashes (about 1 to 1.5 pounds each) are your sweet spot. They roast evenly and give you perfect portions—usually enough for two people as a side dish or one hungry person as a main. Avoid the massive ones unless you’re feeding a crowd; they take forever and sometimes the insides don’t cook through before the outside starts burning.
Prep Work Matters
This is where most people mess up. Wash your squash under running water and scrub the skin with a vegetable brush to get rid of any dirt. Dry it completely with a clean towel—you don’t want water sitting on the skin during roasting.
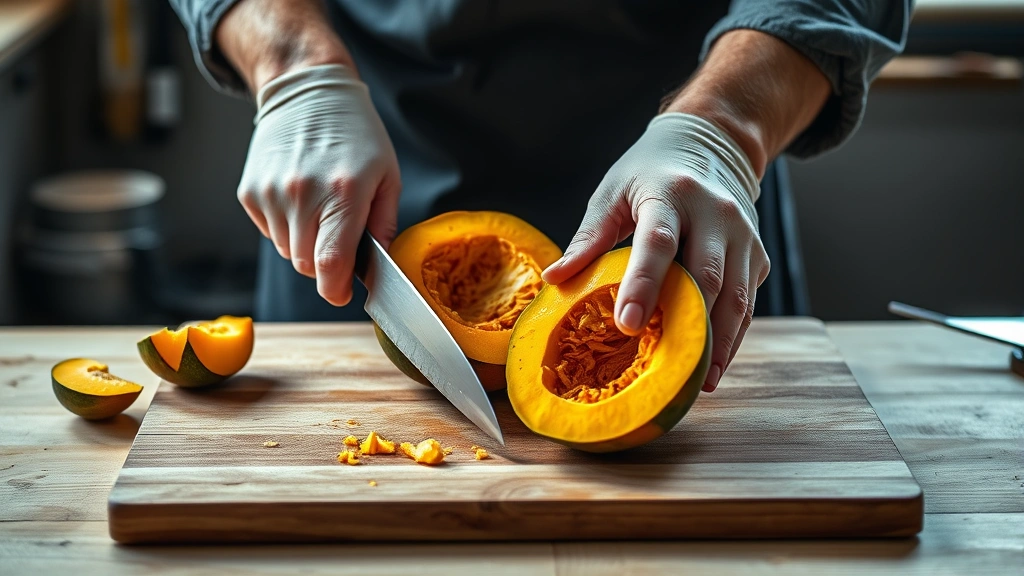
Now for the cut. Slice the squash in half lengthwise using a sharp chef’s knife. Take your time here; acorn squash skin is tough and you don’t want the knife slipping and taking your fingers with it. A steady cutting board and a good grip matter more than speed. Once you’ve got it halved, scoop out all the seeds and stringy bits with a sturdy spoon. Don’t waste those seeds though—roast them separately with a little oil and salt for an amazing snack.
Seasoning the Right Way
Here’s the thing about acorn squash: it’s naturally sweet, so you don’t need to go crazy with sugar or honey. A light brush of olive oil on the cut side is your foundation. Use about a teaspoon per half. This is what creates that gorgeous caramelization and helps seasonings stick.
For basic seasoning, hit it with kosher salt and freshly cracked black pepper. That’s genuinely all you need. But if you want to get creative, try cinnamon and nutmeg for a fall vibe, or cumin and chili powder for something savory. Garlic powder works beautifully too. The key is using a light hand—you’re enhancing the squash’s flavor, not burying it.
Oven Temperature & Timing
Set your oven to 400°F and let it preheat fully—this usually takes about 15 minutes. Some people roast at 375°F for longer, but 400°F is my go-to because it gives you that perfect balance of caramelized exterior and creamy interior in about 35-45 minutes.
The exact timing depends on squash size and your oven’s personality. Smaller squashes might be done in 35 minutes, while larger ones could need 50 minutes. You’ll know it’s getting close when the flesh starts turning translucent at the edges and a fork easily pierces it.
The Roasting Process
Place your squash halves cut-side down on a baking sheet lined with parchment paper or aluminum foil. This prevents sticking and makes cleanup way easier. Space them out so air can circulate—they shouldn’t be touching.
Slide the sheet into your preheated 400°F oven. Don’t open the door for at least 20 minutes; you want that heat to do its job undisturbed. After about 25-30 minutes, you can flip them cut-side up if you want to add toppings or just check progress. I usually leave mine cut-side down the whole time for maximum caramelization.
If you’re making this alongside other dishes like how long to cook chicken at 400, you’ve got timing flexibility. The squash is forgiving and won’t suffer from an extra 10-15 minutes if needed.
Testing for Doneness
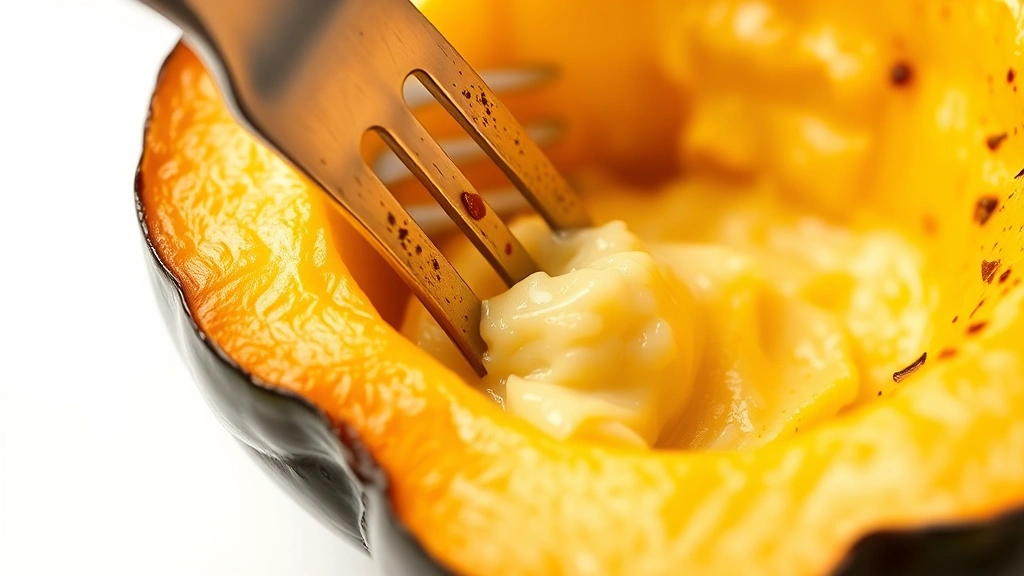
Around the 35-minute mark, grab a fork and press it into the thickest part of the flesh. It should slide through with almost no resistance. The skin should look slightly wrinkled and the edges should be caramelized to a golden brown. That’s your signal that you’re done.
If it’s still firm and the fork meets resistance, give it another 5-10 minutes. Undercooked acorn squash is tough and unpleasant; overcooked is still fine—it just gets softer and more custardy, which honestly isn’t a bad thing.
Flavor Variations Worth Trying
Once you’ve mastered the basic roast, branch out. Brush the cut side with maple syrup or honey about 5 minutes before it finishes roasting—the sugars caramelize and create this incredible glaze. Add a pinch of sea salt on top while it’s still hot.
For a savory route, try topping each half with a pat of herb butter (butter mixed with fresh sage, thyme, or rosemary). Let it melt into the hot squash flesh. You could also roast it, then fill the cavities with healthy potato recipes or grains like quinoa or farro for a complete meal.
Brown butter is another game-changer. Toast some butter in a skillet until it’s nutty and golden, then drizzle it over your roasted squash with a squeeze of fresh lemon juice. The acidity cuts through the richness perfectly.
Storage & Leftovers
Roasted acorn squash keeps in the fridge for up to 4 days in an airtight container. You can eat it cold straight from the container, reheat it gently in the oven at 325°F for about 10 minutes, or microwave it for a quick warm-up.
Leftover roasted squash is perfect for blending into soups, mixing into grain bowls, or stuffing into easy focaccia bread recipe as a filling. You can also freeze it for up to 3 months, though the texture gets slightly softer when thawed—still delicious, just not quite as firm.
Frequently Asked Questions
Can I cook acorn squash cut-side up instead of down?
Absolutely. Cut-side up takes about the same time but won’t caramelize as deeply. You’ll get a more tender result. If you want both caramelization and tenderness, roast cut-side down for 25 minutes, then flip cut-side up for the final 15-20 minutes.
What if my squash is still hard after roasting?
Your oven might run cool, or the squash was particularly dense. Give it another 10-15 minutes. If it’s still firm after that, your oven temperature might be off—consider getting an oven thermometer to check. Also, smaller, younger squashes cook faster than large, mature ones.
Do I need to peel acorn squash before cooking?
Nope. The skin softens during roasting and becomes edible. Some people eat it, others scoop the flesh out and leave the skin on the plate. Both approaches work fine. If you prefer, you can peel it after roasting when it’s cooler and softer.
Can I roast acorn squash at a different temperature?
Yes. Lower temperatures (350-375°F) work but take 50-60 minutes. Higher temperatures (425-450°F) speed things up to 25-35 minutes but increase the risk of burning the outside before the inside cooks. Stick with 400°F for the best balance.
What’s the difference between acorn and butternut squash roasting?
Butternut squash has thinner skin and denser flesh, so it roasts slightly faster—usually 30-40 minutes at 400°F. Acorn squash has thicker skin but less dense flesh. The basic method is identical; just adjust timing based on what you’re cooking.
Should I add water to the baking sheet?
You don’t need to. The squash releases its own moisture during roasting. Adding water actually prevents caramelization, which is the whole point. Keep that baking sheet dry.
Final Thoughts
Roasting acorn squash in the oven is genuinely one of the easiest ways to get a restaurant-quality side dish on your table. Pick a good squash, prep it properly, season it simply, and let the oven do the heavy lifting. Whether you’re serving it alongside how to make gravy from turkey drippings at Thanksgiving or enjoying it as a weeknight side, this method delivers every single time. Once you’ve made it once, you’ll be making it constantly. It’s that good.
Want to explore more squash varieties? Check out our chayote squash recipes for something completely different but equally delicious.


