

Learning how to cook a ribeye in the oven is one of those kitchen skills that’ll make you look like a pro without breaking a sweat. Forget the fancy steakhouse prices—you can nail a restaurant-quality ribeye right in your own kitchen with some basic technique and the right approach. This method works every single time because it uses a two-stage cooking process that gets you a perfectly seared crust and a juicy, evenly cooked interior.
Table of Contents
Why the Oven Method Works
The oven method for cooking ribeye steaks is superior to many other techniques because it gives you precise temperature control and even cooking. When you sear the steak on the stovetop first, you create that golden, caramelized crust that makes your mouth water. Then the oven takes over, gently bringing the interior to your desired doneness without overcooking the outside. This reverse-sear approach is what fancy steakhouses use, and now you can use it at home.
The beauty of this method is consistency. Whether you’re cooking for yourself or impressing dinner guests, the results are predictable and delicious every time. No more guessing, no more overcooked edges with a cold center.
Choosing the Right Ribeye
Start with quality meat—this is non-negotiable. Look for ribeyes that are at least 1.5 inches thick, preferably 2 inches. The thickness matters because thinner steaks cook too fast and don’t develop that beautiful crust. You want good marbling throughout the meat; those little white lines of fat are what make ribeye so flavorful and forgiving to cook.
Ask your butcher for USDA Prime or Choice grade beef if you can. Prime has more marbling, but Choice is excellent and often more affordable. Grab steaks with a bright red color and white (not yellow) fat. If you’re buying from the grocery store, look at the packaging date and choose the freshest option available.
Prep Work That Matters
This step separates good cooks from great ones. Remove your ribeye from the refrigerator 30-40 minutes before cooking. Cold meat won’t cook evenly, and the outside will burn before the inside reaches temperature. Let it sit on the counter to come to room temperature—this is crucial.
Pat the steak completely dry with paper towels. Moisture is the enemy of browning. You want a dry surface so the meat can develop that gorgeous crust. Now season generously with kosher salt and freshly ground black pepper on both sides. Don’t be shy—the seasoning should be visible. Some people add it 40 minutes before cooking, others right before searing. Both work; the timing just affects how the salt penetrates the meat.
If you want to get fancy, try a simple rub with garlic powder, smoked paprika, or dried herbs. But honestly, salt and pepper are all you really need for a perfect ribeye.
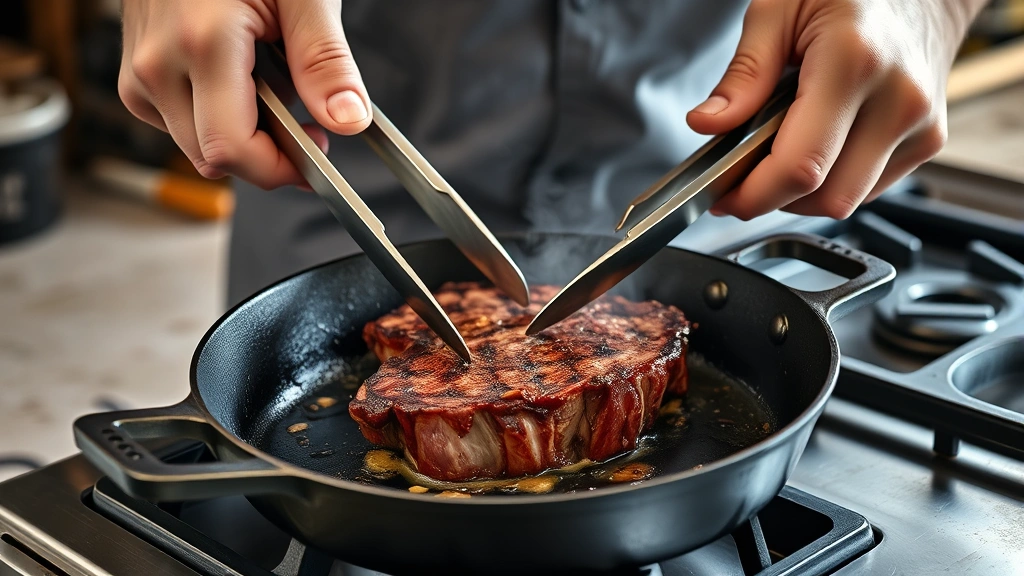
Searing Your Steak
Heat your oven to 400°F first—you’ll need it ready when the searing is done. While the oven preheats, get a cast-iron skillet or heavy stainless steel pan screaming hot over high heat. Cast iron is ideal because it holds heat like a champ and won’t cool down when you add the cold steak.
Add a high-smoke-point oil to the pan—avocado oil, vegetable oil, or refined coconut oil all work great. Don’t use olive oil or butter for this step; they’ll burn. When you see wisps of smoke coming off the oil, you’re ready. Carefully place the ribeye in the pan and resist the urge to move it. Let it sit for 3-4 minutes without touching it. This is how you get that restaurant-quality crust.
Flip it once and sear the other side for another 3-4 minutes. If your steak has a fat cap on the edge, hold it with tongs and sear that side too—about 30 seconds. The goal is a dark brown crust on all sides. Don’t worry about the inside being cooked; that’s what the oven is for.
Finishing in the Oven
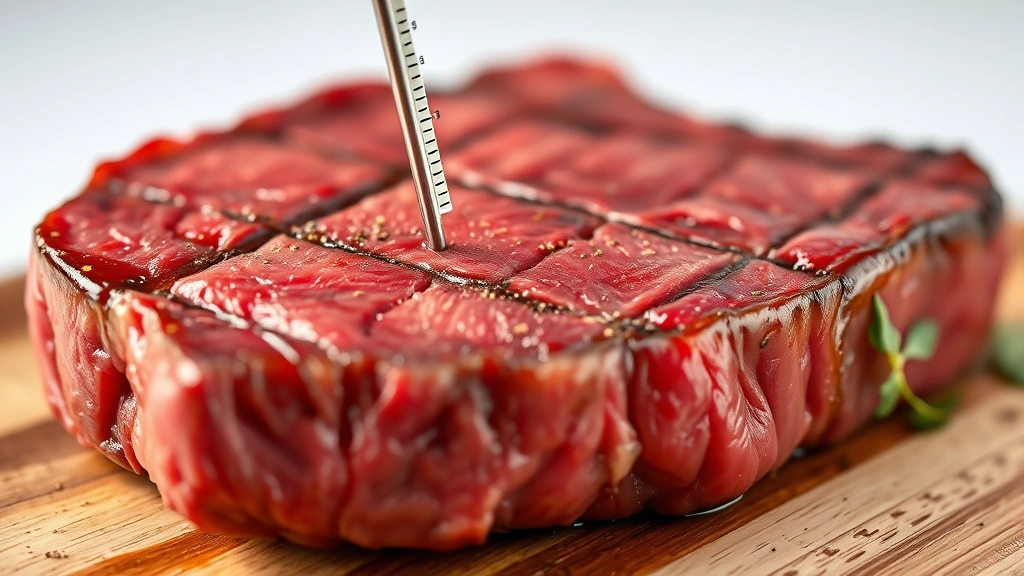
Once your steak is beautifully seared, transfer the whole skillet to your preheated 400°F oven. If your skillet isn’t oven-safe, transfer the steak to a baking dish. Insert a meat thermometer into the thickest part of the steak, making sure it’s not touching bone or fat.
This is where patience pays off. The oven will gently cook the interior while maintaining that crust you just created. Check the temperature after 5 minutes, then every minute or two after that. Cooking time depends on thickness and your oven, but you’re looking at 8-15 minutes total for a 1.5 to 2-inch steak.
Don’t skip the thermometer—it’s your insurance policy against overcooking. Pull the steak out when the internal temperature is about 5 degrees below your target doneness. The residual heat will continue cooking it while it rests.
Temperature Guide for Doneness
Here’s what to aim for with your meat thermometer:
- Rare: 120-125°F (pull at 115°F)
- Medium-Rare: 130-135°F (pull at 125°F) — This is the sweet spot for ribeye
- Medium: 140-145°F (pull at 135°F)
- Medium-Well: 150-155°F (pull at 145°F)
- Well-Done: 160°F+ (pull at 155°F)
Most steak enthusiasts recommend medium-rare for ribeye. It’s warm throughout but still has a beautiful pink center and stays incredibly juicy. The marbling in a ribeye means even well-done won’t be tough, but you’ll lose some of that tender, buttery texture.
The Critical Resting Step
This is the step people skip and immediately regret. When you pull the steak from the oven, place it on a cutting board or plate and let it rest for 5-10 minutes. Cover it loosely with foil if you want to keep it warm.
During cooking, the heat pushes all the juices toward the center of the meat. Resting allows those juices to redistribute throughout the steak. If you cut into it immediately, all those delicious juices run out onto your plate instead of staying in your mouth. Patience here makes the difference between a good steak and an incredible one.
Adding Flavor and Finishing Touches
Once your steak has rested, this is the perfect time to add a finishing touch. A pat of compound butter (butter mixed with herbs like rosemary or thyme) melting on top is absolutely divine. You could also try finishing with fleur de sel (fancy sea salt) for a gourmet touch.
If you’re into sauces, a simple pan sauce made from the drippings works beautifully. For something more sophisticated, try an au poivre sauce recipe that complements ribeye perfectly. A squeeze of fresh lemon juice right before eating brightens everything up too.
For side dishes, check out some best summer recipes to find complementary sides. Loaded baked potatoes, grilled asparagus, or a simple salad all pair wonderfully with a perfectly cooked ribeye.
Mistakes to Avoid
Don’t cook from cold. I mentioned this before but it bears repeating—room temperature meat is essential for even cooking. Starting with a cold steak means the outside will overcook before the inside reaches temperature.
Don’t skip the thermometer. Guessing by touch or timing alone is how you end up with ruined steaks. A good instant-read thermometer costs $15-30 and is worth every penny.
Don’t move the steak while searing. The crust develops through contact with the hot pan. Moving it around prevents browning and steams the meat instead. Patience is your friend here.
Don’t cook past your target temperature. Remember, the steak continues cooking after you pull it out. Pull it 5 degrees early and you’ll nail it every time. Overcooking a premium cut like ribeye is a tragedy.
Don’t skip the rest. I know you’re excited to eat, but those 5-10 minutes make an enormous difference in juiciness and texture.
Frequently Asked Questions
Can I use a different cut of steak with this method?
Absolutely. This oven-searing method works beautifully with New York strips, filet mignon, and porterhouse steaks. Adjust cooking times based on thickness—thinner steaks need less oven time, thicker ones need more. The principle remains the same: sear, then finish in the oven.
What if I don’t have a cast-iron skillet?
Any oven-safe skillet with heavy construction works fine. Stainless steel pans are excellent. Just make sure whatever you use can handle high stovetop heat and oven temperatures. Avoid non-stick pans for this technique—they don’t handle high heat well and don’t brown meat as effectively.
How do I know if my skillet is oven-safe?
Check the bottom or side of the pan for an oven-safe symbol, or look at the manufacturer’s specifications. Most cast iron and stainless steel cookware is oven-safe up to 500°F or higher. If you’re unsure, transfer the steak to a baking dish before putting it in the oven.
Can I cook ribeye this way in a regular oven versus a convection oven?
Yes, both work. Convection ovens circulate air, which can speed up cooking slightly. If using convection, reduce the temperature by 25°F and start checking the internal temperature a bit earlier. The method remains the same.
What’s the difference between this method and grilling?
Grilling gives you more direct heat and char, while the oven method is more controlled and consistent. The oven method is perfect for year-round cooking and when you want predictable results. Grilling is great if you want more intense flavor and have outdoor space. Both methods produce excellent steaks.
Should I oil the steak or the pan?
Oil the pan, not the steak. When you oil the pan, it gets to the right temperature and creates that perfect sear. Oiling the cold steak means the oil cools down when it hits the pan, preventing proper browning.
Can I cook frozen ribeye this way?
Not recommended. Frozen steaks won’t sear properly and the cooking time becomes unpredictable. Thaw your ribeye in the refrigerator overnight before cooking. In a pinch, you can use the cold-water method: seal the steak in a bag and submerge it in cold water for 30 minutes to an hour, changing the water every 15 minutes.


