
Learning how to connect DJI Mic to Sony ZV E10 is one of the smartest moves you can make if you’re serious about content creation. This wireless microphone system transforms your Sony ZV-E10 from a decent vlogging camera into a professional-grade setup that captures crystal-clear audio without the headaches of tangled cables or complicated gear.
Table of Contents
Why DJI Mic Matters
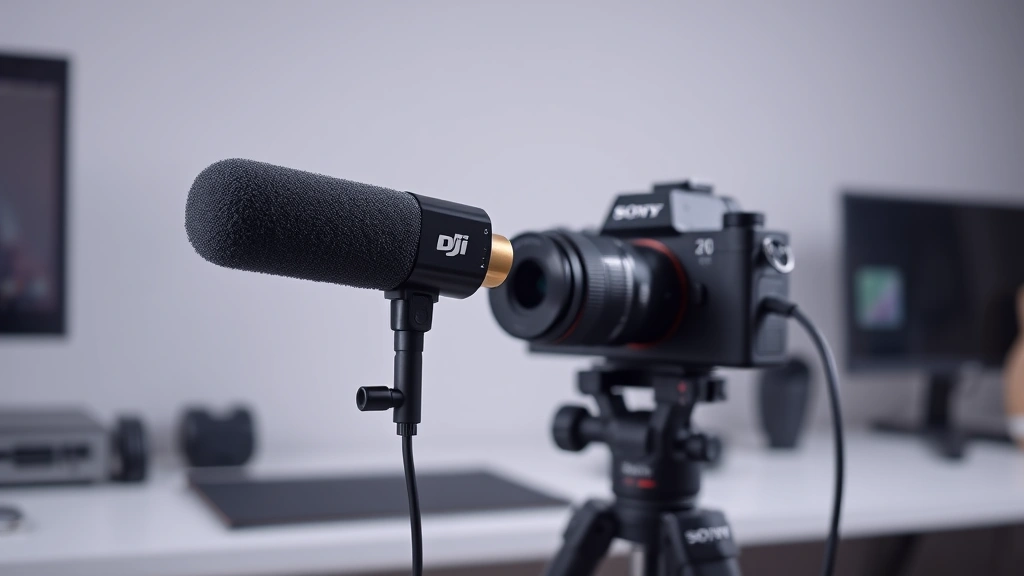
The Sony ZV-E10 is built for creators, and pairing it with the DJI Mic elevates your production value instantly. Unlike traditional lavalier mics that require 3.5mm connections or USB adapters that drain your camera battery, the DJI Mic system gives you wireless freedom up to 250 meters away. Your audio stays synchronized, your movements stay natural, and your viewers hear every word crystal clear.
The real beauty here is simplicity. Once you understand the basics of connecting DJI Mic to Sony ZV E10, you’re looking at a setup that takes under five minutes to deploy on any shoot. No more fumbling with cables between takes or dealing with wind noise that ruins your footage. This is the kind of gear that makes you look like you know what you’re doing, even when you’re just starting out.
What You Need Before Starting
Before you dive into the connection process, gather your equipment. You’ll need the DJI Mic transmitter and receiver units, your Sony ZV-E10 camera, a USB-C cable, and the 3.5mm audio adapter that comes in the DJI Mic box. Some setups also benefit from a USB-C hub if your camera has limited ports, though the ZV-E10 handles this pretty well.
Make sure both devices have fresh batteries or are fully charged. The DJI Mic transmitter and receiver each run on built-in lithium batteries that typically last around 6-8 hours, while your Sony camera should have a solid charge before you start testing. Check that your camera’s firmware is up to date—Sony regularly releases updates that improve microphone compatibility and audio handling. Visit Sony’s official support page to download the latest version if needed.
Step-by-Step Connection Process
Here’s where the magic happens. Start by turning on both the DJI Mic transmitter and receiver. You’ll see LED indicators light up—typically a white or blue light means they’re powered and searching for each other. The receiver and transmitter pair automatically, which is one of the reasons this system is so user-friendly.
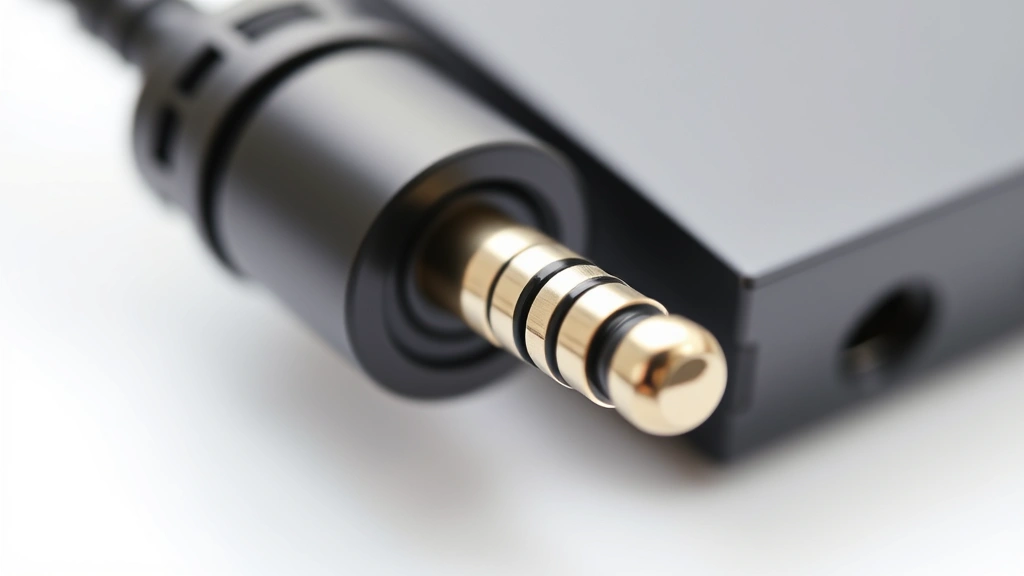
Next, take the 3.5mm audio adapter cable and connect it to the receiver unit. This is the physical bridge between your wireless system and your camera. Plug the other end into your Sony ZV-E10’s 3.5mm microphone jack, which sits on the side of the camera body. You’ll hear a subtle click when it seats properly—don’t force it, just let it settle naturally.
Power on your Sony ZV-E10 and navigate to the menu. Head to the audio settings section and select “Microphone” or “Audio Input.” Set the input source to “Microphone” rather than “Auto” or “Internal Mic.” This tells your camera to listen to the external audio coming through the 3.5mm jack instead of relying on the built-in microphone. At this point, you’ve successfully completed the physical connection, but there’s still configuration work ahead.
Configure Audio Settings on Sony
The Sony ZV-E10 gives you granular control over audio levels, and that’s exactly what you need for professional results. In the camera menu, find the “Microphone Level” or “Audio Level” setting. You’ll see a slider or numerical input—start at around -6dB to -3dB for typical speaking volume. This prevents audio clipping (that horrible distorted sound) while maintaining clear, punchy dialogue.
Enable “Automatic Gain Control” (AGC) if you’re recording in unpredictable environments where volume fluctuates. For more controlled settings like studio recording or interviews, turn AGC off and manually adjust levels. The ZV-E10 displays a real-time audio meter on the screen—watch these bars while you talk to dial in the perfect level. You want the meter hitting around -12dB to -6dB during normal speech, leaving headroom for unexpected loud moments.
Don’t overlook the “Windscreen” or “Wind Noise Reduction” option in your audio menu. Even though you’re using a wireless mic, the DJI Mic receiver still benefits from this setting. Turn it on if you’re shooting outdoors or in breezy conditions. This feature reduces low-frequency rumble that makes your footage sound unprofessional.
Testing Your Audio Setup
Before you hit record on an important project, do a proper test. Put on headphones—this is crucial—and plug them into your camera’s headphone jack if it has one, or use the camera’s speaker. Have someone speak into the DJI Mic transmitter while you monitor the audio. You should hear their voice clearly through the headphones, with no lag or distortion.
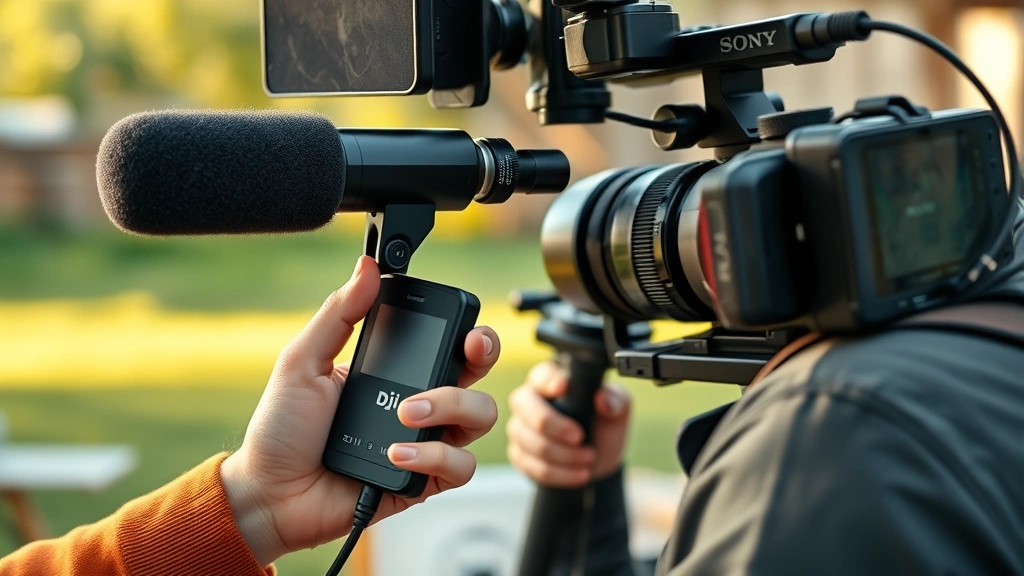
Walk around your recording space while speaking into the transmitter. Test the 250-meter wireless range claim by moving progressively farther from the receiver. In real-world conditions (indoors with walls), you’ll typically get solid performance up to 50-100 meters without issues. Outdoors with clear line-of-sight, you’ll approach that full 250-meter range. Note any dead zones in your space where the signal drops—these are areas to avoid during actual shoots.
Record a 30-second test clip and review it on your camera’s screen or by transferring it to your computer. Listen for clarity, check that levels are consistent, and make sure there’s no weird compression or artifacts. This test run catches problems before they ruin your real content. If you hear any issues, check your connections and revisit the audio settings before moving forward.
Troubleshooting Common Issues
No audio coming through? First, verify that the 3.5mm cable is fully inserted into both the receiver and the camera. Sometimes it looks connected but isn’t seated all the way. Second, check your camera’s audio input setting—make sure it’s set to “Microphone” and not “Internal Mic” or “Auto.” Third, confirm that the DJI Mic transmitter and receiver are actually paired. They should show a solid light, not blinking. If they’re blinking, hold the pairing button for 3-5 seconds on both units.
Audio cutting in and out? This usually means the wireless connection is unstable. Move closer to the receiver, remove any metal objects between the transmitter and receiver, and check for interference from other wireless devices (routers, cell phones, other wireless mics). If you’re in a crowded event with lots of RF interference, the DJI Mic might struggle. In that case, consider a wired connection as backup or use a different microphone system designed for high-interference environments.
Audio levels too low or too high? Adjust the receiver unit’s output level first—there’s usually a small dial or buttons on the receiver itself. Then fine-tune in your camera menu. If levels are still problematic, check that your 3.5mm cable isn’t damaged. A frayed or partially broken cable causes weak audio signals. For reference, B&H Photo’s guide on wireless microphone systems covers common audio issues across multiple setups.
Optimize Recording Quality
Now that your DJI Mic is connected and working, let’s squeeze every ounce of quality from it. Use the camera’s manual audio level mode for consistent results across multiple takes. Set your levels conservatively—aim for peaks around -6dB rather than pushing to 0dB. This gives you safety margin if someone suddenly speaks louder than expected.
Invest in a foam windscreen for the DJI Mic transmitter if you’ll be recording outdoors regularly. The included windscreen is basic, but a quality foam cover dramatically reduces wind noise and plosives (those harsh “p” sounds). Position the transmitter about 6-8 inches from the speaker’s mouth for ideal audio capture. Too close and you get plosive distortion; too far and the signal weakens.
Record in 24-bit or 16-bit audio format if your camera offers the option. Higher bit depth captures more detail and gives you more flexibility during post-production editing. If you’re uploading directly to platforms like YouTube or TikTok, 16-bit is standard and perfectly adequate. For professional editing workflows, 24-bit gives you more room to work with.
Maintenance and Care Tips
The DJI Mic system is durable, but it deserves respect. After each shoot, power down both units and store them in a protective case. The receiver and transmitter have small connectors that can corrode if exposed to moisture, so keep them dry. If you’re shooting in humid conditions, use silica gel packets in your storage case to absorb excess moisture.
Check the 3.5mm cable monthly for any visible damage. These cables take a beating during typical use—they get twisted, stepped on, and yanked accidentally. A damaged cable causes audio dropouts and quality loss. DJI sells replacement cables affordably, so don’t hesitate to swap out a worn one. Battery contacts on both the transmitter and receiver should be cleaned occasionally with a dry cloth to maintain reliable charging.
Keep your camera’s firmware updated, as mentioned earlier. Sony regularly releases audio improvements and bug fixes that enhance microphone compatibility. Subscribe to Sony’s support notifications so you don’t miss important updates. When you’re not using the DJI Mic for extended periods, charge the batteries monthly to keep them healthy. Lithium batteries degrade faster if left completely discharged for months.
Frequently Asked Questions
Can I use the DJI Mic with other cameras besides the Sony ZV-E10?
Absolutely. The DJI Mic connects to any camera with a 3.5mm microphone jack. That includes iPhones (with an adapter), GoPros, DSLRs, mirrorless cameras, and even some smartphones. The connection method is identical—just plug the 3.5mm cable into your device’s mic input and configure audio settings accordingly.
How long does the DJI Mic battery last on a single charge?
Both the transmitter and receiver offer approximately 6-8 hours of battery life per charge. If you’re doing full-day shoots, bring a portable charger or have a second set of batteries ready. The charging case included with some DJI Mic bundles extends total runtime significantly—check your specific model for details.
Is there a delay or lag between speaking and recording with the DJI Mic?
The latency is minimal—typically under 50 milliseconds, which is imperceptible to human ears. You won’t notice any sync issues between your video and audio. This is one of the major advantages of the DJI Mic over cheaper wireless systems that introduce noticeable delays.
What’s the actual wireless range in real-world conditions?
DJI claims 250 meters in ideal conditions, but real-world range is more like 50-100 meters indoors and 100-150 meters outdoors with clear line-of-sight. Walls, metal structures, and other obstacles reduce range significantly. Test your specific environment before relying on maximum distance for important shoots.
Can I record audio while monitoring through headphones?
Yes. Plug headphones into your Sony ZV-E10’s headphone jack (if equipped) and you’ll hear the audio while it records simultaneously. This lets you monitor quality in real-time without affecting the recorded file. This is essential for catching audio problems before they ruin your footage.
Do I need any additional adapters or cables?
The 3.5mm adapter cable comes in the DJI Mic box, so you don’t need to buy anything extra for basic setup. However, a quality USB-C hub, extra 3.5mm cables as backups, and a foam windscreen are worthwhile investments for serious creators. These items prevent you from being stranded if something fails during a shoot.
What if my Sony ZV-E10 doesn’t have a 3.5mm microphone jack?
The ZV-E10 definitely has a 3.5mm input jack on the side of the camera body. If you can’t locate it, refer to your camera manual—it’s a small round jack typically labeled with a microphone symbol. It’s separate from the headphone jack, so make sure you’re connecting to the right port.
Should I use automatic or manual audio levels?
For professional results, use manual levels. Automatic gain control can introduce unwanted compression and make your audio sound processed. Manual levels give you full control and produce cleaner, more natural-sounding dialogue. Set your levels conservatively during setup, then leave them alone during recording.
Wrapping It Up
Connecting the DJI Mic to your Sony ZV-E10 is straightforward once you understand the process. You’re looking at a five-minute physical setup followed by another five minutes of menu configuration. The payoff is professional-quality wireless audio that makes your content look and sound like it was produced by someone who knows their gear.
Start with the basic connection, run your tests, and don’t skip the troubleshooting step. Once you’ve confirmed everything works, you’ll have a reliable audio system that handles real-world shooting conditions beautifully. Whether you’re vlogging, interviewing, or creating tutorials, this combination gives you the freedom to move, the clarity to be heard, and the professionalism to stand out. Your audience will notice the difference immediately—clear audio is one of the fastest ways to elevate perceived production value.
For more detailed information on wireless microphone systems, check out Family Handyman’s tech guides and This Old House’s equipment reviews. Both sites offer comprehensive equipment testing that helps you make informed purchasing decisions for your creative setup.


