
Learning how to collect colostrum is one of the most practical skills you’ll develop as a new mom, and honestly, it’s way easier than you’d think. Colostrum—that first liquid gold your body produces before mature milk arrives—is packed with antibodies and nutrients your baby desperately needs. Whether you’re planning to hand-express, use a pump, or combine methods, this guide walks you through everything you need to know to collect, store, and use your colostrum with confidence.
Table of Contents
What Is Colostrum Anyway?
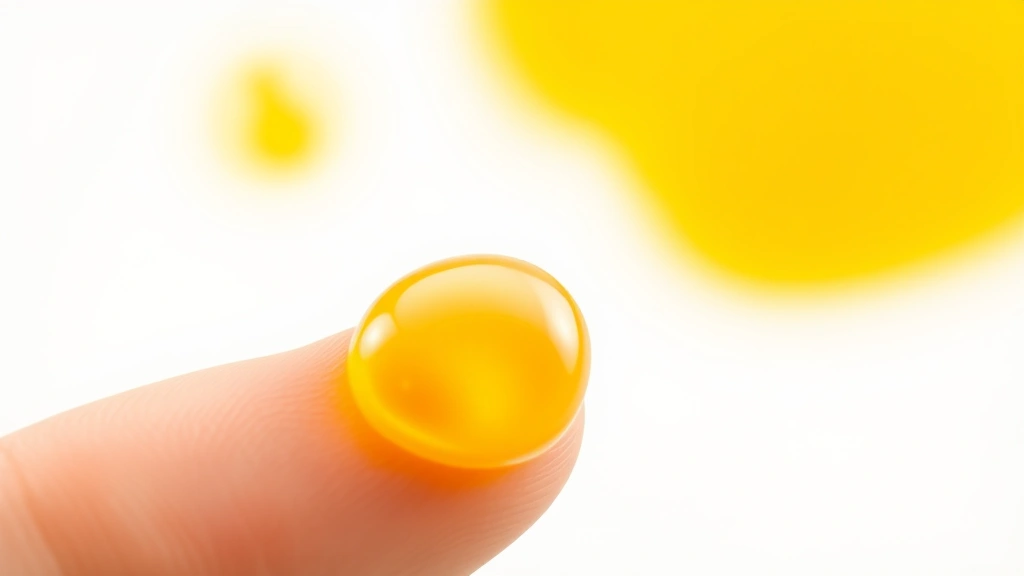
Colostrum is the thick, yellowish liquid your breasts produce during pregnancy and the first few days after birth. Think of it as nature’s first vaccine—it’s concentrated with immunoglobulins, white blood cells, and proteins that protect your newborn from infections and support their immature digestive system. Unlike mature milk, colostrum is produced in smaller quantities (usually just a few milliliters per feeding), but it’s incredibly nutrient-dense. Your body knows exactly what your baby needs at that moment, which is pretty remarkable when you think about it.
The composition actually changes over time. Early colostrum (the first 24-48 hours) is the most concentrated, then gradually transitions to transitional milk around day 3-5, and finally to mature milk by about two weeks postpartum. This is why collecting colostrum early is so valuable—you’re capturing the most potent nutrition your body can provide.
When to Start Collecting
You can start collecting colostrum as early as 34-36 weeks of pregnancy if your healthcare provider gives the green light. Antenatal expression—collecting before baby arrives—gives you a head start and takes pressure off those first chaotic days. However, many moms start collecting immediately after birth, which is perfectly fine too. The key is starting sooner rather than later, because colostrum production is highest in those first 48-72 hours.
If you’re planning to exclusively bottle-feed colostrum (for any reason), starting collection in the hospital or birth center is ideal. You’ll have support from lactation consultants who can guide your technique and answer questions in real-time. If you’re delivering at home or planning to breastfeed directly, you might collect just a small backup supply for peace of mind.
Hand Expression Method
Hand expression is the gold standard for collecting colostrum, especially in those early days. It’s gentler than pumping, requires no equipment, and gives you complete control. Here’s the step-by-step process:
Step 1: Get Comfortable Sit in a comfortable position with good lighting. Wash your hands thoroughly. You can do this one breast at a time, and it usually takes 5-10 minutes per side.
Step 2: Warm and Massage Apply a warm compress or take a warm shower beforehand—warmth increases flow. Gently massage your breast in circular motions, working from the outer edges toward the nipple. This stimulates milk ducts and gets things moving.
Step 3: Position Your Hand Place your thumb and fingers about an inch to an inch-and-a-half behind the nipple, forming a C-shape. You’re aiming for the milk ducts under the areola (the darker area around your nipple), not squeezing the nipple itself.
Step 4: Express Rhythmically Roll your thumb and fingers forward gently, compressing the milk ducts. Release and repeat in a rhythmic pattern—compress, release, compress, release. You’ll feel droplets forming. Don’t rush; this takes patience. Rotate your hand position around the breast to access different ducts.
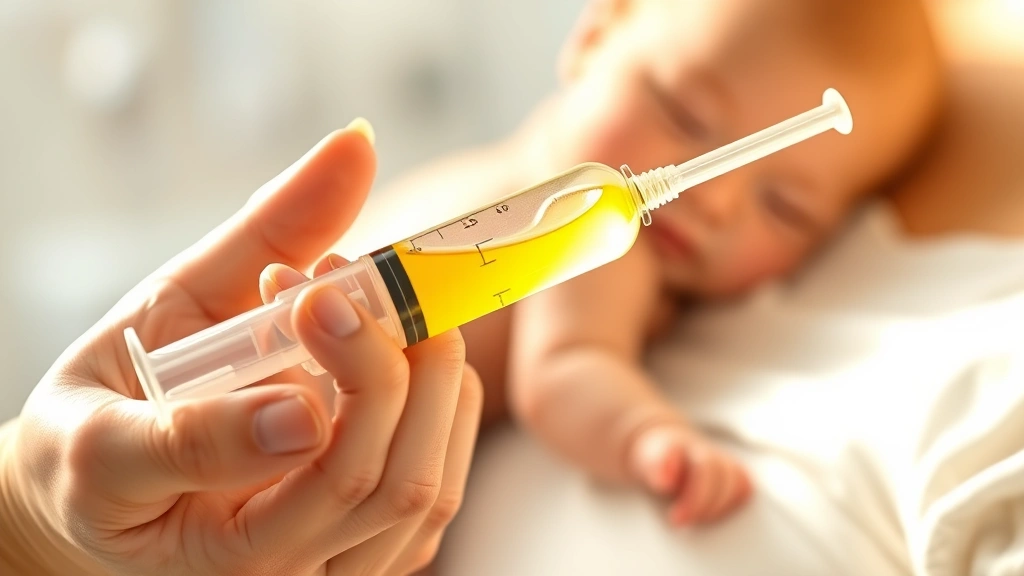
Step 5: Collect in a Container Use a clean, sterile collection cup or syringe. Small 5-10ml syringes work beautifully because the narrow opening catches every precious drop. Some moms use small shot glasses or sterile containers provided by their hospital.
The beauty of hand expression is that you can feel exactly what’s happening and adjust pressure as needed. It’s also free and always available—no equipment to pack or batteries to charge.
Using a Breast Pump
If you prefer pump collection or want to combine hand expression with pumping, that’s absolutely valid. Electric pumps designed for hospital use work best for colostrum collection because they’re more powerful and efficient than personal pumps. Many hospitals and birth centers have them available, and some insurance plans cover rentals.
For early colostrum collection, use the lowest suction setting—you don’t need aggressive suction when you’re working with such small quantities. Start at about 30-40% suction and increase gradually only if needed. Pump for 10-15 minutes per session, or until flow slows significantly.

Manual pumps are less effective for colostrum but can work if that’s your only option. The hand-expression method honestly beats manual pumps for early milk collection anyway. Save the electric personal pump for when your mature milk comes in and production increases.
Storage and Safety Guidelines
Proper storage keeps your liquid gold safe and usable. Here’s the breakdown based on storage location:
Room Temperature (68-72°F): Colostrum can stay out for up to 4 hours. This is fine for immediate use or short-term storage during collection sessions.
Refrigerator (35-39°F): Lasts up to 5 days. This is ideal for colostrum you’ll use within a few days. Store in the back of the fridge, not the door (temperature fluctuates there).
Freezer (0°F or below): Stays good for 6 months in a standard freezer, up to 12 months in a deep freezer. Label everything with the date—seriously, use waterproof labels or a permanent marker. Frozen colostrum is your insurance policy.
Use sterile, food-grade containers or syringes. Many moms prefer syringes because they’re easy to label, take minimal space, and you can feed directly from them with a bottle adapter. Store in small quantities (5-10ml) so you only thaw what you need.
When thawing, move from freezer to fridge overnight, or hold under warm (not hot) running water. Never microwave or boil—heat destroys the antibodies you worked hard to collect. Thawed colostrum lasts 24 hours in the fridge; use it or lose it.
Essential Collection Supplies
You don’t need much, but having the right items makes collection easier. Here’s your checklist:
- Sterile syringes (5-10ml): Perfect for collection and storage. Ask your hospital or midwife for extras.
- Sterile collection cups: Small containers work if you prefer them to syringes.
- Warm compress or heating pad: Encourages milk flow. Even a warm washcloth works.
- Waterproof labels: Mark date and time on everything.
- Storage containers: Sterile bottles or bags designed for breast milk.
- Hand sanitizer: For quick hand cleaning between sessions.
- Nipple cream (optional): If hand expression causes discomfort, a lanolin-based cream helps.
Your hospital or birth center usually provides most of these items, so ask what they have available before buying anything.
Troubleshooting Common Issues
Nothing’s Coming Out This is normal—colostrum production is minimal in early pregnancy or immediately after birth. Keep trying; it often takes 2-3 minutes of massage and expression before anything appears. Warmth helps tremendously. If you’re truly getting nothing after 10-15 minutes, try again in a few hours.
Milk Ducts Feel Blocked Gentle massage with warm compresses usually clears minor blockages. Use varying hand positions around the breast. If you develop a hard lump or redness with fever, contact your healthcare provider—that could indicate mastitis.
Expressing Is Uncomfortable You shouldn’t be in pain. Check your hand position—you might be squeezing the nipple instead of the ducts. Reduce pressure and focus on the areola. Warm compresses and gentle massage help too. If pain persists, ask a lactation consultant to check your technique.
Very Low Production Some moms produce minimal colostrum, especially if they’ve had breast surgery or certain hormonal conditions. This doesn’t mean you can’t breastfeed successfully later. Collect what you can, stay hydrated, and work with a lactation consultant.
Feeding Colostrum to Baby
Once you’ve collected your colostrum, the next step is getting it into your baby. If you’re breastfeeding directly, you might not need to use expressed colostrum at all—your baby gets it straight from the source. But having a backup supply is smart for situations like delayed breastfeeding initiation, low blood sugar concerns, or if you need to be separated from baby temporarily.
For bottle feeding colostrum, use a regular bottle with a slow-flow nipple or even a cup feeder. Some moms prefer syringes because you can give small amounts (5-10ml) precisely and slowly, which mimics how baby would get colostrum at the breast. Warm the colostrum slightly under running water—never microwave. Feed at baby’s cues, watching for rooting and hunger signs.
Your pediatrician or midwife will advise on how much to offer based on baby’s weight and feeding plan. Generally, newborns take small amounts (5-15ml per feeding) in those first days, gradually increasing as their stomach capacity grows.
Frequently Asked Questions
Can I collect colostrum while pregnant?
Yes, antenatal expression is safe from 34-36 weeks onward with your healthcare provider’s approval. It’s especially recommended if you have diabetes, plan to exclusively pump, or want a backup supply. Start gently and stop if you experience any cramping or concerns.
How much colostrum should I expect to collect?
In early days, expect just 5-15ml per session—that’s about a teaspoon or less. This is completely normal. Colostrum is concentrated, so small amounts pack major nutrition. Production increases gradually as days pass.
Is hand expression better than pumping for colostrum?
For early colostrum collection, hand expression is generally more effective and gentler. Pumps work better once mature milk comes in and volumes increase. Many moms use both methods depending on the situation.
Can I mix colostrum collected on different days?
Yes, you can combine colostrum from different collection sessions if they’re all from the same day. If mixing across days, use the earlier date for storage timeline purposes. Label accordingly.
What if my colostrum looks thick or stringy?
That’s perfectly normal—early colostrum is thick and concentrated. It might look more yellow or orange than milk, and the consistency is often sticky. This is exactly what your baby’s digestive system needs.
Do I need to sterilize collection supplies?
Hospital-grade supplies come sterile. For home use, wash with hot soapy water and air dry, or use a sterilizer. For a single-use item like a syringe, washing thoroughly is usually sufficient, but sterilizing adds an extra safety layer.
Final Thoughts
Collecting colostrum is a practical, empowering way to give your baby the best possible start. Whether you’re expressing in a hospital bed hours after delivery or starting antenatal collection in your bathroom at home, you’re doing something incredible. The process is straightforward once you get the hang of it, and having even a small backup supply provides peace of mind during those early chaotic days.
Remember that every drop counts, and what might seem like a tiny amount is actually packed with immune protection and nutrients. If you hit any snags, don’t hesitate to ask your midwife, lactation consultant, or pediatrician for guidance. They’ve helped thousands of moms through this, and they’re there to support you.
For additional information on newborn nutrition and feeding, check out resources from La Leche League International, the American College of Obstetricians and Gynecologists, and your local hospital’s lactation services. You’ve got this, mama.


