
Learning how to clean window screens is one of those simple home maintenance tasks that makes a massive difference in how your windows look and function. Dirty screens trap dust, pollen, and debris that can accumulate over months or even years, blocking natural light and making your view fuzzy. The good news? You don’t need fancy equipment or expensive cleaners. With basic household items and about 30 minutes, you can restore your screens to like-new condition.
Table of Contents
Why Clean Window Screens Matter
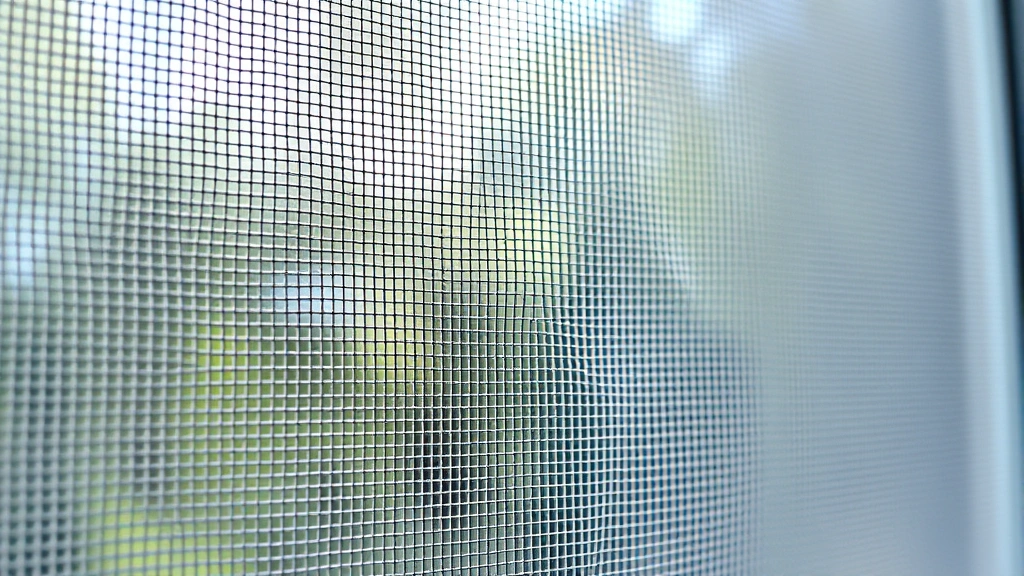
Your window screens are hardworking barriers that keep bugs out while letting fresh air in. But they’re also magnets for dust, pollen, dead insects, spider webs, and outdoor debris. Over time, this buildup doesn’t just look gross—it restricts airflow, reduces natural light, and can actually make your allergies worse during spring and fall. Clean screens mean better ventilation, clearer views, and a healthier home environment. Plus, a quick cleaning session every spring and fall prevents the grime from becoming permanently embedded in the mesh.
Gather Your Cleaning Supplies
Before you start, round up these basic items you probably already have at home:
- Soft-bristled brush (old toothbrush or soft-bristled hand brush)
- Vacuum with brush attachment (optional but helpful)
- Mild dish soap (Dawn or similar)
- Warm water
- Bucket
- Clean towels or old rags
- Spray bottle (optional)
That’s it. You don’t need expensive commercial screen cleaners or harsh chemicals. If you’re dealing with really stubborn grime, white vinegar mixed with water works wonders, and it’s something you likely already use for other household cleaning tasks.
Remove Screens from Windows
The easiest way to clean window screens thoroughly is to take them out of the window frames. Most screens simply pop out or slide down slightly—look for small tabs or clips on the sides of the frame. Push these tabs inward while gently pulling the screen toward you. If your screens are older and stuck, work slowly and carefully to avoid bending the frame. Lay each screen flat on a clean surface like your patio, driveway, or a large table. This gives you full access to both sides of the mesh, which is crucial for real cleaning power.
Give Screens an Initial Rinse
Start by removing loose debris. If you have a garden hose, spray both sides of the screen with a gentle stream of water. You’ll be amazed how much dust and pollen comes off with just water. If you don’t have a hose, use a vacuum with the brush attachment to suck up loose particles from one side, then flip and repeat. This step prevents you from just pushing dirt around when you start scrubbing. Take your time here—removing the easy stuff first makes the actual cleaning much more effective.
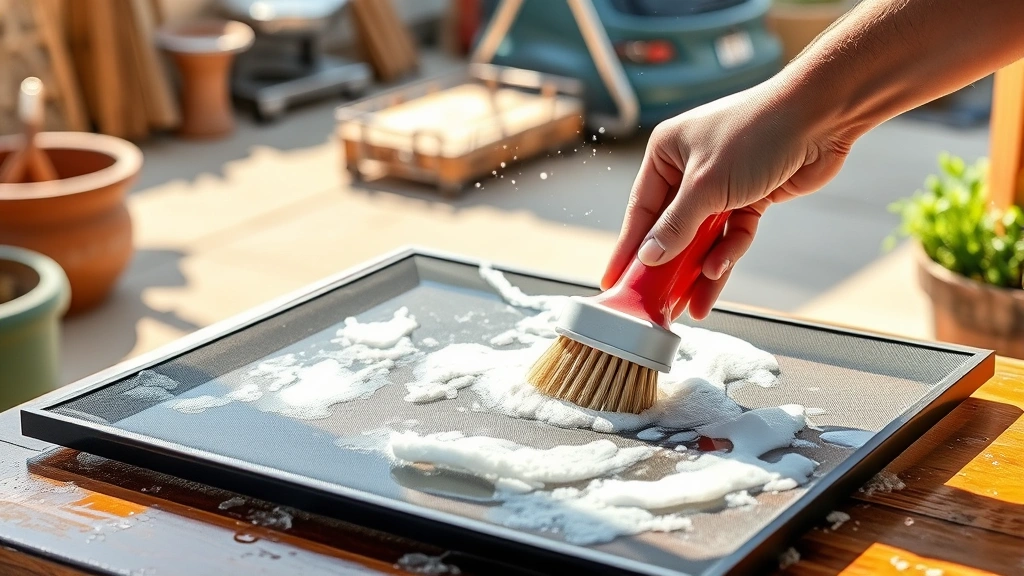
Scrub with Soapy Water
Fill your bucket with warm water and add a squirt of mild dish soap—you want it slightly soapy, not sudsy. Dip your soft-bristled brush into the soapy water and scrub both sides of the screen in gentle, circular motions. Work systematically from top to bottom so you don’t miss any spots. The soft bristles clean the mesh without damaging it, and the soap breaks down stubborn grime and pollen. Pay extra attention to corners and edges where debris likes to accumulate. For screens that haven’t been cleaned in years, this step might take a few minutes per screen, but it’s worth the effort.
Final Rinse and Dry
Once you’ve scrubbed both sides, rinse thoroughly with clean water. Use your garden hose again or rinse under a faucet if you’re doing screens indoors. Make sure all soap residue is gone—any leftover soap will leave streaks and spots. After rinsing, stand the screens upright or lean them against a wall to air dry completely before reinstalling. This usually takes 30 minutes to an hour depending on humidity. Drying them completely prevents water spots and ensures they’re ready to go right back in your windows. If you’re in a hurry, you can gently pat them dry with clean towels.
Handle Stubborn Stains
For screens with really stubborn stains or buildup, mix equal parts white vinegar and water in your bucket instead of using just soap and water. Vinegar is a natural degreaser that cuts through tough grime without harsh chemicals. Soak your brush in the vinegar solution and scrub problem areas, letting the solution sit for a minute or two before scrubbing. You can also spray the vinegar solution directly onto the screen and let it work for a few minutes before scrubbing. The smell is strong but harmless, and it dissipates quickly once everything dries. This approach is particularly effective for screens exposed to kitchen grease or heavy pollen.
Reinstall Your Clean Screens
Once your screens are completely dry, it’s time to put them back. Align the screen frame with the window opening and slide it up into the frame, or push it in depending on your window type. You should feel it click or seat firmly into place. Make sure the screen sits evenly in the frame with no gaps around the edges. If you’re reinstalling multiple screens, take a moment to ensure each one is secure before moving on. Properly installed screens stay in place and function better, so don’t rush this step.
Keep Screens Clean Longer
Now that your screens are spotless, a little preventive maintenance keeps them that way. Vacuum or brush your screens monthly during heavy pollen season to prevent buildup. If you notice dead insects or spider webs, remove them promptly. Consider installing screen protectors or guards if you have pets that press against screens. During winter months when you’re not opening windows, you can remove screens entirely and store them in a garage or shed to protect them from weather. A quick annual cleaning in spring and fall—before and after peak seasons—is much easier than deep cleaning screens that haven’t been touched in years. Think of it like brushing your teeth; a little regular maintenance beats emergency dental work.
Frequently Asked Questions
Can I clean window screens without removing them?
Yes, you can vacuum or brush them in place, but you won’t get them truly clean without removing them. Taking screens out gives you access to both sides and lets you scrub thoroughly. It’s worth the extra five minutes of effort.
What if my screen mesh is torn?
A small tear won’t affect cleaning, but if you have multiple tears or holes, consider patching or replacing the mesh. Small patch kits are inexpensive and easy to apply, similar to patching other household items like removing stains from carpet—a little attention to detail goes a long way.
How often should I clean my window screens?
In most climates, cleaning screens twice a year—spring and fall—is ideal. If you live in a dusty area, near the ocean, or have heavy pollen, you might clean them more frequently. Monthly light vacuuming between deep cleans helps too.
Can I use a pressure washer on screens?
No. Pressure washers are too forceful and will damage the delicate mesh. Stick with gentle water from a regular garden hose or a soft brush. The whole point is to clean without destroying the screen material.

What’s the best soap for cleaning screens?
Any mild dish soap works fine—Dawn, Seventh Generation, or store brands all do the job. Avoid harsh degreasers or bleach-based cleaners, which can damage the screen material. Simple and gentle is always better for screens.
Why are my screens still streaky after cleaning?
Streaks usually mean soap residue wasn’t fully rinsed away. Make sure you rinse thoroughly with clean water on both sides. If you’re using hard tap water, try rinsing with distilled water for the final rinse to eliminate mineral deposits.
Final Thoughts
Learning how to clean window screens is genuinely one of the easiest home maintenance tasks you can master, yet it delivers obvious, satisfying results. Your windows will look clearer, your home will get better ventilation, and you’ll breathe easier knowing you’re not pulling in clouds of dust and pollen. The whole process takes maybe an hour for an average home, and you probably already have everything you need in your kitchen and garage. Make it a seasonal ritual—spring and fall—and you’ll never deal with grimy screens again. Your future self will thank you when you open those windows on a beautiful day and actually enjoy the view.
For other home maintenance projects, check out our guides on balancing ceiling fans and programming garage door openers for more ways to keep your home running smoothly.
External Resources:


