
Learning how to clean toilet tank isn’t the most glamorous home maintenance task, but it’s one of those jobs that makes a real difference in your bathroom’s hygiene and your toilet’s longevity. Most folks only think about cleaning the bowl, but the tank is where the magic happens—and where grime, mineral deposits, and bacteria love to hide. The good news? It’s simpler than you’d think, and you probably already have most of the supplies you need.
Table of Contents
Why Your Tank Matters
Your toilet tank is the unsung hero of your bathroom. It holds fresh water that fills the bowl after each flush, and over time, mineral deposits, rust, and sediment accumulate inside. Hard water is particularly brutal—it leaves behind calcium and lime buildup that can corrode internal components and reduce flushing efficiency. When you understand the importance of tank maintenance, you’re more likely to tackle this job regularly. A clean tank means better water quality in your bowl, fewer clogs, and a toilet that lasts longer. Think of it like changing your car’s oil—preventive maintenance saves you money and headaches down the road.
Gather Your Supplies First
Before you get started, round up everything you’ll need. You don’t want to be halfway through the job and realize you’re missing something crucial. Here’s what works best: white vinegar (the MVP of toilet cleaning), a toilet brush or old toothbrush, rubber gloves, a sponge or soft cloth, a bucket, and optionally some baking soda for stubborn stains. If you’re dealing with serious mineral buildup, a commercial toilet bowl cleaner designed for tanks can help, though vinegar handles most jobs beautifully. Make sure you have good ventilation—open a window and keep the bathroom door open. You’ll also want old towels nearby to catch any spills when you turn off the water supply.
Drain the Tank Completely
This is step one, and it’s critical. Locate the water shut-off valve at the base of your toilet (it’s usually a small knob on the wall behind or beside the toilet). Turn it clockwise until it stops—don’t force it. Now flush the toilet to empty the tank completely. If water keeps trickling in, you may need to turn the valve a bit more. Once it’s empty, you can safely work inside without worrying about water splashing or contamination. Some people place a bucket underneath the valve just in case, which is smart thinking. Take a moment to inspect the tank’s exterior while you’re down there—if you see any cracks or leaks, that’s a separate issue you’ll need to address before refilling.
Scrub the Interior Surfaces
Now comes the actual cleaning. Pour about two cups of white vinegar directly into the empty tank. Let it sit for 15-30 minutes to break down mineral deposits and kill bacteria. The smell is strong, but it dissipates quickly and vinegar is non-toxic. After soaking, grab your toilet brush or an old toothbrush and scrub all interior surfaces—the walls, the bottom, and around the fill valve opening. Pay special attention to corners and crevices where sediment loves to hide. For stubborn stains, make a paste of baking soda and vinegar and let it sit for a few minutes before scrubbing. If you’re dealing with rust stains, a commercial rust remover designed for toilets works well, though vinegar and patience often do the trick. Scrub thoroughly but gently—you don’t want to damage the porcelain or internal components.
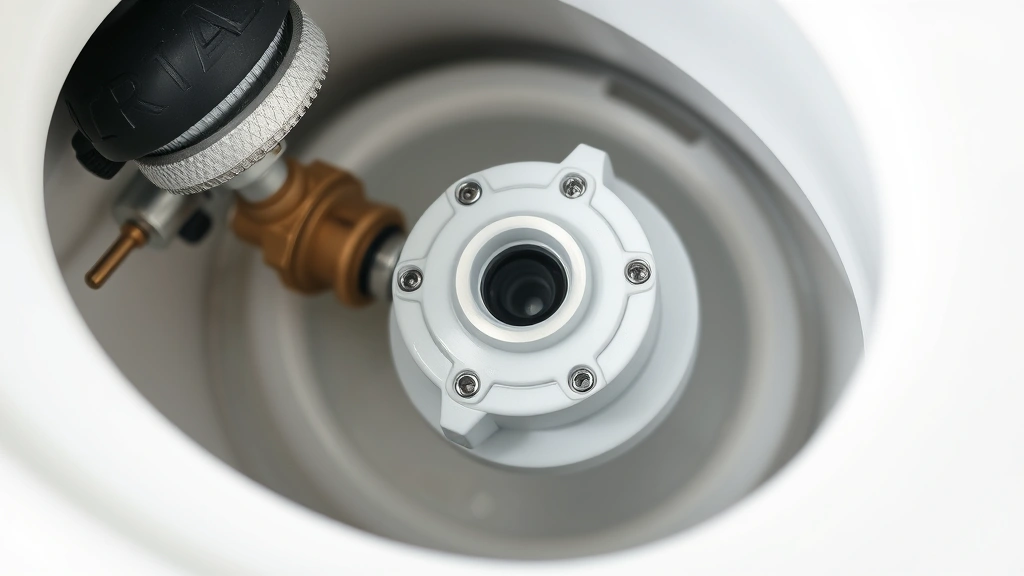
Clean Tank Components Carefully
Inside your tank, you’ll find the fill valve (where water enters), the flush valve (where water exits to the bowl), and possibly a flapper or flush tower. These are precision parts, so handle them gently. If they’re removable, take them out and soak them in vinegar for 15-20 minutes, then scrub away deposits with your brush. If they’re not easily removable, spray vinegar directly on them and scrub in place. Pay attention to the flapper—it’s a rubber seal that can deteriorate over time, especially if your water is hard. If it’s cracked, warped, or doesn’t seal properly, replacement is cheap and easy. Many hardware stores sell universal flapper kits for under $10. While you’re in there, check the overflow tube (the hollow pipe in the center) for any buildup and clean it out with your brush.

Rinse and Refill the System
Once you’ve scrubbed everything, it’s time to rinse. Turn the water supply valve back on slowly—let water fill the tank gradually so you can watch for any leaks or issues. Let the tank fill completely, then flush a few times to rinse away any remaining vinegar or debris. The water might look cloudy or discolored on the first flush or two—that’s normal and just sediment being flushed out. Keep flushing until the water runs clear. If you notice any leaks around the base of the toilet or from the tank itself, turn the water off immediately and investigate. Most leaks are from the fill valve or flush valve, which can usually be adjusted or replaced. After several clear flushes, your tank is officially clean. Take a moment to admire your work—you’ve just extended your toilet’s lifespan and improved its efficiency.
Prevent Future Buildup
Now that your tank is sparkling, let’s keep it that way. The easiest prevention method is adding a toilet tank cleaning tablet that releases slowly with each flush. Brands like Clorox or Lysol make these, though they’re basically just slow-release bleach or vinegar. Alternatively, pour a cup of white vinegar into the tank monthly—it’s cheap, effective, and non-toxic. If you have hard water (you can tell by mineral buildup on faucets or shower heads), consider installing a whole-house water softener, though that’s a bigger investment. Regular cleaning prevents the need for emergency repairs. Most experts recommend a full tank cleaning every 6-12 months, depending on your water quality. If you notice rust stains or mineral deposits returning quickly, you likely have hard water and should clean more frequently. You might also want to check out our guide on how long it takes to boil water if you’re considering using hot water for cleaning, which can help dissolve mineral deposits faster.
Troubleshoot Common Issues
Sometimes cleaning reveals bigger problems. If your toilet runs constantly after cleaning, the flapper might not be sealing properly—try adjusting it or replacing it. If water leaks from the tank base, the tank bolts might need tightening (turn them clockwise gently), or the rubber gaskets might need replacement. If the fill valve keeps running, it might be stuck or faulty—cleaning it often fixes the issue, but replacement is inexpensive. If you see black mold or mildew, that’s a sign of moisture and poor ventilation—run your exhaust fan during and after showers, and ensure your bathroom has adequate airflow. Rust inside the tank suggests either old pipes or a deteriorating tank; if it’s surface rust, vinegar helps, but deep rust might mean tank replacement is in your future. Most of these issues are preventable with regular maintenance, which is why staying on top of tank cleaning matters. For more comprehensive home maintenance tips, check out our article on how to clean stainless steel appliances for similar deep-cleaning principles.
Frequently Asked Questions
How often should I clean my toilet tank?
For most households with normal water quality, cleaning every 6-12 months is sufficient. If you have hard water, rust issues, or notice mineral buildup quickly, clean every 3-4 months. Monthly vinegar treatments between deep cleans help prevent heavy buildup.
Is it safe to use bleach in the toilet tank?
Yes, but dilute it properly—never pour full-strength bleach into your tank. A cup of bleach per tank is safe and effective for killing bacteria and mold. However, vinegar is gentler on components and equally effective for most cleaning tasks.
Can I use commercial toilet bowl cleaners in the tank?
Most commercial bowl cleaners are safe for tanks in diluted form, but check the label first. Some are designed specifically for tanks, while others are meant only for the bowl. Vinegar is a safer, cheaper alternative that works just as well.
What if my tank has a slow leak after cleaning?
Check that all bolts are tight and gaskets are seated properly. If tightening doesn’t help, the rubber gaskets likely need replacement—they’re inexpensive and available at any hardware store. If the tank itself is cracked, replacement is necessary.
Is it necessary to drain the tank completely?
Yes, for thorough cleaning. You can’t scrub effectively with water in the tank, and you risk contaminating your water supply if you don’t drain it first. The process only takes a few minutes and ensures safety and effectiveness.
Can mineral deposits damage my toilet?
Absolutely. Heavy mineral buildup can corrode internal components, reduce flushing efficiency, and eventually cause leaks or complete valve failure. Regular cleaning prevents these expensive problems and keeps your toilet functioning optimally.
Final Thoughts
Cleaning your toilet tank isn’t complicated, but it’s one of those tasks that makes a real difference in your home’s health and your toilet’s longevity. By following these five straightforward steps—gathering supplies, draining the tank, scrubbing surfaces, cleaning components, and rinsing thoroughly—you’ll have a sparkling clean tank and the satisfaction of knowing you’ve tackled a job most people avoid. The best part? Once you’ve done it once, you’ll realize it’s not nearly as intimidating as it seemed. Set a reminder on your phone for six months out, grab a bottle of vinegar, and you’re set. Your toilet will run better, your water will be cleaner, and you’ll avoid expensive repairs down the road. That’s the kind of preventive maintenance that separates folks who love their homes from those who just live in them.


