
Keeping your vinyl plank flooring clean doesn’t require fancy chemicals or complicated techniques—just the right approach and a bit of elbow grease. Whether you’ve got luxury vinyl planks (LVP) in your kitchen, bathroom, or living room, how to clean vinyl plank flooring comes down to understanding what works and what doesn’t for this durable material. I’ve spent years working with vinyl flooring in renovation projects, and I’m going to walk you through everything you need to know to keep your floors looking fresh and protected for years to come.
Table of Contents
Daily Maintenance Basics
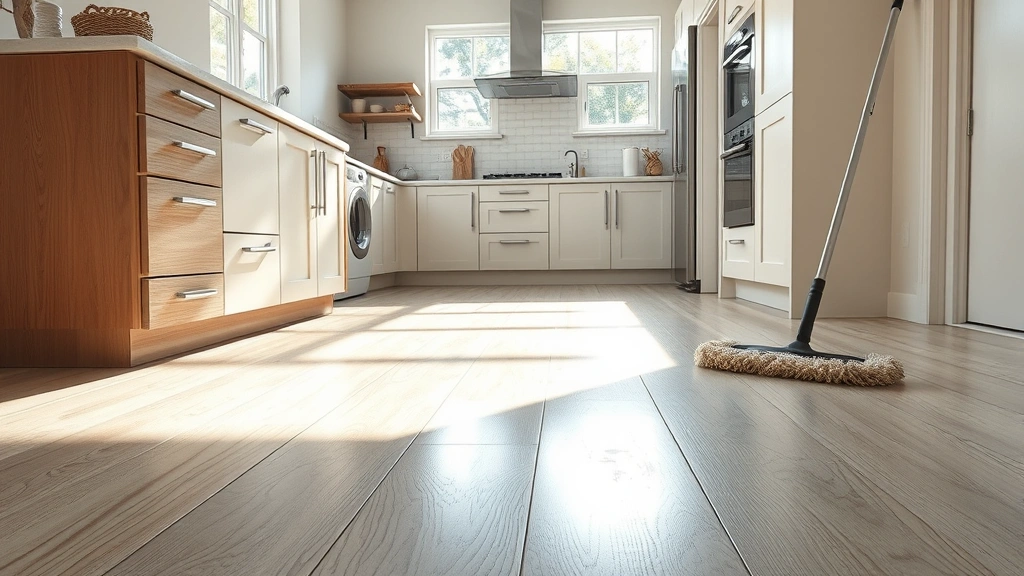
The foundation of keeping vinyl plank flooring clean starts with daily maintenance. Think of it like brushing your teeth—prevention beats cure every time. Sweep or vacuum your floors at least three times a week, more often in high-traffic areas. Use a soft-bristle broom or the hard floor attachment on your vacuum to avoid scratching the surface. Dust, dirt, and grit are your enemy because they act like sandpaper under foot traffic, gradually dulling the finish.
Wipe up spills immediately. Water sitting on vinyl plank flooring can seep into the seams and cause swelling or warping. Keep a microfiber cloth handy in your kitchen and bathroom. This simple habit prevents most of the damage that requires deeper cleaning later. If you’re looking for ways to maintain other household items with similar care, check out our guide on how to clean a washing machine, which covers preventative maintenance principles.
Wet Cleaning Method
When it’s time to wet clean your vinyl plank flooring, less water is more. Mix a solution of warm water with a few drops of dish soap or a vinyl-specific floor cleaner. According to the Resilient Floor Covering Institute, you want the mop barely damp, not dripping wet. Wring out your microfiber mop thoroughly before each pass across the floor.
Work in sections, moving your mop in the direction of the planks. This technique follows the grain and helps water flow away from seams rather than into them. Let the solution sit for just 30 seconds on stubborn dirt spots, then wipe clean with a fresh, damp mop. Finish by going over the floor one more time with a mop dampened in plain water to remove any soap residue. Dry the floor with a clean towel to prevent water spots and streaking.
For best results, clean your vinyl plank flooring once a week or as needed. This schedule keeps the floor looking great without over-working it. Many homeowners find that combining daily sweeping with weekly wet cleaning maintains that fresh appearance indefinitely.
Tackling Stubborn Stains
Not every mark comes off with basic cleaning. For sticky residue from tape or labels, apply a bit of rubbing alcohol to a cloth and rub gently. Test this on an inconspicuous area first. Scuff marks from shoes often respond to a magic eraser—just use light pressure and don’t scrub aggressively. For pet accidents or organic stains, mix equal parts white vinegar and water, apply to the spot, let sit for five minutes, then wipe clean.
Ink stains require quick action. Blot immediately with a dry cloth, then use rubbing alcohol on a cloth to lift the remaining ink. For grease or oil spots, sprinkle a little baking soda on the area, let it sit for 10 minutes to absorb the grease, then vacuum and clean with your standard wet method.
Never use abrasive scrubbers or steel wool on vinyl plank flooring. You’ll scratch the protective wear layer and create more problems than you solve. Stick with soft cloths, microfiber mops, and gentle pressure. If a stain won’t budge after trying these methods, it’s probably permanent—accept it and move on rather than damaging the floor trying to remove it.
Products to Avoid
This is critical: avoid harsh chemicals that damage vinyl. Never use bleach, ammonia, or acidic cleaners like vinegar at full strength. Don’t use oil-based products, furniture polish, or wax—these create slippery surfaces and leave residue that’s hard to remove. Steam mops are off-limits too. The intense heat and moisture combination can cause the planks to warp or the seams to open up.
Stay away from abrasive powders and scouring pads. Avoid products designed for tile or stone—they’re often too harsh for vinyl. Don’t use excessive water or let puddles sit on the surface. And skip those trendy “no-mop” cleaning products unless they’re specifically formulated for vinyl plank flooring. Many leave buildup that makes floors look dull over time.

When in doubt, stick with simple solutions: water, mild dish soap, and white vinegar diluted properly. These basics clean effectively without damaging your investment. Check the manufacturer’s recommendations for your specific vinyl plank brand—they often provide approved cleaning products and methods.
Protective Measures
Prevention is always easier than cleaning up messes. Place doormats at all entrances to catch dirt and moisture before it reaches your floors. Use felt pads under furniture legs to prevent scratches and scuffs when moving chairs or tables. Area rugs in high-traffic zones protect the finish and add visual interest.
In kitchens and bathrooms, use anti-fatigue mats or waterproof rugs to manage moisture and protect against spills. These areas are where vinyl plank flooring gets the most stress. Keep humidity levels between 30-50% using a dehumidifier in damp climates. Excessive moisture in the air can cause expansion and contraction issues over time.
Avoid dragging heavy items across the floor. Lift furniture when moving it, even if it’s awkward. Wear clean shoes indoors or go barefoot to minimize dirt transfer. In homes with pets, trim their nails regularly to prevent scratching. These simple habits extend the life of your flooring and reduce the cleaning burden significantly.
Deep Cleaning Techniques
Once or twice a year, give your vinyl plank flooring a deeper clean. Mix a solution of one part white vinegar to four parts water, or use a commercial vinyl floor cleaner designed for deep cleaning. Apply this solution with a damp mop to the entire floor, paying special attention to corners and along baseboards where dirt accumulates.
For stubborn buildup, let the solution sit for a few minutes before wiping. Use a soft-bristle brush to gently work the solution into the texture of the planks if they have a wood-grain pattern. Wipe clean with fresh water and a mop, then dry thoroughly. This deeper cleaning removes soap residue, dust accumulation, and restores the floor’s shine.
If your vinyl plank flooring has lost its luster, a vinyl-specific floor polish can restore the finish. Apply according to manufacturer directions, usually with a clean mop in thin, even coats. Allow proper drying time before walking on the floor. This step isn’t necessary for all vinyl planks—some are designed to maintain their finish without additional products—but it’s an option if your floor looks dull.
Moisture Control Tips
Moisture is the biggest threat to vinyl plank flooring longevity. Always wring out your mop until it’s barely damp. Moisture that seeps into seams causes the planks to swell and can lead to buckling or warping. In bathrooms, use exhaust fans during and for 30 minutes after showers to remove humidity. In kitchens, wipe up spills immediately and ensure your dishwasher door seals properly.
If you have a basement or ground-level installation, ensure proper subfloor preparation and moisture barriers were installed during initial installation. This prevents moisture from the ground from wicking up through the planks. If you notice cupping, buckling, or soft spots in your vinyl plank flooring, moisture is likely the culprit—address the source immediately before damage becomes irreversible.
During humid seasons, run air conditioning or a dehumidifier to maintain proper moisture levels. Vinyl planks expand slightly when exposed to high humidity and contract when dry. Maintaining consistent conditions prevents the expansion and contraction that can open seams and create gaps. This is especially important in climates with dramatic seasonal changes.
Frequently Asked Questions
Can I use vinegar to clean vinyl plank flooring?
Yes, but dilute it properly. Mix one part white vinegar with four parts water for safe cleaning. Never use vinegar at full strength—the acidity can damage the protective wear layer and dull the finish. Use this solution sparingly and wipe dry immediately. For routine cleaning, plain water with a drop of dish soap works just as well and is gentler on the material.
How often should I clean vinyl plank flooring?
Sweep or vacuum three times weekly to remove dirt and dust. Wet clean once a week or as needed for visible dirt. Deep clean once or twice yearly. High-traffic areas may need more frequent attention. The exact schedule depends on your household—homes with kids and pets may need cleaning more often than quiet homes with minimal foot traffic.
What’s the best mop for vinyl plank flooring?
Microfiber mops are ideal because they’re soft, don’t scratch, and absorb water effectively. Avoid traditional string mops that hold too much water and sponge mops that can leave residue. Spray mops with built-in solution dispensers work well if you control the moisture carefully. Always wring out your mop thoroughly before cleaning—this is the most important factor regardless of mop type.
Will vinyl plank flooring get damaged by water?
Vinyl planks are water-resistant but not waterproof. Standing water or excessive moisture can seep into seams and cause damage. Wipe up spills immediately and use barely damp mops. Proper installation with moisture barriers underneath protects against moisture from below. The key is preventing water from sitting on the surface or penetrating the seams.
Can I use a steam mop on vinyl plank flooring?
No. Steam mops use intense heat and moisture that can warp vinyl planks and open seams. The moisture can seep into the core material and cause irreversible damage. Stick with traditional damp mops or spray mops for vinyl plank flooring. For sanitizing, use a diluted vinegar solution or a vinyl-specific cleaner instead of steam.
How do I remove scuff marks from vinyl flooring?
Use a magic eraser with light pressure for most scuff marks. Test on an inconspicuous area first. For tougher marks, try rubbing alcohol on a cloth with gentle circular motions. Never use abrasive scrubbers or harsh chemicals. If the mark is permanent, accept it—attempting aggressive removal can damage the protective wear layer more than the original scuff.
What should I do if vinyl planks are starting to buckle?
Buckling indicates moisture damage. Check for water leaks, high humidity, or moisture from below. Improve ventilation, use a dehumidifier, and ensure spills are wiped up immediately. If the problem persists, you may need to address the subfloor moisture barrier or replace affected planks. This is a serious issue that requires investigation into the moisture source.
Final Thoughts
Cleaning vinyl plank flooring is straightforward when you follow these guidelines. The key is consistency with daily sweeping, weekly wet cleaning with minimal water, and immediate spill cleanup. Avoid harsh chemicals and excessive moisture, use proper tools like microfiber mops, and protect your floors with doormats and furniture pads. For more detailed guidance on maintaining different household items, our article on how to clean sterling silver covers similar protective principles for valuable materials.
Your vinyl plank flooring will look great for years if you treat it with respect and clean it properly. Most problems stem from using wrong products or allowing moisture to sit on the surface. Stick with gentle methods, minimal water, and the preventative measures outlined here. Your floors will reward you with durability and beauty that lasts through years of family living. For additional home maintenance guidance, explore our comprehensive DIY resources that cover everything from flooring to appliance care.


