
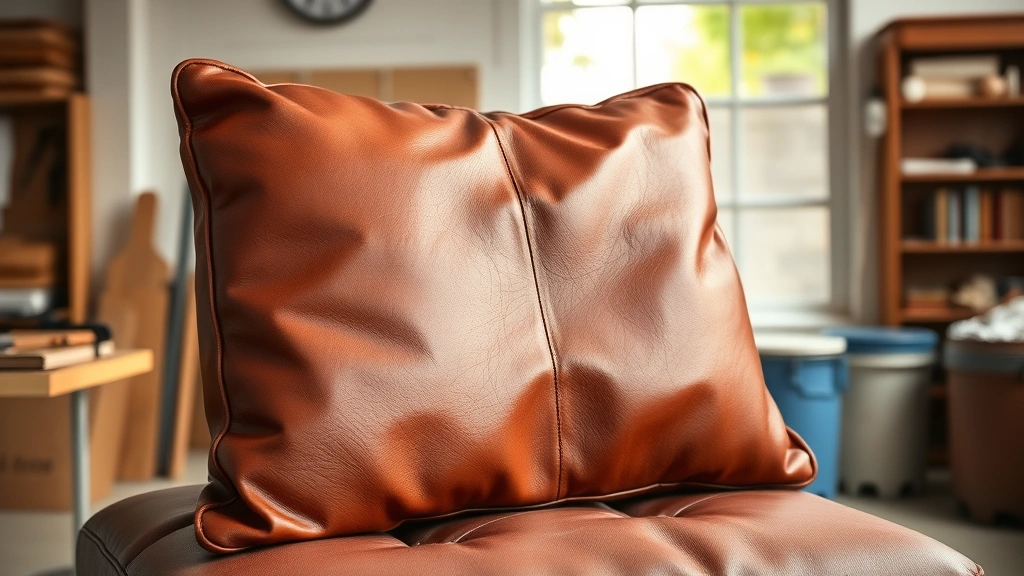
Learning how to clean leather properly will save you hundreds on replacements and keep your favorite jackets, couches, and bags looking sharp for decades. Whether you’re dealing with a stubborn stain on your leather sofa or just want to refresh that vintage jacket, the right technique makes all the difference between a disaster and a showroom finish.
Table of Contents
Assess Your Leather Type
Before you touch that leather with anything wet, you need to know what you’re working with. Leather comes in several varieties, and treating them wrong is like using a sledgehammer when you need a scalpel. Full-grain leather is the most durable and develops a natural patina over time. Top-grain leather is thinner but still quality. Then you’ve got genuine leather, which is lower quality, and bonded leather, which is basically leather scraps held together with adhesive.
Check the manufacturer’s tag or documentation if you have it. If not, look at the surface texture. Full-grain leather shows natural imperfections and has a rich, consistent look. Suede and nubuck are special cases—they’re velvety and require completely different care than smooth leather. If you’re unsure, start with the gentlest approach possible. You can always escalate, but you can’t un-damage leather.
Gather the Right Materials
Don’t raid your kitchen pantry and start experimenting. I’ve seen people use vinegar, baking soda, and all kinds of homemade concoctions that left permanent damage. Here’s what actually works: a leather-specific cleaner (Leather Honey or Saddle Soap are solid choices), distilled water, microfiber cloths, a soft-bristled brush, and a quality leather conditioner. You’ll also want white vinegar diluted 1:1 with water for tough spots, but use it sparingly.
Grab some cotton swabs for detailed work and maybe a leather protection spray once you’re done cleaning. The investment in proper products is minimal compared to replacing a ruined leather jacket or couch. Keep everything organized in a small caddy so you’re not scrambling when you find a stain. Professional detailers spend good money on these products because they actually work without destroying the material underneath.
Dust and Vacuum First
This step gets skipped constantly, and it’s the biggest mistake people make. Dirt and dust particles act like tiny sandpaper when you start cleaning. Rub a wet cloth over dusty leather and you’re basically grinding grit into the finish. Use a soft-bristled brush or a clean, dry microfiber cloth to dust the entire surface. For couches and larger items, a vacuum with an upholstery attachment works great—just use low suction to avoid damaging the leather.
Pay special attention to seams, creases, and any textured areas where dust loves to hide. Spend two minutes on this and you’ll prevent 90% of the problems that come from cleaning too aggressively. It’s the unglamorous part of the job, but it’s absolutely critical. Think of it like prepping a wall before painting—nobody gets excited about prep work, but it determines whether your final result looks professional or amateur.
Test Your Cleaning Solution
Always test on a hidden area first. I know it sounds paranoid, but leather can react unpredictably depending on its age, tanning process, and finish. Find a spot on the underside of a jacket, the back of a couch, or somewhere nobody looks. Apply your cleaner to a small section and let it sit for a minute. Use a clean cloth to wipe it away and check for discoloration, fading, or texture changes.
Wait 24 hours before you commit to full cleaning. Sometimes damage takes time to show up. This single step has saved me from ruining countless items. It costs nothing except time and could save you from a heartbreak when you realize you’ve stripped the finish off a leather jacket that’s been in your family for 20 years. Patience here isn’t just a virtue—it’s insurance.
Clean the Leather Surface
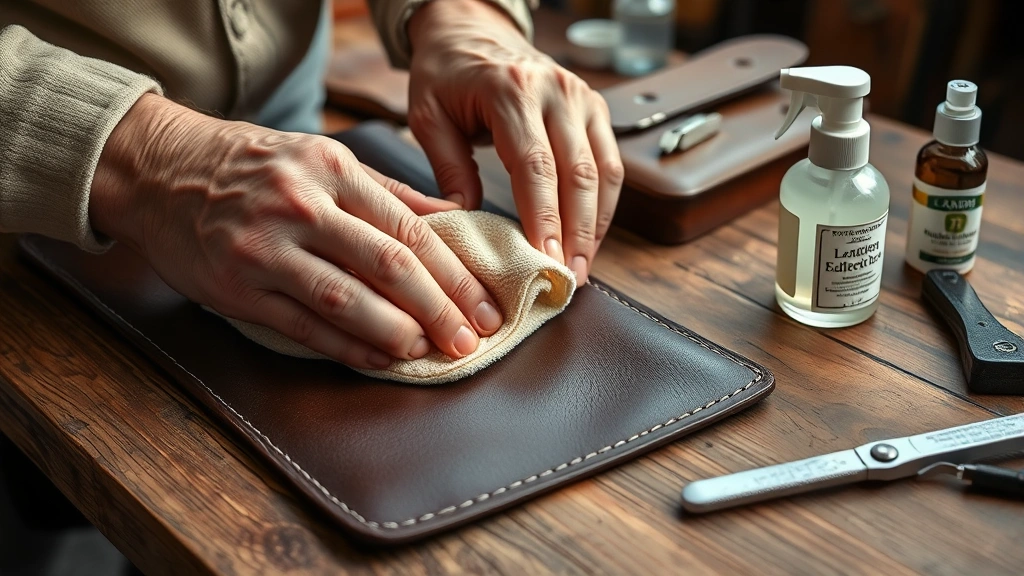
Once you’ve tested and confirmed your cleaner is safe, apply it to your microfiber cloth—not directly to the leather. Work in small sections using gentle circular motions. You’re not trying to scrub off the leather; you’re lifting dirt and oils from the surface. Let the cleaner do the work. If you’re using a leather-specific product, follow the manufacturer’s instructions for dilution and contact time.
For stubborn grime, let the cleaner sit for 2-3 minutes before wiping. Use a second damp cloth with just distilled water to remove any residue. This rinse step is essential—leftover cleaner can leave a sticky film or cause discoloration. Work methodically across the entire piece, and don’t be tempted to use hot water. Warm water is fine, but hot water can cause leather to shrink and crack. When you’re done, use a dry cloth to remove excess moisture and let the leather air dry naturally, away from direct heat or sunlight.
Condition and Protect
Cleaning strips natural oils from leather, which is why conditioning is the final and most important step. A good leather conditioner replaces those oils and keeps the material supple. Apply conditioner with a soft cloth using the same gentle circular motions you used for cleaning. Let it soak in for the time recommended on the bottle—usually 10-15 minutes. Buff away any excess with a clean cloth.
Once the conditioner has fully dried (usually 24 hours), apply a leather protection spray if you want extra defense against future stains and water damage. This is especially important for lighter-colored leather or items that get heavy use. The protection spray creates an invisible barrier that makes future cleaning easier and prevents stains from setting in. Think of it like wax on a car—it protects the finish and makes maintenance simpler down the road. If you’re cleaning a leather hat, similar conditioning principles apply, though you’ll want to be extra careful around any fabric linings.
Tackle Common Stains
Different stains need different approaches. For grease or oil stains, sprinkle baking soda on the spot and let it sit overnight. The powder absorbs the oils. Vacuum it up gently the next day. If the stain persists, make a paste of baking soda and a tiny bit of water, apply it, let it dry, and brush it off. For ink stains, dab (don’t rub) with a cloth barely dampened with rubbing alcohol. Work from the outside of the stain toward the center to avoid spreading it.
Wine, coffee, and juice stains should be blotted immediately with a dry cloth to remove as much liquid as possible. Then use a slightly damp cloth with a tiny bit of your leather cleaner. For pet accidents or biological stains, white vinegar diluted 1:1 with water works surprisingly well. Apply it, let it sit briefly, and wipe thoroughly with a damp cloth. Always test these solutions on hidden areas first. Stains are frustrating, but they’re usually fixable if you act quickly and don’t panic.
Prevention and Maintenance
The best cleaning is the cleaning you don’t have to do. Establish a maintenance routine: dust your leather items monthly with a soft cloth and condition them every 6-12 months depending on use. Keep leather away from direct sunlight, which fades color and dries out the material. Use coasters under drinks, and keep sharp objects away from leather furniture and bags.
For leather couches, rotate cushions if possible and use throw blankets or protective covers in high-traffic areas. Store leather jackets and accessories in a cool, dry place away from plastic bags, which trap moisture and promote mold growth. A little prevention goes a long way toward keeping your leather looking fresh. If you maintain your leather properly, you’ll rarely need deep cleaning beyond the basic five-step process. This approach is similar to how you’d maintain other surfaces—like keeping your quartz countertops protected from stains with regular sealing and careful use.
Frequently Asked Questions
Can I use soap and water on leather?
Not regular soap. Bar soap and dish soap contain harsh detergents that strip oils and leave residue. Leather-specific cleaners are formulated to clean without damaging the material. If you’re in a true emergency, use a tiny amount of mild castile soap diluted heavily in distilled water, but follow up immediately with conditioning.
What’s the difference between cleaning and conditioning?
Cleaning removes dirt, oils, and stains from the surface. Conditioning replaces natural oils that cleaning removes and keeps leather soft and supple. You need both steps for proper leather care. Cleaning alone will eventually dry out and crack your leather.
How often should I clean my leather furniture?
Dust monthly with a soft cloth. Do a deep clean with leather cleaner 1-2 times per year depending on use and visible soiling. Condition every 6-12 months. High-traffic items like couches in living rooms might need more frequent attention than rarely-used leather chairs.
Is it safe to use vinegar on leather?
Diluted vinegar (1:1 with water) can work for tough stains, but it’s acidic and can damage some leather finishes. Always test on a hidden area first. Use it as a last resort before professional cleaning, not as your primary cleaning solution.
Can I use a leather cleaner on suede?
No. Suede and nubuck require specialized products and techniques. Standard leather cleaners can damage the delicate nap. Use a suede brush and suede-specific cleaner. If you’re unsure about your material, assume it’s suede and start with the gentlest approach.
What do I do if leather gets wet?
Don’t panic and don’t use heat. Blot excess water with a dry cloth and let it air dry naturally at room temperature, away from direct sunlight or heat sources. Once fully dry, condition it to replace any oils lost during the drying process. Rapid drying causes cracking and shrinkage.
Final Thoughts
Learning how to clean leather properly transforms how long your items last and how good they look. The five-step process—assess, gather materials, dust, test, clean, and condition—works for everything from leather jackets to couches to bags. It takes maybe 30 minutes for most items and costs just a few dollars in supplies. Compare that to replacing a leather couch or jacket, and the value is obvious.
The key is patience and the right products. Don’t cut corners with cheap cleaners or household products. Don’t rush the testing phase. Don’t skip conditioning. Follow these steps consistently, and your leather will look better in five years than it does today. That’s not an exaggeration—properly maintained leather actually improves with age, developing a rich patina that newer leather can’t match. Start today, and you’ll be amazed at the results.


