
Learning how to clean foggy headlights is one of those garage tasks that’ll save you serious cash and take maybe an hour of your time. Cloudy headlights aren’t just an eyesore—they reduce your visibility on the road and can actually fail safety inspections. The good news? You don’t need a mechanic or replacement lenses. I’m going to walk you through five battle-tested methods that work, from the quick-fix toothpaste trick to the heavy-duty restoration approach.
Table of Contents
Why Headlights Get Foggy
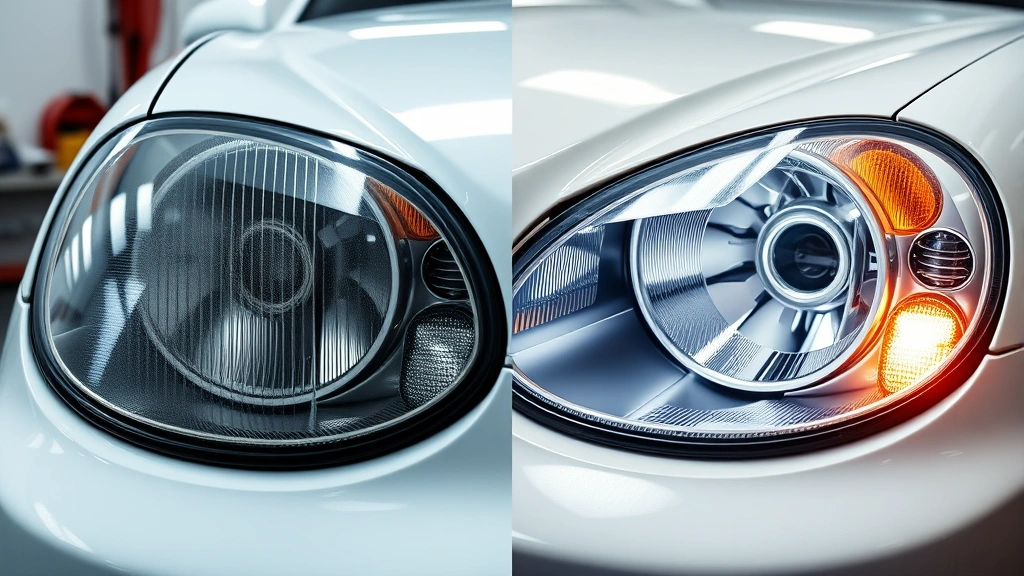
Before you grab your supplies, understand what you’re fighting. Modern headlight lenses are made from polycarbonate plastic, not glass. This plastic is lightweight and shatter-resistant, but it’s vulnerable to UV rays. Over time, the protective coating breaks down, oxidation sets in, and moisture gets trapped between the lens and housing. You end up with that milky, cloudy appearance that kills your night visibility and looks neglected.
The fogginess isn’t permanent damage—it’s a surface issue. That’s why restoration works so well. You’re essentially removing the oxidized layer to expose the clear plastic underneath. Think of it like removing rust from metal; the base material is still good.
The Toothpaste Quick Fix
This is your entry-level approach, and honestly, it works better than people expect. Grab a tube of regular toothpaste (not gel) and you’re halfway there. The mild abrasives in toothpaste gently scrub away surface oxidation without being aggressive enough to damage the lens.
Here’s the process: Clean the headlight with soap and water first. Squeeze a quarter-sized amount of toothpaste onto a soft cloth and apply it in circular motions across the foggy lens. Work it for about two minutes per headlight. Rinse thoroughly with water and dry completely. You’ll see immediate improvement in light clarity.
The catch? This method works best on light fogginess. If your headlights look like they’ve been buried in the Sahara for a decade, toothpaste won’t cut it. But for maintenance or early-stage cloudiness, it’s a solid weekend hack. It’s also free if you’ve already got toothpaste in your bathroom—no special tools required.
Baking Soda & Vinegar Method
This is the classic household remedy that actually delivers results. Baking soda acts as a gentle abrasive while vinegar cuts through oxidation. It’s like having a chemistry experiment that actually fixes your car.
What you’ll need: Baking soda, white vinegar, a soft cloth, and water. Mix baking soda and vinegar into a paste—aim for a consistency like peanut butter. Apply it generously to the headlight and let it sit for five to ten minutes. This gives the vinegar time to break down the oxidized layer. Then scrub in circular motions for about three minutes, applying moderate pressure. Rinse completely and dry.
This method handles moderate fogginess really well. The chemical reaction between the baking soda and vinegar does heavy lifting that plain toothpaste can’t match. You might need to repeat the process for heavily clouded lenses, but each pass will show visible improvement. Best part? You probably have these ingredients already, so your cost is basically zero.
Sandpaper Restoration Technique
Now we’re getting into the serious restoration territory. This method requires more elbow grease and precision, but it’s devastatingly effective on heavy oxidation. When household cleaners aren’t enough, sandpaper removes the compromised layer entirely.
The supplies you need: Automotive sandpaper (220, 400, and 1000-grit), water, a spray bottle, and masking tape. Start by taping around the headlight to protect the paint and trim. Spray the lens with water to keep it wet—this prevents clogging the sandpaper and generates a slurry that helps the abrasive work.
The technique: Begin with 220-grit sandpaper, working in circular motions with light to medium pressure. You’re not trying to strip the lens in one pass. Work for about two minutes, then check your progress. Move to 400-grit and repeat, then finish with 1000-grit for smoothing. This progressive approach prevents deep scratches. The lens will look dull and rough after sanding—that’s normal. The polish step comes next.
This method is aggressive, so respect it. You can damage the lens if you press too hard or use grit that’s too coarse. Take your time and let the sandpaper do the work. Many detailers use this as their go-to restoration method because it removes all oxidation, not just the surface layer.
Rubbing Compound & Polish
After you’ve removed the oxidized layer through sanding or chemical methods, rubbing compound brings back the clarity and shine. This is the finishing move that transforms a dull, frosted lens back into something that looks factory-fresh.
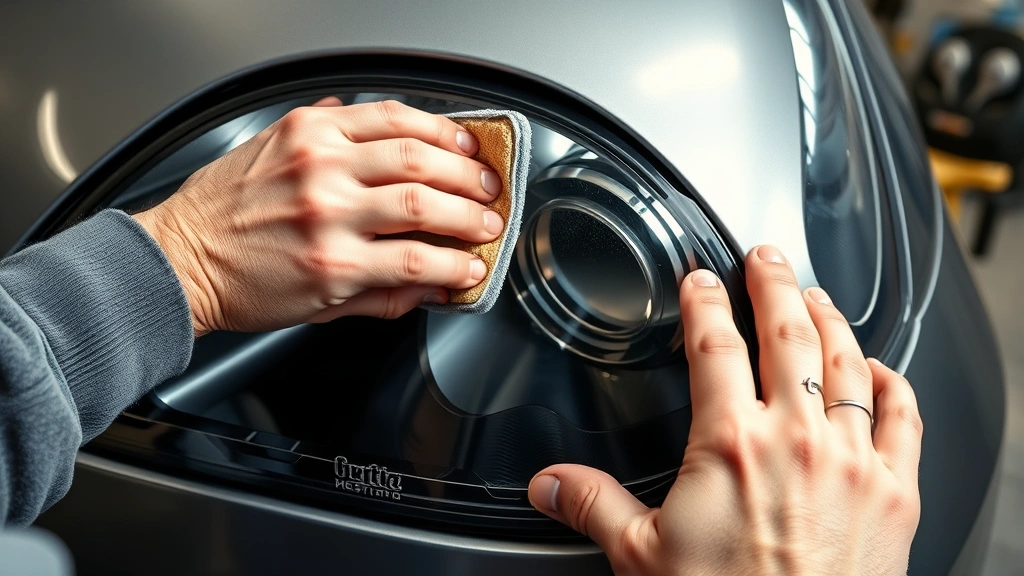
The process: Apply a small amount of automotive rubbing compound to a microfiber cloth. Work it onto the lens in circular motions, applying moderate pressure. You’re not scrubbing hard—you’re polishing. The compound contains fine abrasives that smooth the surface and remove any remaining oxidation. After two to three minutes, wipe away the compound with a clean cloth and inspect your work.
If you still see some haziness, apply a finishing polish designed for automotive plastic. This is thinner than compound and brings out maximum clarity. The difference between a polished headlight and an unpolished one is night and day—literally. You’ll notice the beam pattern is sharper and brighter.
Pro tip: Use a power drill with a foam polishing pad if you’re doing multiple vehicles or want faster results. Keep the speed moderate (around 1500 RPM) and let the pad do the work. You can restore both headlights in about 15 minutes with power tools.
Applying Protective Sealant
Here’s the step most people skip, and it’s the difference between results that last six months and results that last years. After restoration, your headlight lens is clean but unprotected. UV rays will start attacking it immediately.
What to use: Automotive headlight sealant or clear protective coating. These products create a barrier against UV rays and oxidation. Apply according to the product instructions—most require a thin, even coat that you buff off after it cures.
Some detailers use ceramic coatings designed for headlights, which provide even longer protection. These cure harder and last longer than standard sealants. The investment is minimal compared to replacing headlights, and the protection is substantial.
After applying sealant, give it the recommended cure time before driving in rain or washing the car. This lets the protective layer bond properly. You can also learn about how to clear the codes of a check engine light while you’re tackling your vehicle maintenance—keeping your car in top shape is all connected.
Keeping Them Clear Long-Term
Prevention beats restoration every single time. Once you’ve cleaned your headlights, protect that investment with smart habits.
Regular maintenance: Wash your headlights monthly with the rest of your car. This removes contaminants before they bond to the lens. Use a microfiber cloth and gentle automotive soap—nothing abrasive.
Park smart: Whenever possible, park in the shade or garage. Direct UV exposure is the primary culprit in headlight degradation. Even a carport makes a difference over time.
Protective film: Consider applying clear protective film to your headlights. It’s like a sacrificial shield that takes the UV damage so your lens doesn’t have to. Professional installation runs $100-200 per vehicle, but the protection lasts years.
Sealant reapplication: Reapply headlight sealant every 6-12 months depending on your climate and sun exposure. It’s a five-minute job that pays massive dividends. Think of it like sunscreen for your headlights.
When Replacement Makes Sense
Sometimes restoration isn’t the answer. If your headlights have internal moisture that won’t go away, deep cracks in the lens, or the coating is peeling off in chunks, you’re looking at replacement. Modern headlight assemblies aren’t cheap—you might spend $200-500 per side depending on your vehicle—but safety matters.

Also consider replacement if your headlights are sealed units where moisture keeps returning despite restoration. This indicates a failed seal, and restoration will just be temporary. You can learn more about keeping your vehicle maintained by checking out how to care for a money tree—proper maintenance applies to everything you own.
If you’re handy, you can replace headlights yourself. Most vehicles require removing a few bolts and disconnecting a connector. YouTube has excellent walkthroughs for specific makes and models. You’ll save the labor cost, which is often $100+ per side.
Frequently Asked Questions
How long do headlight restoration results last?
Without sealant, restored headlights typically stay clear for 3-6 months before oxidation starts returning. With protective sealant, you’re looking at 1-2 years. Reapplying sealant annually keeps them in top condition indefinitely.
Can I use a power drill to sand headlights?
Absolutely. A power drill with a foam sanding pad works great, but keep the speed under 1500 RPM and maintain even pressure. Let the tool do the work rather than forcing it. This method is faster than hand sanding and gives excellent results.
Is headlight restoration permanent?
No, it’s not permanent because the underlying polycarbonate is still vulnerable to UV rays. That’s why sealant is crucial. Think of restoration as removing the damage and sealant as preventing new damage. Together, they keep your headlights clear.
What’s the cheapest method that actually works?
Baking soda and vinegar is genuinely free if you have those at home. For light fogginess, it works as well as any $50 product. If you need something stronger, sandpaper and compound cost under $20 total and handle heavy oxidation better than anything else at that price point.
Can I use regular car wax on headlights?
Car wax isn’t ideal for headlights. It’s designed for painted surfaces and doesn’t provide the same UV protection. Use products specifically formulated for plastic headlight lenses—they’re designed to bond to polycarbonate and offer better protection.
How often should I clean my headlights?
Monthly washing during regular car maintenance keeps them clear. If you live in a harsh climate with intense sun, do it more frequently. Preventive maintenance beats waiting until they’re completely fogged over.
Will toothpaste damage my headlights?
No. Regular toothpaste is mild enough that it won’t damage polycarbonate lenses. The abrasive particles are smaller than sandpaper grit, so it’s a gentle option. Avoid whitening toothpaste with extra-strong abrasives—stick with regular formula.
You can also check out how to clean a couch for more cleaning tips and techniques that apply across different surfaces and materials.
Final Thoughts
Foggy headlights are fixable, and you’ve got options ranging from free household items to specialized automotive products. Start with the method that matches your fogginess level and available time. Toothpaste or baking soda for light haze, sandpaper and compound for heavy oxidation.
The real secret isn’t which method you choose—it’s applying sealant and maintaining them regularly afterward. That’s what separates people who fix their headlights once and watch them get cloudy again from people who keep them clear for years. You’re not just cleaning today; you’re setting up a system that keeps them clean.
Grab your supplies, spend an hour on a Saturday morning, and you’ll have headlights that look like they just rolled off the lot. Your night visibility improves, your car looks better, and you’ve saved hundreds on replacement costs. That’s a win across the board. For more DIY guidance on vehicle care and household maintenance, explore resources like Family Handyman and This Old House for comprehensive how-to articles.


