
Learning how to clean a carburetor is one of those skills that separates the casual tinkerer from someone who actually knows their way around an engine. A dirty carburetor is like asking your engine to breathe through a straw—it just won’t perform right. Whether you’re dealing with a lawnmower that won’t start, a chainsaw that’s acting temperamental, or a classic motorcycle that’s been sitting in the garage, a carburetor cleaning can bring it back to life without dropping serious cash at a mechanic’s shop.
The good news? You don’t need fancy equipment or a degree in automotive engineering. With some basic tools, a little patience, and the right approach, you can tackle this job yourself. Let’s walk through exactly what you need to know to get your carburetor running clean again.
Table of Contents
Why Carburetors Get Dirty
Before we dive into the cleaning process, it helps to understand what’s happening inside that carburetor. Over time, fuel breaks down—especially if your equipment sits unused for months. Old fuel leaves behind varnish and gummy deposits that clog the tiny passages and jets inside the carburetor. These passages are incredibly small, sometimes just fractions of a millimeter, so even a little buildup can completely block fuel flow.
Dirt and debris can also sneak in through the air intake, and water can accumulate in the fuel bowl if moisture gets trapped. All of this creates a perfect storm for poor engine performance: hard starting, rough idling, stalling, or refusing to run altogether. The culprit is almost always a dirty carburetor.
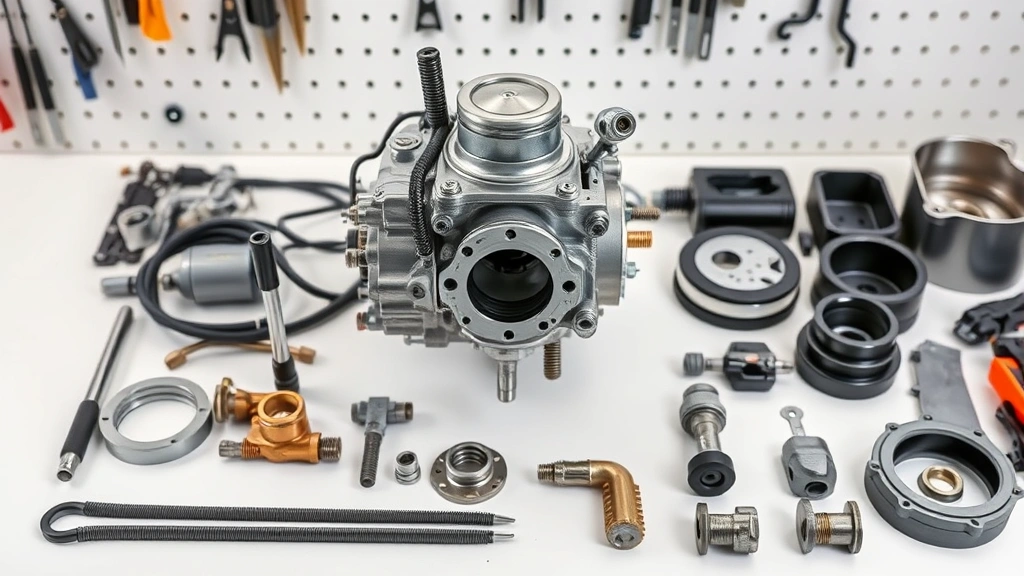
Tools and Materials Needed
You don’t need a professional mechanic’s toolkit, but having the right items makes the job infinitely easier. Here’s what you’ll want to gather before you start:
- Socket set and wrenches (various sizes for your specific equipment)
- Screwdrivers (both Phillips and flathead)
- Carburetor cleaner (the aerosol spray kind works great)
- Clean gasoline or carburetor solvent for soaking
- Wire brush or soft brass brush (avoid steel wool on aluminum parts)
- Compressed air (an air compressor is ideal)
- Small containers for parts organization
- Shop towels or rags (lint-free preferred)
- Safety glasses and gloves
- Gasket scraper (plastic, not metal)
- New gaskets and seals (if your carburetor kit includes them)
- Small parts tray or magnetic mat
Step 1: Preparation and Safety
This step might seem boring, but it’s absolutely crucial. First, make sure you’re working in a well-ventilated area—carburetor cleaner fumes are no joke, and you don’t want to get lightheaded halfway through. Open windows, turn on a fan, or work outside if possible.
Disconnect the negative terminal of your battery to prevent accidental starting. Seriously, you don’t want the engine firing up while you’re elbow-deep in the carburetor. Take a photo of your carburetor and fuel lines before you disconnect anything—it’ll be your reference when reassembling.
Let the engine cool completely if it’s been running recently. Touching hot metal is a quick way to ruin your day. Wear safety glasses because carburetor cleaner can splash, and those tiny springs and screws have a habit of flying across the workshop when you least expect it.
Step 2: Fuel System Drainage
You’ve got to empty the fuel system before you can safely work on the carburetor. This is where things get real—fuel is flammable, so treat it with respect. If your equipment has a fuel shutoff valve, turn it off. If not, you’ll need to drain the fuel tank.
Position a container underneath the carburetor’s drain plug (usually at the bottom of the fuel bowl). Slowly open the drain plug and let the old fuel flow out. This stuff is often dark and smelly—that’s the varnish and gunk that’s been accumulating. Once it stops dripping, you’re ready to move forward. Don’t pour this fuel down the drain; take it to a hazardous waste facility or save it in a sealed container.
After draining, turn the fuel shutoff valve back on if you have one. Some carburetors will still have fuel in the bowl, so be prepared for a little spillage when you disconnect the fuel lines.
Step 3: Carburetor Removal
Now comes the part where you actually take the carburetor off the engine. Start by disconnecting the fuel line—pinch it with a clamp first to minimize spillage. Take a photo of how the throttle cable and choke cable connect before you disconnect them; these can be tricky to reattach correctly.
Unbolt the carburetor from the intake manifold using your socket set. Most carburetors are held on with two or four bolts. Keep these bolts in a safe place—you’ll need them again. Gently pull the carburetor away from the engine, being careful not to bend any linkages.
Once it’s off, you’ll likely see an old gasket stuck to the mounting surface. Scrape this off carefully with your plastic gasket scraper, being gentle around the intake manifold opening. Don’t use a metal scraper—you can damage the soft aluminum.
Step 4: Disassembly and Cleaning
This is where patience becomes your best friend. Lay out your small parts tray and start carefully disassembling the carburetor. Most carburetors have a fuel bowl held on by a single bolt. Remove this, drain any remaining fuel, and set the bowl aside.
Next, you’ll typically find the main jet, pilot jet, and needle seat—these are the critical components that get clogged. Remove these carefully and place them in your organized tray. Take photos as you go; you’ll thank yourself during reassembly.
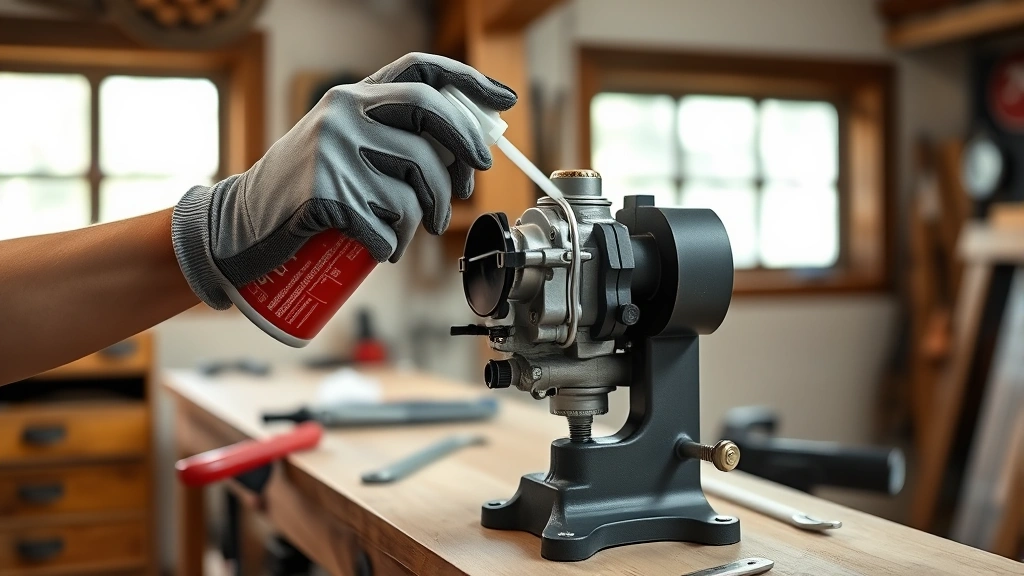
Now for the actual cleaning. Spray carburetor cleaner liberally into all the passages, jets, and openings. Use a soft brass brush to gently scrub away deposits—never use steel wool on aluminum parts. For stubborn varnish, soak the metal parts (not plastic or rubber components) in clean gasoline for 15-30 minutes, then spray again with carburetor cleaner.
Use compressed air to blow out all the passages. This is crucial—you need to make absolutely sure all the tiny jets and ports are completely clear. If you don’t have an air compressor, you can use canned compressed air, though it’s less powerful. Hold the carburetor up to a light and look through the passages to verify they’re clear.
Pay special attention to the idle jet and main jet—these are the most common culprits for clogs. If they’re really gunked up, soak them longer or use a soft brush to clean them individually. Never poke a wire through the jets; you can enlarge the opening and ruin the carburetor’s calibration.
Step 5: Reassembly and Testing
Reassembly is basically the reverse of disassembly, but go slowly and deliberately. Start by installing the main jet and pilot jet, making sure they’re snug but not over-tightened. Install the needle seat and float, then attach the fuel bowl with a new gasket if you have one.
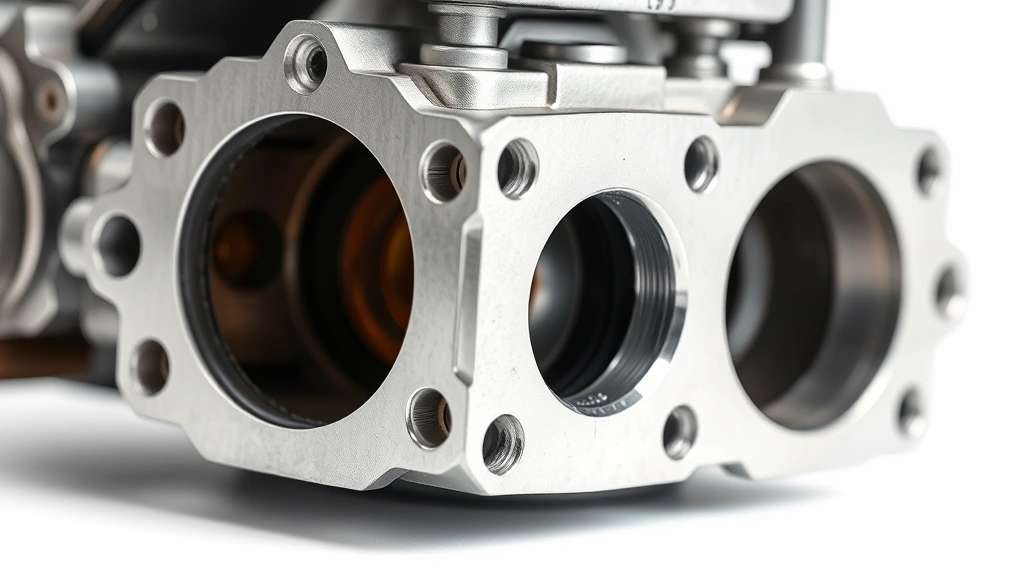
Before you bolt the carburetor back onto the engine, double-check that all passages are clear and all parts are properly seated. Install a new gasket on the mounting surface of the intake manifold—this is crucial for preventing air leaks that’ll cause rough idling.
Bolt the carburetor back onto the engine, reconnect the fuel lines (using your reference photo), and reattach the throttle and choke cables. Make sure the throttle moves smoothly through its full range without binding.
Fill the fuel tank with fresh gasoline and reconnect the battery. Prime the carburetor by turning the fuel valve on and letting fuel fill the bowl. You might need to turn the engine over several times before it fires up—this is normal. Once it starts, let it run for a few minutes and check for fuel leaks around the bowl and fuel lines.
If everything looks good, take your equipment for a test run. It should start easier, idle more smoothly, and run with better throttle response. If you’re still having issues, you might need to check your check engine light codes or verify that your fuel system is delivering adequate pressure.
Common Mistakes to Avoid
The biggest mistake people make is reassembling the carburetor before it’s completely dry. Any moisture inside will cause the same problems you just fixed. After your final cleaning and compressed air treatment, let the carburetor sit for at least 30 minutes to air dry completely.
Another common error is over-tightening jets and screws. These are precision components—snug is good, but you’re not building a deck. Use just enough pressure to hold them in place. Over-tightening can strip the threads or damage the delicate needle seat.
Don’t forget about the gaskets. Old, crushed gaskets are a major source of air leaks that’ll cause rough running. If your carburetor kit came with new gaskets, use them. If not, consider ordering a complete gasket kit—they’re inexpensive and worth every penny.
Avoid mixing up which carburetor parts go where. Take photos before disassembly, label everything, and keep parts organized. A single jet installed in the wrong port will cause poor performance.
Prevention Tips for Future
Now that you’ve cleaned your carburetor, let’s keep it that way. The best prevention is using fresh fuel. If you’re storing equipment for more than a month, drain the fuel tank and run the engine dry, or add fuel stabilizer to prevent varnish formation.
If you’re storing equipment for winter, this is especially important. Stale fuel is the number-one cause of carburetor problems on seasonal equipment like lawnmowers and snowblowers. Run the engine until it stops after adding stabilizer, which ensures the stabilized fuel is in the carburetor.
Keep your air filter clean—a clogged air filter forces the engine to run rich, which accelerates carburetor buildup. Check it regularly and replace it according to your equipment’s maintenance schedule.
Consider using quality fuel from reputable gas stations. Cheap fuel sometimes has higher water content and more contaminants, which accelerates varnish formation. It’s not worth saving a few cents per gallon if you end up cleaning the carburetor more often.
Frequently Asked Questions
How long does carburetor cleaning take?
For someone doing it for the first time, plan on 2-4 hours total. This includes disassembly, cleaning, reassembly, and testing. Once you’ve done it a few times, you can cut this down to 1-2 hours. The actual cleaning takes 30-45 minutes; most of the time is spent carefully disassembling and reassembling.
Can I clean a carburetor without removing it?
You can spray carburetor cleaner through the intake while the engine’s running, and this helps with minor buildup. However, for significant varnish and deposits, removal is really the best approach. You simply can’t get to all the passages without taking it apart.
What’s the difference between carburetor cleaner and gasoline?
Carburetor cleaner is a stronger solvent specifically formulated to dissolve varnish and gum. Gasoline works for soaking, but carburetor cleaner is more effective. For the final cleaning stages, carburetor cleaner is worth the investment.
Do I need to replace the gaskets?
Old gaskets can leak air, causing rough idle and poor performance. If your carburetor kit includes new gaskets, definitely use them. If not, they’re inexpensive and worth replacing while you have the carburetor off.
How do I know if my carburetor needs cleaning?
Hard starting, rough idle, stalling, poor acceleration, and black smoke from the exhaust are all signs of a dirty carburetor. If your equipment has been sitting unused for months, it almost certainly needs cleaning. You can also check your battery condition to rule out electrical issues first.
Can I use vinegar to clean a carburetor?
Vinegar can remove some deposits, but it’s not as effective as dedicated carburetor cleaner. For serious varnish buildup, stick with carburetor cleaner or gasoline. Vinegar also leaves residue that needs rinsing, adding extra steps.
What if my carburetor still doesn’t work after cleaning?
If you’ve thoroughly cleaned it and the engine still won’t run properly, you might have a fuel delivery problem—check that your fuel pump is working and fuel lines aren’t kinked. You could also have an ignition issue; verify your spark plug is firing. Sometimes what looks like a carburetor problem is actually something else entirely.
Wrapping It Up
Learning how to clean a carburetor is a valuable skill that’ll save you money and keep your equipment running strong. Yes, it requires some patience and attention to detail, but it’s absolutely doable for anyone willing to take their time. The key is staying organized, taking reference photos, and not rushing through any step.
Once you’ve successfully cleaned one carburetor, you’ll realize it’s not nearly as intimidating as it seemed. You’ll also develop confidence to tackle other maintenance tasks on your equipment. And the next time your lawnmower won’t start or your chainsaw’s acting up, you’ll know exactly what to do instead of reaching for your wallet.
Remember: fuel stabilizer for storage, fresh fuel for regular use, and clean air filters go a long way toward preventing future carburetor problems. But if you do end up with a dirty carburetor again, you now know the complete process to bring it back to life. Happy wrenching!


