
Learning how to change a kitchen faucet is one of those DIY projects that looks intimidating but honestly? It’s a total game-changer once you realize how straightforward it actually is. You don’t need a plumber’s license or fancy credentials—just some basic tools, a little patience, and maybe a towel to catch the inevitable water drips. In this guide, we’re walking through the exact steps I’ve used dozens of times, plus the real-world tips that make the difference between a smooth swap and a frustrating afternoon.
Table of Contents
Gather Your Tools and Materials
Before you touch anything under that sink, get organized. I can’t stress this enough—having everything ready means you won’t be halfway through and suddenly realize you’re missing a wrench. Here’s what you actually need:
Essential tools: An adjustable wrench (your best friend here), a basin wrench (this curved thing is specifically designed for tight faucet spaces), a screwdriver set, and a flashlight. Seriously, bring a good flashlight—under the sink is dark, and you need to see what you’re doing.
Materials: Your new faucet (obviously), plumber’s tape (also called PTFE or Teflon tape), and potentially some caulk if your old faucet left a mess. Grab a bucket or towel too, because water is coming out regardless of how careful you are.
Pro tip: Read your new faucet’s installation manual before you start. Different models have slightly different setups, and you want to know if yours needs any special adapters or has quirky mounting hardware.
Turn Off the Water Supply
This step separates the people who stay dry from the people who become intimate with their kitchen floor. Under your sink, you’ll see two shut-off valves—one for hot water, one for cold. Turn both clockwise until they stop. Don’t force them; they’ll let you know when they’re closed.
Now turn on the faucet to release any remaining pressure. You’ll see a little water come out, and that’s exactly what you want. If water keeps flowing, your valves aren’t fully closed—go back and tighten them more.
If you can’t find shut-off valves under the sink (some older homes don’t have them), you’ll need to shut off your main water supply. It’s usually in the basement or outside near the foundation. This takes longer, so hopefully you’ve got the under-sink version.
Remove Your Old Faucet
Crawl under the sink with your flashlight. You’re looking for the connections where the faucet attaches to the sink—usually three bolts or a mounting nut, depending on your faucet style. This is where the basin wrench earns its keep. It reaches into those impossibly tight spaces where a regular wrench can’t fit.
Loosen these fasteners by turning counterclockwise. Once they’re loose enough, you can often unscrew them by hand. Keep track of which nut is which—some are different sizes, and you don’t want to mix them up.
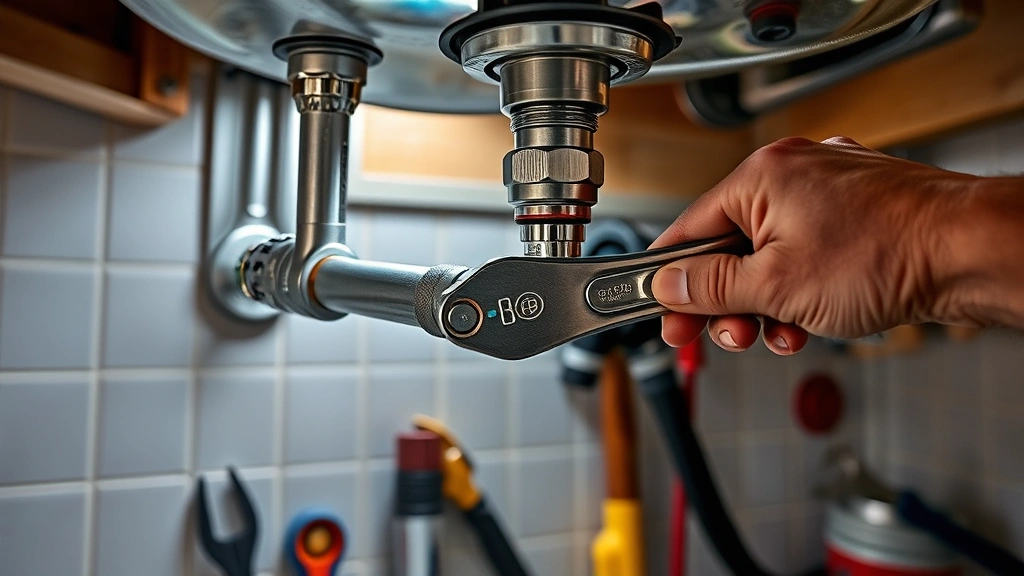
Next, disconnect the water supply lines. You’ll see two braided hoses connected with compression fittings. Use your adjustable wrench to hold the fitting while you unscrew the nut. Water might drip, so have that bucket ready. Once both lines are disconnected, you can lift the old faucet right out.
Prepare the Sink Surface
This is the cleanup moment. The old faucet probably left behind caulk, mineral deposits, or just general gunk. Use a plastic scraper or old credit card to remove the old caulk—don’t use anything sharp that’ll scratch your sink. Wipe everything clean with a damp cloth and let it dry completely.
If you’re mounting a new faucet with a different hole pattern, you might need to fill old holes or drill new ones. Most modern faucets come with a template—use it. A drill with a ceramic tile bit works great for most kitchen sinks. Take your time here; a crooked hole ruins the whole look.
This is also when you want to apply new caulk around the base of your new faucet once it’s installed. Use 100% silicone caulk—it’s waterproof and flexible. But we’re getting ahead of ourselves.
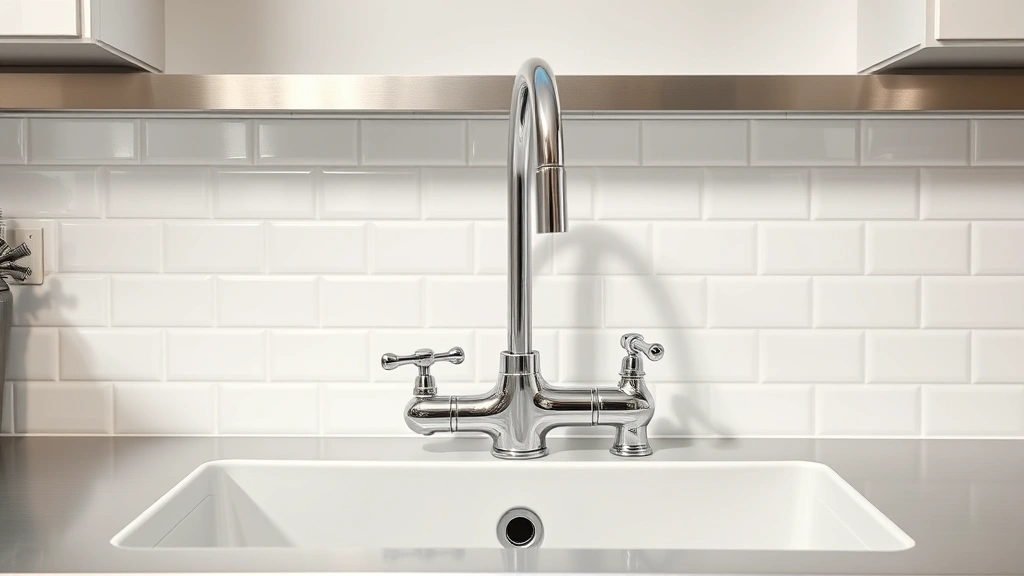
Install Your New Faucet
Your new faucet should come with a rubber gasket and mounting hardware. Install the gasket first—it goes between the faucet base and the sink surface. This creates a watertight seal. Then thread the mounting bolts through the holes from underneath.
Hand-tighten the bolts first, making sure the faucet sits straight and level. Then use your wrench to snug them down. You want it tight enough that it doesn’t move, but not so tight that you crack the sink. Listen to your instincts here—if it feels like you’re using crazy force, you’re probably overdoing it.
This is a good time to check that your faucet sits properly and that any optional spray head or side sprayer is positioned where you want it. Once you tighten everything down, adjusting becomes a hassle.
Connect Supply Lines Properly
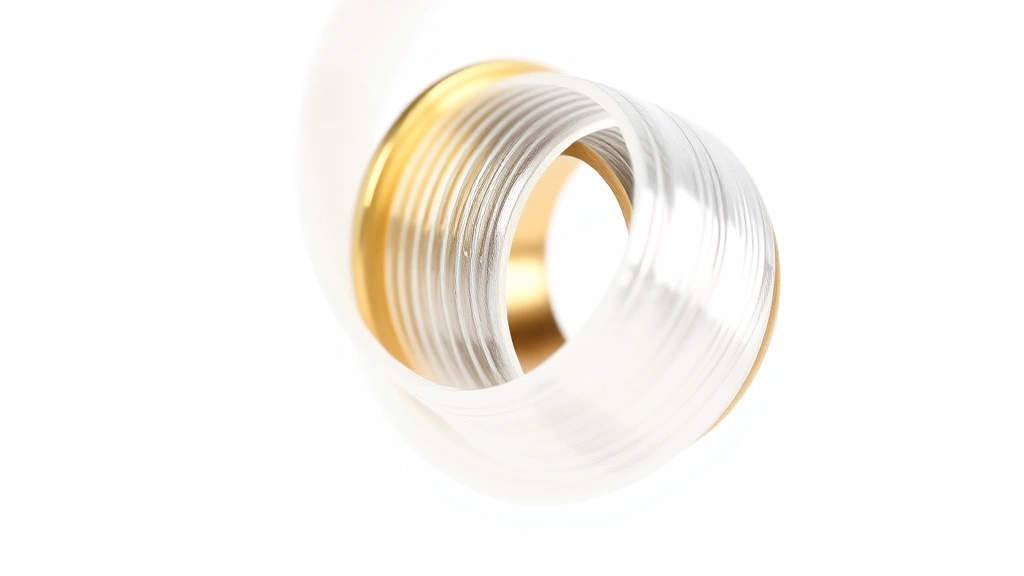
Now you’re connecting the water supply lines to your new faucet. This is where plumber’s tape becomes your secret weapon. Wrap the male threads (the part that screws in) with plumber’s tape, going clockwise around the thread. Three wraps is usually perfect. This creates a watertight seal and makes the connection easier to tighten.
Connect the hot and cold lines to the correct ports on your faucet. Usually, hot is on the left, cold on the right, but check your faucet manual. Hand-tighten first, then use your wrench to snug the compression fitting. Again, snug doesn’t mean death grip—just firm enough that it won’t leak.
If your new faucet came with pre-attached supply lines (some do), you’re skipping the tape step and just connecting directly to the shut-off valves. Either way, the principle is the same: hand-tight first, then wrench-tight.
Test and Troubleshoot Issues
Turn the shut-off valves back on slowly. Let water flow into the faucet for a few seconds, then turn it off. Check underneath for leaks. Look at every connection point—the base of the faucet, both supply line connections, and anywhere else water could escape.
Small drips at the compression fittings usually mean you need to tighten them a quarter turn more. Don’t panic. If you’ve got a steady leak, turn the water back off and check your plumber’s tape—you might need to redo the connection with more tape.
Run both hot and cold water. Check that the handle moves smoothly, that water flows evenly, and that everything feels right. If you have a spray head or side sprayer, test those too. Some faucets need a quick bleed—just hold the handle open for a minute to let air bubbles escape.
Once everything’s working and dry, apply that silicone caulk around the base where the faucet meets the sink. Let it cure per the manufacturer’s instructions before using the faucet heavily.
Common Mistakes to Avoid
The biggest mistake I see? People skip the plumber’s tape and wonder why they’ve got leaks. That tape is cheap insurance. Use it every time.
Another common one: over-tightening the compression fittings. You’ll crack the fitting or strip the threads, and suddenly you’re back at square one. Hand-tight plus a quarter turn with a wrench. That’s it.
Don’t forget to check your old faucet’s manual before removing it. Some have special clips or quick-connect fittings that need to be released in a specific way. Forcing the wrong thing can damage the new faucet before you even install it.
And here’s something people overlook: make sure your new faucet is actually compatible with your sink. Most kitchen faucets are, but if you’re upgrading from a single-hole to a two-hole setup (or vice versa), you need to know that going in. Check measurements and hole counts before purchase. For more home improvement guidance, check out how high to hang pictures to get your kitchen looking complete after the faucet swap.
Frequently Asked Questions
How long does it take to change a kitchen faucet?
For someone doing it the first time, expect 1-2 hours. If you’ve done it before, you’re looking at 30-45 minutes. Most of that time is spent carefully removing the old faucet and making sure connections are leak-free. Don’t rush it.
Do I need to hire a plumber?
Absolutely not. This is one of the most beginner-friendly plumbing projects. If you can use a wrench and follow instructions, you can do this. Save the plumber money for something more complicated.
What if I can’t turn off the water supply valves?
If they’re stuck, try applying penetrating oil and letting it sit for 15 minutes. Gently work the valve back and forth. If they’re completely seized, you’ll need to shut off your main water supply. This is actually a sign those valves need replacing—add it to your to-do list.
Can I change a faucet if I have a garbage disposal?
Yes, but you’ll have less space to work. The disposal takes up real estate under the sink. Just work around it carefully. You might need a shorter basin wrench or extra patience, but it’s doable.
What type of faucet is easiest to install?
Single-handle faucets are generally simpler than two-handle models. Pull-down sprayer faucets are slightly more complex because of the hose routing, but still totally manageable. Avoid wall-mounted faucets if this is your first time—those require different plumbing and are a bigger job.
Is plumber’s tape really necessary?
Yes. It prevents leaks and makes connections easier to work with. It’s also cheap—a roll costs a couple bucks and lasts forever. Use it.
What if water is still leaking after I’ve finished?
Check every connection point. Most leaks are at the compression fittings where the supply lines connect. Turn the water off, loosen the fitting slightly, add more plumber’s tape to the male threads, and reconnect. This fixes 90% of post-installation leaks.
If the leak is at the base of the faucet where it meets the sink, you might need more or better caulk. If it’s coming from inside the faucet itself, the faucet might be defective—contact the manufacturer.


