

Learning how to can tomatoes is one of the most rewarding skills you can master in the kitchen—it’s easier than you think, and the payoff is year-round access to homegrown flavor. Whether you’re preserving your garden harvest or stocking your pantry with shelf-stable goodness, canning tomatoes gives you that farm-to-table satisfaction without the farm. I’m going to walk you through the entire process, from picking your tomatoes to sealing your jars, so you’ll feel confident doing this yourself.
Table of Contents
Gather Your Supplies
Before you start, make sure you’ve got everything within arm’s reach. You’ll need mason jars—quart or pint sizes work great for tomatoes. Grab new lids and bands (the metal parts that hold the lid on). You can reuse the jars and bands forever, but lids need to be fresh each time. A large canning pot with a rack insert is essential; this is where the magic happens. You’ll also want a jar lifter (trust me, it’s worth it), a bubble remover, a funnel designed for canning, and a clean kitchen towel.
Beyond the hardware, stock your pantry with bottled lemon juice or white vinegar—this is crucial for food safety and prevents spoilage. Salt is optional but recommended for flavor. Have a large pot for blanching, a slotted spoon, and a sharp paring knife ready to go. The Family Handyman has excellent guides on setting up your canning station properly.
Choose the Right Tomatoes
Not all tomatoes are created equal when it comes to canning. You want firm, ripe tomatoes without blemishes or soft spots. Roma tomatoes are the gold standard because they have fewer seeds and thicker flesh, but any paste variety works beautifully. Beefsteaks and other slicing tomatoes are fine too—just expect more liquid. Avoid overripe tomatoes; they’ll turn to mush during processing. Pick tomatoes at peak ripeness, ideally in the early morning when they’re still cool.
One pound of tomatoes yields roughly one pint jar, so plan accordingly. If you’re using store-bought tomatoes, choose ones that feel heavy for their size and have no bruises. Green or underripe tomatoes won’t work—they lack the acidity needed for safe canning.
Prep Your Jars
Cleanliness is non-negotiable here. Wash your jars, lids, and bands in hot soapy water, then rinse thoroughly. Some people run them through the dishwasher—that works too. For canning, you can either keep them hot in your canning pot or place them in a 200°F oven for 10 minutes before filling. Hot jars prevent thermal shock when you add hot tomatoes.
Soak your lids in hot (not boiling) water for at least 5 minutes before using. This softens the rubber seal and helps them adhere properly. Have everything organized and ready; once you start filling jars, you’ll want to move quickly. Keep your jars hot until the moment you fill them.
Blanch and Peel
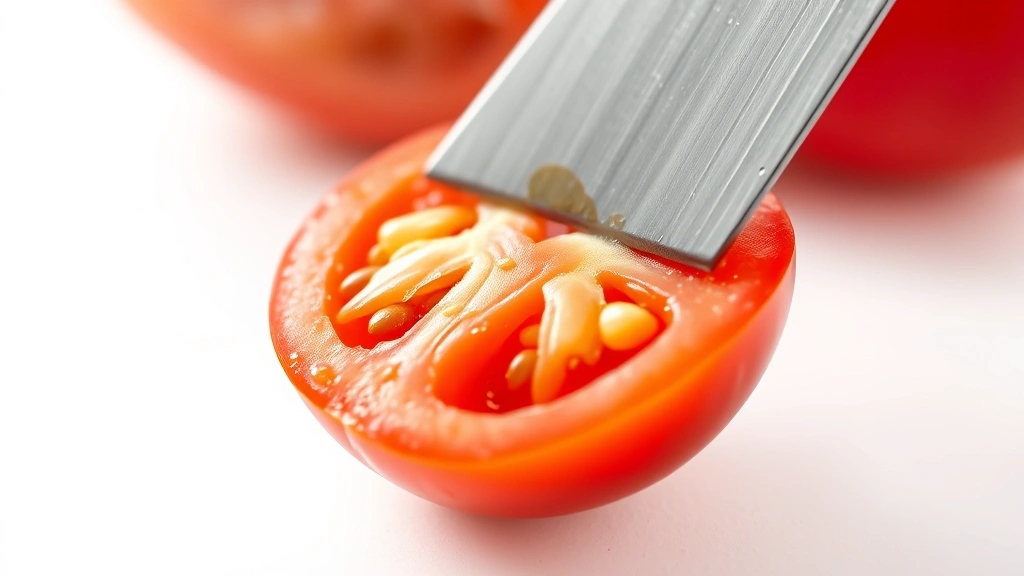
This step separates amateurs from pros. Bring a large pot of water to a rolling boil. Cut an X on the bottom of each tomato with a sharp knife—just a shallow score, nothing deep. Working in batches, drop tomatoes into boiling water for 30-60 seconds. You’ll see the skin start to split at the X. Use a slotted spoon to fish them out and plunge them immediately into a bowl of ice water to stop the cooking.
Once cooled, the skin slides off like magic. Start at the X and peel away the skin with your fingers or a paring knife. This takes patience, but it’s worth it—nobody wants chewy tomato skin in their sauce. After peeling, core the tomato and remove any green bits. At this point, you can leave them whole, quarter them, or crush them, depending on your preference and what you’re planning to use them for.
Pack Your Jars
Now for the actual canning part. Add ½ teaspoon of salt to each pint jar (1 teaspoon for quarts) if desired—this is purely for flavor since the acid does the preserving. Pour 2 tablespoons of bottled lemon juice into each pint jar, or 1 tablespoon per pint if using vinegar. This acid is critical; it prevents botulism and ensures your canned tomatoes stay safe.
Using your canning funnel, pack hot peeled tomatoes into the jar, pressing gently to release juices. Leave ½ inch of headspace at the top—this is the gap between the tomato and the rim. Too much headspace and the seal won’t work; too little and tomato juice may escape during processing. Use your bubble remover tool to gently slide around the inside of the jar and release any air pockets. Wipe the rim clean with a damp cloth—any residue prevents a proper seal.
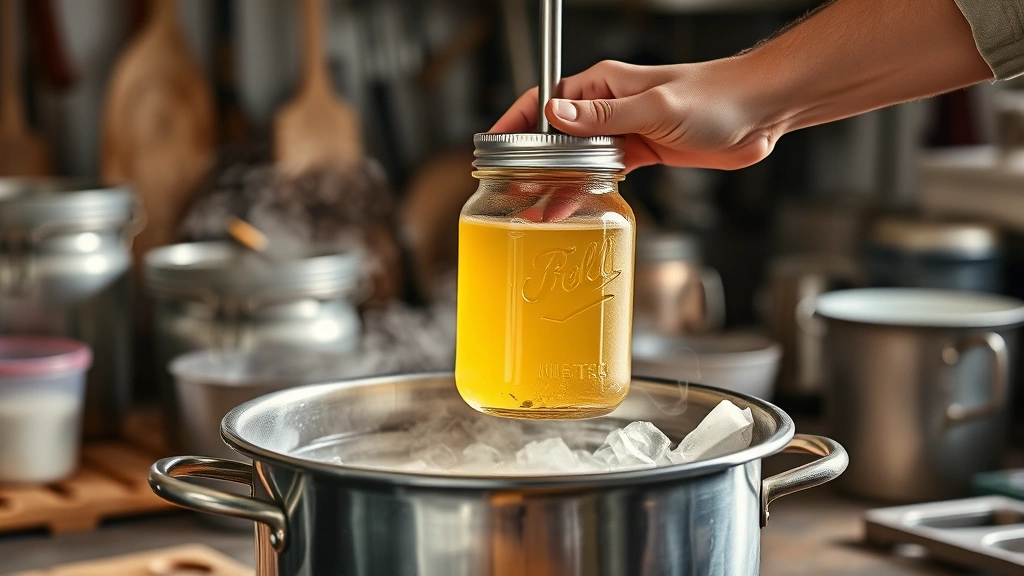
Process in Water Bath
Place your filled jars on the rack in your canning pot, ensuring they’re covered by at least 1-2 inches of water. Bring the water to a rolling boil. Once boiling, process pint jars for 35 minutes or quart jars for 45 minutes. This time kills any bacteria and creates a vacuum seal as the jars cool. Don’t skip this step or rush it—processing time is non-negotiable for food safety.
Keep the water at a gentle, rolling boil throughout processing. If it stops boiling, restart your timer. At higher altitudes (above 1,000 feet), you’ll need to add extra time—check This Old House for altitude adjustments specific to your location. The National Center for Home Food Preservation is the gold standard for canning safety guidelines.
Cool and Store
When the timer goes off, carefully remove jars using your jar lifter and place them on a clean kitchen towel, leaving space between each jar. Don’t tighten the bands—let them sit as-is. As the jars cool, you’ll hear a satisfying “pop” sound; that’s the seal forming. This is your confirmation that everything worked. Let jars cool completely at room temperature for 12-24 hours before checking seals.
To test the seal, press the center of the lid. If it’s flat and doesn’t flex, you’ve got a good seal. If it pops back up, the jar didn’t seal properly—refrigerate and use that one first. Remove the bands (you can reuse them), label your jars with the date and contents, and store in a cool, dark place. Properly canned tomatoes last 1-2 years, though they’re best used within the first year for optimal flavor.
Common Issues
If your jars didn’t seal, don’t panic. You can either reprocess them immediately with a new lid or simply refrigerate and use them within a few days. Cloudy liquid inside the jar usually means mineral deposits from your water—it’s harmless but unattractive. Use distilled water next time. If you notice mold or an off smell when opening a jar, discard it immediately; this indicates spoilage.
Siphoning (where liquid leaks out during processing) happens when you pack jars too full or don’t remove air bubbles properly. Next time, be more careful with headspace and use your bubble remover religiously. If tomatoes float to the top of the jar, don’t worry—they’re still safe. This happens because the tomatoes lose density during processing. You might want to crush them more next time for a more uniform texture.
For more detailed troubleshooting and advanced techniques, Bob Vila has excellent resources on preserving food at home. If you’re interested in using your canned tomatoes in recipes, consider exploring complementary preserved foods—black lentil recipes pair beautifully with homemade tomato sauce, and great northern beans recipes are another versatile option for using your harvest.
Frequently Asked Questions
Can I can tomatoes without a canning pot?
Technically, you can use a large stockpot with a rack on the bottom, but a proper canning pot with a rack insert is really the way to go. It ensures even heat distribution and makes the process much easier. The investment pays for itself quickly if you plan to can regularly.
Do I need to add lemon juice to every jar?
Yes, absolutely. Tomatoes aren’t naturally acidic enough to prevent botulism when canned. Bottled lemon juice (not fresh) or vinegar is essential for food safety. This is not optional or negotiable.
How do I know if my canned tomatoes went bad?
Signs of spoilage include mold, cloudiness, off-smells, or a bulging lid. If you see any of these, throw the jar out. Properly canned tomatoes should look bright and fresh when you open them.
Can I reuse canning lids?
No, always use new lids. The rubber seal can only be used once. You can reuse jars and bands indefinitely, but lids are one-time use only.
What’s the difference between canning and freezing tomatoes?
Canning creates shelf-stable preserves that last 1-2 years without refrigeration, while freezing requires freezer space and power. Both work, but canning is more space-efficient for long-term storage and doesn’t depend on electricity.
Can I use fresh tomato juice instead of lemon juice?
No—you must use bottled lemon juice or vinegar. Fresh lemon juice has variable acidity and isn’t safe for canning. Bottled versions have consistent acidity levels that ensure food safety.
Wrap It Up
Learning how to can tomatoes transforms you from a home cook into a true food preserver. The process is straightforward once you understand the why behind each step—the acid prevents spoilage, the heat kills bacteria, and the seal keeps everything safe. Start with small batches to build confidence, follow food safety guidelines religiously, and you’ll have gorgeous jars of homemade tomatoes ready whenever inspiration strikes. Whether you’re making sauce, soup, or simply enjoying them straight from the jar, there’s nothing quite like the taste of summer preserved in glass. Your future self will thank you every time you crack open a jar.


