

Learning how to bread chicken is one of those kitchen skills that’ll change your cooking game forever. Once you nail the technique, you’re looking at restaurant-quality crispy chicken every single time—whether you’re frying it up golden brown or baking it for a lighter version. No more soggy breading or bland chicken. Just perfectly seasoned, crunchy coating that sticks to juicy meat underneath. Let’s walk through this step-by-step so you can master it like a pro.
Table of Contents
Prep Your Chicken Right
Before you even think about breading, your chicken needs proper prep work. Pat your chicken pieces completely dry with paper towels—this is non-negotiable. Moisture is the enemy of crispy breading. If your chicken is wet, the breading won’t adhere properly and you’ll end up with a soggy mess.
If you’re working with thick breasts, consider pounding them to an even thickness. A meat mallet works great here. You want uniform thickness so everything cooks at the same rate. Pound gently but firmly, working from the center outward. This step makes a huge difference in your final result.
Season your chicken pieces with salt and pepper on both sides before you start the breading process. This base seasoning gets into the meat itself, not just the coating. Give it a few minutes to sit so the salt can start breaking down the surface proteins.
Set Up Your Breading Station
Organization is everything when you’re breading chicken. Set up three shallow bowls or plates in a line: one for your flour mixture, one for your egg wash, and one for your breadcrumb mixture. This assembly-line approach keeps things clean and efficient.
Use bowls wide enough that you can dredge your chicken pieces without making a mess. Pie dishes work perfectly for this. Arrange them left to right in the order you’ll use them. Have paper towels nearby for your non-breading hand so you don’t end up with a gloppy mess.
Pro tip: use one hand for the wet ingredients (egg wash) and keep your other hand dry for handling the flour and breadcrumbs. This prevents your hands from becoming a sticky disaster and keeps your breading mixture from getting clumpy.
Dry Ingredients Matter
Your flour mixture is the foundation of good breading. Standard all-purpose flour works fine, but here’s where you add flavor. Mix your flour with salt, pepper, garlic powder, onion powder, and paprika. I typically use about 1 cup flour with 1 teaspoon each of the seasonings.
Some folks add a tablespoon of cornstarch to their flour mixture. This creates an extra-crispy texture because cornstarch fries up differently than wheat flour. If you’re after that fried-chicken-joint crispiness, definitely include it.
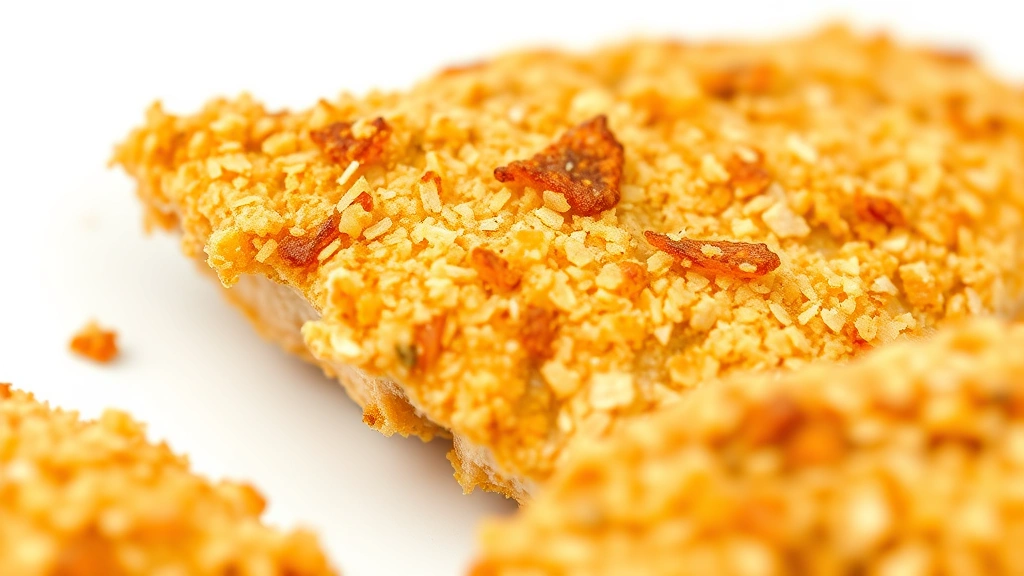
Your breadcrumb choice matters too. Panko breadcrumbs give you that coarse, crunchy texture. Regular breadcrumbs create a finer, more delicate crust. Mix your breadcrumbs with the same seasonings as your flour—consistency across all your dry ingredients is key. You can also add grated Parmesan cheese to your breadcrumb mixture for extra flavor and a golden-brown color.
The Wet Coating Technique
Your egg wash is what makes the breading stick. Crack 2-3 eggs into a shallow bowl and beat them thoroughly with a fork. Add a splash of milk or water—about 2 tablespoons—to thin it out slightly. This makes it easier to coat your chicken evenly without creating thick globs.
Some cooks add a tablespoon of hot sauce, Worcestershire sauce, or even a bit of mustard to their egg wash for extra flavor. These additions don’t just taste good—they help the breading adhere better because of their acidity and binding properties.
The egg wash needs to fully coat your chicken. Dip each piece into the egg mixture and let excess drip back into the bowl. You want a thin, even coating, not a thick layer. This is where patience pays off. Rushing this step results in patchy breading.
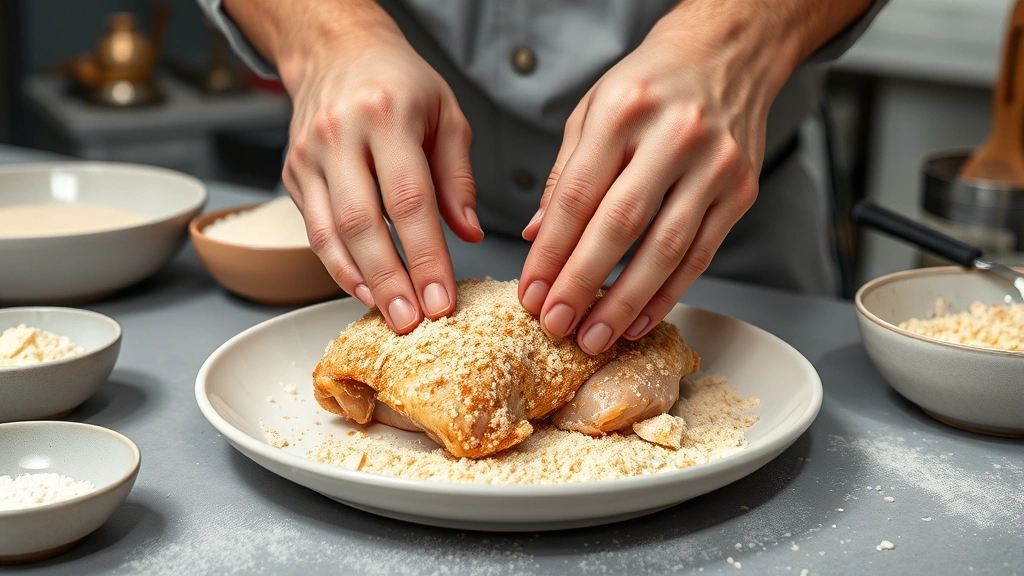
Apply Breading Like a Pro
Once your chicken is coated in egg wash, immediately transfer it to your breadcrumb mixture. Press the chicken gently into the breadcrumbs, making sure all sides get covered. This pressing motion is important—it helps the breadcrumbs stick to the egg wash instead of just sitting on top.
Use your fingers to gently pat breadcrumbs onto any bare spots. Work quickly but carefully. The longer the chicken sits in the wet mixture, the more it’ll absorb liquid and get soggy. Flip it over and coat the other side, pressing gently.
Here’s a pro move: after your initial breading, dip the piece back into the egg wash for just a second, then back into the breadcrumbs. This double-breading creates an extra-thick, extra-crunchy coating. It’s what restaurants do, and it’s worth the extra step.
Let It Rest Before Cooking
Don’t skip this step. Once you’ve breaded your chicken, place the pieces on a wire rack and let them sit for at least 15-20 minutes. This resting period lets the breading set and adhere properly to the chicken. The egg wash dries slightly, creating a stronger bond.
If you’re prepping ahead, you can refrigerate breaded chicken for up to 24 hours. Cover it loosely with plastic wrap. Cold chicken actually fries better because the inside stays juicy while the outside gets crispy. Just let it come to room temperature for about 10 minutes before cooking.
This rest period is also when you can prep your cooking station. Get your oil to temperature if frying, or preheat your oven if baking. By the time your chicken is ready, everything else will be too.
Frying vs. Baking Methods
For deep frying, heat your oil to 350°F. Use a thermometer—guessing gets you burnt outside and raw inside. Oil temperature is everything. Work in batches so you don’t crowd the pan. Fry for about 12-15 minutes depending on thickness, turning halfway through. The chicken should reach 165°F internal temperature.
For shallow pan-frying, use about ½ inch of oil in a heavy skillet. Heat to 350°F and cook for about 6-8 minutes per side. This method uses less oil and still gives you great results. Check out our guide on how long to bake chicken wings for timing on specific cuts.
Baking breaded chicken is the lighter option. Place your breaded pieces on a parchment-lined baking sheet and lightly spray with cooking oil. Bake at 400°F for about 20-25 minutes until golden and the internal temperature hits 165°F. You won’t get quite the same crispiness as frying, but it’s still delicious and way less oil.
For extra crispy baked chicken, use an air fryer at 380°F for 12-15 minutes. Air fryers actually do a surprisingly good job mimicking the texture of fried chicken without all the oil.
Common Breading Problems
If your breading is falling off during cooking, your chicken probably wasn’t dry enough or your egg wash didn’t coat evenly. Make sure you’re patting your raw chicken completely dry before seasoning. Also, don’t skip the resting period—it’s crucial for adhesion.
Soggy breading usually means one of two things: either your oil temperature was too low, or you didn’t let the breaded chicken rest long enough before cooking. Low oil temperature means the chicken takes longer to cook, and the breading absorbs oil instead of crisping up. Always use a thermometer.
Uneven browning happens when your heat source isn’t consistent or you’re crowding your pan. Leave space between pieces so heat circulates evenly. If frying, don’t flip too early—let that first side get golden before turning.
If your breading is too thick and hard, you might be using too much egg wash or leaving the chicken in the wet mixture too long. Keep things moving through your breading station quickly. Thin, even coatings crisp up better than thick ones.
Creative Flavor Variations
Once you master the basic technique, play with flavors. Mix Italian seasoning and Parmesan into your breadcrumbs for an Italian-style coating. Add cayenne pepper and smoked paprika for a spicy kick. Try mixing crushed potato chips or pretzels into your breadcrumb mixture for a totally different texture.
For Asian-inspired breading, use panko mixed with sesame seeds and a pinch of ginger powder. Add a bit of soy sauce to your egg wash. Serve it with sweet and sour sauce or sriracha mayo.
Herb-forward breading works great too. Fresh or dried herbs like oregano, thyme, basil, or dill mixed into your breadcrumb mixture add serious flavor. Just don’t use so much that you overpower the chicken. Start with about a teaspoon per cup of breadcrumbs.
Check out our best summer recipes for more inspiration on breaded chicken dishes that work year-round.
Storage and Make-Ahead Tips
Breaded chicken keeps in the fridge for up to 24 hours before cooking. Layer pieces between parchment paper on a baking sheet, then cover loosely with plastic wrap. Don’t stack them too tightly or the breading will compress.
Cooked breaded chicken lasts about 3-4 days in an airtight container in the fridge. Reheat in a 350°F oven for about 10 minutes to restore crispiness. The microwave will make it soggy, so avoid that.
You can freeze breaded chicken before cooking it. Place breaded pieces on a baking sheet and freeze for 2-3 hours until solid, then transfer to freezer bags. Cook from frozen—just add a few extra minutes to your cooking time. No need to thaw first.
Cooked breaded chicken also freezes well. Let it cool completely, then freeze in a single layer before transferring to freezer bags. It’ll keep for up to 3 months. Reheat in a 350°F oven until warmed through.
Frequently Asked Questions
Can I use milk instead of eggs for the breading?
Not really. Eggs have proteins that help the breading adhere and crisp up properly. Milk alone won’t bind as well. If you need an egg-free option, use a mixture of cornstarch and water, or try plant-based egg replacer. The results won’t be quite the same, but they’ll work.
What’s the best oil for frying breaded chicken?
Use oil with a high smoke point like vegetable oil, canola oil, or peanut oil. Avoid olive oil—it has a lower smoke point and will burn. Peanut oil is great if you’re not dealing with nut allergies because it has a neutral flavor and high smoke point.
How do I know when breaded chicken is done cooking?
Use a meat thermometer. Chicken is safely cooked when it reaches 165°F internal temperature. Don’t rely on color alone—breading can brown faster than the inside cooks. Check the thickest part of the meat, away from bone.
Can I bread chicken the night before cooking?
Absolutely. Breaded chicken actually does better when you let it rest in the fridge overnight. The breading sets more firmly and adheres better. Just make sure it’s covered loosely so moisture can escape.
Why is my breading greasy after frying?
Your oil temperature is too low. If oil isn’t hot enough, the chicken absorbs it instead of the breading crisping up. Use a thermometer and keep your oil at 350°F. Also, don’t overcrowd the pan—this drops the oil temperature.
Is there a difference between panko and regular breadcrumbs?
Yes. Panko is coarser and creates a crunchier, lighter texture. Regular breadcrumbs are finer and create a more delicate crust. For maximum crispiness, use panko. For a more refined texture, use regular breadcrumbs.
Can I make breaded chicken without frying?
Yes. Baking at 400°F or air frying at 380°F both work. You won’t get quite the same level of crispiness as deep frying, but baking is lighter and air frying gets surprisingly close. Brush or spray lightly with oil either way.
Related Cooking Guides: If you’re planning a full meal, check out our guide on how long to cook chicken legs in oven for timing on different cuts. For complementary sides, explore our fried pickles recipe for a tasty appetizer. And if you’re doing meal prep, our healthy lunch recipes meal prep guide has plenty of breaded chicken ideas.
External Resources: For more detailed frying techniques, check Family Handyman’s kitchen guides. This Old House offers great food preparation resources. And Bob Vila’s cooking section has additional tips on kitchen techniques.


