
How often to feed sourdough starter is one of the most common questions beginners ask, and honestly, it’s where a lot of people get tripped up. The truth is, there’s no single answer that works for everyone—it depends on your kitchen temperature, how active you want your starter, and what you’re actually baking. Let me walk you through the real-world approach I’ve learned from years of keeping starters alive and kicking.
Table of Contents
Room Temperature Feeding Schedule
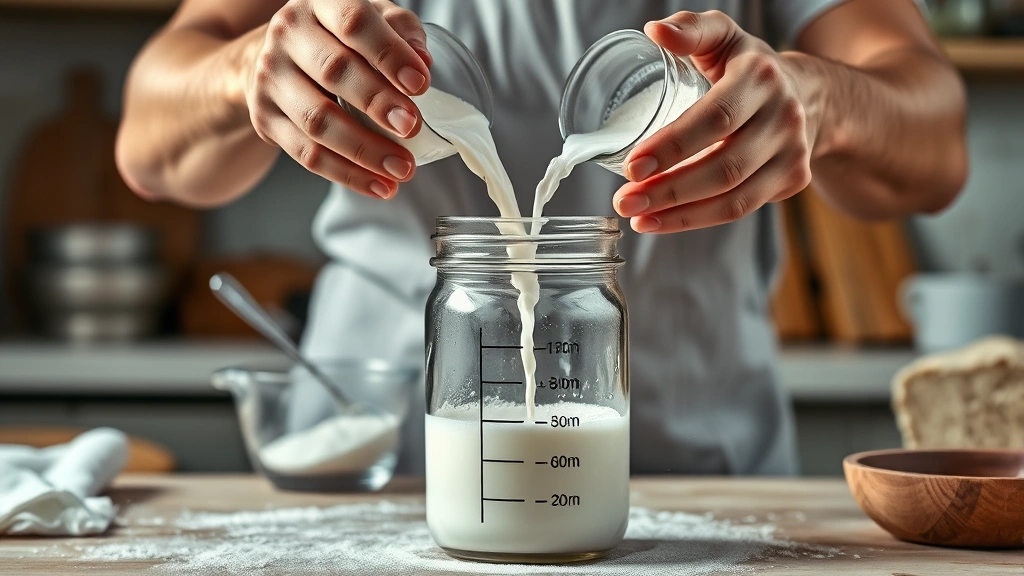
At a comfortable room temperature—around 68-72°F—most starters thrive on a once-daily feeding schedule. I typically feed mine in the morning, using equal parts starter, flour, and water by weight. That’s usually about 50 grams of each if you’re measuring by volume. The starter will peak in activity around 4-8 hours after feeding, then start to level off. This is your sweet spot for baking if you’re planning to mix dough the same day.
The key here is consistency. Your starter develops a rhythm, kind of like a pet that expects dinner at the same time every day. If you feed at 8 AM every morning, your starter will learn to anticipate that and be ready. This predictability makes planning your baking schedule way easier.
Warm Kitchen Rules
If your kitchen runs warm—say 75-80°F—you’ll need to feed more frequently, sometimes twice daily. I’ve had starters in summer kitchens that were absolutely ravenous at that temperature. The warmer environment speeds up fermentation dramatically, so your starter burns through its food faster. Think of it like metabolism: warmer conditions equal faster activity.
In these situations, I often switch to a 12-hour feeding schedule. Morning and evening works perfectly. If you skip a feeding in a warm kitchen, you might come back to find your starter has collapsed or developed a dark liquid layer on top (called “hooch”). That’s actually alcohol your starter produced when it ran out of food—it’s not ruined, but it’s a sign you’re pushing it too hard.
Cold Storage Method
Here’s where things get really practical: refrigeration. If you’re not baking regularly, your best friend is the cold storage method. I keep my backup starter in the fridge and only feed it once a week. The cold dramatically slows fermentation, so your starter enters a kind of hibernation mode. This is perfect if you bake sourdough once or twice a month rather than weekly.
Before you bake, pull your starter out of the fridge, feed it, and let it come to room temperature. Give it 4-8 hours to wake up and become active again. Some bakers do what’s called “cold retarding”—they feed their starter, let it sit at room temperature for an hour, then immediately refrigerate it. This works beautifully for managing feeding schedules around a busy life.
Signs Your Starter Needs Food
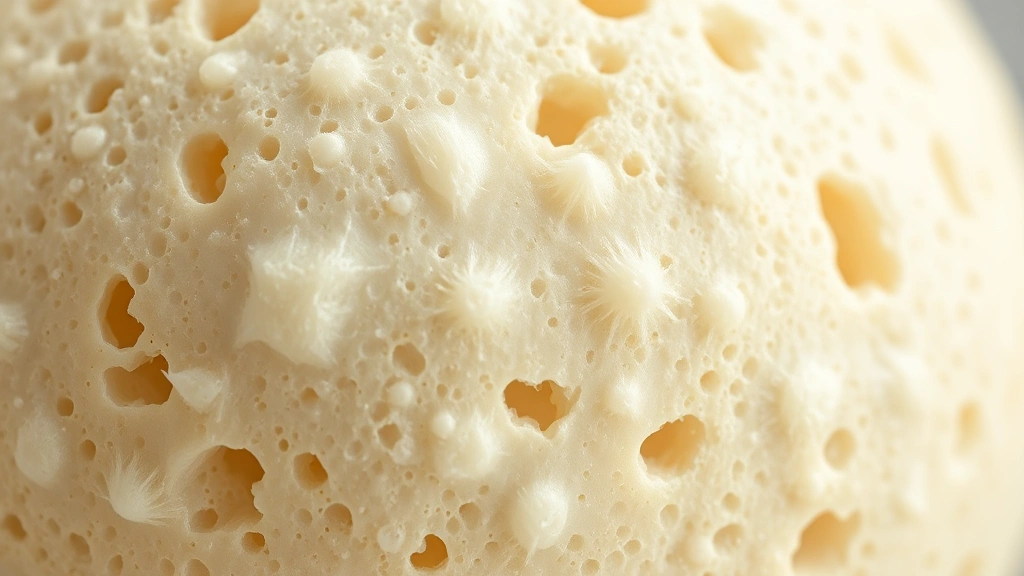
Forget rigid schedules for a moment. The real indicator is what your starter looks like. A healthy, well-fed starter shows clear signs of activity: it’s bubbly, has a pleasant sour smell, and roughly doubles in volume within 4-8 hours of feeding. When it starts to look flat and the bubbles disappear, that’s your cue it’s hungry.
Another telltale sign is the “hooch” I mentioned earlier—that dark liquid layer on top. A little bit is normal, but if it’s thick and your starter hasn’t been fed in days, feed it immediately. Some people pour off the hooch, others stir it back in. I usually stir it back in because it adds flavor, but do what works for your taste preference.
The smell is equally important. A well-fed starter smells pleasantly sour and yeasty. If it smells like nail polish remover or acetone, that’s the hooch telling you it’s starving. Again, not dangerous—just hungry.
Feeding Ratio Matters Most
Here’s the thing that really changed my starter game: the feeding ratio is more important than the absolute schedule. When I say “equal parts,” I mean by weight. But you can also do 1:2:2 (one part starter, two parts flour, two parts water) or even 1:5:5 if you want your starter to go longer between feedings.
A 1:1:1 ratio (equal parts) means your starter will be ready in 4-8 hours and will need feeding again relatively soon. A 1:5:5 ratio stretches that timeline to 12-24 hours because there’s more food available. If you’re working a full-time job and can’t feed daily, the higher ratio is your solution. I use this method when life gets hectic.
The math is simple: more food equals longer between feedings. Less food means more frequent feedings but faster activity. Pick the ratio that matches your lifestyle and feeding schedule.
Seasonal Temperature Shifts
Your kitchen temperature isn’t constant throughout the year, and your starter knows it. In winter, when the house is cooler, I shift to once-daily or even every-other-day feeding depending on how cold it gets. In summer, I’m back to twice daily or using the fridge method.
I actually keep a simple thermometer near my starter jar so I can track the temperature and adjust accordingly. A 10-degree shift in room temperature can change your feeding schedule by hours. This is especially true if you live somewhere with dramatic seasonal swings. The starter itself will tell you when it’s unhappy—it’ll either move too slowly or collapse too quickly.
Troubleshooting Sluggish Starters
Sometimes your starter just seems lazy. It’s not moldy or smelly, but it’s not doubling in volume like it should. First, check the temperature. If your kitchen is below 65°F, that’s probably your culprit. Starters slow way down in cold conditions. Moving it to a warmer spot—like on top of the fridge or near a sunny window—often fixes this immediately.
Second, consider the flour. Some flours ferment faster than others. Whole wheat and rye activate starters quickly because they have more nutrients. If you’ve been using only all-purpose flour, try mixing in 10-20% whole wheat flour in your next feeding. You’ll often see a dramatic increase in activity within 24 hours.
Third, make sure you’re using filtered or dechlorinated water if your tap water is heavily chlorinated. Chlorine can actually slow fermentation. I switched to filtered water years ago and noticed a real difference in starter vigor.
Maintaining Long-Term Health
If you want a starter that lasts decades—and you absolutely can have one—consistency is key. Pick a feeding schedule and stick with it for at least two weeks before you judge whether it’s working. Your starter needs time to adjust to a new rhythm.
Keep your starter in a clean glass jar (plastic can absorb odors and oils). Use good-quality flour—I prefer unbleached bread flour or a mix of all-purpose and whole wheat. Feed with filtered water if possible. These simple practices keep your starter healthy and vigorous for years.
One more thing: always keep a backup. If something goes wrong with your main starter, you’ll be devastated if you don’t have a backup in the fridge. I actually keep my backup starter in a different location (my parents’ house) just in case something catastrophic happens. It sounds extreme, but sourdough starters become like family members after a while.
Frequently Asked Questions
Can I feed my starter once a week?
Yes, absolutely. Keep it in the refrigerator and use the 1:5:5 feeding ratio (or even 1:10:10). Pull it out, feed it, let it sit for an hour at room temperature, then refrigerate it again. This method works perfectly for casual bakers who make sourdough monthly rather than weekly. I’ve maintained starters this way for over a year without any issues.
What happens if I forget to feed my starter?
Your starter won’t die if you miss a feeding or two. It might smell bad and develop that dark liquid layer, but it’s still alive. Feed it as soon as you remember. If you’ve left it unfed for weeks, it might take 2-3 feedings to get back to normal vigor, but it’ll recover. I once forgot about a starter for three weeks and successfully revived it. These things are surprisingly resilient.
Is my starter ready to bake with?
Your starter is ready when it reliably doubles (or more) within 4-8 hours of feeding and shows lots of visible bubbles. The smell should be pleasant and sour, not acetone-like. If it’s doing this consistently, you’re good to go. Some people do a “float test”—drop a small spoonful of starter into water. If it floats, it’s bubbly enough for baking. If it sinks, give it more time.
Should I use filtered water?
Filtered water is ideal but not absolutely necessary. If your tap water is heavily chlorinated, filtering helps because chlorine can inhibit fermentation. I use filtered water now and notice better, more consistent results. It’s a small investment that pays off in starter reliability. If you’re having trouble with a sluggish starter, switching to filtered water is worth trying.
Can I use different flours?
Yes, and it changes your starter’s behavior. Whole wheat and rye flours ferment much faster than all-purpose or bread flour. If you want a faster starter, use 20-30% whole wheat in your feedings. If you want to slow it down, use only white flour. I actually maintain two starters: one with whole wheat for quick fermentation and one with all-purpose for longer fermentation windows. It gives me flexibility in my baking schedule.
What’s the best temperature for my starter?
The sweet spot is 70-75°F. At this temperature, most starters thrive on a once-daily feeding and are ready to bake in 4-8 hours. Below 65°F, fermentation slows dramatically. Above 80°F, fermentation accelerates and you’ll need more frequent feedings. If your kitchen temperature is variable, adjust your feeding schedule to match. This is why understanding your kitchen’s microclimate matters more than following a rigid rule.
Now, let’s talk about some practical applications. If you’re planning to make homemade butter alongside your sourdough baking, understanding starter maintenance helps you plan your kitchen time better. Both require some waiting and observation. Similarly, if you’re interested in healthy overnight oats, you’ll appreciate how fermentation works in different contexts.
For timing your baking sessions, knowing how long it takes to boil water helps you plan your kitchen workflow. And if you’re baking sourdough bread to serve with proteins like chicken or chicken legs at 400 degrees, understanding your starter’s schedule means you can coordinate your entire meal prep. Even seemingly unrelated tasks like grass seed growth follow similar principles of patience and proper conditions.
Final Thoughts
How often to feed sourdough starter really comes down to three things: your kitchen temperature, your lifestyle, and what your starter is telling you. There’s no shame in keeping a starter in the fridge and feeding it weekly if that’s what works for you. There’s also nothing wrong with feeding twice daily if you’re baking constantly. The goal is a starter that works for your life, not one that controls your life.
Start with once-daily feeding at room temperature, watch how your starter responds, and adjust from there. Within two weeks, you’ll have a rhythm that works. After a month, you’ll wonder why you ever thought this was complicated. Your starter will become second nature—like checking your mail or making coffee. And unlike those tasks, your starter will reward you with incredible bread that tastes better than anything you can buy.
The best part? Once you nail this, you’ll have a living thing in your kitchen that connects you to thousands of years of baking tradition. That’s worth the small effort of consistent feeding.


