

Learning how long to cook chuck roast in oven is one of those game-changing skills that transforms you from “I guess I’ll order takeout” to “I’m making a killer pot roast tonight.” This cut of beef is forgiving, flavorful, and absolutely worth mastering. Whether you’re feeding a crowd or meal-prepping for the week, a perfectly cooked chuck roast delivers tender, fall-apart meat that makes your kitchen smell incredible.
Table of Contents
Cooking Time Basics
Here’s the straight answer: plan on 3 to 4 hours at 325°F for a typical 3 to 4-pound chuck roast. That’s the sweet spot for low-and-slow cooking that breaks down the connective tissue without drying out the meat. If you’re working with a smaller 2-pound roast, you’re looking at 2.5 to 3 hours. Go bigger—say 5 to 6 pounds—and you’ll need 4 to 5 hours.
The key isn’t hitting a specific time; it’s hitting the right texture. You want meat so tender it practically shreds when you look at it hard. That happens when collagen converts to gelatin, and that process takes time. Rush it, and you’ll end up with tough, chewy meat that makes you question your life choices.
Temperature Matters Most
Forget everything you’ve heard about cooking roasts hot and fast. Chuck roast demands low and slow. Set your oven to 325°F—not 375°F, not 400°F. At 325°F, the meat cooks evenly, the exterior browns without burning, and the inside becomes impossibly tender. Some cooks go even lower at 300°F, which takes longer but gives you more control and less risk of overcooking.
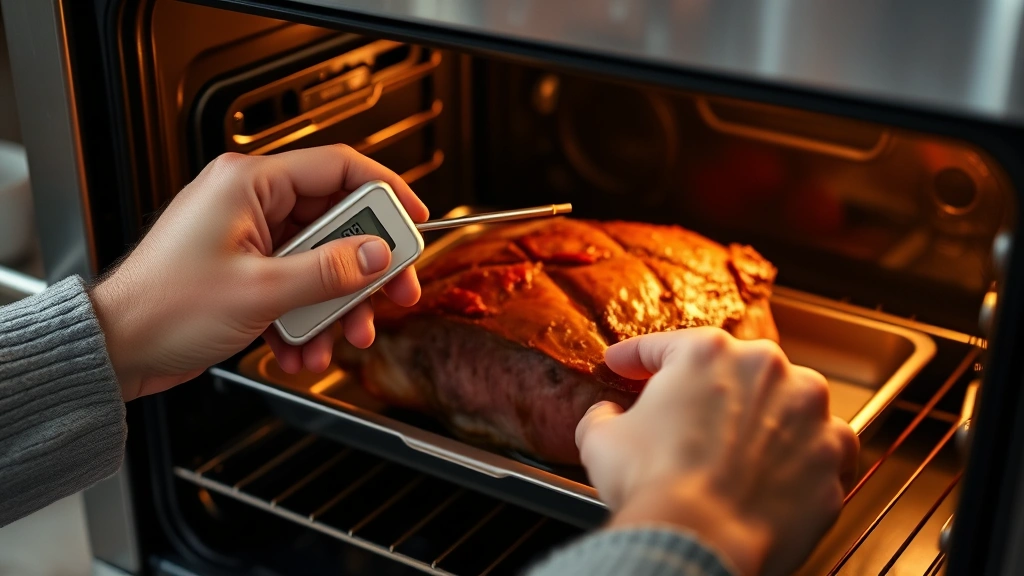
Internal temperature is your checkpoint, not your finish line. Chuck roast is done when it hits 190-205°F internally, measured at the thickest part away from bone. At that range, the connective tissue has fully broken down. Use a reliable meat thermometer—the instant-read kind is your best friend here. Stick it in, wait 3 seconds, and you’ve got your answer.
Prep Work is Essential
Don’t skip the searing step. Pat your chuck roast completely dry with paper towels—moisture is the enemy of browning. Season it generously with salt and pepper at least 40 minutes before cooking. This lets the seasoning penetrate, not just sit on the surface.
Heat a heavy Dutch oven or large oven-safe pot over medium-high heat. Add a splash of oil with a high smoke point—vegetable or avocado oil works great. Once it’s shimmering, sear the roast on all sides until you’ve got a deep brown crust. This takes 8-12 minutes total and creates flavor through the Maillard reaction. Don’t skip this; it’s the difference between good and restaurant-quality.
Braising Liquid Secrets
Your liquid is what transforms a roast into something magical. The classic combo is beef broth mixed with red wine—about 2 cups broth to 1 cup wine for a 3-4 pound roast. But you’re not limited to that. Try apple cider, balsamic vinegar, or even beer. The acid helps tenderize the meat while adding depth.
Add aromatics: onions, garlic, carrots, and celery. These aren’t just there for flavor; they break down during cooking and thicken your sauce naturally. Fresh thyme, rosemary, and a bay leaf round out the profile. Pour your liquid over the seared roast until it comes halfway up the sides—you want braising, not boiling. Cover with a lid and slide it into that preheated 325°F oven.
Size Affects Timing
Chuck roast size is the biggest variable in cooking time. A 2-pound roast might be done in 2.5 hours, while a 5-pound monster needs 5 hours or more. The rule of thumb: add 45 minutes to 1 hour per pound beyond the first pound. So a 4-pound roast gets roughly 3 hours plus 3 hours (1 hour per additional pound) = 4 hours total. That’s approximate, but it gets you in the ballpark.
Here’s where a meat thermometer becomes non-negotiable. Two roasts of the same weight can finish at different times depending on shape and how evenly they cook. Check internal temp at the 2.5-hour mark for smaller roasts and 3-hour mark for larger ones. Then check every 30 minutes until you hit 190-205°F.
Doneness Tests That Work
Forget poking with a fork—that’s for amateurs. Your thermometer is the pro move. Insert it into the thickest part of the meat, away from any bone, and wait for a steady reading. Aim for 190°F minimum, but 200-205°F is the sweet spot where the meat is genuinely fork-tender.
The second test: the fork-shred. Take a fork and try to shred a small piece of meat from the roast. If it falls apart easily, you’re golden. If it resists and feels firm, give it another 15-30 minutes. The meat should practically dissolve on your tongue, not require chewing.
Resting Period is Critical
Here’s where patience pays off big time. Remove the roast from the oven and let it rest, covered loosely with foil, for 15-20 minutes. This isn’t wasted time—it’s essential. The meat fibers relax, reabsorb juices, and the whole thing becomes more tender and flavorful. Skip this step and you’ll lose precious moisture when you cut into it.
While the roast rests, strain your braising liquid into a saucepan and skim off excess fat. Simmer it on the stovetop for 5-10 minutes to concentrate flavors. If you want a thicker sauce, mix a tablespoon of cornstarch with cold water, whisk it in, and simmer until it coats the back of a spoon. This sauce is liquid gold over mashed potatoes or crusty bread.
Common Mistakes to Avoid
The biggest mistake? Cooking too hot or too fast. I see people cranking the oven to 400°F thinking they’ll save time. All that does is dry out the outside while leaving the inside tough. Patience is literally the ingredient you can’t buy. Stick with 325°F.
Second mistake: not enough liquid. If your braising liquid evaporates completely, the bottom of the roast will scorch and the meat won’t stay moist. Check it halfway through cooking. If it’s looking dry, add more broth. You want enough liquid that the roast is about halfway submerged throughout cooking.
Third mistake: skipping the sear. I get it—you’re busy. But that brown crust is flavor you literally can’t get any other way. It takes 10 minutes and transforms the entire dish. Do it.
Troubleshooting Guide
Meat is still tough after 4 hours: Keep cooking. Some roasts need 4.5 or 5 hours. Temperature is more important than time. If it’s at 205°F and still tough, the roast might be from a particularly muscular animal. Keep going until it’s genuinely tender.
Meat is falling apart but still looks pink: That’s fine. Chuck roast isn’t like steak—it’s a tough cut that needs extended cooking. Pink color at 190-205°F is actually normal and safe. The extended cooking time kills any bacteria.
Liquid evaporated and bottom is burning: Move the roast to a clean pot immediately, add more liquid, and return to the oven. Lower the oven temperature to 300°F to slow things down. This is salvageable.
Vegetables are mushy: Add them later. Carrots and potatoes added at the beginning get destroyed. Add them in the last 45 minutes of cooking for better texture.
Complementary Dishes
Chuck roast pairs perfectly with classic sides. Mashed potatoes are the obvious choice—that braising sauce over creamy potatoes is pure comfort. Roasted root vegetables work great too, especially if you add them in the final 45 minutes of cooking.

Looking to branch out? Try serving your chuck roast alongside high fiber dinner recipes for a more balanced meal. Or if you’re planning a Creole-inspired night, check out our authentic jambalaya recipe to round out your menu. For something completely different, explore air fryer vegetable recipes for quick, crispy sides that contrast beautifully with the slow-cooked meat.
Frequently Asked Questions
Can I cook chuck roast at a higher temperature to save time?
Technically yes, but you’ll compromise quality. At 375°F or higher, the outside dries out before the inside becomes tender. Stick with 325°F. The time investment pays dividends in texture and flavor. This is one of those situations where shortcuts actually cost you.
What’s the difference between chuck roast and other beef cuts?
Chuck roast comes from the shoulder of the cow and is loaded with connective tissue and fat. That’s what makes it perfect for braising—all that collagen becomes gelatin when cooked low and slow. Leaner cuts like sirloin would dry out with this cooking method. Chuck roast was literally born for the oven.
Do I need a Dutch oven or can I use a regular pan?
A Dutch oven is ideal because it distributes heat evenly and has a tight-fitting lid that traps moisture. But if you don’t have one, use any heavy oven-safe pot with a lid. Make sure the lid fits snugly to prevent excessive evaporation. Avoid thin pans that can cause uneven cooking or hot spots.
How do I store leftover chuck roast?
Let it cool to room temperature, then transfer to an airtight container. It keeps in the fridge for 3-4 days and actually tastes better the next day as flavors meld. Freeze it for up to 3 months. Reheat gently on the stovetop with a splash of broth to restore moisture.
Can I use a slow cooker instead of the oven?
Absolutely. Use the low setting for 8-10 hours or high for 4-6 hours. Skip the searing step if you’re short on time, but honestly, searing makes a huge difference even with slow cooking. The principle is the same: low heat, long time, and you’ll get that fall-apart texture.
What if my roast is smaller than expected?
Reduce cooking time proportionally. A 2-pound roast needs about 2.5 hours at 325°F. The key is using your meat thermometer, not the clock. Check internal temperature starting at 2 hours and every 15 minutes after that until you hit 190°F.
Should I cover the roast while cooking?
Yes, always. The lid traps steam and moisture, which is essential for braising. Without it, your liquid evaporates too quickly and the top of the roast dries out. Keep that lid on for the entire cooking time, only removing it at the very end if you want to reduce and concentrate the sauce.
Final Thoughts
Mastering chuck roast isn’t complicated—it’s just about respecting the process. Low temperature, adequate time, proper searing, and a reliable thermometer are all you need. The first time you pull a perfectly cooked roast from the oven and watch it shred with just a fork, you’ll understand why this cut has been a kitchen staple for generations.
Start with a 3-4 pound roast at 325°F for 3-4 hours. Check the temperature at the 2.5-hour mark and every 30 minutes after. Aim for 190-205°F internal temperature. Let it rest 15-20 minutes before serving. That’s the formula. Follow it, and you’ll nail it every single time.


