

The real question isn’t just how long to bake chicken tenderloins—it’s how to nail that sweet spot between juicy and cooked through every single time. I’ve been cooking these little strips for years, and I’m going to walk you through exactly what works in my kitchen, because let’s be honest, dry chicken is nobody’s idea of dinner.
Table of Contents
Basic Baking Time & Temperature
Let’s start with the foundation: bake chicken tenderloins at 400°F for 12 to 15 minutes. That’s your baseline. Most tenderloins are naturally thin—about ½ to ¾ inch thick—so they cook faster than breasts. At 400°F, you’re getting that nice exterior without drying out the inside.
I always preheat my oven for at least 10 minutes. A properly heated oven is non-negotiable. If you throw cold tenderloins into a lukewarm oven, you’re basically asking for uneven cooking. The outside will cook slower, the inside might stay soft, and you’ll end up with that rubbery texture nobody wants.
If you prefer a lower, slower approach, 375°F works too—just bump the time to 15-18 minutes. It’s a bit gentler on the chicken, though I find the extra time isn’t worth it unless you’re doing a really large batch and space is tight in your oven.
Prep Work Matters More
Before you even think about the oven, your prep determines everything. Pull your chicken tenderloins from the fridge 15 minutes before cooking. Cold chicken straight from the refrigerator will cook unevenly—the outside will overcook while the inside catches up. Room temperature chicken cooks predictably.
Pat them dry with paper towels. Moisture is the enemy of browning and even cooking. Any excess water on the surface will steam off before the chicken can develop a nice exterior. This step takes 30 seconds and makes a huge difference.
Arrange them on a baking sheet in a single layer, not touching. If they’re crowded together, they’ll steam instead of bake. Use a sheet with sides (rimmed baking sheet) so any drippings stay contained and your oven stays clean.
How Thickness Affects Timing
Not all chicken tenderloins are created equal. Some packages have massive ones, some have thin strips. This matters for your timing. Here’s the breakdown:
Thin tenderloins (½ inch or less): 10-12 minutes at 400°F. These cook fast. Don’t walk away from the kitchen.
Standard tenderloins (½ to ¾ inch): 12-15 minutes at 400°F. This is your sweet spot for most packages.
Thick tenderloins (¾ inch or more): 15-18 minutes at 400°F. If you’ve got really meaty ones, give them the extra time.
If your tenderloins vary wildly in size—which happens—pound the thick ones slightly to even them out. You don’t need to go crazy; just a few gentle whacks with the flat side of a knife gets them closer to uniform thickness so they cook at the same rate.
Breading Techniques for Crunch
Here’s where people get fancy, and honestly, simple works best. If you want breaded chicken tenderloins, use the classic three-step system: flour, egg, breadcrumbs.
Dust lightly with all-purpose flour mixed with salt and pepper. Dip in beaten egg (one egg per 4-5 tenderloins works). Roll in panko breadcrumbs—panko gives you better crunch than regular breadcrumbs. If you want it really crispy, add a tablespoon of melted butter to the panko before rolling.
The baking time stays the same: 12-15 minutes at 400°F. The breading actually insulates the chicken slightly, so it cooks at about the same rate as unbreaded. The difference is you get a golden, crunchy exterior that makes people think you fried them.
Pro tip: Let breaded tenderloins sit in the fridge for 15 minutes after breading. This helps the coating stick better during baking.
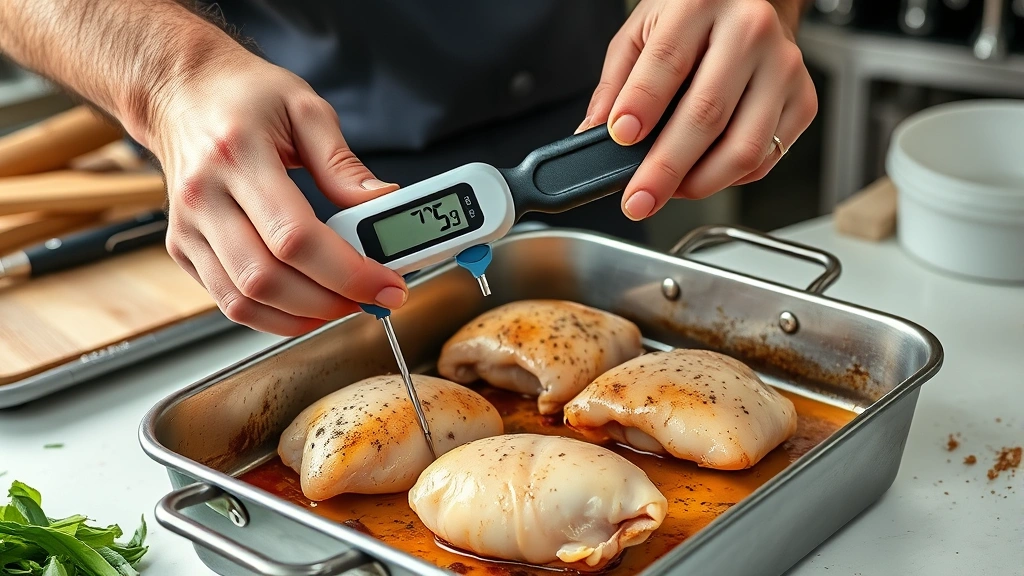
Checking for Doneness Right
The thermometer is your best friend here. Chicken is safely cooked when the internal temperature hits 165°F. Stick a meat thermometer in the thickest part of the tenderloin. If it reads 165°F or higher, you’re done. If it’s at 160°F, give it another 2-3 minutes and check again.
Don’t rely on color alone. Breaded chicken can look golden and done on the outside while still being undercooked inside. The thermometer doesn’t lie.
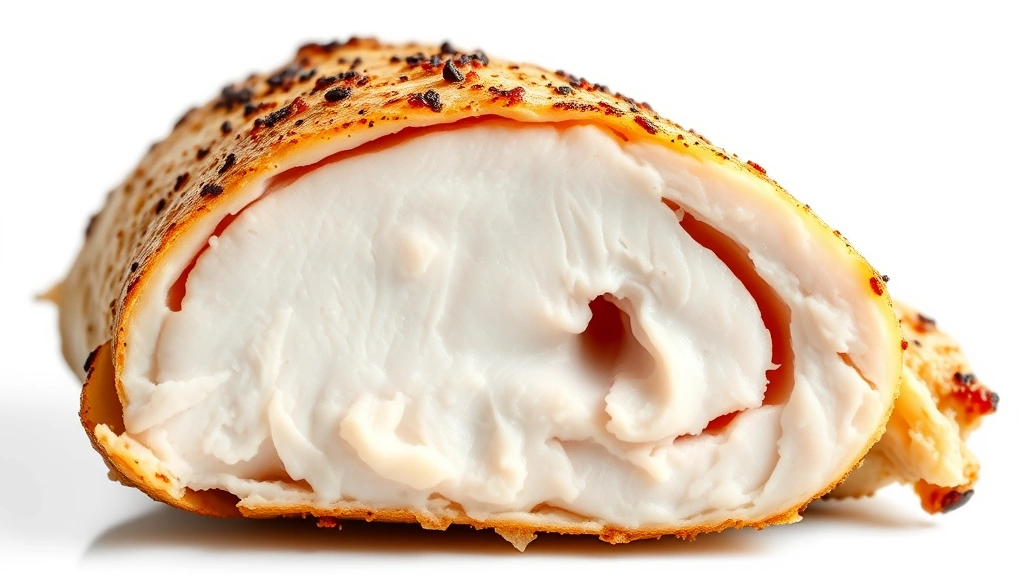
If you don’t have a thermometer—and honestly, get one, they’re cheap—you can cut into the thickest piece. The meat should be white throughout with no pink. The juices should run clear, not pink. It’s not as reliable as a thermometer, but it works in a pinch.
Common Mistakes to Avoid
I see people mess this up constantly, so let me call out the biggest culprits:
Overcrowding the pan: I mentioned this already, but it bears repeating. Crowded tenderloins steam. Space them out.
Using a cold baking sheet: A cold sheet means the bottom cooks slower than the top. Let your sheet preheat with the oven.
Skipping the resting period: More on this below, but pulling them off the heat and letting them sit is crucial.
Opening the oven door constantly: Every time you open that door, heat escapes and cooking time extends. Trust your timer and your thermometer.
Using wet chicken: Moisture = steam = uneven cooking. Pat them dry.
Seasoning Strategies That Work
Salt and pepper are the baseline, but you can do so much more. Season before cooking, not after. The seasoning needs time to penetrate the meat.
My go-to is kosher salt, fresh cracked pepper, garlic powder, and a tiny bit of paprika. Apply it generously on both sides about 5 minutes before the chicken hits the oven. This gives the salt time to start drawing moisture to the surface, which actually helps with browning.
If you’re doing a marinade, keep it simple: olive oil, lemon juice, garlic, and herbs. Marinate for 30 minutes to 2 hours. Longer than that and the acid starts to break down the meat texture. You want tender, not mushy.
Why Resting Matters
This is the step most people skip, and it’s a mistake. When chicken comes out of the oven, the proteins are contracted and the juices are concentrated in the center. If you cut into it immediately, all those juices run out onto the plate, leaving dry chicken behind.
Let your baked tenderloins rest for 5 minutes. Just 5 minutes. The residual heat finishes cooking the very center, and the proteins relax, reabsorbing the juices throughout the meat. You end up with juicier, more tender chicken. It’s science, and it works.
Storage and Reheating Tips
Cooked tenderloins keep in the fridge for 3-4 days in an airtight container. They freeze beautifully for up to 3 months. Cool them completely before storing to avoid condensation.
To reheat, use a 350°F oven for 8-10 minutes. Low and slow keeps them from drying out. Microwave works in a pinch—30-45 seconds for a few pieces—but it’s not ideal. The oven is worth the extra few minutes.
If you’re making a big batch for meal prep, consider pairing them with easy dessert recipes to feed a crowd for dinner parties, or use them as components in fall recipes when you’re cooking for groups.
Frequently Asked Questions
Can I bake frozen chicken tenderloins?
Yes, but add 5-8 minutes to the baking time. Bake at 400°F for 18-23 minutes depending on size. Check with a thermometer to be sure—frozen chicken takes longer to cook through. Thawing them first gives you more control and more consistent results.
What’s the difference between tenderloins and breasts?
Tenderloins are the thin strip of meat that runs along the underside of the breast. They’re naturally more tender and cook faster. Breasts are larger and thicker, so they take longer. If a recipe calls for breasts and you use tenderloins, reduce the cooking time by about 5 minutes.
Why do my tenderloins come out dry?
Usually because they’re overcooked or they were cold when they went in the oven. Use a thermometer and stop cooking at 165°F, not higher. Room temperature chicken before cooking also helps. And don’t skip the resting period—that’s huge for juiciness.
Can I use a convection oven?
Absolutely. Reduce the temperature by 25°F (so 375°F instead of 400°F) and reduce the time by about 10-15%. Convection ovens circulate air, so things cook faster and more evenly. Start checking at 10 minutes instead of 12.
Should I oil the baking sheet?
You can, but it’s not necessary. If you do, use just a light coating. Too much oil and they’ll brown unevenly. Parchment paper is a better option if you want easy cleanup—it prevents sticking without adding extra oil.
What temperature is safe for chicken?
165°F internal temperature is the USDA safe minimum. That’s where all bacteria are killed. You don’t need to go higher. Some people cook to 170°F or 175°F, but that’s overkill and you risk drying them out.
Can I bake and freeze for later?
Yes. Cool them completely, then freeze in a single layer on a baking sheet for 2-3 hours. Once solid, transfer to freezer bags. This prevents them from sticking together. They’ll keep for 3 months. Thaw in the fridge overnight before reheating.
Final Thoughts
Baking chicken tenderloins is genuinely one of the easiest proteins you can cook, and there’s no reason to mess it up. Stick to 400°F for 12-15 minutes, use a thermometer to verify doneness, and let them rest for 5 minutes. That’s it. You’ll have juicy, perfectly cooked chicken every time.
The beauty of tenderloins is their versatility. Serve them plain with roasted vegetables, shred them for tacos or salads, or use them in filet mignon recipes as a lighter protein option. If you’re cooking for larger groups, you might also explore how long it takes to smoke a turkey for holiday meals, or try Dutch oven camping recipes for outdoor cooking. And if you’re making gravy to go with your meal, check out how to make gravy from turkey drippings for a complementary sauce.
Once you nail the basic technique, you’ll be making these on weeknights without thinking twice. That’s the goal—reliable, delicious, hands-off cooking that actually works.


