
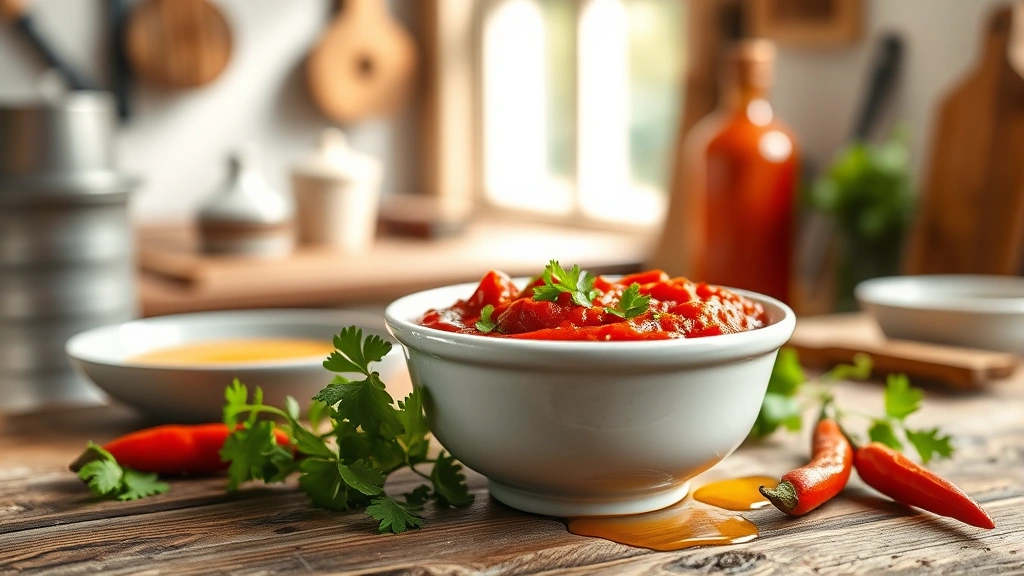
A harissa paste recipe is your ticket to bringing authentic North African heat and complexity into your kitchen. This fiery red condiment—a staple in Tunisian, Moroccan, and Algerian cuisine—transforms simple dishes into something memorable. Whether you’re a spice enthusiast or just looking to expand your flavor arsenal, making harissa from scratch beats any store-bought version by miles. It’s easier than you’d think, and the results are absolutely worth it.
Table of Contents
What Is Harissa Anyway?
Harissa is a North African chili paste that packs serious punch. It’s made primarily from dried red chiles, garlic, spices, and oil. Think of it as the region’s answer to sriracha or gochujang—except it’s got its own distinct personality with warm spice notes from caraway and coriander. The beauty of harissa is its versatility. You can use it as a condiment, a marinade base, a soup thickener, or even a finishing touch on roasted vegetables. The heat level varies depending on which chiles you choose and how much you use.
Ingredients Breakdown
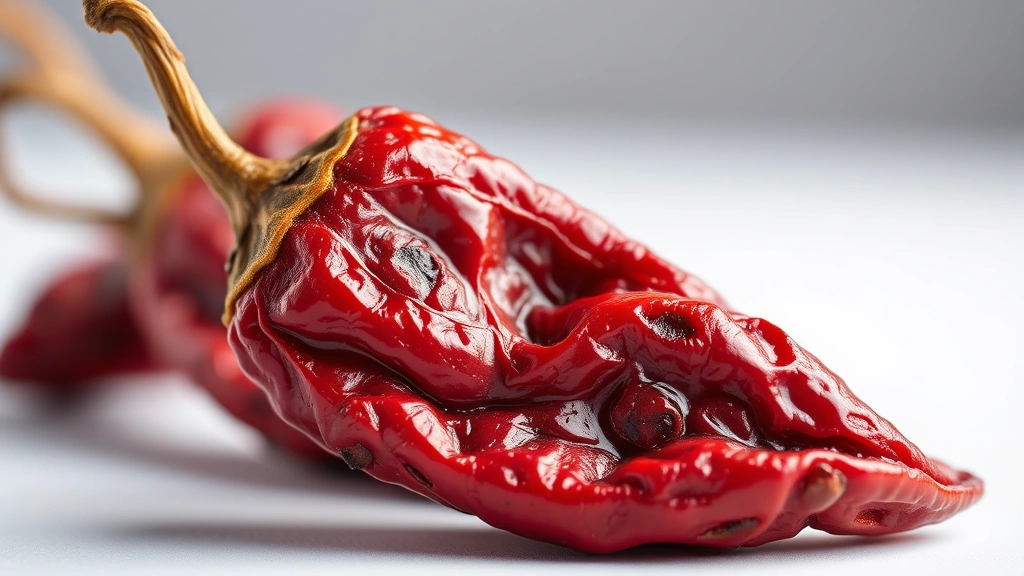
Let’s talk about what actually goes into a solid harissa paste recipe. You’ll need dried red chiles—Kashmiri, Aleppo, or a mix of Thai bird’s eye chiles work beautifully. Garlic is non-negotiable. Then come the spices: caraway seeds, coriander seeds, and cumin. Add some tomato paste for depth, a touch of salt, and quality olive oil to bind everything together. Some recipes include a pinch of smoked paprika for extra dimension. Here’s the thing: ratios matter, but they’re flexible based on your heat tolerance and flavor preferences.
The dried chiles are your foundation. Kashmiri chiles give you color and mild heat. Aleppo chiles bring fruity notes. If you want serious fire, mix in some Thai chiles. Garlic should be fresh—about 4-6 cloves depending on your batch size. For spices, you want them whole and toasted, never pre-ground. That’s where the magic happens. Toasting releases essential oils and deepens flavors in ways pre-ground spices simply can’t match.
Step-by-Step Method
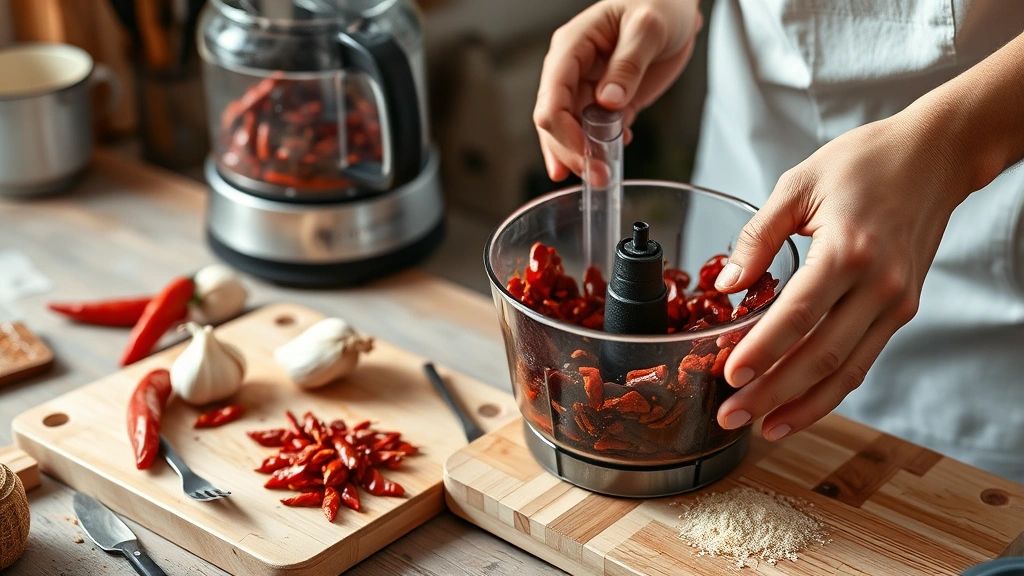
Here’s the straightforward process. First, remove stems and seeds from your dried chiles. Pour boiling water over them and let them soak for 15-20 minutes until they’re soft and pliable. While they’re soaking, toast your caraway seeds, coriander seeds, and cumin in a dry skillet over medium heat for 2-3 minutes until fragrant. Don’t walk away—they burn fast.
Drain your softened chiles, reserving some of the soaking liquid. Combine the chiles, toasted spices, garlic, tomato paste, and salt in a food processor. Pulse it down, then stream in olive oil while blending until you reach your desired consistency. Some people like it smooth and spreadable; others prefer a chunkier texture. Add reserved chile soaking liquid if you need to loosen it up. Taste as you go and adjust seasoning.
Roasting Your Chiles
Here’s a pro move: dry-roast your chiles before soaking them. Heat a skillet over medium-high heat and toast the dried chiles for 30-60 seconds per side. You’re not trying to burn them—just awaken their flavors. This step is optional but absolutely transforms the final product. It adds a subtle smokiness and intensifies the chile character. After roasting, let them cool slightly before removing stems and seeds.
The roasting technique is especially important if you’re using milder chiles like Kashmiri varieties. It compensates for their gentler profile and adds complexity. For hotter chiles, roasting still helps but is less critical. Think of it like the difference between toasting spices versus using them raw—technically you’ll get harissa either way, but roasted is superior.
Blending Techniques Matter
Your choice of blending equipment affects the final texture. A food processor gives you control and produces a slightly coarser paste with more texture. A high-powered blender like a Vitamix creates something smoother and more uniform. A mortar and pestle is the traditional method and produces excellent results, though it requires elbow grease. For a harissa paste recipe, I recommend a food processor—it’s the sweet spot between effort and results.
When blending, pulse rather than continuous blend. This prevents overheating and gives you better texture control. Add oil gradually while pulsing. Watch the consistency develop. If it’s too thick, add a splash of reserved chile water or a bit more olive oil. If it’s too loose, add more tomato paste or let it sit—sometimes the paste firms up as it rests.
Storage & Shelf Life
Harissa keeps beautifully in the refrigerator for up to two weeks in an airtight container. For longer storage, freeze it in ice cube trays, then pop the cubes into freezer bags. Each cube is roughly a tablespoon—perfect for portioning. Frozen harissa lasts 3-4 months. You can also preserve it in oil by transferring it to a jar and covering the surface with olive oil, which creates a protective seal and extends fridge life to three weeks.
For shelf-stable storage, you can make a thicker, more concentrated version without as much oil and preserve it in sterilized jars using a water bath canning method, though this requires proper food safety knowledge. The simplest approach is freezing—no special equipment needed, and you always have it on hand.
Flavor Variations to Try
The base harissa paste recipe is your canvas. Want smokiness? Add smoked paprika or roasted the chiles longer. Prefer brightness? Squeeze in fresh lemon juice or add a pinch of sumac. Craving depth? Toast your spices longer or add a tablespoon of pomegranate molasses. Some cooks add a touch of honey for sweetness that balances heat. Others incorporate preserved lemon for authentic Moroccan vibes.
You can also experiment with different chile combinations. Mix Aleppo with Thai chiles for heat plus fruity notes. Use all Kashmiri for a milder, more colorful version. Add a dried guajillo or two for earthiness. The spice ratios are flexible too—if you love caraway, use more. Prefer coriander? Dial back the cumin. This is where personal preference takes over.
Serving Ideas & Uses
Harissa is ridiculously versatile. Swirl it into yogurt for a dip. Mix it with mayo for a spicy sandwich spread. Stir it into soups, stews, or greens and beans recipes for instant depth. Use it as a marinade base for grilled meats or vegetables. Dollop it on eggs, rice bowls, or roasted cauliflower. It pairs beautifully with hummus, works as a condiment for grilled fish, and elevates simple couscous.
For a quick chiles en nogada recipe variation or spicy sauce, thin harissa with olive oil and lemon juice. Use it as a finishing touch on soups—a tiny spoonful on top adds visual appeal and flavor punch. Mix it into chipotle aioli recipe bases for a North African twist. The applications are endless once you have a batch ready.
Troubleshooting Common Issues
Too thick? Add more olive oil or reserved chile soaking liquid, a tablespoon at a time. Too thin? Mix in more tomato paste or let it rest—it thickens as it sits. Not spicy enough? You either didn’t use enough chiles or used very mild varieties. Next time, increase the chile quantity or add hotter varieties like Thai chiles. Too spicy? Blend in more tomato paste or a touch of honey to balance the heat.
Bitter taste? You likely burned the chiles or spices during roasting. Go lighter next time—just 30 seconds per side for chiles, 2-3 minutes for spices. Gritty texture? Your spices weren’t toasted long enough or your blender isn’t powerful enough. Toast longer and blend more thoroughly. The paste should be smooth or slightly chunky, never grainy.
Frequently Asked Questions
Can I make harissa without a food processor?
Absolutely. Use a mortar and pestle—it’s the traditional method and produces excellent results. You’ll need patience and arm strength, but the paste develops beautiful texture. A blender works too, though you’ll need to work in batches and may need to add more liquid.
What’s the difference between harissa and sriracha?
Harissa is a North African chile paste with warm spices like caraway and coriander. Sriracha is a Southeast Asian sauce that’s usually thinner, sweeter, and made with fresh chiles. They’re different products for different purposes, though both add heat and flavor.
Can I use fresh chiles instead of dried?
You can, but the flavor profile changes significantly. Fresh chiles give you brighter, grassier notes rather than the deep, concentrated flavors of dried chiles. If using fresh, reduce the quantity—they’re much wetter and less concentrated. You’ll need to adjust the oil ratio too.
How much harissa should I use?
Start small—a teaspoon or less if you’re unfamiliar with it. Harissa is potent. You can always add more, but you can’t remove it. In soups or stews, a tablespoon per serving is typical. As a condiment, use a teaspoon or two.
Is harissa gluten-free?
Yes, traditional harissa paste recipe ingredients are naturally gluten-free. Just verify your tomato paste and any other ingredients don’t have additives. Most are fine, but always check labels.
Can I use harissa in a classic Bolognese?
Definitely. A spoonful of harissa in your classic Bolognese recipe Italian version adds North African flair and complexity. Start with a teaspoon and adjust to taste—you want it to enhance, not overpower, the traditional flavors.
Conclusion: Making your own harissa paste recipe is genuinely simple and pays dividends in flavor. You’ll have a vibrant, complex condiment that elevates everything it touches. The investment is minimal—just dried chiles, basic spices, and a food processor. Once you taste homemade harissa, you’ll understand why it’s been a kitchen staple across North Africa for generations. Start with the base recipe, taste as you go, and customize to your preferences. Before long, you’ll be adding it to dishes you never imagined, discovering new favorites along the way. Keep a batch in the freezer and you’re always ready for flavor.


