
A frying saucer recipe isn’t your typical kitchen creation—it’s a delicious, crispy appetizer that’ll have your guests asking for seconds. Think of it as a savory pastry pocket filled with seasoned ingredients, fried until golden and served with a dipping sauce that ties everything together. Whether you’re prepping for a party or just craving something crunchy, this guide walks you through everything you need to nail it.
Table of Contents
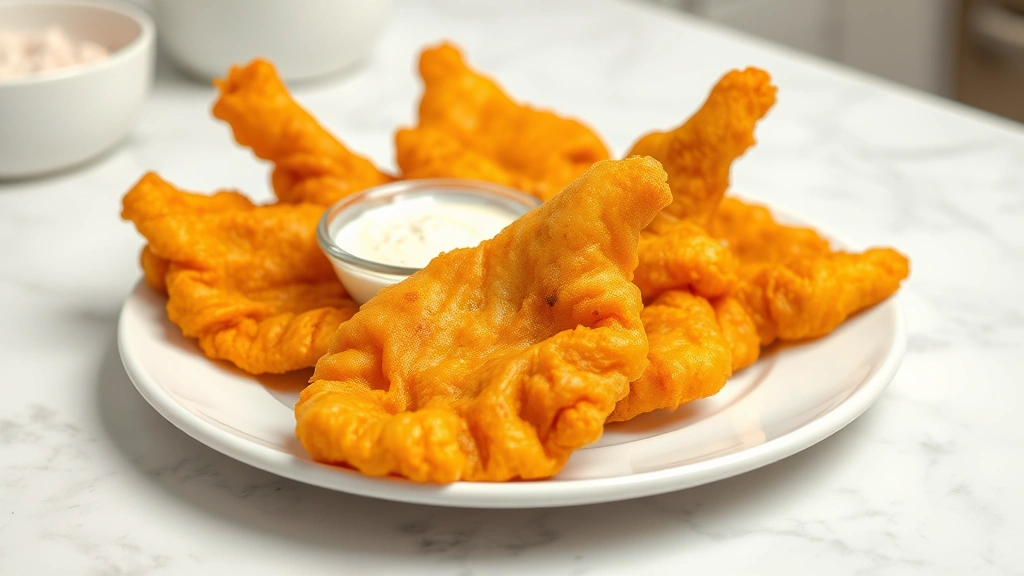
What Is a Flying Saucer?
A flying saucer is a deep-fried pastry appetizer that resembles its namesake—two thin, crispy discs sealed around the edges with a savory filling sandwiched between them. The magic happens when you fry it: the dough puffs up, becomes impossibly light and crispy, and the filling stays hot and flavorful inside. It’s the kind of dish that looks fancy but tastes like pure comfort food. You’ll find variations across different cuisines, but the core concept remains the same: crispy exterior, delicious interior, maximum satisfaction.
Ingredients You Need
Let’s break down what goes into making a solid frying saucer recipe. You’ll need basic pantry staples, nothing exotic. For the dough: all-purpose flour (about 2 cups), water, salt, and a touch of oil. The filling depends on your preference—ground meat, vegetables, cheese, or a combination work beautifully. For frying, you’ll need vegetable oil or peanut oil (aim for a neutral flavor). Finally, don’t skip the dipping sauce; this is where you’ll use that dill sauce recipe or create your own signature blend. Having everything prepped before you start makes the whole process smoother.
Dough Prep Work
The dough is your foundation, so get this right. Mix flour and salt in a bowl, then slowly add water while stirring until you’ve got a shaggy mass. Knead it for about 5-7 minutes until it’s smooth and slightly elastic—you want it softer than bread dough but not sticky. Let it rest for 30 minutes covered with a damp cloth; this relaxes the gluten and makes rolling easier. When you’re ready, divide it into golf ball-sized portions and roll each one thin, about 1/8-inch thick. The thinner you go, the crispier your final product. If your dough keeps shrinking back, let it rest another 5 minutes before rolling again.
Filling Options & Variations
This is where creativity shines. A classic filling combines seasoned ground beef or chicken with finely diced onions, garlic, and spices. Brown your meat first, add minced aromatics, and season aggressively—you want bold flavors. Some cooks swear by adding finely chopped vegetables like bell peppers or mushrooms for texture. If you’re going vegetarian, sautéed mushrooms with cheese work wonderfully. For something different, try a cajun alfredo sauce recipe mixed with shrimp as your filling base. Keep the filling relatively dry; too much moisture will make your saucer soggy. Let it cool completely before assembling—warm filling will make the dough tear and steam escape during frying.
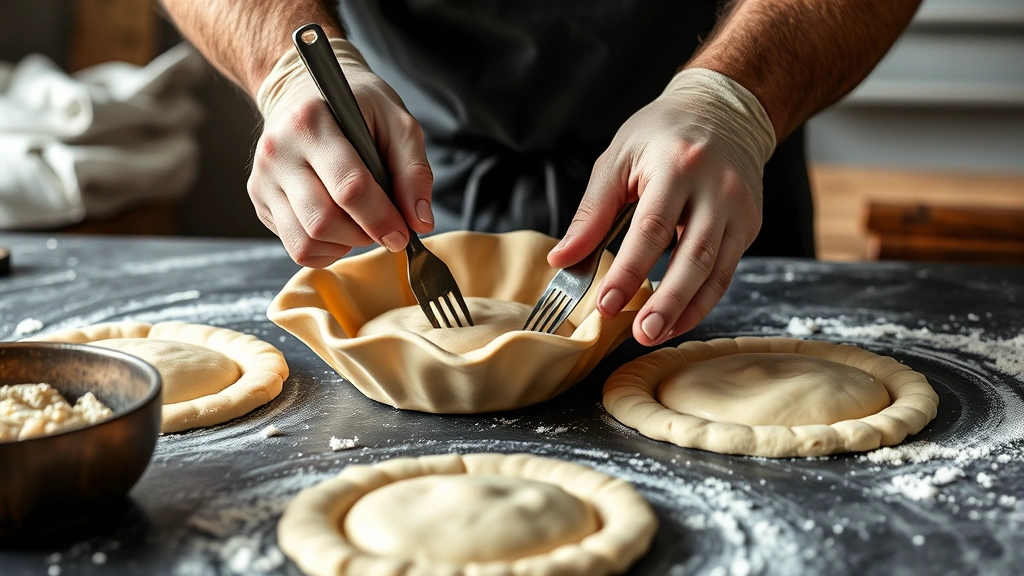
Frying Technique Master
Here’s where precision matters. Heat your oil to 350°F (175°C)—use a thermometer, don’t guess. Place a spoonful of filling on one dough circle, leaving a half-inch border. Wet that border with water, then press the second dough circle on top, sealing the edges firmly by pressing with a fork. This seal is critical; any gaps let oil seep in and filling leak out. Gently slide your saucer into the hot oil. It’ll sink, then float back up as it cooks. Fry for 2-3 minutes per side until golden brown—don’t crowd the pan, work in batches. When it’s done, it should sound crispy when you tap it. Remove with a slotted spoon and drain on paper towels. The whole frying process is quick; stay focused.
Sauce Pairings Guide
Your dipping sauce makes or breaks the experience. A simple mix of mayo, garlic, and lemon juice works beautifully. For something spicier, blend sriracha into sour cream. If you want to go traditional, make a fajita marinade recipe reduced into a glaze—the spices complement fried pastry perfectly. You could also try a deep fried mushrooms recipe sauce approach with a creamy mushroom reduction. Sweet and spicy works too: mix honey with hot sauce. The key is balancing richness; since the saucer itself is fried, you want a sauce with acidity or brightness to cut through that richness. Serve sauce in a small bowl for dunking, not drizzling—presentation matters.
Troubleshooting Common Issues
Dough tearing during sealing? Your filling’s too wet or your dough’s too dry. Add water dropwise to dough, or cook your filling longer to evaporate excess moisture. Oil spattering everywhere? Lower your heat slightly and make sure your saucer is completely dry before frying. Filling leaking into oil? Your seal wasn’t tight enough. Press harder with that fork and make sure the dough edge is completely sealed. Saucer stays pale instead of browning? Oil’s not hot enough—bring it up to 350°F minimum. Saucer’s crispy outside but doughy inside? You’re frying too fast or your oil’s too hot. Aim for a gentle, steady bubble around the saucer as it cooks. These issues are fixable; they’re just feedback telling you to adjust.
Storage and Reheating
Freshly fried saucer is best eaten immediately, but life happens. Store cooled saucer in an airtight container in the fridge for up to 3 days. To reheat, pop it in a 350°F oven for 5-7 minutes until it’s warm and crispy again—skip the microwave unless you enjoy rubber texture. You can also freeze uncooked, sealed saucer on a tray, then fry directly from frozen, adding maybe a minute to cooking time. This is perfect for meal prep. If you’re making these for a party, fry them 30 minutes ahead and keep them warm in a low oven (200°F) on a wire rack so air circulates and they stay crispy.
Frequently Asked Questions
Can I bake flying saucer instead of frying?
You can try, but you’ll lose the signature crispy texture. Baking produces a drier, less satisfying result. Deep frying is really the way to go for this dish.
What oil is best for frying?
Vegetable oil, canola oil, or peanut oil all work well. Avoid olive oil—it has a low smoke point and will burn. Stick with neutral, high-heat oils.

How do I know when my oil is ready?
Use a thermometer. 350°F is your target. If you don’t have one, drop a small piece of dough in—if it sizzles immediately and floats, you’re good.
Can I make the dough ahead?
Yes. Prepare dough up to 4 hours ahead, wrap it tightly, and refrigerate. Bring it to room temperature before rolling and filling.
Why is my filling coming out when I fry?
Your seal isn’t tight enough, or your filling is too wet. Make sure the dough border is completely sealed by pressing firmly with a fork all the way around.
Can I double the recipe?
Absolutely. The ratios stay the same. Just multiply ingredients and fry in batches—don’t overcrowd your pan.
Final Thoughts
Mastering a frying saucer recipe takes practice, but it’s worth every attempt. You’re learning a fundamental cooking skill—dough work, filling preparation, and deep frying—all wrapped into one delicious package. Start with a simple meat filling, nail your sealing technique, and get your oil temperature right. Once you’ve got the basics down, experiment with different fillings and sauces. Try pairing it with a crab fried rice recipe for an interesting meal combination, or serve it as an appetizer before a Christmas cocktail recipes gathering. The beauty of flying saucer is its versatility—it’s elegant enough for entertaining but casual enough for weeknight snacking. Get in there, trust the process, and enjoy the results.


