
A fried oysters recipe is your ticket to restaurant-quality seafood in your own kitchen, and honestly, it’s way easier than most folks think. I’ve been making these for years, and the secret isn’t some fancy technique—it’s understanding a few core principles about breading, oil temperature, and timing. In just 15 minutes from prep to plate, you’ll have golden, crispy oysters with a tender, briny center that’ll make you wonder why you ever paid restaurant prices.
Table of Contents
Selecting Fresh Oysters
The foundation of any great fried oysters recipe starts at the seafood counter. You want oysters that are fresh, firm, and smell like the ocean—not fishy or ammonia-like. I always ask the fishmonger when they arrived; same-day or next-day stock is your sweet spot. You’ll need about 24 oysters (roughly 1.5 pounds) to serve 4 people as an appetizer, or 36 for a main course.
Shucking oysters yourself saves money, but if you’re short on time, ask your fishmonger to shuck them for you. Just make sure they drain the liquor (the liquid inside) into a container so you can use it later if needed. Fresh oyster liquor adds incredible flavor to dipping sauces.
Prep Work Matters
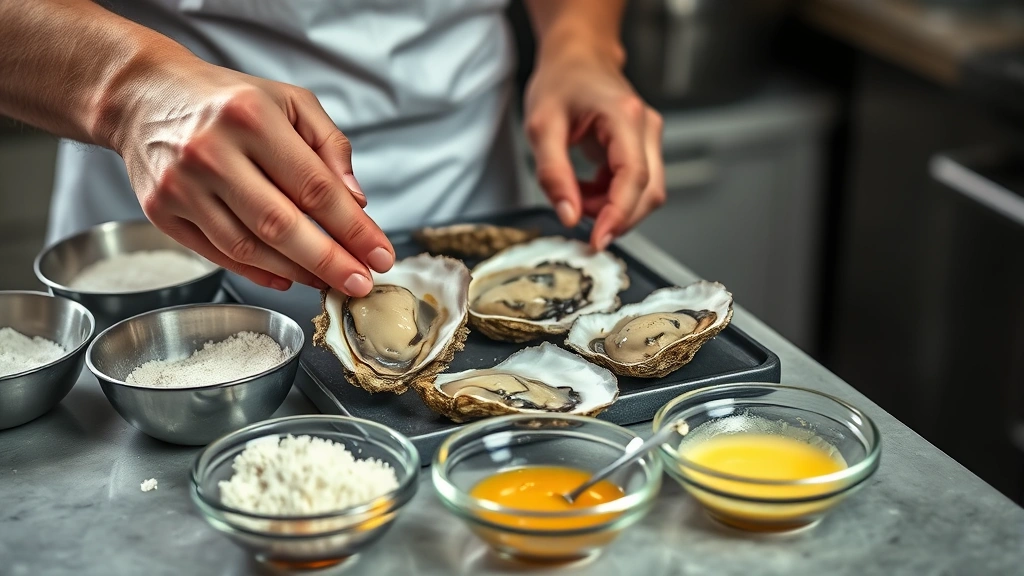
Once your oysters are shucked, pat them completely dry with paper towels. This is non-negotiable—moisture is the enemy of crispiness. Any water clinging to the oyster will create steam during frying, which leads to soggy breading instead of that satisfying crunch. Spread them on a plate lined with paper towels and let them sit for a few minutes while you set up your breading station.
Set up three shallow bowls in a row: one with all-purpose flour mixed with 1 teaspoon of salt and ½ teaspoon of black pepper, one with beaten eggs (about 2-3 eggs), and one with panko breadcrumbs mixed with 1 teaspoon of Old Bay seasoning and ½ teaspoon of cayenne pepper (optional, but it’s worth it). This assembly line approach keeps things clean and efficient.
The Breading Technique
Here’s where most home cooks mess up their fried oysters recipe: they rush the breading. Each oyster needs to be coated in flour first, which creates a base layer that helps everything stick. Dredge each oyster in the flour mixture, tapping off excess, then dip it into the egg wash. Make sure it’s fully coated—this acts as the glue. Finally, press it into the panko breadcrumbs, making sure the coating adheres evenly on all sides.
The key is using your hands strategically: use one hand (your “wet” hand) for the egg dipping and one hand (your “dry” hand) for the flour and breadcrumb stations. This prevents your hands from becoming a gloppy mess. As you bread each oyster, place it on a clean plate. If you’re making these ahead, you can refrigerate breaded oysters for up to 4 hours before frying.
Getting Oil Temperature Right
Oil temperature is everything. Too cool, and you’ll get greasy, soggy oysters. Too hot, and the outside burns before the inside cooks through. You want 350°F exactly. I use a deep-fry thermometer—they’re cheap, reliable, and take the guesswork out of the equation. Fill a heavy-bottomed pot or Dutch oven with 3-4 inches of neutral oil (vegetable, canola, or peanut oil work great).
Heat the oil slowly over medium-high heat. This takes about 10-15 minutes, so don’t rush it. Once you hit 350°F, maintain that temperature throughout frying. If you don’t have a thermometer, the bread cube test works: drop a 1-inch cube of bread into the oil. If it turns golden brown in about 60 seconds, you’re at the right temperature.
The Frying Process
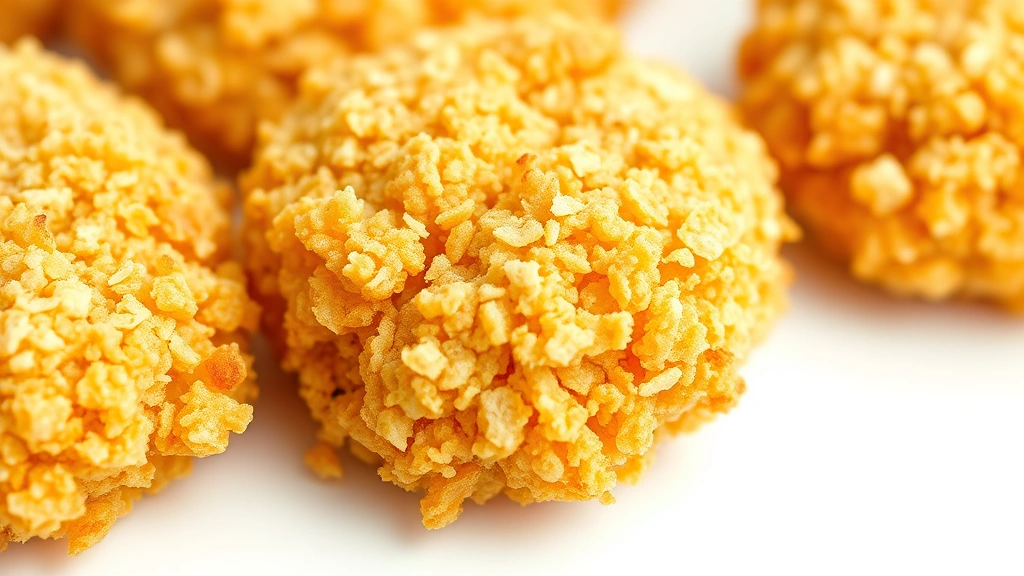
Working in batches, carefully lower breaded oysters into the hot oil using tongs or a slotted spoon. Don’t overcrowd the pan—you want about 6-8 oysters per batch. Overcrowding drops the oil temperature and causes uneven cooking. Fry for 1.5 to 2 minutes per side until the coating is golden brown. The oyster itself is already cooked (it’s raw when shucked, but the heat from the breading and oil cooks it), so you’re really just cooking the breading.
Once they’re golden, transfer them to a paper towel-lined plate to drain excess oil. Keep finished batches warm in a 200°F oven while you fry the remaining oysters. This keeps everything hot and ready to serve at the same time.
Seasoning & Finishing Touches
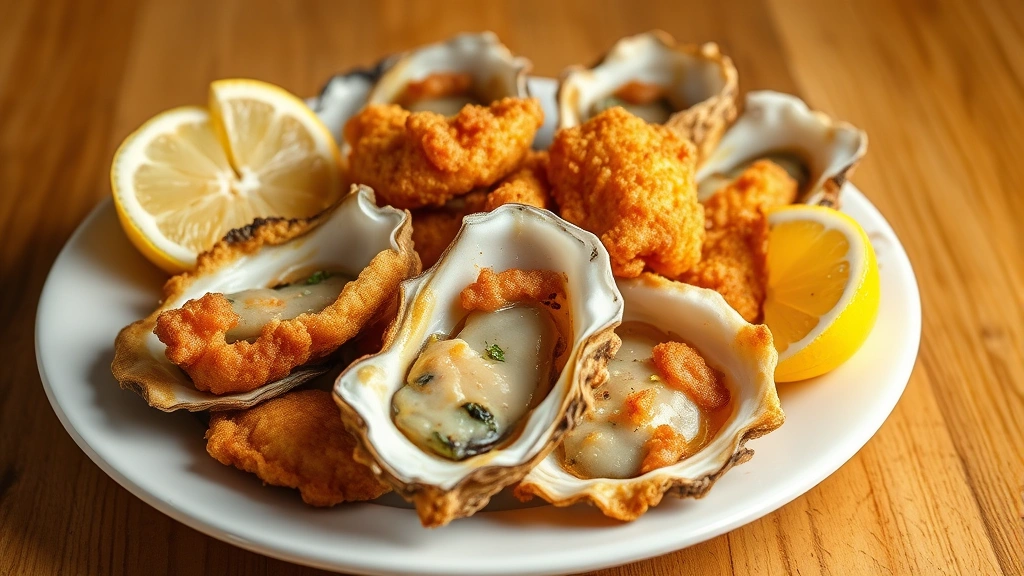
Season your fried oysters immediately after they come out of the oil—the heat opens up the seasoning and helps it stick. A light dusting of fleur de sel or fine sea salt is traditional, but you can also add a pinch more Old Bay or even a tiny sprinkle of smoked paprika. Some folks like fresh lemon juice squeezed over the top, which adds brightness and cuts through the richness.
If you’re serving these as part of a larger spread, consider pairing them with chipotle queso recipe for dipping, or make a quick remoulade with mayo, lemon juice, hot sauce, and minced pickles. You could also try electric skillet recipes for sides like crispy potatoes or fried vegetables.
Serving Ideas & Pairings
Fried oysters are incredibly versatile. Serve them as an appetizer with cocktail sauce, mignonette, or tartar sauce. Make them into po’boys by stuffing them into crusty bread with lettuce, tomato, and remoulade. Toss them into a salad for a protein boost, or serve them alongside seafood dishes like canned crab meat recipes for a full shellfish feast.
For beverages, crispy fried oysters pair beautifully with cold beer, dry white wine, or even a crisp gin and tonic. If you’re looking for non-alcoholic options, sparkling water with lemon works wonderfully, or you could even make a caramel macchiato for dessert afterward.
Storage & Make-Ahead Tips
Cooked fried oysters are best eaten immediately, but you can store leftovers in an airtight container in the refrigerator for up to 2 days. To reheat without losing crispiness, place them on a baking sheet and warm in a 350°F oven for about 5-7 minutes. Skip the microwave—it’ll turn them soggy.
Breaded oysters can be frozen for up to 1 month before frying. Don’t thaw them; just add 30 seconds to the frying time. This is a game-changer for meal prep. You could also prep sides like how to steam broccoli in microwave to round out your meal.
Common Mistakes to Avoid
The biggest mistake I see is wet oysters going into the fryer. Moisture and hot oil don’t mix well—you’ll get splattering and soggy results. Always pat them dry. Second mistake: not maintaining oil temperature. Use a thermometer, period. Third: overcrowding the pan. I know it’s tempting to fry everything at once, but patience pays off with evenly cooked, crispy results.
Another common issue is over-breading. A thin, even coat is better than a thick one. Too much breading and you’ll end up with a crunchy shell that doesn’t have much oyster inside. Finally, don’t skip the salt immediately after frying—it makes a huge difference in flavor and seasoning distribution.
Frequently Asked Questions
Can I use frozen oysters for a fried oysters recipe?
Technically yes, but fresh is always better. If you use frozen oysters, thaw them completely and pat them extra dry before breading. Frozen oysters tend to release more liquid during cooking, which can affect texture.
What’s the difference between panko and regular breadcrumbs?
Panko is made from a different type of bread and creates larger, airier crumbs that fry up crispier and stay crunchier longer. Regular breadcrumbs are finer and create a denser coating. For fried oysters, panko is the clear winner.
How do I know when oysters are fully cooked?
The oyster meat itself doesn’t change much visually, but the breading will be golden brown. The heat from the oil cooks the oyster through—you’re really just cooking the breading. If the breading is golden, the oyster inside is done.
Can I bake fried oysters instead of frying them?
You can bake breaded oysters at 400°F for about 12-15 minutes, but they won’t have the same crispy texture. They’ll be more like baked breaded oysters than truly fried. If you want that authentic crunch, pan-frying in a shallow amount of oil is a decent compromise if you don’t want to deep-fry.
What oil should I use for frying?
Use a neutral oil with a high smoke point: vegetable, canola, or peanut oil. Avoid olive oil, which has a low smoke point and will break down at frying temperatures. Peanut oil is my favorite because it adds subtle flavor without overpowering the oysters.
How far ahead can I bread the oysters?
You can bread oysters up to 4 hours ahead and refrigerate them. For longer storage (up to 1 month), freeze them on a baking sheet, then transfer to a freezer bag. Fry from frozen, adding about 30 seconds to the cooking time.
Wrapping It Up
Making a fried oysters recipe at home is genuinely one of the easiest ways to impress people. You’re not doing anything complicated—you’re just respecting the ingredient and following a few simple rules: dry oysters, proper breading, correct oil temperature, and good seasoning. That’s it. Start with fresh oysters, invest in a thermometer, and you’ll be making restaurant-quality fried oysters in your own kitchen every time. The 15-minute timeline is real, and once you nail this technique, you’ll find yourself making these regularly for weeknight dinners, entertaining, or just because you’re craving something crispy and briny.


