
Making an easy focaccia bread recipe at home is honestly one of the most rewarding kitchen projects you can tackle, and I’m not exaggerating. This Italian flatbread is forgiving, flexible, and delivers restaurant-quality results without requiring any fancy equipment or advanced baking skills. Whether you’re a complete beginner or someone who’s intimidated by yeast, this guide walks you through everything you need to know to pull a golden, dimpled focaccia straight from your oven.
Table of Contents
What Is Focaccia Bread
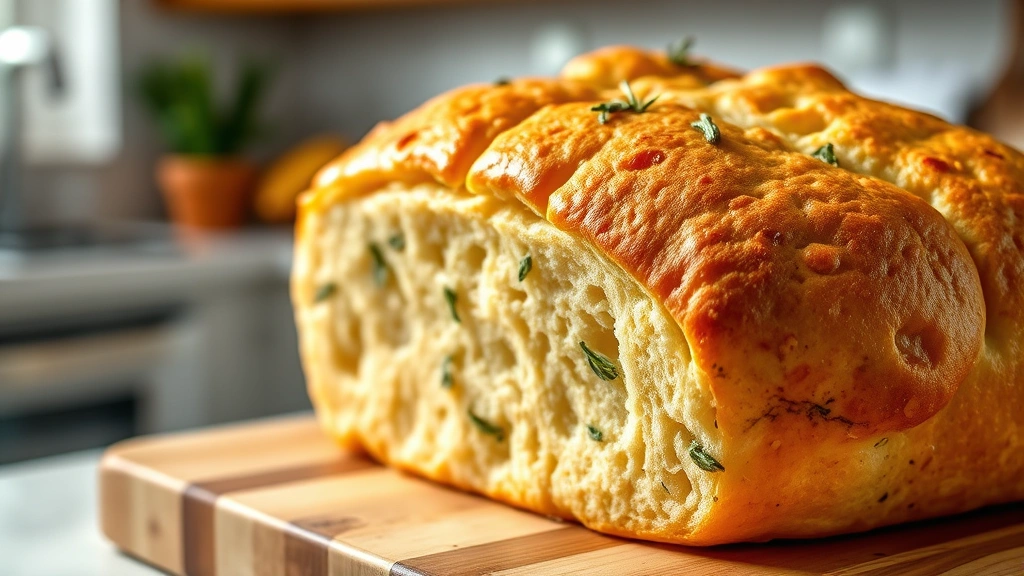
Focaccia is a flat, airy Italian bread that sits somewhere between pizza dough and a dinner roll in texture. It’s traditionally topped with olive oil, coarse salt, and rosemary, though modern variations get creative with everything from caramelized onions to sun-dried tomatoes. The beauty of focaccia is that it’s incredibly forgiving—the dough is wetter than standard bread dough, which means it’s actually harder to mess up because the extra moisture keeps it from drying out.
What makes focaccia special is those characteristic dimples across the surface. Those aren’t just decorative; they’re functional. They create pockets that trap oil and toppings, giving you those incredible flavor bursts in every bite. The crumb structure is open and airy, with a crispy exterior and soft, pillowy interior that makes it perfect for dipping in soups, serving alongside dinner, or eating straight from the pan.
Ingredients You Need
Here’s what you’ll need for a basic batch that feeds 4-6 people:
- 3 cups all-purpose flour (or bread flour for extra structure)
- 1½ teaspoons instant yeast (one packet)
- 1½ teaspoons salt
- 1 cup warm water (around 110°F)
- ¼ cup olive oil (plus extra for topping)
- Coarse sea salt for finishing
- Fresh rosemary (optional but recommended)
That’s it. No fancy ingredients, nothing you can’t find at any grocery store. The quality of your olive oil matters more than anything else here—use something you actually enjoy eating, not the cheapest bottle on the shelf.
Step-by-Step Process
The entire process from start to finish takes about 3-4 hours, but most of that is hands-off rising time. Your actual active work time is maybe 20 minutes spread across the afternoon. Here’s the breakdown of our five simple steps: mixing, kneading, first rise, shaping, second rise, topping, and baking. Each step builds on the last, and there’s real flexibility built in if your schedule doesn’t cooperate.
Mixing and Kneading Dough
Start by combining your warm water, yeast, and a pinch of sugar in a bowl. Let it sit for about 5 minutes until it’s foamy on top—this is your proof that the yeast is alive and ready to work. If it doesn’t foam, your yeast is dead and you need to start over with fresh yeast.
In a large mixing bowl (or the bowl of a stand mixer), combine your flour and salt. Pour the yeast mixture and olive oil into the dry ingredients. Mix everything together until you have a shaggy, wet dough. This dough will look wetter and messier than regular bread dough, and that’s exactly right.
Knead for about 8-10 minutes by hand (or 5-6 minutes with a stand mixer) until the dough becomes smooth and elastic. You’re not looking for a stiff dough here—it should still feel slightly tacky and soft. If it’s sticking excessively to your hands, dust with a tiny bit of flour, but resist the urge to add too much flour. That wet dough is your secret weapon for achieving that open, airy crumb structure.
First Rise and Shaping
Oil a large bowl and transfer your dough into it, turning it to coat all sides with oil. Cover with a damp cloth or plastic wrap and let it rise at room temperature for about 1-1.5 hours until it’s roughly doubled in size. You’re looking for visible bubbles and a puffy, pillowy mass.
While your dough rises, prepare a 9×13 inch baking pan by coating it generously with olive oil. When the dough has risen, gently transfer it to your oiled pan. Don’t punch it down aggressively—you want to preserve those air bubbles you’ve worked hard to develop. Gently stretch and press the dough to fit the pan, working from the center outward. If it springs back, let it rest for 5 minutes and try again.
Second Rise Techniques
Cover your shaped dough and let it rise for another 45 minutes to 1 hour. During this time, preheat your oven to 425°F. The dough should puff up noticeably and feel airy when you gently poke it. If you’re short on time, you can do the second rise in a slightly warm oven (turned off) or even in a proofing box if you have one.
Here’s a pro tip: if you’re doing this on a cooler day or your kitchen runs cold, place the covered pan in a slightly warm spot—like on top of your refrigerator or near (not on) a heating vent. Yeast works faster when it’s warmer, but not so warm that it kills the yeast. Around 75-80°F is ideal.
Toppings and Baking
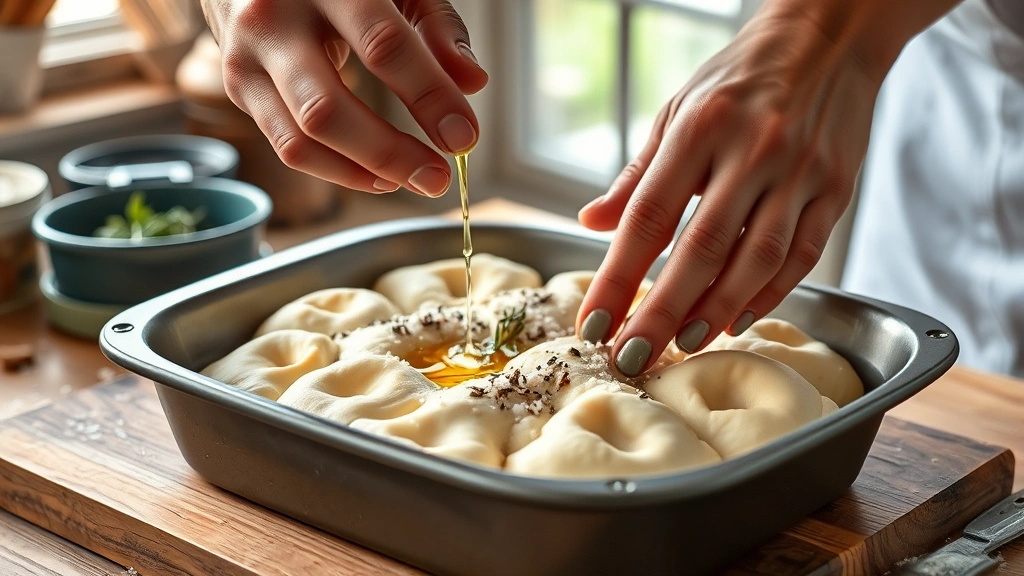
Once your dough has finished its second rise, this is where the magic happens. Using your fingertips (or the handle of a wooden spoon), press dimples all over the surface of the dough, creating those characteristic focaccia indentations. Don’t be shy—press firmly enough to create visible dimples, but not so hard that you deflate everything.
Drizzle generously with olive oil (this is not the time to be stingy), then sprinkle with coarse sea salt and fresh rosemary if you’re using it. Some people like to add thin slices of garlic, caramelized onions, or even olives at this stage. Let your creativity run wild, but remember that less is often more with focaccia.
Bake for 20-25 minutes until the top is golden brown and the edges are crispy. You should see the focaccia puff up in the oven and develop a beautiful golden crust. When it’s done, it should sound hollow if you tap the bottom, and the internal temperature should reach about 205°F if you’re using a thermometer.
Remove from the oven and let it cool in the pan for about 5 minutes, then transfer to a wire rack. Resist the urge to eat it immediately (I know, it’s hard)—letting it cool slightly allows the crumb structure to set properly.
Troubleshooting Common Issues
If your focaccia comes out dense and heavy, you likely didn’t let it rise long enough or your kitchen was too cold. Yeast needs time and warmth to do its job. Next time, extend the rising times or find a warmer spot for proofing.
If it’s too oily or greasy, you’ve either used too much oil in the dough or too much on top. Start with the amount specified and adjust based on your preference. Some people love a more oil-forward focaccia, while others prefer less.
If the crust is too thick or hard, your oven temperature might be too high or you baked it too long. Try lowering the temperature to 400°F and checking it a few minutes earlier. Every oven is different, so you might need to adjust based on your specific equipment.
If the dough won’t hold its shape, it’s likely too warm or you’re being too gentle with it. Make sure your water is around 110°F, not hotter. And don’t be afraid to really press it into the pan—it can handle it.

Storage and Serving Ideas
Fresh focaccia is best eaten the day you make it, but it stores well for 2-3 days in an airtight container at room temperature. You can also freeze it for up to a month—just wrap it tightly in plastic wrap and foil before freezing. Reheat in a 350°F oven for about 10 minutes to restore crispness.
Serve focaccia warm alongside soups (it’s fantastic with tomato soup or minestrone), use it as a sandwich base, or simply tear off chunks to enjoy with good olive oil and balsamic vinegar for dipping. Some people even use it as a base for bruschetta toppings or slice it horizontally to make focaccia sandwiches.
If you want to get fancy, you can make flavored versions by adding different toppings. Try caramelized onions and thyme, sun-dried tomatoes and basil, or even a simple garlic and herb combination. The basic dough recipe stays the same—you’re just changing what goes on top.
Frequently Asked Questions
Can I use instant yeast instead of active dry yeast?
Yes, absolutely. Instant yeast and active dry yeast are nearly interchangeable in most recipes. Instant yeast particles are slightly smaller, so some people use about 25% less, but honestly, using the same amount works fine. Just make sure whatever yeast you use is fresh and hasn’t expired.
What if I don’t have a stand mixer?
Hand kneading works perfectly fine. It’ll take a bit longer (8-10 minutes instead of 5-6), but you’ll get the same results. Some people actually prefer hand kneading because you can feel exactly when the dough reaches the right consistency. Plus, it’s a good workout.
Can I make focaccia dough ahead of time?
Definitely. You can prepare the dough, let it rise once, then refrigerate it for up to 24 hours. When you’re ready to bake, let it come to room temperature and do the second rise at room temperature. Cold fermentation actually develops more flavor, so this method is worth trying.
Why is my focaccia dough so sticky?
That’s the nature of focaccia dough—it’s supposed to be wetter than regular bread dough. If it’s so sticky you can’t work with it at all, you might have added too much water or your flour is particularly absorbent. Try using bread flour instead of all-purpose, or reduce the water by a tablespoon or two next time.
Can I use whole wheat flour?
You can substitute up to 25-30% whole wheat flour for the all-purpose flour. Whole wheat absorbs more water, so you might need to add a bit more water to get the right consistency. The bread will be slightly denser and nuttier, which some people really enjoy.
How do I know when the dough has risen enough?
The poke test is your friend. Gently poke the dough with your finger. If the indent springs back slowly and leaves a slight mark, it’s perfect. If it springs back immediately, it needs more time. If it doesn’t spring back at all, you’ve overproofed it (though focaccia is pretty forgiving about this).


