
A solid cranberry beans recipe is your ticket to restaurant-quality meals at home—these beautifully speckled legumes cook up creamy, nutty, and packed with flavor. Whether you’re a seasoned home cook or just starting out in the kitchen, I’m going to walk you through five foolproof methods to get perfectly cooked cranberry beans every single time.
Table of Contents
What Are Cranberry Beans?
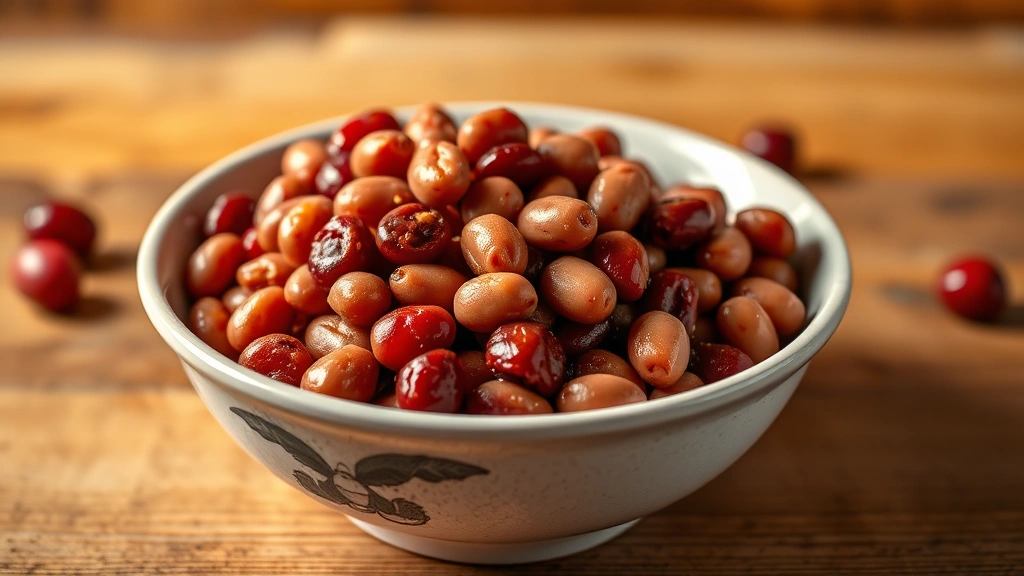
Cranberry beans—also called borlotti or Roman beans—are those gorgeous speckled legumes with deep red streaks on a cream-colored background. They’re a staple in Italian and Portuguese cooking, and honestly, once you taste them, you’ll understand why. These beans have a naturally buttery texture and a slightly sweet, nutty flavor that makes them perfect for soups, salads, and side dishes. They’re also packed with protein and fiber, making them a nutritional powerhouse for your kitchen arsenal.
The beauty of a good cranberry beans recipe is that the beans themselves do most of the heavy lifting—you just need to cook them right. Fresh cranberry beans (if you can find them in season) cook faster than dried ones, but dried versions are what you’ll typically work with year-round.
Prep Work Matters
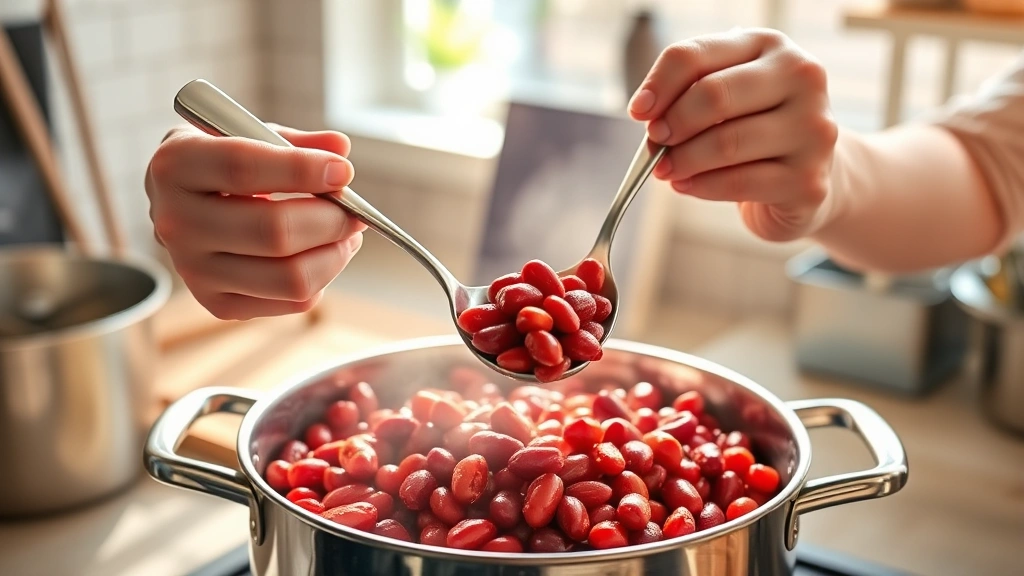
Before you jump into any cooking method, proper preparation is non-negotiable. Start by spreading your dried cranberry beans on a clean surface and picking through them carefully—you’re looking for any shriveled beans, pebbles, or debris. This takes five minutes and saves you from biting down on something unpleasant later.
Next, rinse the beans thoroughly under cold running water. I use a fine-mesh strainer and let the water run until it comes out completely clear. This removes surface dust and some of the compounds that cause digestive discomfort. Now you’ve got a choice: soak or don’t soak. Traditional soaking (overnight in plenty of water) reduces cooking time by about 30 minutes and can help with digestibility. If you’re short on time, the quick-soak method works fine—boil the beans for 2 minutes, then let them sit off heat for an hour before draining and cooking.
Stovetop Method
This is the classic approach, and it’s what I reach for most often. It gives you the most control and requires nothing fancy. After soaking (or quick-soaking) your beans, drain them and place them in a large pot. Cover with fresh water—aim for about 3 inches of water above the beans. Bring everything to a boil, then reduce heat to a gentle simmer.
Here’s the key: don’t salt the water yet. Salt can toughen the bean skins if added too early. Instead, add it during the last 10 minutes of cooking. Simmer for 45 minutes to 1 hour for soaked beans, or 1.5 to 2 hours for unsoaked beans. You’ll know they’re done when you can easily squash a bean between your thumb and forefinger, but it still holds its shape.
This method pairs beautifully with complementary dishes—try serving alongside baby red potato recipes for a complete, satisfying meal. The earthiness of both legumes complements each other perfectly.
Pressure Cooker Fast Track
If you’ve got a stovetop pressure cooker, you’re looking at serious time savings. Soak your beans first (this step really matters for pressure cooking), then drain them well. Add them to the pressure cooker with 3 cups of fresh water per cup of beans. Lock the lid, bring to pressure, and cook for 8-10 minutes for soaked beans, or 15-20 minutes for unsoaked beans.
Let the pressure release naturally for 10 minutes, then carefully release any remaining pressure manually. Open the pot and check your beans—they should be tender but not falling apart. This method is fantastic when you’re planning ahead but need results faster than the stovetop approach.
Slow Cooker Approach
The slow cooker is your friend if you want hands-off cooking. Soak your beans overnight, drain them, and place them in the slow cooker with 3 cups of fresh water per cup of beans. Add a bay leaf, a few whole peppercorns, and a pinch of salt if you like. Cover and cook on low for 6-8 hours, or on high for 3-4 hours.
The advantage here is that you can prep this in the morning and come home to perfectly cooked beans. The slow, gentle heat produces incredibly creamy results. I often add aromatics like onion, garlic, or celery to the cooking liquid for extra depth. This method works wonderfully if you’re also preparing bierocks recipe components—you can coordinate your timing so everything finishes together.
Instant Pot Technique
The Instant Pot has revolutionized bean cooking for busy home cooks. Here’s my go-to method: soak your beans (or use the quick-soak method), then drain them completely. Add them to the Instant Pot with 3 cups of water per cup of beans. Seal the lid, set to high pressure, and cook for 20 minutes for soaked beans or 30 minutes for unsoaked beans.
Let the pressure release naturally for 15 minutes, then manually release any remaining pressure. The results are consistently creamy with intact skins—exactly what you want. The Instant Pot is particularly good if you’re cooking multiple components for a meal, since you can use the sauté function to build flavor before pressure cooking.
Oven Braising Method
This is the method for when you want maximum flavor development. Soak your beans, drain them, and place them in a heavy Dutch oven or covered baking dish. Add 4 cups of water per cup of beans, along with diced onion, smashed garlic, a bay leaf, fresh thyme, and a good glug of chilli oil recipe (about 2 tablespoons). You can also add diced tomato or a splash of wine for complexity.
Cover the pot with a lid and braise in a 325°F oven for 1.5 to 2 hours. Check occasionally to make sure there’s still liquid—add water if needed. The beans will develop a rich, deep flavor that you simply can’t achieve with other methods. This is worth the extra time when you’re making something special.
Flavor Boosting Tips
Raw beans are basically flavor sponges—they’ll absorb whatever you cook them with. Here are my favorite additions to elevate a basic cranberry beans recipe: a piece of Parmesan rind adds savory depth, a splash of apple cider vinegar brightens the finish, smoked paprika brings subtle complexity, and fresh rosemary or sage adds herbaceous notes.
If you’re making a soup or stew, sauté your aromatics first—onion, celery, and garlic—then add the beans and cooking liquid. This builds a flavor foundation that transforms simple beans into something restaurant-worthy. For side dishes, finish cooked beans with good olive oil, fresh lemon juice, and minced fresh herbs.
Consider pairing your cooked beans with dishes like beet hummus recipe for a Mediterranean-inspired meal, or use them in hearty soups and braises. The versatility is remarkable.
Storage and Leftovers
Cooked cranberry beans keep in the refrigerator for 4-5 days in an airtight container, or you can freeze them for up to 3 months. I like to freeze them in their cooking liquid—this preserves texture and flavor better than freezing them dry. Portion them into ice cube trays first, then transfer the frozen cubes to a freezer bag for easy grab-and-go cooking.
Leftover cooked beans are gold for quick weeknight meals. Toss them into salads, add them to grain bowls, mash them into a quick dip, or reheat them as a side dish. You can also use them as a base for calamari recipe accompaniments if you’re planning a seafood dinner—the beans’ creamy texture balances beautifully with delicate proteins.

One trick I use regularly: if you’re cooking beans for a specific recipe, save some of the cooking liquid. This starchy liquid is perfect for thinning soups or adjusting the consistency of bean dips and spreads.
Frequently Asked Questions
Do I have to soak cranberry beans before cooking?
No, but soaking cuts cooking time by 30-45 minutes and can improve digestibility. If you’re short on time, the quick-soak method (boil 2 minutes, soak 1 hour) works well. Unsoaked beans will cook fine—they just take longer.
Why are my beans still hard after cooking?
Hard beans usually mean one of three things: you added salt too early (which toughens the skins), the beans are old (older dried beans take longer to cook), or your water quality is very hard (mineral-heavy water can prevent beans from softening). Try adding a pinch of baking soda to the cooking water if this keeps happening.
Can I use canned cranberry beans instead of dried?
Absolutely. One can of beans equals about 1.5 cups cooked beans. Drain and rinse canned beans before using. They’re perfect for quick meals when you don’t have time to cook from scratch, though home-cooked beans have better texture and you can control the sodium.
What’s the difference between cranberry and kidney beans?
Kidney beans are larger, denser, and have a slightly earthier flavor. Cranberry beans are smaller, creamier, and have a nuttier taste. They’re not interchangeable in all recipes—cranberry beans work better in Italian dishes and lighter preparations, while kidney beans hold up better in heavy chilis and stews.
How do I know when beans are perfectly cooked?
Gently squeeze a bean between your thumb and forefinger. It should squash easily but still hold its shape. If it falls apart, it’s overcooked. If it’s hard to squash, keep cooking. Taste one too—it should be creamy inside with no chalky center.
Can I add acidic ingredients while cooking beans?
No—acid (tomatoes, vinegar, wine) toughens bean skins and slows cooking. Add acidic ingredients only after the beans are fully cooked and tender. This is a critical timing issue in bean cookery.
Final Thoughts
Mastering a solid cranberry beans recipe opens up endless possibilities in your kitchen. Whether you choose the slow, meditative stovetop method, the hands-off slow cooker approach, or the speedy Instant Pot technique, the foundation is the same: quality beans, proper preparation, and patience. Start with one method that fits your schedule, nail it, then experiment with the others. You’ll develop a feel for what works best for your kitchen and cooking style. These beans deserve a place in your regular rotation—they’re nutritious, delicious, and genuinely versatile. Now get cooking.


