
A cold foam recipe is your ticket to café-level coffee drinks made right at home without dropping cash on fancy equipment. I’m talking silky, luxurious foam that sits perfectly on iced lattes, cold brew, and specialty drinks—the kind that makes you feel like you actually know what you’re doing behind the espresso machine. The best part? You probably have everything you need already.
Table of Contents
What Is Cold Foam?
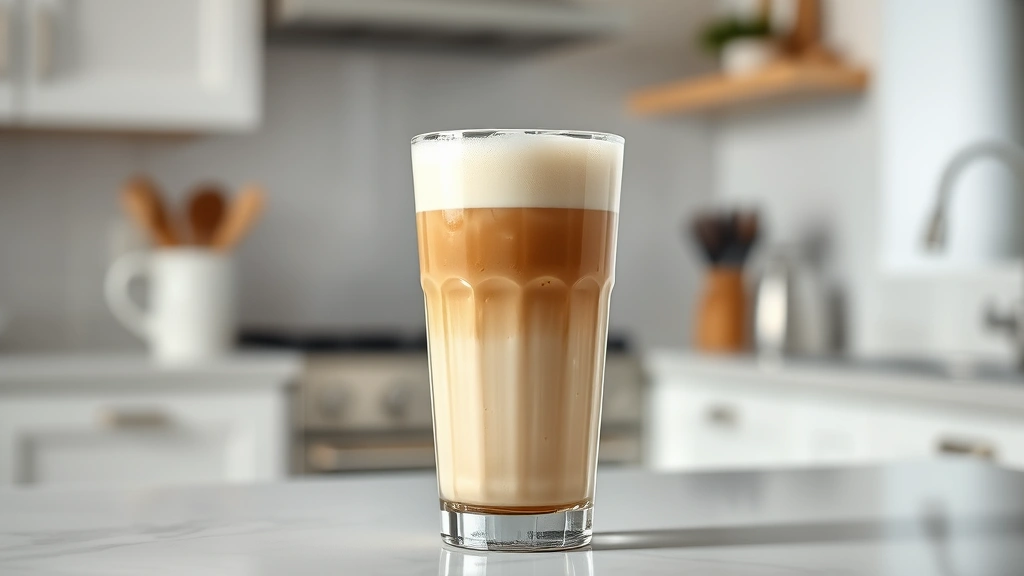
Cold foam is aerated milk that’s whipped into pillowy clouds without heat. Unlike traditional steamed milk foam, which requires an espresso machine’s steam wand, cold foam stays refreshingly cool and brings a completely different texture to your drinks. It’s lighter, airier, and honestly more forgiving if you’re just starting out. Think of it as the lazy barista’s secret weapon—except there’s nothing lazy about the results.
The magic happens when you introduce air into cold milk, creating tiny bubbles that give you that signature creamy texture. It’s the same principle behind making whipped cream, but with milk instead. The foam sits on top of your drink like a cloud, melting slightly as it meets the cold liquid below.
Why Cold Foam Matters
If you’ve ever ordered a cold brew at a specialty coffee shop and wondered why it tasted so much better than yours, cold foam was probably part of the answer. It’s not just about looks—though it definitely looks professional. That foam creates a barrier that keeps your drink colder longer and adds a textural element that makes each sip more interesting.
Cold foam also gives you control over your drink’s richness. You can dial it up with whole milk for that luxurious mouthfeel, or keep things lighter with 2% or oat milk. It’s versatile enough to work with basically any cold beverage, from your morning cold brew to afternoon iced lattes or even creative cocktails like a caipirinha recipe if you’re feeling adventurous.
Essential Ingredients
Here’s where it gets simple: you really only need milk. That’s it. One ingredient. I know it sounds almost too easy, but that’s the whole point of a good cold foam recipe. You’ve got options though.
- Whole milk: Creates the richest, most stable foam. The fat content is your friend here.
- 2% milk: Still works great, slightly less creamy but totally acceptable.
- Oat milk: My go-to for a vegan option. It froths beautifully and adds a subtle sweetness.
- Almond milk: Works, but can be a bit finicky. You might need to add a tiny bit of cornstarch or xanthan gum for stability.
If you want to get fancy, add a splash of vanilla extract, a pinch of cinnamon, or even a drizzle of honey to your milk before frothing. Some people swear by adding a tiny bit of sweetened condensed milk for extra richness—similar to how you’d approach an almond paste recipe where precision with ingredients matters.
Equipment You’ll Need
This is where I love cold foam—you’ve got multiple paths forward depending on what’s in your kitchen drawer right now.
Option 1: Milk Frother (Easiest) Electric milk frothers are cheap, usually under $30, and they do the heavy lifting for you. Just pour milk in, press a button, and walk away. Dead simple.
Option 2: French Press Already have one gathering dust? Perfect. Fill it halfway with cold milk, put the lid on, and pump the plunger up and down for about 30-60 seconds. The mesh filter traps air and creates foam beautifully.
Option 3: Jar with a Lid Seriously, this works. Pour milk into any jar with a tight-fitting lid, seal it up, and shake vigorously for 60-90 seconds. Your arm gets a workout, but the results are solid.
Option 4: Immersion Blender Stick it in a cup of cold milk and blend for 30-45 seconds. Watch it carefully so milk doesn’t splash everywhere.
Step-by-Step Cold Foam Method
Let me walk you through the most reliable approach using a milk frother, but the principles work with any method.

Step 1: Chill Your Milk Start with cold milk straight from the fridge. Room temperature milk won’t foam properly and defeats the whole “cold” part of cold foam. Pour about 1/2 to 3/4 cup into your frother or container—don’t fill it more than halfway or you’ll have milk everywhere.
Step 2: Froth for the Right Duration If using an electric frother, hit the button and let it run until it shuts off (usually 60-90 seconds). If you’re using a jar, seal it tight and shake hard for 90 seconds. With a French press, pump steadily for about 60 seconds. The goal is visible foam on top with liquid milk below.
Step 3: Let It Settle Here’s the trick most people miss: let your foam sit for 10-15 seconds. This allows the large bubbles to rise to the top and consolidate into proper foam, separating from the liquid milk underneath. You’ll see a distinct layer of foam forming.
Step 4: Prepare Your Drink While the foam settles, pour your cold brew, iced latte, or whatever drink you’re making into your cup. Fill it most of the way—leave about an inch of space at the top for the foam.
Step 5: Top with Foam Using a spoon to hold back the liquid, pour the foam onto your drink. You want mostly foam on top with just a tiny bit of the liquid milk mixed in. The spoon technique takes practice, but you’ll get it after a couple tries. If you’re using a frother with a pour spout, many have a special opening that lets you pour foam separately from the milk.
Flavor Variations
Once you’ve mastered the basic cold foam recipe, it’s time to experiment. Add any of these to your milk before frothing:
- Vanilla Cold Foam: 1/2 teaspoon vanilla extract per 1/2 cup milk. Makes everything taste like a fancy café drink.
- Cinnamon Foam: A pinch of ground cinnamon stirred in. Pairs perfectly with cold brew.
- Honey Sweetened: A teaspoon of honey mixed in before frothing. Creates a naturally sweet foam.
- Maple Foam: 1/2 teaspoon maple syrup. Autumn vibes year-round.
- Chocolate Foam: A tablespoon of chocolate syrup mixed thoroughly before frothing. Like a cold mocha in foam form.
- Caramel Foam: A splash of caramel sauce stirred in. Decadent without being over the top.
You can also get creative with your base drink pairing. If you’re making something sweet like a aeropress recipe cold brew, keep the foam simple. If you’re working with straight black cold brew, layer on the flavor in the foam.
Troubleshooting Tips
Foam Won’t Form Your milk is probably too warm. Always start with cold milk straight from the fridge. If you’re using non-dairy milk, try whole oat milk instead—it’s more forgiving. Some almond milks just won’t cooperate no matter what you do.
Foam Is Too Bubbly and Separates You’re introducing too much air too fast. Slow down your frothing speed. With a jar, shake less aggressively. With a frother, if it has speed settings, use a lower one. Let the foam settle for a full 15 seconds before pouring.
Foam Disappears in Five Seconds This usually means you’ve got mostly air bubbles without enough structure. Try using whole milk instead of skim, or add a tiny pinch of xanthan gum (like 1/8 teaspoon per cup) for stability. Some baristas swear by adding a drop of vanilla extract for better foam retention.
Milk Overflows During Frothing You filled the container too full. Never fill more than halfway—foam needs room to expand. Learn this lesson once and you won’t repeat it.
Storage and Timing
Cold foam is best used immediately, ideally within 5-10 minutes of making it. The bubbles will gradually collapse over time as physics does its thing. If you’re making drinks for multiple people, make the foam in batches rather than trying to make it all at once and store it.
If you absolutely need to store it, keep it in the fridge in a sealed container for up to 2 hours, but expect some separation and deflation. The foam will still taste fine, but the texture won’t be as luxurious. For best results, just make it fresh for each drink.
Pro tip: If you’re hosting and want to make cold foam drinks for guests, prep all your cold brew or iced coffee in advance, but make the foam just before serving. Takes 90 seconds and impresses everyone.
Frequently Asked Questions
Can I make cold foam without a frother?
Absolutely. A jar with a lid, French press, or even vigorous hand-shaking works fine. It takes longer and requires more elbow grease, but the results are identical. An immersion blender is also surprisingly effective if you’re careful about splashing.
What’s the difference between cold foam and regular steamed milk foam?
Cold foam stays cold and has a lighter, airier texture. Steamed foam is hotter and denser because the steam introduces heat along with air. Cold foam sits on top of drinks without sinking, while steamed foam tends to integrate more. For iced drinks, cold foam is the move.
Can I use skim milk for cold foam?
Technically yes, but it’s not ideal. Skim milk has less fat, so the foam won’t be as stable or creamy. Whole milk or 2% gives much better results. If you’re using skim for dietary reasons, try whole oat milk as an alternative.
How long does cold foam last once it’s on the drink?
It’ll stay foamy for about 5-10 minutes before starting to deflate and integrate with the drink below. That’s why you want to drink it relatively quickly. The foam melts into the cold liquid, which is actually nice because it adds richness to the whole drink.
Can I add protein powder to cold foam?
Yes, but be careful. Add just a small amount (like 1/4 scoop) and mix it thoroughly into the cold milk before frothing. Too much protein powder can prevent proper foaming. Vanilla protein powder works better than chocolate for most cold drinks.
Is cold foam the same as whipped cream?
Not quite. Whipped cream is heavily aerated cream with air whipped into it until it’s thick and holds its shape. Cold foam is more delicate—it’s aerated milk that’s lighter and fluffier. Cold foam will gradually deflate and melt into your drink, while whipped cream maintains its structure longer.
Final Thoughts
Mastering a cold foam recipe is genuinely one of the easiest ways to level up your home coffee game. You don’t need expensive equipment, fancy ingredients, or years of barista training. Just cold milk, a way to introduce air, and about two minutes of your time. Start with whole milk and a basic frother, nail the technique, then experiment with flavors once you’re comfortable.
The real magic is consistency—once you’ve made it a few times, you’ll develop a feel for how long to froth, when the foam is ready, and how to pour it perfectly. That’s when your homemade cold drinks will genuinely rival what you’re paying $6 for at the coffee shop. And that’s worth celebrating.


