
If you’re hunting for killer chile con queso recipes, you’ve landed in the right spot. This isn’t just about melting cheese and throwing in some peppers—we’re talking about building layers of flavor that’ll make your guests wonder why restaurant versions taste like cardboard by comparison. Whether you’re prepping for game day, a casual hangout, or just need something to justify opening that bag of tortilla chips, I’ve got you covered with tested recipes and pro tips that actually work.
Table of Contents
The Classic Recipe Foundation
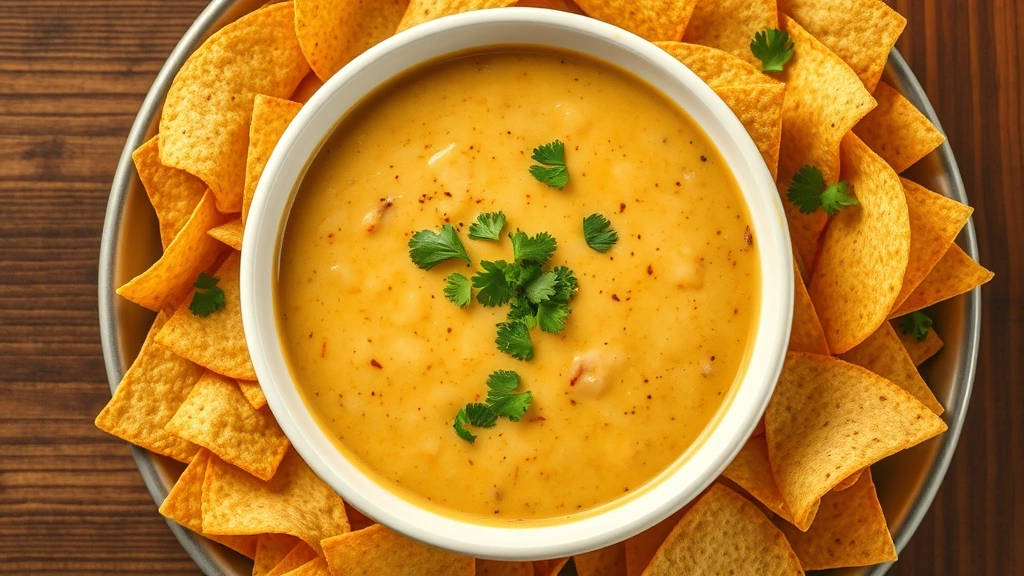
Let’s start with the backbone that makes chile con queso recipes work. The traditional approach uses two types of cheese—usually a melting cheese like Oaxaca or Monterey Jack paired with something that adds tang and depth like sharp cheddar. You’re looking at roughly 2 pounds of cheese for a standard batch that feeds 8-10 people comfortably.
The base starts with roasted poblano peppers or fresh green chiles. If you can’t find fresh ones, canned green chiles work fine—just drain them well. Add diced onions sautéed until they’re soft and slightly caramelized, then incorporate your chiles. The trick is cooking everything together before adding cheese so flavors marry properly.
For the liquid component, whole milk or heavy cream keeps things smooth. Some folks use evaporated milk, which concentrates flavors nicely. You’ll need about a cup of liquid to start, though you might add more depending on your cheese ratio and desired consistency.
Choosing Your Ingredients Right
This is where most homemade versions fall short. People grab whatever’s on sale, and suddenly you’ve got a grainy, separated mess. Here’s the reality: your cheese matters enormously.
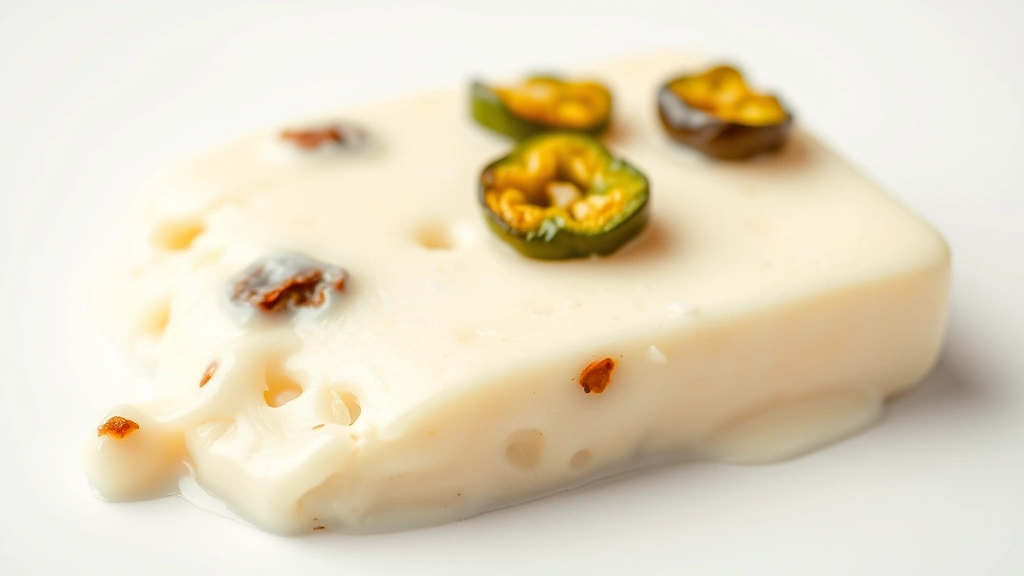
Fresh Oaxaca cheese is the gold standard—it melts smooth and stays creamy. Monterey Jack is the reliable backup. Avoid pre-shredded cheese at all costs; the anti-caking agents prevent smooth melting. Buy a block and grate it yourself using the large holes on your box grater.
For peppers, roasted poblanos give authentic depth. You can roast them yourself over a gas flame or under the broiler until blackened, then steam in a plastic bag for 10 minutes before peeling. Fresh jalapeños add brightness and heat. If using canned adobo sauce chiles, drain them completely and chop fine—they’re intense.
Don’t overlook the aromatics. Real garlic (minced, not powder), fresh cilantro, and lime juice elevate everything. These ingredients transform basic cheese dip into something memorable.
Dialing In Heat Levels
Heat tolerance varies wildly among guests, so building in control points makes sense. Start with mild poblanos as your base—they’re flavorful without overwhelming heat. Add jalapeños gradually, tasting as you go. You can always add more heat; you can’t remove it.
If you’re making this for mixed crowds, consider a two-batch approach: one mild version as the main dip, then a smaller hot version on the side for the brave souls. Alternatively, add hot sauce or cayenne pepper at the end so people can customize their portion.
The heat level also depends on cooking time. Longer cooking mellows pepper intensity slightly. If you want maximum heat, add your hot peppers in the last few minutes.
Best Cooking Methods Explained
You’ve got three solid approaches: stovetop, slow cooker, or cheese melter.
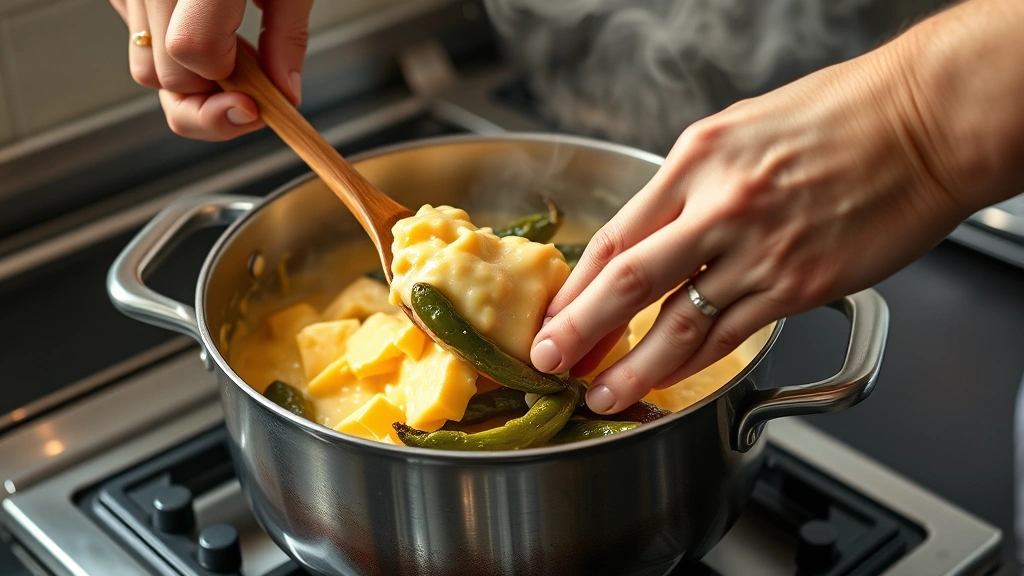
Stovetop Method: This gives you the most control. Medium-low heat is key—high heat breaks down cheese and creates a separated, oily mess. Melt your cheese slowly in a heavy-bottomed pot, stirring constantly. Add peppers and other ingredients after cheese is mostly melted, then fold in gently. Total time: 15-20 minutes.
Slow Cooker Method: Perfect for parties since it keeps dip warm for hours. Combine all ingredients on low setting, stirring occasionally. Takes about 30-45 minutes to reach serving temperature. The advantage is hands-off time; the disadvantage is less control over texture.
Cheese Melter or Fondue Pot: If you own one, this is ideal. Designed specifically for keeping cheese smooth and warm without overcooking. Set to low and you’re golden.
Creative Flavor Variations
Once you nail the classic, experiment. Add chorizo (cooked and crumbled) for smokiness and richness. Incorporate fresh cherry tomatoes diced fine for brightness and texture contrast.
Try adding crispy bacon bits for depth. A splash of beer—especially Mexican lager—adds complexity. Some recipes include a tablespoon of cumin and a pinch of smoked paprika for Southwestern flair.
For seafood lovers, cooked shrimp or crab works surprisingly well. Add in the last few minutes so it doesn’t overcook. Roasted corn kernels add sweetness and visual interest.
The key with variations: don’t overload. Add one or two complementary ingredients, not five. Let each element shine.
Getting Texture Just Right
Texture separates good chile con queso recipes from great ones. You want creamy, pourable dip that clings to chips without being soupy or gummy.
If your dip is too thick, add cream or milk a tablespoon at a time, stirring well. If it’s too thin, you’ve either used too much liquid or added watery ingredients. Next time, drain canned peppers thoroughly and pat fresh tomatoes dry.
Cornstarch is your secret weapon for fixing consistency without adding more dairy. Mix a teaspoon with a tablespoon of cold milk, then whisk into your dip over low heat. It thickens without affecting flavor.
Graininess usually means overheating or using low-quality cheese. If it happens, remove from heat immediately and whisk in a splash of fresh cream. Sometimes you can save it; sometimes you’re starting over. Prevention through proper technique is easier.
Make-Ahead & Storage Tips
Prepare components ahead: roast and peel peppers the day before, chop onions and garlic, grate cheese. Keep everything in separate containers in the fridge.
You can make the complete dip up to 24 hours ahead. Store in an airtight container in the refrigerator. When ready to serve, reheat gently on the stovetop over low heat, stirring frequently. Add a splash of cream if it’s thickened too much during storage.
Freezing works but affects texture slightly. Freeze in ice cube trays for portion control, then transfer to freezer bags. Thaw in the refrigerator overnight before reheating. Use within three months for best quality.
Leftover dip keeps 3-4 days refrigerated. Use it as a topping for baked potatoes, nachos, or eggs. It’s also excellent stirred into soups or used as a sauce for enchiladas.
Serving & Pairing Ideas
Presentation matters. Serve in a shallow bowl or on a small platter so chips access the dip easily. Keep it warm in a slow cooker set to low, a cheese melter, or a fondue pot. Stir occasionally to maintain consistency.
Pair with quality tortilla chips—thick, sturdy ones hold up better than thin varieties. Also offer fresh vegetables like bell pepper strips, cucumber rounds, and radishes for contrast. Warm flour tortillas torn into pieces work great too.
For a full spread, add steamed broccoli florets, celery sticks, and jicama slices. Include a small bowl of salsa on the side for those who want extra brightness.
Common Problems & Fixes
Separated, oily dip: Overheating broke the cheese emulsion. Start fresh or try whisking in a tablespoon of cornstarch mixed with cold milk. Work quickly over low heat.
Too thick and gluey: You’ve cooked it too long or used too much cheese. Add cream or milk gradually while stirring. A squeeze of lime juice helps too.
Bland flavor: Taste and adjust seasonings. Add salt carefully—cheese is already salty. Lime juice, cilantro, and cumin punch up flavor fast. Don’t be shy with these additions.
Watery consistency: Your fresh ingredients released moisture. Drain peppers and tomatoes before adding. Pat dry with paper towels.
Cheese won’t melt smoothly: Low-quality cheese or too-high heat. Use fresh block cheese, cut into small pieces, and maintain medium-low temperature. Patience wins here.
Frequently Asked Questions
Can I make chile con queso without dairy?
It’s challenging but possible. Cashew cream or nutritional yeast-based sauces can work, though texture won’t be identical. You’ll lose the authentic melt and creaminess that makes this dip special. If someone’s lactose intolerant, lactose-free cheese and cream are better solutions.
How far ahead can I prepare this?
Prepare components 1-2 days ahead. Assemble the complete dip up to 24 hours before serving. Reheat gently on the stovetop, never at high temperatures. Freezing works for up to three months but slightly affects texture.
What’s the difference between chile con queso and chile con carne?
Chile con queso is a cheese dip with peppers—no meat required. Chile con carne includes ground beef or chunks of meat as a main ingredient. They’re different dishes entirely, though you can combine them if you want.
Why does restaurant chile con queso taste different?
Restaurants often use processed cheese products, emulsifiers, and stabilizers for consistency and shelf life. Homemade versions with real cheese taste fresher and more authentic, though they require more care during cooking.
Can I use a blender to smooth out lumps?
Not recommended. Blending incorporates air and can further break down the cheese emulsion. Stick with whisking, stirring, or using an immersion blender on low speed if absolutely necessary. Prevention through proper technique is better.
What cheese melts smoothest?
Oaxaca cheese is ideal—it’s designed for melting. Monterey Jack, young cheddar, and Asadero all work well. Avoid aged cheddars and hard cheeses; they don’t melt smoothly. Always use block cheese, never pre-shredded.
How do I keep it warm during a party?
Use a slow cooker on low, a cheese melter, or a fondue pot. Stir every 10-15 minutes. If it thickens, add a splash of warm cream. Keep temperature around 150-160°F—hot enough to stay warm but cool enough to prevent breaking.
Final Thoughts
Mastering chile con queso recipes comes down to respecting your ingredients and controlling heat. Use real cheese, fresh peppers, and proper technique. Start with the classic foundation, then experiment with variations once you’ve nailed the basics.
The best part? Once you’ve made this a few times, you’ll stop thinking about it and start making it on instinct. You’ll know when the cheese is perfectly melted, how much heat your crowd prefers, and what variations work with your favorite add-ins. That’s when homemade versions become genuinely superior to anything you’d buy.
Keep these recipes and tips handy, taste as you cook, and don’t be afraid to adjust. Your perfect chile con queso is just a batch or two away.


